
Subscribe to Our Youtube Channel
Related Manuals for Wren FI.PK.FIT.009


Summary of Contents for Wren FI.PK.FIT.009
- Page 1 WALL CABINET PENINSULAR FITTING GUIDE FI.PK.FIT.009 - Peninsular Frame Escanear para español For Internal Use: FI.PK.FIT.009_50-WKIN00203_Peninsular_Unit_Guide_Rev5...
- Page 2 WALL CABINET PENINSULAR FITTING GUIDE FI.PK.FIT.009 - Peninsular Frame BEFORE YOU START INSTALLATION SHOULD BE PERFORMED BY A COMPETENT PERSON ONLY. THIS PRODUCT COULD BE DANGEROUS IF INCORRECTLY INSTALLED Screws for fixing to walls are not provided as these vary depending on your wall material and construction.
- Page 3 WALL CABINET PENINSULAR FITTING GUIDE FI.PK.FIT.009 - Peninsular Frame Step 3. Cut the decor end panel to the required height. E.g. cabinet + crown molding + light rail or frame thickness*. (*which ever is taller). Cut out a notch in the bottom of the decor end panel, to fit to the frame. (E.g. the light rail height).
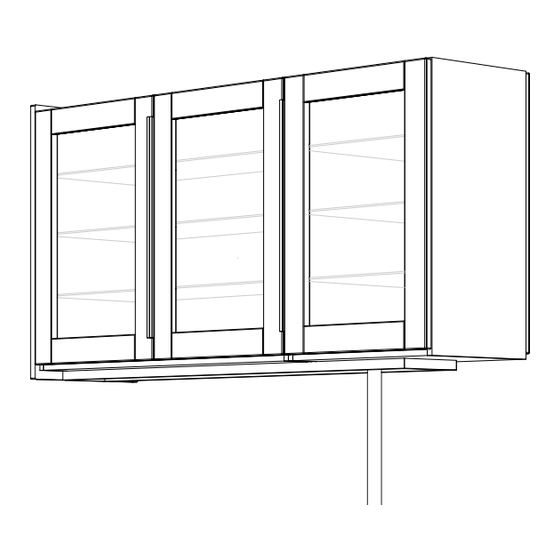
- Page 4 WALL CABINET PENINSULAR FITTING GUIDE FI.PK.FIT.009 - Peninsular Frame Step 6. Screw the cabinet to frame using 3/4”screws provided. Step 7. Refer to customer specific kitchen plan, add any additional cabinets to the frame. Secure to adjoining cabinets using 4 x 1 1/4” screws provided. Screw just to the rear of the hinge plates at the top and bottom on both sides and place a cover caps on the heads to conceal them.
Need help?
Do you have a question about the FI.PK.FIT.009 and is the answer not in the manual?
Questions and answers