Advertisement
Quick Links
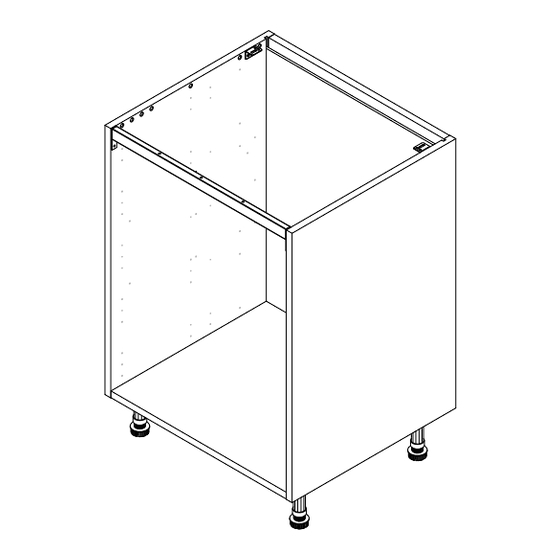
BASE CABINET
VANITY BASE FITTING GUIDE
FI.PK.FIT.025 - Vanity Base
Vanity Base with legs
Screws and fixings for attaching to walls and countertops are not provided as
these vary depending on materials, thickness and construction. Ensure appropriate
fixings for wall and countertop construction are used. Please refer to the specialist
Step 1.
Secure each of the legs in place with 2 x 5/8" screws (B). Ensure legs are rotated as
shown so that part of the leg is supporting the end panel and the flat edge is facing
the front. Adjust legs to the same height before turning the cabinet upright.
Once in situ level accordingly.
Cabinet shown for illustrative
purposes only
Inside View
For Internal Use: FI.PK.FIT.025_50-WKIN00100_VanityBase_Rev2
countertop supplier if these are required for solid surface countertops.
Step 2.
Use a stud finder to locate appropriate
studs to use. Place a mark centrally on the
identified stud at the appropriate fixing
heights. Drill a pilot hole through the back
panel and rail of the cabinet into the wall at
the stud location. Secure cabinet to the wall
by screwing through the pilot hole into the
wall with an appropriate screw. Screws not
provided. Use appropriate fixing for wall
construction if stud is not available.
Step 3.
Screw into any adjacent cabinets using 1 1/4"
screws (H) provided to secure the cabinet.
Screw just to the rear of the hinge plates.
Place cover caps on the screw heads to
conceal them.
Step 4.
Use 2 x 5/8" screws (B) to secure each L bracket LGE (K)
to the top rear of the cabinet at either side. Screw up
through the front metal rail and the L Brackets LGE (K)
into the countertop to secure it in place.
Screws not provided.
Escanear para español
(B) x18
5/8" Screws
1 1/4" Screws
(H) x8
(K) x2 L Bracket
Inside View
Large
Advertisement

Subscribe to Our Youtube Channel
Related Manuals for Wren FI.PK.FIT.025


Summary of Contents for Wren FI.PK.FIT.025
- Page 1 BASE CABINET VANITY BASE FITTING GUIDE FI.PK.FIT.025 - Vanity Base Escanear para español Vanity Base with legs (B) x18 (H) x8 (K) x2 L Bracket 5/8” Screws 1 1/4” Screws Large Screws and fixings for attaching to walls and countertops are not provided as these vary depending on materials, thickness and construction.
- Page 2 BASE CABINET VANITY BASE FITTING GUIDE FI.PK.FIT.025 - Vanity Base Escanear para español Vanity Base Floating (B) x18 (H) x8 (K) x2 L Bracket 5/8” Screws 1 1/4” Screws Large Screws and fixings for attaching to walls and countertops are not provided as these vary depending on materials, thickness and construction.
Need help?
Do you have a question about the FI.PK.FIT.025 and is the answer not in the manual?
Questions and answers