
Related Manuals for Wren Feature Robe


Summary of Contents for Wren Feature Robe
- Page 1 ROBE UNIT Feature Robe Assembly Guide 7 Shelf Robe 5 Shelf Robe For Internal Use: FI.WR.INS.138_WBIN0037_Feature_Robe_AssemblyGuide_Rev1 Page 1...
- Page 2 ROBE UNIT Feature Robe Assembly Guide BEFORE YOU START THIS PRODUCT MUST BE SECURED TO THE WALL INSTALLATION SHOULD BE PERFORMED BY A COMPETENT PERSON ONLY. THIS PRODUCT COULD BE DANGEROUS IF INCORRECTLY INSTALLED Hex Key NOT to be used with CAM DOWEL &...
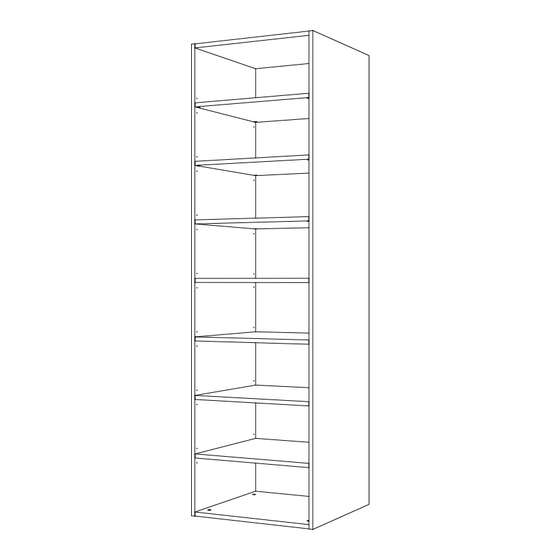
- Page 3 1 x Bottom 1 x Top 2 x Rails Loose Shelf Fixed Shelf Fixed Shelf Pack (Cb) (Ct) Throughout this instruction the full depth 7 shelf feature robe will be used for reference only For Internal Use: FI.WR.INS.138_WBIN0037_Feature_Robe_AssemblyGuide_Rev1 Page 3...
- Page 4 ROBE UNIT Feature Robe Assembly Guide (F) x16 (L) x10 (K) x6 (P) x6 (W) x12 (H) x12 Wooden Dowel 15mm Screw 30mm Screw 45mm Screw Cam Dowel Cam Lock (LL) x5 15mm Cover Cap Anti Tipping Loose Shelf Peg...
- Page 5 ROBE UNIT Feature Robe Assembly Guide Step 1. Seat dowels (F) into holes in both end panels (B) as shown. For Internal Use: FI.WR.INS.138_WBIN0037_Feature_Robe_AssemblyGuide_Rev1 Page 5...
- Page 6 ROBE UNIT Feature Robe Assembly Guide Step 2. Seat cam dowels (W) into holes in both end panels (B) as shown. Do not use power tools with cam dowels (W) or cam locks (H) For Internal Use: FI.WR.INS.138_WBIN0037_Feature_Robe_AssemblyGuide_Rev1 Page 6...
- Page 7 ROBE UNIT Feature Robe Assembly Guide Step 3. Attach panels (Ct), (Cb) & (D) to panel (B), using cam dowels (W), and also using wooden dowels (F) in positions as shown. All cam locks (H) are to be positioned facing the outside of the unit, for ease of tightening.
- Page 8 ROBE UNIT Feature Robe Assembly Guide Step 4. Slide back panel (A) into groove of end panel (B). Ensure the back is in-line with top and bottom fixed shelves. For Internal Use: FI.WR.INS.138_WBIN0037_Feature_Robe_AssemblyGuide_Rev1 Page 8...
- Page 9 ROBE UNIT Feature Robe Assembly Guide Step 5. Attach panel (B) to panels (Ct), (Cb) & (D), using cam dowels (W), and also using dowels (F) in positions as shown. For Internal Use: FI.WR.INS.138_WBIN0037_Feature_Robe_AssemblyGuide_Rev1 Page 9...
- Page 10 ROBE UNIT Feature Robe Assembly Guide Step 6. Insert cam locks (H) and hand tighten, this will tighten the unit together. Do not use power tools with cam dowels (W) For Internal Use: FI.WR.INS.138_WBIN0037_Feature_Robe_AssemblyGuide_Rev1 Page 10...
- Page 11 ROBE UNIT Feature Robe Assembly Guide Step 7. Ensure the unit is square. Secure back panel (A) with 45mm screws (P) through the pre drilled holes in the top and bottom of the back panel (A) into the fixed shelves (Ct) and (Cb) as shown.
- Page 12 ROBE UNIT Feature Robe Assembly Guide Step 8. Position the top section of the legs as shown. Ensure legs are rotated to provide support to the end panels (B). Secure with 2 x 15mm screws (L) per leg. Attach the bottom section of the legs and set all legs to the same height.
- Page 13 Ensure the unit is level and positioned correctly. Wren recommends securing the robe to the wall using rails (D). Drill pilot holes through back panel (A) and rails (D) into the wall. Screw through the pilot holes into the wall, place cover stickers on the heads to conceal them.
- Page 14 ROBE UNIT Feature Robe Assembly Guide Loose Shelves Insert shelf pegs into holes on each end panel. 4 x shelf pegs are required per loose shelf. Position loose shelf onto shelf pegs ensuring the shelf pegs locate in the holes on the bottom of the loose shelf.
- Page 15 ROBE UNIT Feature Robe Assembly Guide For Internal Use: FI.WR.INS.138_WBIN0037_Feature_Robe_AssemblyGuide_Rev1 Page 15...
Need help?
Do you have a question about the Feature Robe and is the answer not in the manual?
Questions and answers