Table of Contents
Advertisement
Quick Links
Advertisement
Table of Contents

Related Manuals for Pyronix Enforcer X Series


Summary of Contents for Pyronix Enforcer X Series
- Page 1 ENFORCER X USER GUIDE Document SAP:102032020-01...
-
Page 2: Table Of Contents
CONTENTS HomeControl2.0 Arming Devices Wired Keypads Keypad keys Keypad LEDs Wireless Keyfobs Locking the keyfob Arming the System Arming a multi-area system at a Keypad Arming all areas Arming individual areas Arming a Single Area System at a Keypad Using the Wireless Keyfob Disarming the System Disarming a Multi-Area System at a Keypad Disarming a Single Area System at a Keypad... - Page 3 Basic Controls Connecting to the panel Biometric authorisation Intruder system homescreen HomeControl2.0 App Icons Installation Information Installation Company Information ENFORCER X USER GUIDE...
-
Page 4: Homecontrol2.0
HOMECONTROL2.0 Extending the capabilities of security control Simple and intuitive to use Constantly evolving Detailed history of events Biometric login (FaceID/Touch ID (iOS) and Android equivalents) Geofence alerts for easy reminders Smart plug control Voice push notifications Scan the QR code to find out more and to download HomeControl2.0 https://bit.ly/2Pi2GZN ENFORCER X USER GUIDE... -
Page 5: Arming Devices
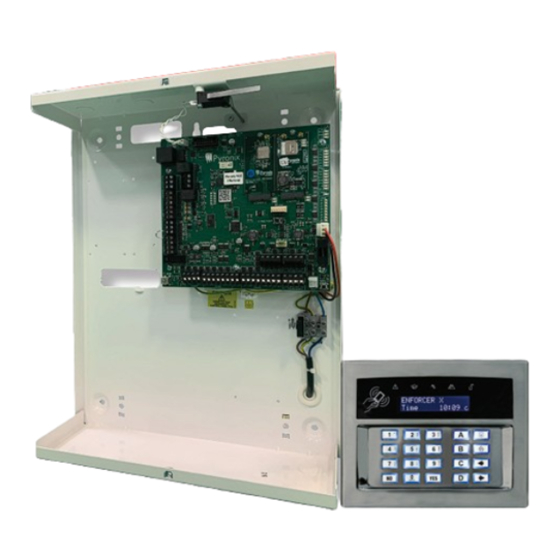
ARMING DEVICES WIRED KEYPADS Keypad keys a = Exits to day mode from main menu and selects level A when arming. Enforcer X Time 10:09 c b = Moves backwards in menus and selects level B when arming. c = Enables chime, displays additional information in the event log, and selects level C when arming. -
Page 6: Arming The System
ARMING THE SYSTEM Example set-up This example will be used to refer to throughout this section to further explain the arming procedure. • User 001 has access to areas 01, 02, 03 and 04. • User 002 has access to areas 01 and 02. •... -
Page 7: Arming A Single Area System At A Keypad
Once the area to be armed is on the display, use a, b, c or d to select the level. Once selected, press f. Arm [02] [*B**] Example referral Level B If Area 02 level B was selected, the following zones will arm: •... -
Page 8: Using The Wireless Keyfob
USING A PROXIMITY TAG AT A READER Present a proximity tag to the reader and the system will begin the exit time immediately. Please note: The system will arm depending on a combination of permissions programmed to the reader and the access the user has. Speak to the installation company for more details. USING THE WIRELESS KEYFOB To arm via a keyfob. -
Page 9: Disarming The System
DISARMING THE SYSTEM DISARMING A MULTI-AREA SYSTEM AT A KEYPAD Enter the building, the ‘entry time’ will start. ENTRY TIME [30] Enter a valid PIN code or present a valid tag to the symbol as Enter Your Code shown. [******] Press h. -
Page 10: Disarming A Single Area System At A Keypad
DISARMING A SINGLE AREA SYSTEM AT A KEYPAD Enter the building, the ‘entry time’ will start. ENTRY TIME [30] Enter a valid PIN code or present a valid tag to the symbol as Enter Your Code shown. [******] The keypad will return to day mode. Alarm Panel Time 10:09 c... -
Page 11: Disarming After An Alarm
DISARMING AFTER AN ALARM USING A PIN CODE OR PROXIMITY TAG Enter a valid PIN code or present a valid tag to the symbol as Enter Your Code shown. [******] The alarm or tamper symbol will flash indicating there has been an Alarm Silenced activation and the keypad will display which zone has activated. -
Page 12: Fault Indications & Unable To Arm
FAULT INDICATIONS & UNABLE TO ARM FAULT INDICATIONS Control panel Any faults that occur on the system will be easily recognised by the Alarm Panel flashing ALERT LED. Time 10:09 c To see what the fault is, enter a valid PIN code, or present a valid tag, or press ... -
Page 13: Advanced Functions
ADVANCED FUNCTIONS CHIME The chime can be used for any zone on the system. This can be programmed by your installation company. To enable the chime on the keypad, when the time is displayed, press c. Press c again to cycle through ‘c’ , ‘C’ and nothing. Alarm Panel Cycle Display... -
Page 14: Master Manager Mode Overview
MASTER MANAGER MODE OVERVIEW The Master Manager menu has the following functions: Please note: Some of the following menus may not appear. The menu is dynamic, meaning that it will only display relevant menus which are impacted by equipment and programming. This is nothing to be concerned about. Omit Zones? MASTER MANAGER MENU Omits any zone except PA and/or fire. -
Page 15: Entering Master Manager Mode
ENTERING MASTER MANAGER MODE Press d. Enter the Master Manager code or present the Master Manager tag. Enter Your Code Press b or h to scroll through the different functions. EXITING MASTER MANAGER MODE Press b or h keys to scroll through until ‘EXIT MANAGER MODE?’... -
Page 16: Date & Time
DATE & TIME DATE & TIME? All log entries are date and time stamped. This can also programmed in the Master Manager Mode. The time is also shown on the LCD in ‘Day Mode’ . Please note: Powering down the system will reset the time and date information unless communications are configured and the system reconnects to the data path on power up. -
Page 17: Area Arm Choice
Area arm choice Area arm choice allows you to choose which level/area to arm if a user code or tag is assigned to one or more levels/ areas. If this function is disabled, when a user code is entered or proximity tag presented, the system will automatically arm the areas/levels that the user is assigned to. -
Page 18: Adding A New User (Keyfob)
Adding a new user (keyfob) Press b or h to scroll to ‘LEARN USER CODES KEYFOBS & TAGS?’. LEARN USER CODES KEYFOBS & TAGS? Press f. To add a new user, press f. Press h to delete or change a Add New User? user code (see ‘Deleting or Changing a User’). -
Page 19: Change Master Manager Code
Change user Press f to change a user code, and follow the screen shots Change User? previously shown to edit either code, tag or keyfob permissions. Change Master Manager code To change the Master Manager Code, press f. Change Master Manager Code? Press c then enter the new code or present a tag. -
Page 20: Wifi-Setup
WIFI-SETUP WI-FI SETUP? Setup with WPS? Wi-Fi SSID? Wi-Fi Password? WiFi Signal Val. Setup with WPS Go into the Master Manager menu. Press h until the WI-FI SETUP? option ‘WI-FI SETUP?’ is displayed. Press f. ‘Setup with WPS?’ will now be displayed, press f and Setup with WPS? then f again when the system asks ‘Are You Sure?’... -
Page 21: Wi-Fi Password
Wi-Fi password Press h and the LCD will change to ‘Wi-Fi Password?’ Press f and enter the password for the wireless network. Wi-Fi Password? Press f to return to ‘Wi-Fi Password?’. Wi-Fi signal value GOOD POOR EXCELLENT Wi-Fi Signal Strength (%) Press h and the panel will indicate the strength of the Wi-Fi WiFi Signal signal. -
Page 22: Homecontrol2.0 Smart Device App
HOMECONTROL2.0 SMART DEVICE APP GETTING STARTED Downloading the app The app can be downloaded from either the Apple App Store or on Android from the Google Store by searching ‘HomeControl’. Adding a system via QR code 1. When HomeControl2.0 is opened for the first time, the first screen presented is the homescreen. Tap ‘+’ in the bottom toolbar to add a system. -
Page 23: Adding A System Via Short Code
Adding a system via short code Finding short code The short code is in the master manager menu. To access this menu, from day mode press d then enter the master code. SETUP APP? App Short Code APP SHORT CODE Acquiring... -
Page 24: Basic Controls
BASIC CONTROLS Connecting to the panel 1. Select the intruder system from the main screen of HomeControl2.0 that you wish to connect to. 2. Enter your ‘User code’ and ‘App password’. 3. To save the user code and app password, toggle the sliders so that they are green and then tap ‘Login’. 4. -
Page 25: Intruder System Homescreen
INTRUDER SYSTEM HOMESCREEN Disconnect from system Manage Tap this to disconnect Tap here to change the from the system and system name and to return to the main screen. create quick actions. Area information The alias of this area along with name of the last user to arm or disarm the area. -
Page 26: Homecontrol2.0 App Icons
HOMECONTROL2.0 APP ICONS Action button icons The area is disarmed and can be armed with no problems. The area is in the process of arming. ARMING The area is armed. ARMED A zone in the area has been triggered which means it is now in alarm. The alarm can be silenced by tapping this icon. -
Page 27: Installation Information
After 6 presentations of an invalid tag, the reader will be disabled for 90s. After reinstatement, this will be repeated for each invalid tag until a valid tag is used. Pyronix Ltd, Secure House, Braithwell Way, Hellaby, Rotherham, S66 8QY...
Need help?
Do you have a question about the Enforcer X Series and is the answer not in the manual?
Questions and answers