Pyronix STERLING 10 User Manual
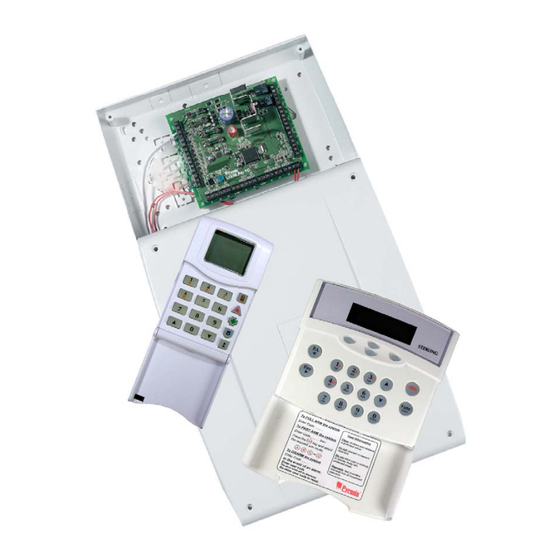
Control panel with remote keypads
Hide thumbs
Also See for STERLING 10:
- Installation manual (48 pages) ,
- Installation instructions manual (34 pages) ,
- User manual (12 pages)

Related Manuals for Pyronix STERLING 10


Summary of Contents for Pyronix STERLING 10
- Page 1 STERLING 10 Control Panel with Remote Keypads USER MANUAL (ICON and LCD) IMPORTANT: Please note the Sterling 10 LCD keypad is not compatible for use with the Sterling 10 ICON keypad. RINS415-9...
-
Page 2: Table Of Contents
CONTENTS 1. INTRODUCTION .............................1 1.1 Sterling 10 LCD Keypad ........................1 1.2 Sterling 10 ICON Keypad ........................2 2. MASTER AND LIMITED USER FUNCTIONS....................3 2.1 Arming The Panel ..........................3 Arming Different Arm Modes .........................3 2.2 Silent Arming The Panel ........................4 2.3 Arming the panel when the Mains Fails ....................4 2.4 Arm with Omits...........................5... -
Page 3: Introduction
Sterling 10 User Manual 1. INTRODUCTION Thank you for buying the Sterling 10 control panel. The Sterling panel uses the latest technology in design and manufacture. As the end user of the Sterling you will have been provided with either an LCD or ICON keypad. This manual is written to help you use the functions of your alarm system, enabling you to get the best out of your system. -
Page 4: Sterling 10 Icon Keypad
Where functionality for both keypads is the same, only one set of instructions for both are described. IMPORTANT: Please note the Sterling 10 LCD keypad is not compatible for use with the Sterling 10 ICON keypad. Page: 2 RINS415-9... -
Page 5: Master And Limited User Functions
The following operations can be performed by both Master and Limited Users. 2.1 Arming The Panel At the time of arming the Sterling 10, any four arm modes can be selected. i.e. ARM MODE A: Whole system armed, nobody on premises. -
Page 6: Silent Arming The Panel
The exit timer will sound and keep sounding until a Push Button is pressed; once this is pressed the panel will be armed after 7 seconds. 2.2 Silent Arming The Panel If you wish to silent arm the Sterling 10, so the entry and exit timer is silent: Press the key (on the ICON press the... -
Page 7: Arm With Omits
Sterling 10 User Manual 2.4 Arm with Omits It is possible to arm the panel with one or more zones omitted (that is, not activated). The sensors for these zones will not activate the alarm system under any circumstances for that arm procedure. -
Page 8: Duress Arm/Disarm
Sterling 10 User Manual Once entered, the zone that was activated will be displayed (as above). To reset the system, enter you user code again, and “SYSTEM DISARMED” will be shown. If the panel is not reset, then your engineer has enabled engineer or Anti-code reset. Please contact your installation company. -
Page 9: Turning Chime On And Off
2.11 Reading the Event Log The Sterling 10 control panel incorporates a memory log of the last 100 alarm events and is accessible to both Users and the Engineer. It will record Fire, Intruder, Personal Attack and Tamper alarms and will also show if any of the 8 alarm zones have been triggered or omitted. - Page 10 Sterling 10 User Manual SYSTEM DISARMED UNSET USER 1 STERLING P.A. A B C D E F G H I Fire Func Enter J K L M N O P Q R S T U V W X SPACE Similarly, if the down arrow key is pressed, the next most recent entry will be displayed. The up and down arrow keys may be used to scroll through the last 100 events in the event log.
- Page 11 Sterling 10 User Manual EVENT LOG DISPLAY ICONS Icon Meaning A fault has occurred. The number following this icon identifies one of the following faults: = Bell Fuse Failure = Auxiliary Fuse Failure = Telephone Line Failure = Mains (AC) Failure Engineer mode entered.
-
Page 12: Master User Only Functions
Sterling 10 User Manual 3. MASTER USER ONLY FUNCTIONS The following operations can only be performed by the Master User. The panel distinguishes who the user is by reading the last code that was entered to disarm the system. If the last code entered was by a Limited User, then these functions won’t be available. -
Page 13: Walk Test Mode
Sterling 10 User Manual Press the key to perform the next test: ‘STROBE TEST’ will then be displayed. Func Enter Press the key to perform the next test: ‘BELL TEST’ will then be displayed. Func Enter Press the key to perform the next test: ‘SOUNDERS TEST’ will then be displayed. -
Page 14: Changing Master And Limited User Codes
Set Backlight. Changing display user name text. The default master code is 1234. Pyronix recommends that this should be changed as soon as your panel is up and running. Please also note that the Master Code cannot be deleted and is needed to change any other code. -
Page 15: Changing The Master Code
Sterling 10 User Manual Changing the Master Code LCD Keypad Press the Func Enter Then the key and scroll to ‘CHANGE CODES’. Press the key to accept. Func Enter The following will be displayed: CHANGE CODES KEY MASTER CODE STERLING P.A. -
Page 16: Changing The Limited User Code
Sterling 10 User Manual Enter the new 4-digit new code twice as per the display prompts. Three tones will be heard an acceptance of each command. A single low tone indicates that the procedure hasn’t been completed and the process will need to be started again. -
Page 17: Deleting A Limited User Code
Sterling 10 User Manual Deleting a Limited User Code LCD Keypad Press the Func Enter Then the Scroll to ‘CHANGE CODES’ Press the key to accept. Func Enter The following will be displayed Enter your 4-digit Master User Code (Default 1234). -
Page 18: System Faults
Sterling 10 User Manual 3.6 System Faults There are 4 fault conditions automatically detected by the Sterling 10. The user is informed of a fault via a flashing ' ' (LCD keypad) or ' ' (Icon keypad) and an error tone will be emitted every 5 seconds when the panel is in disarmed mode. -
Page 19: Change Text (Lcd Only)
Sterling 10 User Manual 3.7 Change Text (LCD only) It is possible to change the text for the users, so you can easily determine the last person to arm/disarm the panel (this will be displayed in the event log). LCD Keypad... -
Page 20: Lcd Text Defaults
Sterling 10 User Manual 3.8 LCD Text Defaults The following shows the default labels: Situation Label SYSTEM DISARMED System Disarmed SYSTEM ARMED System Armed First To Alarm Mode SYSTEM ARMED (After alarm, when code ALARM LOUNGE entered) !SYSTEM DISARMED System Faults... -
Page 21: Zone Programming Table
Sterling 10 User Manual 4. ZONE PROGRAMMING TABLE RINS415-9 Page: 19... -
Page 22: Notes
Sterling 10 User Manual 5. NOTES Page: 20 RINS415-9... - Page 24 Pyronix Limited Pyronix House Braithwell Way Hellaby, Rotherham S66 8QY, UK www.pyronix.com/installer...
Need help?
Do you have a question about the STERLING 10 and is the answer not in the manual?
Questions and answers