Table of Contents
Advertisement
Advertisement
Table of Contents

Related Manuals for Pyronix EURO 76


Summary of Contents for Pyronix EURO 76
- Page 1 EURO USER GUIDE Document SAP 102040129-01...
-
Page 2: Table Of Contents
Menu Options Set Date and Time Operate User Outputs Omit Zones Edit Users (Deleting and Changing Users) Edit Users (Changing Master Manager Code) Event Log Set up App Data Module Set Up SMS Phonebook Walk Test EURO 76 User Guide... -
Page 3: Document Terminology
The act of stopping an zone from becoming armed. A wired zone will Bypass, omit still detect an intruder or object but the system will not react to it - a wireless zone will become dormant. EURO 76 User Guide... -
Page 4: Introduction
This alarm system has 6 areas which may be set up in the following way: Area A: Full set of the house Area B: Downstairs set. Upstairs unset. Area C: Garage set. Rest of house unset. Your engineer will be able to design the system according to your needs. EURO 76 User Guide... -
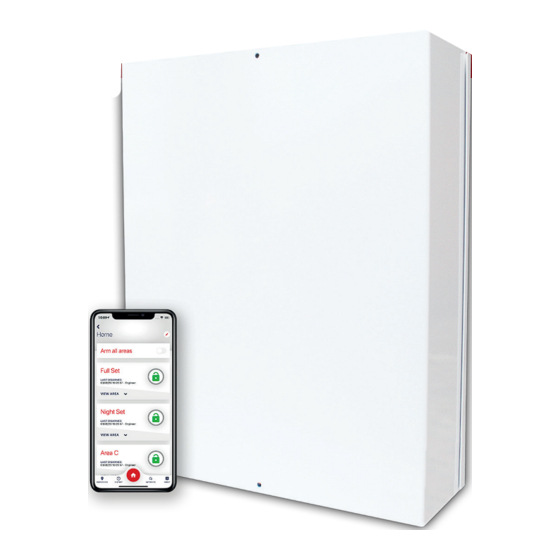
Page 5: Homecontrol2.0
Simple and intuitive to use Constantly evolving Detailed history of events Biometric login (FaceID/Touch ID (iOS) and Android equivalents) Geofence alerts for easy reminders Voice push notifications Scan the QR code to find out more and to download HomeControl2.0 EURO 76 User Guide... -
Page 6: Setting Devices
The external tag reader can be used for arming/disarming, entry control or access control. To arm/disarm the system using the external tag reader, present a pre-programmed tag to the centre of the device. The device will display the system status: Green = Unset Red = Set EURO 76 User Guide... -
Page 7: Wireless Arming Stations
Once illuminated, it signifies that the output has triggered. Press the key again to deactivate the output. For information on how these may have been programmed, please speak to your engineer. Check out our wireless range at www.pyronix.com/uk EURO 76 User Guide... -
Page 8: Arming The System
Press f and the area that the code is assigned to will be unset. Area Set System Select the area or areas you wish to unset then Enter Your Code [*******] press f. EURO 76 Time 10:09 c EURO 76 User Guide... -
Page 9: After An Alarm
Tags for the readers need to be programmed through the ‘Edit Users’ function in the Master Manager menu. The internal and external readers can be both assigned to individual areas, this will need to be set up by your engineer. Unset Unset EURO 76 User Guide... -
Page 10: Entry Control
Alarm Silenced The keypad will display as shown to the right. Restore G76491 It is essential to take note of the number, on the screen (including the ‘G’) and call your Alarm Receiving Centre (ARC). Press h. EURO 76 User Guide... -
Page 11: Engineer Restore 1
To do this, enter your PIN code or present a tag, select the area then press f. Please note: Any fault may affect the overall performance of your alarm control panel and therefore your engineer should be contacted for further assistance if any fault is active. EURO 76 User Guide... -
Page 12: Unable To Arm
Press a. After 10 Omit Day Al [01] seconds the exit time continues. Please note: Zones have to be programmed so that they can be bypassed by your engineer for this feature to operate. EURO 76 User Guide... -
Page 13: Keypad Hold Up / Panic Alarm
EURO 76 A ‘Hold Up’ alarm will be generated. Time 10:09 c Please note: The ‘Hold Up’ facility needs to be enabled by your engineer (either silent or full alarm). EURO 76 User Guide... -
Page 14: Master Manager Menu
Please note: The Master Manager code allows access to all the options above. A ‘user code’ has access to the ‘User Menu’ which includes the functions: ‘OPERATE USER OUTPUTS’ , ‘CHANGE CODE’ , ‘REVIEW LOGS’ , ‘WALK TEST’ , ‘SIREN TEST’ , ‘ALLOW ENGINEER MENU’ , and ‘EXIT USER MENU’. EURO 76 User Guide... -
Page 15: Entering And Exiting Master Manager Menu
SET DATE & TIME? Enter the Year. Press f. Year (00-99) [07] Enter the Month. Press f. Month (1-12) [01] Enter the Day. Press f. Day (1-31) [01] Enter the Hours. Press f. Hours (0-23) [10] EURO 76 User Guide... -
Page 16: Operate User Outputs
Press f. Enter the zones you require to be omitted for the OMIT INPUTS? next setting procedure. Press f. Please note: All zones will be only omitted for the next setting procedure. Omit Day Al [01] EURO 76 User Guide... - Page 17 Press b or d to choose between ‘Unset/Set’ , ‘Unset Only’ , ‘Set Only’ or ‘None’. Press f. User Set Options Please note: This screen will not be displayed if Unset / Set you have programmed a wireless key fob. EURO 76 User Guide...
-
Page 18: Edit Users (Deleting And Changing Users)
To edit the Master Manager Code, press f. Enter the new code or present a tag. Press f. Change Master Refer to the section ‘Adding New Users’ for the Manager Code? options which will follow the code change. EURO 76 User Guide... -
Page 19: Event Log
Please note: This menu will only be visible with a HomeControl2.0 compatible module installed. Press b or h to scroll to ‘SET UP APP DATA’. Press f. SET UP APP DATA? Press b or d to enable or disable using the HomeControl2.0 App. Press f. Use App EURO 76 User Guide... - Page 20 Security Level High Press f to generate a high security password. Generate App Password Key? Please take note of the key (part 1 is shown, press f for part 2). Key Part 1 A1B2 C3D4 E5F6 G7H8 EURO 76 User Guide...
-
Page 21: Module Set Up
If “do not use” is shown on the display of a number, then a telephone number already exists that is communicating to an Alarm Receiving Centre (this can only be changed by your engineer). Press b or h to scroll to ‘SMS PHONEBOOK’. Press f. SMS PHONEBOOK EURO 76 User Guide... -
Page 22: Walk Test
Walk Test Input [01] SIREN TEST This function is used to test the siren and strobe outputs. Press b or h to scroll to ‘SIREN TEST’. Press SIREN TEST? EURO 76 User Guide... - Page 23 UDL software. Should you wish to block this access, you can enable this function. Press the b or h keys to scroll to ‘BLOCK UDL SET’. Press f. BLOCK UDL SET? Press b or d to select either ‘Yes’ or ‘No’. Press f. Block UDL Set EURO 76 User Guide...
- Page 24 Use the b and h keys to scroll to ‘SYSTEM SOUNDS DEMO’. Press the f key. SYSTEM SOUNDS DEMO? Press b or d to scroll through the different system sounds. Press f to exit. Sound to Play No Sound [00] EURO 76 User Guide...
- Page 25 Once it has been entered. entered, press ‘continue’. Please note: Once this step is Please note: If desired, This can be complete, this username cannot edited at a later time. be edited without deleting and reinstalling HomeControl2.0. EURO 76 User Guide...
- Page 26 To disconnect, press < in the top left corner of the system controls screen. Biometric Authorisation The next time the system is selected from the main screen, HomeControl2.0 will ask whether the user would like to enable facial or fingerprint recognition; depending on the smart device capabilities. EURO 76 User Guide...
- Page 27 Please note: The ‘Arm all areas’ slider is only operational on certain installations. Please speak to your installer for more information. EURO 76 User Guide...
- Page 28 This zone was triggered whilst arming or has a fault and needs to be investigated. The zone is active and will be live if the area is armed This zone is bypassed meaning it will not be live if the area is armed and will not trigger an alarm. EURO 76 User Guide...
- Page 29 90 seconds. After reinstatement, this state will be repeated after 2 invalid tags are presented to any reader. Certification All wireless devices comply with the following EU requirements: EMC Directive 2014/30/EU Low Voltage 2014/35/EU RE Directive 2014/53/EU And meet the following standards where relevant: EURO 76 User Guide...
- Page 30 PD6662:2017 EN50131-1:2006+A1:2009+A2:2017 EN50131-3:2009 Security Grade (SG) 3 - Large Security Grade (SG) 2 - Small Environmental Class (EC) II EURO 76 User Guide...
- Page 31 ZONE TABLE ZONE ZONE NAME ZONE AREAS DESCRIPTION EURO 76 User Guide...
- Page 32 ZONE ZONE NAME ZONE AREAS DESCRIPTION EURO 76 User Guide...
- Page 33 USERS TABLE CODE CODE/TAG/FOB CODE AREAS CODE NAME Master EURO 76 User Guide...
- Page 34 CODE CODE/TAG/FOB CODE AREAS CODE NAME EURO 76 User Guide...
- Page 35 Electronic messages and SMS messages are carried by the POTS/SMS Server operator by means of networks and transmission facilities over which Pyronix Limited (Pyronix) has no control. Pyronix shall therefore not be responsible for the POTS/SMS Server operator’s service level or the POTS/SMS Server operator’s network failures.
Need help?
Do you have a question about the EURO 76 and is the answer not in the manual?
Questions and answers