Table of Contents
Advertisement
Quick Links
Advertisement
Table of Contents

Related Manuals for Arturia AUDIOFUSE 16RIG


Summary of Contents for Arturia AUDIOFUSE 16RIG
- Page 1 USER MANUAL _AUDIOFUSE 16RIG...
- Page 2 Development Team DIRECTION Frédéric Brun Kévin Molcard PROJECT MANAGEMENT Daire O'Neill PRODUCT MANAGEMENT Martin Dutasta Leo Der Stepanians DESIGN Maxence Berthiot Axel Hartmann Héloïse Noir HARDWARE DEVELOPMENT Thierry Chatelain Laurent Baret FIRMWARE DEVELOPMENT Valentin Depoisier Julien Fezandelle Daire O'Neill SOFTWARE DEVELOPMENT Timothée Béhéty Valentin Foare Victor Krawiec...
- Page 3 Information contained in this manual is subject to change without notice and does not represent a commitment on the part of Arturia. The software described in this manual is provided under the terms of a license agreement or non-disclosure agreement. The software license agreement specifies the terms and conditions for its lawful use.
- Page 4 Thank you for purchasing AudioFuse 16Rig! AudioFuse 16Rig brings a new set of powerful capabilities to the Arturia audio interface family, while retaining the same superior sound quality found in the entire Arturia Fuse lineup. This manual covers the features and operation of the AudioFuse 16Rig. For additional information about Arturia’s AudioFuse Control Center, the companion software for the...
- Page 5 IMPORTANT: The product and its software, when used in combination with an amplifier, headphones or speakers, may be able to produce sound levels that could cause permanent hearing loss. DO NOT operate for long periods of time at a high level or at a level that is uncomfortable. If you encounter any hearing loss or ringing in the ears, you should consult an audiologist.
- Page 6 Introduction Dear musician, We’d like to thank you for purchasing the AudioFuse 16Rig, one of the most powerful pro audio interfaces on the market. Thanks to its great flexibility, and its powerful features, the AudioFuse 16Rig will serve you well whether you're just getting started or expanding your existing setup with the very best equipment.
-
Page 7: Table Of Contents
AudioFuse Control Center ......................................8 3.1.2. AudioFuse Creative Suite ......................................8 3.1.3. User Guide ............................................9 3.2. Preparing the AudioFuse 16Rig to work with your computer: macOS or Windows?..... 9 3.2.1. macOS..............................................9 3.2.2. Windows ............................................10 Getting to Know the AudioFuse 16RIG......................11 4.1. - Page 8 7.2.4. ANALOG OUT 5–10........................................35 7.3. MIXER ......................................35 7.3.1. MIXER CHANNEL SETTINGS ....................................36 7.3.2. MAIN MASTER ..........................................37 7.3.3. MAIN CHANNELS........................................37 7.4. CUE......................................38 7.5. MIDI......................................38 7.5.1. MIDI ACTIVITY..........................................38 7.5.2. MIDI CONFIG ..........................................39 7.5.3. STANDALONE MIDI .........................................
-
Page 9: Welcome To The Audiofuse 16Rig
& Manuals page of the Arturia support site. There's no telling what you'll be able to create with the AudioFuse 16Rig as the center of your music-making... um... rig. (Yes, that's why we chose that name!) Arturia - User Manual AudioFuse 16Rig - Welcome to the AudioFuse 16Rig! -
Page 10: Features Of Audiofuse 16Rig
1.2. Diving in (suggestions on using this manual) In this manual, you'll be introduced to all of the AudioFuse 16Rig's functions, step by step. It's organized so that you can quickly find what you need, whether it's a detailed list of parameters for a given page or just figuring out the difference between clicking a knob and turning it. -
Page 11: Setting Up The Hardware
2. SETTING UP THE HARDWARE The first thing to do when you unbox the AudioFuse 16Rig is to set it up for rackmount or tabletop use. Follow these instructions carefully so you don't damage your interface. 2.1. What’s in the box? •... -
Page 12: Configuring The Audiofuse 16Rig For Tabletop Use
Keep in mind that the AudioFuse 16Rig does generate heat that needs to be able to escape the chassis. Don't block the vents and leave room for air circulation, and don't stack another item that generates heat on top of it (such as a laptop). -
Page 13: Rackmounting The Audiofuse 16Rig
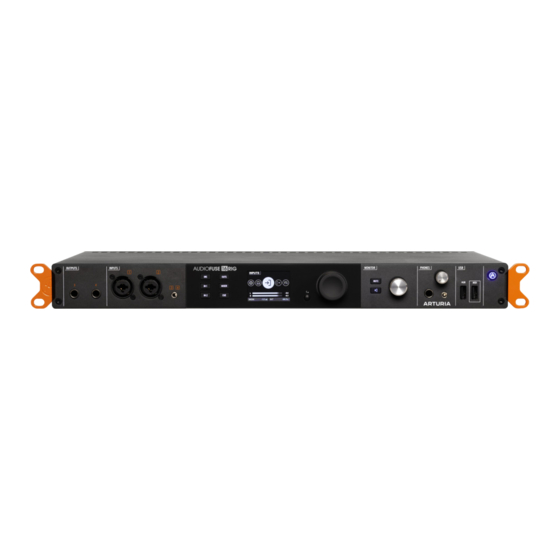
2.2.2. Rackmounting the AudioFuse 16Rig AudioFuse 16Rig configured for rackmounting Attach the rack ears in the configuration shown above, and the AudioFuse 16Rig is ready to slot into your rack. In this configuration, you won't need the rear feet or rubber pads, so leave them in the box in case you want to rack mount the unit some day. -
Page 14: Registration And Software Setup
3. REGISTRATION AND SOFTWARE SETUP Now that we know a bit more about the AudioFuse 16Rig, it's time to get it ready to work with your computer. 3.1. Registration Once you've set up your hardware, the next part of the process is to register it with Arturia. -
Page 15: User Guide
3.2.1. macOS Connect the AudioFuse 16Rig to its power supply, plug it into your Mac with the appropriate USB cable, and power it up. Launch Audio MIDI Setup (you'll find it in Applications/Utilities) and the AudioFuse 16Rig should already be there. -
Page 16: Windows
3.2.2. Windows When you install AudioFuse Control Center on your Windows PC, it will also install the appropriate Arturia USB Audio Drivers. Once that's done, you can plug in and power up the AudioFuse 16Rig. To set up the AudioFuse 16Rig as your default audio device: Control Panel Sound Default Select on Windows Go to the Control Panel and click Sound. -
Page 17: Getting To Know The Audiofuse 16Rig
As you've seen for yourself when you took the AudioFuse 16Rig out of the box, this interface has a whole lot going on! Let's take a tour around the AudioFuse 16Rig, and in the process we'll learn a lot about what it can do. -
Page 18: Inputs 3 & 4
You'll find the rest of the inputs on the rear panel – see below.) There are also TRS jacks on the rear panel for Inputs 1 & 2. The AudioFuse 16Rig has an auto-sensing feature, so the rear-panel jacks can remain plugged in at all times, and are automatically ignored when the front-panel jacks are used. -
Page 19: Monitor And Phones
B Speaker use. However, we recommend using 5-6, 7-8 or 9-10, and leaving 3-4 available since outputs 3-4 are mirrored on the front panel and provide other useful functionalities. Arturia - User Manual AudioFuse 16Rig - Getting to Know the AudioFuse 16RIG... -
Page 20: Front Panel Usb
Note the small button in the upper right corner with the Arturia logo. This button turns the AudioFuse 16Rig on and off. One push will power the unit on; to power off, hold the button until the display says "Goodbye!" so the unit shuts down in a safe and controlled fashion. You can also tap the button to bring up the AFCC software on the connected computer. -
Page 21: The Rear Panel
4.2. The Rear Panel The AudioFuse 16Rig rear panel The AudioFuse 16Rig's rear panel has a large complement of connectors. Here's a guide, moving from right to left . 4.2.1. Line Inputs 1–16 Rear panel audio inputs At the far right, you'll find 16 TRS balanced analog inputs with world-class A/D converters. -
Page 22: Digital Audio I/O
Rear panel MIDI, USB, and power connections The AudioFuse 16Rig has one MIDI In and a pair of assignable MIDI Out/Thru jacks, all on 5-pin DIN connectors. A 3.5mm jack next to MIDI Out/Thru 2 provides an analog MIDI clock signal for use with certain analog synths, drum machines and modular synthesizers. -
Page 23: Putting Your Audiofuse 16Rig To Work
This will get you the cleanest sound; use gain control on the AudioFuse 16Rig only for devices with no level control or very weak output signals. -
Page 24: Recording A Microphone
Connect your microphone to one of the mic inputs on the front panel. AudioFuse 16Rig will auto-detect that you have connected an XLR cable and that input channel will be given a 48V button in both the hardware and in AFCC. -
Page 25: Recording A Guitar Or Bass
Connect your guitar or other instrument to either of the front panel inputs with a standard 1/4" cable. AudioFuse 16Rig will auto-detect that you have connected a 1/4" cable and that channel in AFCC will add a button labeled INST. By default, channels are set to receive a line-level signal;... -
Page 26: Reamping A Guitar Or Bass
Therefore it has to present the right signal level and output impedance. Commercial reamplification boxes (sometimes nicknamed "reverse DI boxes") have been around for many years, but the AudioFuse 16Rig has the capability built into the front panel outputs 3 and 4. -
Page 27: Creating A Mix
5.5. Creating a Mix The AudioFuse 16Rig can combine signals with two different mixers: the Main Mix , which includes up to four Aux Sends , and the Cue Mix , which does not. Typically you'd use the Main Mix in the same way you'd use any conventional mixer, while the Cue Mix can feed a headphone amplifier so performers can hear "more me"... -
Page 28: Using Two Sets Of Speakers
This method lets you adjust a mix on any or all channels from the front panel of the AudioFuse 16Rig without a computer, and up to eight Main mixes can be saved and loaded as Presets. As you can imagine, this process can get pretty tedious. It's much faster and easier to set up and save Main and Cue mixes using the AudioFuse Control Center [p.8]... -
Page 29: Connecting To Adat Digital Audio Devices
5.7. Connecting to ADAT Digital Audio Devices The AudioFuse 16Rig can support up to 16 channels of ADAT digital I/O by using the four optical Toslink connectors on its rear panel. Each port carries eight channels of audio in one direction when working at 44.1 or 48k sampling rates. -
Page 30: Working With Multiple Adat Devices Using Wordclock Sync
(44.1 or 48k) sampling rates so only the first input and output ports should be used. How to set up the Word Clock sync: 1. AudioFuse 16Rig is our primary reference clock and so we must set its “Clock Source” parameter to “Internal.”... -
Page 31: Connecting Midi And Usb Devices
2. We then configure the first AudioFuse 8Pre to synchronize itself to the AudioFuse 16Rig through the Word Clock connection by setting the AudioFuse 8Pre’s “Sync” parameter (on the front panel) set to “Word.” 3. Next, let’s switch on the “Pass Thru” function on the first AudioFuse 8Pre. This is done through the AFCC under Device Settings (Gear Icon) >... -
Page 32: Using The Audiofuse 16Rig As A Control Voltage Source
In fact, you can control AudioFuse 16Rig's Main mixer using MIDI messages from any connected controller. 5. Click on the MIDI menu to select how the AudioFuse 16Rig will route and respond to MIDI. If you're going to be recording and playing back MIDI via recording software, consult that software's documentation to learn how. -
Page 33: Getting Around
6. GETTING AROUND Now it's time to dive in and learn how to use the AudioFuse 16Rig. The chapters after this one will serve as a step-by-step reference to all of the hardware's functions. But first, it would help to learn a few basics about how to navigate the front-panel interface controls, and some of the most important parts of the interface's functions and menu structure. -
Page 34: Audiofuse 16Rig Hardware Shortcuts
MIXER / CUE + MONITOR Knob on Mixer / Cue Change the current channel gain channel view Double-click Back button Return to main menu 6.1.4. The Mute and Monitor buttons MUTE button, Monitor button, and Monitor knob Arturia - User Manual AudioFuse 16Rig - Getting Around... -
Page 35: Screen Layout: What Will I See When I Get There
– like a carousel (merry-go-round). The seven menus include: INPUTS: Metering and controls for the analog and digital inputs. • OUTPUTS: Metering and controls for all analog and digital outputs. • Arturia - User Manual AudioFuse 16Rig - Getting Around... -
Page 36: Pages
MIDI Activity monitor. SETTINGS: Clock, Monitor, and global preferences, as well as a System Info page • to show basic information about your particular AudioFuse 16Rig's hardware. PRESETS: Controls to save and load presets. There are 8 slots available. •... -
Page 37: Scroll, Select, Activate
Center software, in a neat graphical interface with instant visual feedback. While we recommend that you read the software's user manual, you will find that many of the features there are self-explanatory once you've learned your way around the hardware. Arturia - User Manual AudioFuse 16Rig - Getting Around... -
Page 38: Menus And Functions
7. MENUS AND FUNCTIONS The AudioFuse 16Rig's Carousel screen gives you access to seven different sets of functions. In this chapter, we'll go through them one by one, and show which functions are available on each page. 7.1. INPUTS 7.1.1. ANALOG INPUTS / ADAT INPUTS... -
Page 39: Outputs
PHONES indicates the Phones output • • Numbers 3–10 indicate those rear panel outputs Click on the name or number of the channel you want to edit (highlighted in white). Arturia - User Manual AudioFuse 16Rig - Menus and Functions... -
Page 40: Monitor
The first page has a Gain knob and a Stereo Link button • The second page has an indicator showing which signal is being sent to that channel's OUT jack. Arturia - User Manual AudioFuse 16Rig - Menus and Functions... -
Page 41: Analog Out 5-10
USB channels. If there are more channels in the mix than there is room on the screen, scrolling to the right will move you to the next screen and more channels. Arturia - User Manual AudioFuse 16Rig - Menus and Functions... -
Page 42: Mixer Channel Settings
MIXER button, the MONITOR knob directly controls the channel level. That means you can rapidly jump from channel to channel and tweak levels, just by holding down the MIXER button and going back and forth between the Encoder and the MONITOR knob! Arturia - User Manual AudioFuse 16Rig - Menus and Functions... -
Page 43: Main Master
ADAT channels. • The second page is where you select from up to 32 USB "return" channels. These are channels that come from your computer (for example your DAW's various outputs). Arturia - User Manual AudioFuse 16Rig - Menus and Functions... -
Page 44: Cue
Double-click again to turn it off. 7.5. MIDI Clicking on the MIDI icon in the carousel accesses the MIDI menu, which has 3 pages: 7.5.1. MIDI ACTIVITY Arturia - User Manual AudioFuse 16Rig - Menus and Functions... -
Page 45: Midi Config
USB DEVICE: MIDI messages going to your music software and/or computer (via • USB) 7.5.2. MIDI CONFIG The MODE control is a drop-down menu that lets you set how the AudioFuse 16Rig responds to MIDI. STANDALONE: The AudioFuse 16Rig passes MIDI from sources to destinations •... -
Page 46: Standalone Midi
Each can be connected to one of the following sources: NONE, DIN, USB HOST, USB+DIN What happens if you send two or more sources to one destination? The AudioFuse 16Rig will merge their MIDI signals, acting like a sort of MIDI mixer. - Page 47 16Rig is equally capable of providing tight clocking to other devices, or following the clock generated by another device. AudioFuse 16Rig can operate on its own internal clock, or use an input clock signal from the ADAT inputs or the Word Clock input. The clock source and sample rate are displayed at the...
-
Page 48: Monitor Settings
You can choose either –10dB or –20dB. DIM button: Engages and disengages dimming without leaving this page. It's a • handy way to test which amount of dimming you prefer. 7.6.3. PREFERENCES Arturia - User Manual AudioFuse 16Rig - Menus and Functions... -
Page 49: System Info
Hardware Revision 7.7. PRESETS One of the fun things you can do with the AudioFuse 16Rig is to use it in standalone mode, with no computer attached to it. It's a very handy mixer with lots of routing flexibility, and it doesn't need a host program to be useful in that regard. -
Page 50: Preset Save
This page is identical to the PRESET SAVE page, but has a Load button instead. Notice that the Load preset actually has nine presets. This is because there is a preset called "0-Factory" that loads AudioFuse 16Rig's factory defaults and can not be overwritten. ... -
Page 51: Audiofuse Control Center
8. AUDIOFUSE CONTROL CENTER While nearly all of the AudioFuse 16Rig's functions can be accessed from the front panel controls, you may find it more convenient to control your interface from a computer. Like all AudioFuse interfaces, the AudioFuse 16Rig can be set up and controlled from the AudioFuse Control Center (AFCC) software. -
Page 52: Screen Selectors
• display. Manual: opens this manual. • Shortcuts: Opens a window with all AFCC and AudioFuse 16Rig shortcuts • conveniently located in one place. Memorizing these will really help you speed up your workflow in the longrun. About: opens a window with the current software version and a list of credits. - Page 53 The Factory preset can't be edited and saved, or overwritten. If you start with the Factory preset and edit it to fit your needs, you must save the result into one of the eight preset slots. Arturia - User Manual AudioFuse 16Rig - AudioFuse Control Center...
-
Page 54: Sample Rate And Clock Source
The Save icon opens a drop-down menu indicating where an edited preset may be saved. Next to it is the floppy-diskette Quick Save icon, which you click to save an edited preset into the same slot. 8.1.4. Sample Rate and Clock Source Arturia - User Manual AudioFuse 16Rig - AudioFuse Control Center... -
Page 55: Global Settings
These drop-down menus let you select the Sample Rate, from 44.1 to 192 kHz, and Clock Source, whether Internal, ADAT, or Word Clock. NOTE: Selecting a sample rate higher than 48 kHz will limit the capabilities of the AudioFuse 16Rig. See the section on Clock Settings [p.40] for more information. -
Page 56: Preferences
This controls how long a level meter will indicate clipping before it resets itself. Options include 1.5 seconds, 3 seconds, and Infinite (clip indicators remain lit until manually reset, as explained here [p.18]). Arturia - User Manual AudioFuse 16Rig - AudioFuse Control Center... -
Page 57: Firmware Update
AFCC and the hardware. 8.2.2.3. Device Name You can name your AudioFuse 16Rig. This name will be displayed in the Upper Toolbar, and is useful you have more than one AudioFuse interface connected to your computer. -
Page 58: Overview Screen
8.3. Overview Screen Clicking the first of the Screen Selector icons opens an overview of the AudioFuse 16Rig's inputs and outputs, with level meters and various controls. 8.3.1. Analog Inputs The upper left section of the Overview screen contains meters and controls for the Analog Inputs. -
Page 59: Adat Inputs
8.3.2. ADAT Inputs The upper right portion of the Overview screen has 16 level meters for the ADAT digital inputs. There are no controls associated with these meters. 8.3.3. Analog Outputs Arturia - User Manual AudioFuse 16Rig - AudioFuse Control Center... -
Page 60: Loopback And Adat Outputs
Analog Outputs 3 and 4 on the front panel have a drop-down menu for selecting their function: LINE, REAMP, DIRECT THRU, and ALT PHONES. In addition, a GROUND LIFT switch is available to eliminate possible ground loop hum when connecting the AudioFuse 16Rig outputs to guitar amps and other gear. -
Page 61: Main Mixer Screen
8.4. Main Mixer Screen This screen brings up AudioFuse 16Rig's Main mixer, and provides functions that let you build and set it far more quickly and easily than with the user interface of the AudioFuse 16Rig itself. When you open this screen for the first time, it will look like this: The Factory preset populates the Main mixer with a set of eight analog input channels as shown here. - Page 62 Once you've selected the channels you want, click anywhere outside the Main Channels pop-up to dismiss it. Your populated Main mixer screen might look something like this: Arturia - User Manual AudioFuse 16Rig - AudioFuse Control Center...
-
Page 63: Cue Mixer Screen
There is one other important difference when it comes to the Cue Mixer. There is a CUE button above the Master fader, which turns the Cue mix on or off. This corresponds to the CUE button on the front panel of the AudioFuse 16Rig itself. ... -
Page 64: Routing Matrix Screen
8.6. Routing Matrix Screen With so many inputs and outputs, the AudioFuse 16Rig provides many choices for routing signals. The Routing Matrix screen lets you make sense of the many possible routing options and see at a glance where signals are going. -
Page 65: Sources
If you click on any of the black boxes with group labels (e.g. ANALOG or ADAT 2), the screen will switch to the following view: Here, the USB sources are displayed individually while the other three groups of sources have been collapsed into single columns. Arturia - User Manual AudioFuse 16Rig - AudioFuse Control Center... -
Page 66: Destinations
You'll probably find it easier to mix with an external control surface than with your computer mouse! Across the top of the MIDI Screen are several important MIDI-related control sets: Arturia - User Manual AudioFuse 16Rig - AudioFuse Control Center... -
Page 67: Midi Configuration
8.7.1. MIDI Configuration The MIDI CONFIGURATION section has two controls with drop-down selection menus. The Mode menu lets you choose whether the AudioFuse 16Rig is operating in Standalone mode or Hosted mode. • In Standalone mode, MIDI message routing is controlled by the AudioFuse 16Rig's Standalone MIDI [p.40]... -
Page 68: Standalone Midi
8.7.2. Standalone MIDI The STANDALONE MIDI controls at the top center of the screen let you specify the routings of MIDI Inputs to MIDI Outputs among the AudioFuse 16Rig's various ports when it's in Standalone mode. There are four fixed destinations: DIN 1, DIN 2, Sync, and USB HOST. -
Page 69: Main Mixer Midi Mapping
MIDI control. In addition, the following MIDI controls are available in the Master section: • Aux 1 through Aux 4 return levels • Master level Arturia - User Manual AudioFuse 16Rig - AudioFuse Control Center... - Page 70 MIDI mapping to work properly. If two or more controls share the same assignments, you'll get an error message showing the controls that are in conflict, and telling you to change the values for one or the other, as shown below: Arturia - User Manual AudioFuse 16Rig - AudioFuse Control Center...
-
Page 71: Hover Tips
Hover Tips display at the bottom of the plug-in window. After all, everybody needs a little extra help now and then! Arturia - User Manual AudioFuse 16Rig - AudioFuse Control Center... -
Page 72: Specifications
2,7kΩ Maximum input level +22dBu Gain range 55dB Pad mode -20dB Equivalent Input Noise (EIN) -129.5dBu (A-weighted) Frequency response 20Hz to 20kHz +/-0.08dB Dynamic range 117dB (A-weighted) THD+N @ 1kHz -110dB (A-weighted) Arturia - User Manual AudioFuse 16Rig - Specifications... - Page 73 DC voltage amplitude +/-8.7V (asymmetrical) Phones Outputs Measured values Output impedance 5Ω Maximum output level +14.4dBu Dynamic range 109dB (A-weighted) Power @ 33Ω @1%THD 271mW @-78dB THD THD+N @ 1kHz -103dB (A-Weighted) Arturia - User Manual AudioFuse 16Rig - Specifications...
-
Page 74: Appendices
10. APPENDICES 10.1. USB Audio mapping AudioFuse 16Rig displays differing numbers of input and output channels in your DAW depending on your selected sampling rate. Sampling Rate Inputs Outputs 44.1 / 48 kHz 88.2 / 96 kHz 176.4 / 192 kHz The tables below contain detailed information about inputs and outputs at each sampling rate. - Page 75 Rear Out 5 Rear In 6 Rear Out 6 Rear In 7 Rear Out 7 Rear In 8 Rear Out 8 Rear In 9 Rear Out 9 Rear In 10 Rear Out 10 Arturia - User Manual AudioFuse 16Rig - Appendices...
- Page 76 Rear In 5 Rear Out 5 Rear In 6 Rear Out 6 Rear In 7 Rear Out 7 Rear In 8 Rear Out 8 Free Rear Out 9 Free Rear Out 10 Arturia - User Manual AudioFuse 16Rig - Appendices...
-
Page 77: Declaration Of Conformity
Directive on the approximation of the laws of the member states relating to Electromagnetic Compatibility according to 2014/30/EU, and Low Voltage Directive 2014/35/EU. 11.4. ROHS This device has been produced with lead free solder and fulfills the requirements of the ROHS directive 2011/65/EU. Arturia - User Manual AudioFuse 16Rig - Declaration of Conformity... -
Page 78: Weee
For more information about collection points and recycling of these products, please contact your local municipal office, your household waste disposal service, or the shop where you purchased the product. Arturia - User Manual AudioFuse 16Rig - Declaration of Conformity... -
Page 79: Software License Agreement
All intellectual property rights in the software belong to Arturia SA (referred to as 'Arturia' from now on). Arturia permits you to only copy, download, install and use the software in accordance with the terms and conditions of this Agreement. - Page 80 (a) return of the purchase price, or (b) replacement of the disk that does not meet the Limited Warranty and which is returned to Arturia with a copy of your receipt. This limited Warranty becomes void if failure of the software has resulted from an accident, abuse, modification, or misapplication.
- Page 81 (including without limitation, damages for loss of business profits, business interruption, loss of business information and the like) even if Arturia was previously advised of the possibility of such damages. Some states do not allow limitations on the length of an implied warranty or the exclusion or limitation of incidental or consequential damages, so the above limitation or exclusions may not apply to you.
Need help?
Do you have a question about the AUDIOFUSE 16RIG and is the answer not in the manual?
Questions and answers