Table of Contents
Advertisement
Advertisement
Table of Contents

Related Manuals for Arturia Keylab Essential


Summary of Contents for Arturia Keylab Essential
- Page 1 USER MANUAL...
- Page 2 Information contained in this manual is subject to change without notice and does not represent a commitment on the part of Arturia. The software described in this manual is provided under the terms of a license agreement or non-disclosure agreement. The software license agreement specifies the terms and conditions for its lawful use.
- Page 3 Quick Start Guide are required to unlock your software. Remember to register! It sounds boring, but it’s worth it. Registering is important because it lets you download and activate Analog Lab 2, as well as the Arturia MIDI Control Center.
- Page 4 Specifications Subject to Change: The information contained in this manual is believed to be correct at the time of printing. However, Arturia reserves the right to change or modify any of the specifications without notice or obligation to update the hardware that has been purchased.
-
Page 5: Table Of Contents
Table Of Contents Getting Started ................................2 1.1. Connecting KeyLab Essential ............................2 1.2. The Front Panel..................................2 1.3. The Rear Panel ..................................3 Guided Tour..................................4 2.1. Keyboard..................................... 4 2.2. Pitch & modulation wheel............................... 4 2.3. Octave Control & Transpose............................5 2.3.1. -
Page 6: Getting Started
Your controller keyboard is now ready to use. If you wish to use KeyLab Essential as a universal MIDI controller for outboard equipment, simply use the optional 9v DC 500mA PSU, and connect KeyLab Essential’s MIDI Out socket to your preferred equipment’s MIDI In socket using a standard MIDI cable. -
Page 7: The Rear Panel
USB. Sustain Pedal Input The sustain pedal input automatically detects the polarity of your sustain pedal when KeyLab Essential is turned on, so it can be used with practically any standard pedal. USB Connection Use this socket to connect KeyLab Essential to your device. This port provides both power, MIDI data, and control information. -
Page 8: Guided Tour
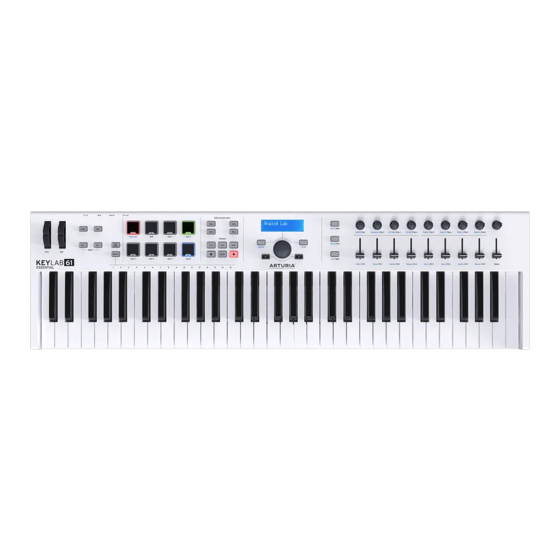
KeyLab Essential features either 49 or 61 velocity sensitive, synth-action keys. This is obviously used to capture melodic performance, but can also be used in conjunction with the MIDI Channel Select function to change KeyLab Essential's MIDI output channel. 2.2. Pitch & modulation wheel These controllers allow for real-time pitch shifting and modulation control. -
Page 9: Octave Control & Transpose
• Octave -3: Oct - blinks quickly • To quickly reset the octave shift and set the KeyLab Essential to the neutral position, hit both Oct - and Oct + buttons simultaneously. NOTE: Both Octave and Transpose settings can be saved within User map presets. -
Page 10: Activating Transpose
To transpose in KeyLab Essential, simply press and hold the Trans button, and select the note you wish to hear at the position of C on the keyboard. Notes lower than middle C will transpose down, and notes above Middle C will transpose up. -
Page 11: Pads
Arturia MIDI Control Center. 2.5.1. Selecting Maps using the pads The pads can also be used to select the different Map options within KeyLab Essential. When the Map Select button is pressed, the corresponding pad will light up to show the Map currently in use. -
Page 12: Midi Channel Selection
MIDI channel you wish to select. Now all controls set to follow the "User" MIDI Channel in the MCC will change to that channel. For example, to make KeyLab Essential’s output to MIDI channel 8, hold the MIDI CH button and hit the note E2 on the keyboard. -
Page 13: Part Controls
2.9. Part Controls The 3 control buttons are used to switch the functions of KeyLab Essential’s encoders and faders, letting you control different channels while using the DAW map, and control the parameters of all 3 sections of Analog Lab’s Multi Mode. -
Page 14: Daw Command Center
NOTE: KeyLab Essential's compatibility with your chosen DAW will depend on how each manufacturer handles the MCU and HUI protocols. For more information, consult the KeyLab Essential page on the Arturia website, or the documentation of your preferred DAW. -
Page 15: Preset Browser & Display
Don't worry, you can easily remedy this by sending what is known as a "Panic Message", which resets all controllers and sends a "note off" message to all MIDI channels. To do this using KeyLab Essential, press and hold the < and > buttons simultaneously. Arturia - User Manual KeyLab Essential - Guided Tour... -
Page 16: Factory Reset
2.13. Factory Reset Sometimes you may wish to factory reset your KeyLab Essential. This will initialize the unit, putting in its default state. To factory reset your KeyLab Essential, follow these simple steps: • Make sure KeyLab Essential's USB cable is disconnected. -
Page 17: Midi Control Center
TIP: If you have multiple Arturia devices connected at the same time, you can select the one you wish to edit by selecting it from the drop-down menu in the Device section of MCC. Now your KeyLab Essential is connected, let’s go over a few of the simple ways to... -
Page 18: Device Memories
• software. Again, this map is read-only, and cannot be altered. User 1-6 - These maps correspond to User Map 1 - 6 on KeyLab Essential, and are • the saveable maps you can use to customize your KeyLab Essential experience. -
Page 19: Local Templates
3.1.3. Local Templates The Local Templates section lets you store and organize your custom User maps without needing to save or recall settings from KeyLab Essential. It can also be used to load pre- configured maps generated from the Arturia user community. -
Page 20: Mcc Controller Map
NOTE: Some sections of the KeyLab Essential - such as the DAW Command Center - cannot be customized. In the next part of the manual, we’ll take a look at the options available for each the controls. -
Page 21: Customizing The Pads
Option: Choose between Gate and Toggle. Gate activates the pad only when • struck or depressed and deactivates it when released, and Toggle activates the pad when struck, and deactivates it when struck again. Arturia - User Manual KeyLab Essential - MIDI Control Center... -
Page 22: Pad Patch Change
KeyLab Essential. 3.3.5. Pad MMC This simple option lets you use any of KeyLab Essential’s pads as an MMC command button. Color: Select the color the pad will illuminate on being struck or toggled on. -
Page 23: Customizing The Encoders
TIP: Setting the Min & Max Values of the encoders is a great way of ensuring you only ever move within a synth parameter sweet-spot, for example. Arturia - User Manual KeyLab Essential - MIDI Control Center... -
Page 24: Customizing The Faders
• maximum values the fader can move between. 3.6. Customizing the Keyboard KeyLab Essential's keyboard can also be modified using the MIDI Control Center. Channel: Select the MIDI channel output for KeyLab Essential’s keyboard, • between 1 to 16. This can also be set to “user”, which will make the fader output to the default MIDI channel selected in the Device Settings. -
Page 25: Customizing The Sustain Pedal
0 and 127. 3.7.4. Sustain Pedal MMC This simple option lets you use KeyLab Essential’s sustain pedal input as an MMC command switch. MMC: Choose between the 3 MCC options available for the pedals: Start, Stop, •... -
Page 26: Changing The Global Settings
User MIDI Channel: This changes the default MIDI channel output for KeyLab • Essential from 1 to 16. Vegas Mode: When KeyLab Essential is left idle and untouched for around 5 • minutes, it will begin an eye-catching, colorful light show. You can choose to Enable or Disable this as you see fit. -
Page 27: Software License Agreement
The License is not a sale of the original SOFTWARE. 2. Grant of License Arturia grants you a non-exclusive license for the use of the software according to the terms and conditions of this Agreement. You may not lease, loan or sub- license the software. - Page 28 (a) return of the purchase price or (b) replacement of the disk that does not meet the Limited Warranty and which is returned to Arturia with a copy of your receipt. This limited Warranty is void if failure of the software has resulted from accident, abuse, modification, or misapplication.
-
Page 29: Declaration Of Conformity
Important notice: DO NOT MODIFY THE UNIT! This product, when installed as indicate in the instructions contained in this manual, meets FCC requirement. Modifications not expressly approved by Arturia may avoid your authority, granted by the FCC, to use the product.