Table of Contents
Advertisement
Quick Links
Advertisement
Table of Contents
Troubleshooting

Related Manuals for StarTech.com CABCONS1716I


Summary of Contents for StarTech.com CABCONS1716I
- Page 1 Rackmount LCD Console with Integrated 16 Port IP KVM CABCONS1716I...
- Page 3 Where they occur these references are for illustrative purposes only and do not represent an endorsement of a product or service by StarTech.com, or an endorsement of the product(s) to which this manual applies by the third-party company in question. Regardless of any direct acknowledgement elsewhere in the body of this document, StarTech.com hereby acknowl-...
-
Page 4: Table Of Contents
Table of Contents Introduction ... 1 Features ... 1 Required Cables and Hardware ... 1 Assembly... 4 Hardware Guide ... 9 Front Panel Functions... 9 LCD Panel Power SwitchRear Panel Functions ...10 Network Configuration...11 Web Configuration Using the On-Screen Display...11 Web Configuration Using DHCP ...12 Web Configuration Using Static IP ...14 Terminal Configuration Using a Serial Cable...14... - Page 5 Accessing KVM Features...35 Cascade Configuration ...35 OSD Operations ...36 OSD Function Keys ...37 Hot Key Commands...40 Changing Your Configuration ...42 Optimizing video performance...42 Using the Advanced Video Tuning feature ...43 Using the Modem Feature...45 Connecting a Modem ...45 Modem configuration ...46 Configuring the Remote Connection ...47 Accessing the Web Interface ...48 Modem Troubleshooting Guide...50...
-
Page 6: Introduction
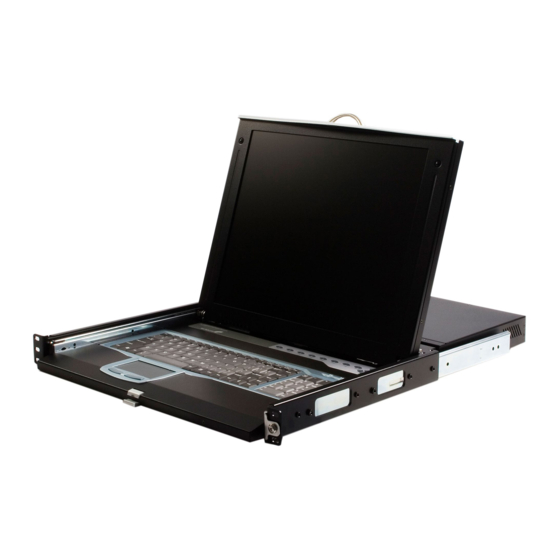
Thank you for purchasing a StarTech.com 17” Rackmount LCD Console with Integrated 16 Port IP KVM. An ideal solution to help save valuable cabinet space, CABCONS1716I allows you to securely access connected servers from anywhere in the world over the Internet or over a LAN or WAN, and integrates a 17” active matrix LCD monitor, low-profile keyboard and touchpad that can be folded... - Page 7 StarTech.com part number: SCNM9FF StarTech.com 10 ft. Cross Wired Serial/Null Modem Cable DB9 F/F StarTech.com part number: SVECONUSXX StarTech.com Ultra-Thin USB 2-in-1 KVM Cable Console Installation 1U Cabinet Console - assembled “LCD panel + keyboard + touch pad” drawer Rear bracket & extension kit - This kit contains two pieces of rear brackets and two extensions.
- Page 8 Instruction Manual Overhead Diagram KVM Module KVM Module Console Console Drawer Drawer The KVM Module can be connected to a console, or be used as a stand- alone KVM Switch. There are three major categories: PS/2, USB and Sun Interfaces. Please note: You can only connect to a computer using the PS/2 port.
-
Page 9: Assembly
Assembly Remove the safety stopper from the console drawer. The safety stopper is designed to prevent the drawer from sliding out during transportation. Please note that once the Safety Stopper is removed, the drawer is free to slide out when the console is tilted. Be cautious, as this could cause injury. - Page 10 Instruction Manual Please note the orientation of the wide side of the extension Fasten the console to the rack, using the provided screws.
- Page 11 Slide the rear bracket into both sides of the unit, ensuring the three round screws are INSIDE the bracket track, while sliding inward (noting the arrows in the diagram below). Attach both brackets to the rack: Instruction Manual...
- Page 12 Push the KVM switch module evenly toward the drawer: Slide the console drawer out and fasten both units using the screws provided: Instruction Manual...
- Page 13 Make sure the C-36 connectors are firmly connected: Connect the power supply to the power jack on the KVM module to complete the assembly. Instruction Manual 8mm (5/16”) C36 Connector...
-
Page 14: Hardware Guide
Local Console in Operation - the console, this will illuminate green. Remote Console in Operation - computer is accessed by another set of keyboard/mouse/monitor connected to the Remote console when the KVM Switch Function Module is a 2-console KVM. LCD Panel Control:... -
Page 15: Lcd Panel Power Switchrear Panel Functions
Serial Port VGA Out R-Port IP Setup button - automatically load the On-Screen Display. Reset button a) Power reset - reboots power to the CABCONS1716I b) Configuration reset - During configuration, resets PS/2 Keyboard PS/2 Mouse Remote connections Instruction Manual Pressing this button (using a paperclip, etc.) will... -
Page 16: Network Configuration
CABCONS1716I offers four distinct methods for configuring the unit for your network. Which method will work best depends on your level of expe- rience and your specific network configuration. Please note: Connecting the remote computers prior to fol- lowing the steps outlined below can result in system instability. -
Page 17: Web Configuration Using Dhcp
Enter. At the main OSD menu (pictured below), you will be given several basic setup options. To configure CABCONS1716I to your required network set- tings, use the Network Setup Wizard. To select from the menus provided, use the arrow keys on your keyboard. - Page 18 MAC Address: 00-0E-C5-00-08-1A Device Name: (none) The easiest way to identify your CABCONS1716I on the network is by its MAC address, a unique hardware identifier that is specific to your unit. The MAC address of the unit can be found on a white sticker on the bot- tom of the CABCONS1716I.
-
Page 19: Web Configuration Using Static Ip
System Administrator for assistance. NOTE: It is advisable to verify whether another device on your network is using the same IP address as the CABCONS1716I before connecting it to the network, to avoid a conflict. Should an IP address conflict occur with another device on the network, power off the conflicting device or... - Page 20 You can use the serial port on the CABCONS1716I to access the terminal configuration tool; to do so, you will require a null modem serial cable. Connect a female end of a serial cable to the serial port used for serial access on the host computer.
-
Page 21: Using The Web Interface
HTML Web browser. You can access the Web interface by opening your Web browser and entering the IP address of the CABCONS1716I you wish to configure. The IP address will be either: a) The address assigned by your DHCP server as identified in the previous section, or b) 192.168.1.123 if your network uses static IP addressing. -
Page 22: Navigating The Web Interface
Instruction Manual browser or the Java VNC client, always choose the option to continue. Navigating the Web Interface Name Help Area Main Menu After the inital login, the screen is divided into several sections, three of which will remain on the screen at all times while viewing the Web Interface: Name: At the top of the screen, the name of the machine being controlled is displayed... -
Page 23: Main Menu Selections
file transfer functions, Monitoring Information, System Identification and VNC Client options: Preferences: The Preferences screen offers several configuration op- tions, pertaining to the functionality of CABCONS1716I. Here, you will be able to customize settings to optimize overall performance, (i.e. Encryp-... - Page 24 tion options, VNC options, display and bandwidth options etc.), according to each user’s individual preferences. Please save your selections by clicking the Save Changes button. Snapshots: The Snapshots screen allows you to view and save a screenshot of the controlled computer in its current state. This screenshot will update periodically (automatically).
- Page 25 Clicking the Commit button applies any changes made on this page, but leaves the old settings active until the next time the unit restarts. Clicking Make changes effective now applies the changes and restarts CABCONS1716I so the new settings take effect immediately. Ethernet Address (MAC Address): This is the Ethernet hardware address of this unit’s...
- Page 26 Compatibility: The Compatibility menu offers features that may provide enhanced functionality with certain KVM and power products, such as StarTech.com’s Remote Power Switch (PCM8155HNA). These can be left at their default values if you are not connecting the unit to a KVM or...
- Page 27 Serial Ports: The Serial Ports menu allows you to manage and connect to devices connected to the unit using the R-Port on the CABCONS1716I. Time / Date: Date and time are stored without consideration for time zone. If you are controlling multiple sites in different time zones, we...
- Page 28 Firmware: The firmware on the Server Remote Control is field upgrade- able. To upgrade to another version, login as admin. Auto Self Upgrade: The CABCONS1716I unit is able to upgrade itself over the Internet. Simply click on the button labeled Upgrade to Latest and the unit will access the Internet to download the latest version of the system firmware and then install it.
- Page 29 To disable a service, change its port number to 0. When you have made any necessary changes, click Commit Changes to use the settings the next time the CABCONS1716I restarts. To force the unit to restart immediately, click Restart Servers.
-
Page 30: Using The Terminal Interface Via Serial Port
Using the Terminal Interface via Serial Port The terminal interface can be accessed via the serial port for configura- tion of the basic settings of the CABCONS1716I. While not intended to be a substitute for the Web interface, it does allow you to configure similar functions. -
Page 31: Native Vnc Client
Instruction Manual modern browsers come with a version of Java that is compatible with this application. The Java VNC client makes a connection back to the Server Remote Control unit over port 5900 (by default) or 15900, if encrypted. The encrypted connection is a standard SSL (Secure Socket Layer) encrypted link that encrypts all data from the session, including the actual video pictures. - Page 32 VNC require the flag -bgr233. For examples on using this flag, review the commands in the following section. SSH Tunnel (with Native VNC client) If you are using Openssh, the following Unix command is appropriate based on the default settings on a machine at 10.0.0.34: ssh -f -l admin -L 15900:127.0.0.1:5900 10.0.0.34 sleep 60 vncviewer -bgr233 127.0.0.1::15900 Same command, but using the WAN port:...
-
Page 33: Using The Vnc Menu
VNC data stream so that it is effectively laid over the existing video. These menus allow you to control the many features of the CABCONS1716I without using the web interface or a custom client. - Page 34 Instruction Manual or PS/2 signals. If Autosync appears beneath this indicator, the mouse pointers on the local mouse and the VNC session will be synchronized automatically. Bandwidth: Indicates current average bandwidth coming out of the Server Remote Control unit. The second number measures round trip time (RTT) of the connection when it was first established.
-
Page 35: Main Menu
Main Menu To access the main menu, quickly press F7 twice.You must press the key twice within one second. If you press it once or too slowly, then the F7 key(s) are sent to the host, just like any other key. This is the only way to get into the menu system, if the Bribar is disabled. - Page 36 KVM Menu: Generates the key sequence used to access the on- screen menu for an enterprise-class KVM switch. When these conventional KVM switches are combined with the CABCONS1716I, this key makes accessing their built-in menu easier, especially from the Java client. This button will only be shown when an external KVM has been enabled via the web interface.
-
Page 37: Virtkeys Menu
VirtKeys Menu Clicking any button in the top half of the window simulates pressing and releasing the indicated key. In the bottom area of the screen, clicking will simulate the indicated Meta key being pressed.You may then click in the top part to send another key and release the Meta key at the same time. -
Page 38: Video Tuning Menu
Instruction Manual Video Tuning menu Use the Auto Everything button to automatically fine-tune all three ad- justments. If the test pattern for Color Offset calibration is not present on the screen, then the Color Offset adjustment is skipped. Changes/frame indicates the number of 16x16 blocks of video that are being sent, on average, for every frame of video. - Page 39 Instruction Manual If the system cannot find the test pattern on the screen, check that the pattern isn’t scaled or covered up. (perform this operation in 24-bit or 32-bit color video mode (i.e. truecolor). Although the algorithm may work in 16-bit or 8-bit color video modes, the results will not be optimum and usually it won’t be able to recognize the test pattern.
-
Page 40: Accessing Kvm Features
Instruction Manual Accessing KVM Features Once you can access and configure the networking component of the Server Remote Control, you can use it to select and control the managed computers connected to it. This section describes how to add additional KVM switches to the master unit for greater flexibility, and how to use the on-screen display (OSD) system to manage your computers. -
Page 41: Osd Operations
OSD Operations By hitting the left <CTRL> key twice within two seconds, you may see the ‘Hotkey Menu’ if it is enabled (an OSD option). Or, by hitting the left <CTRL> key three times within two seconds, you will see a KVM MENU screen (below) showing a list of the computers with corresponding chan- nel addresses, names and status. -
Page 42: Osd Function Keys
Instruction Manual OSD Function Keys You can use the function keys when the OSD menu is active. The Function key <F1> edits the name of a managed computer or a Slave KVM. First, use the <UP> and <DOWN> arrow keys to highlight a channel then press <F1>... - Page 43 Auto Scan: In this mode, the KVM automatically switches from one powered computer to the next, sequentially in a fixed interval. During Auto Scan mode, the OSD displays the name of the selected computer. When Auto Scan detects any keyboard or mouse activity, it suspends the scanning until activity stops;...
- Page 44 Keyboard Speed: The KVM offers a keyboard typematic setting that overrides the typematic settings in the BIOS and Windows operating system. Available speed options are Low, Middle, Fast and Faster as 10, 15, 20 and 30 characters/sec respectively. The Keyboard Speed setting is retained in non-volatile memory.
-
Page 45: Hot Key Commands
Hot Key Commands A hot key command is a short keyboard sequence to select a computer, activate a computer scan, etc. A hot-key sequence starts with two Left Control keystrokes followed by one or two more keystrokes. The short form hot-key menu can be turned on as an OSD function (<F4>: More\Hotkey Menu) every time the left <CTRL>... - Page 46 Manual Scan: Manual Scan enables you to manually switch back and forth between powered computers: left Ctrl + left Ctrl + F2. Press the up or down arrow to select the previous or next computer in sequence. Press any other key to abort the Manual Scan. NOTE: The Scan Type setting will determine whether computers must be eye-marked to be included in the scan.
-
Page 47: Changing Your Configuration
Enable the Noise Filter option (in the Video Tuning menu) to mitigate noise issues. Network performance The CABCONS1716I will always send as much data as it can, given what’s happening on the screen and the actual network performance. When nothing is changing on the video screen, zero bytes are sent over the network. -
Page 48: Using The Advanced Video Tuning Feature
Network latency, which is the total time it takes for a packet to get to the CABCONS1716I and come back, has the biggest impact on perceived performance and usability. Network bandwidth has a lesser effect, particularly when just moving the mouse around. Only a few bytes need to be sent when the mouse is moving (and nothing else is changing on the screen), but the round- trip-time limits the hand-eye coordination of the user if it is too great. - Page 49 is 10 units. The ’ -’ and ’+’ buttons decrease or increase the parameter by one unit. The middle button sets the parameter to the middle value. The text of the middle button also indicates which parameter is being controlled. Note that in the case of phase, the middle button invokes the auto- phase algorithm.
-
Page 50: Using The Modem Feature
Instruction Manual The Modem feature allows the CABCONS1716I to act as an Internet con- nection server for increased security and flexibility in connecting with the host computer. Unlike the TCP/IP connection used with the standard Web configuration and VNC clients, the modem creates a one-to-one connection between the CABCONS1716I and the computer you are using, bypassing the public Internet completely. -
Page 51: Modem Configuration
“downstream” rate is often within a similar range for a typical connection. Therefore, speeds below 56,000 bps do not indicate a problem with the modem or the CABCONS1716I, but simply reflect the line conditions at the time the connection is made. -
Page 52: Configuring The Remote Connection
The initialization (“init”) string is the command (using the standard- ized Hayes AT command set) that the CABCONS1716I will send to the modem to activate it. The included string should work with the majority of modems and configures the following connection properties: answer... -
Page 53: Accessing The Web Interface
Click Next. In the space provided under for the line to which the CABCONS1716I’s modem is connected. You may need to add the area code, country code, or other digits needed to access the outside line as appropriate. When finished, click Next. - Page 54 Note that the remote machine (the one you dialed from) is automatically assigned the IP address 99.99.99.100 for the PPP session. This, and the IP address of the CABCONS1716I, cannot be modified. The following TCP/IP port numbers are assigned for a PPP connection, regardless of the settings configured in the Web interface for the LAN or WAN ports:...
-
Page 55: Modem Troubleshooting Guide
(R-Port) Modules Serial Remote Control operation The CABCONS1716I offers a unique way to expand the functionality of the base product. Using the integrated R-Port on the rear panel, you can manage up to 16 serial devices using a specialized daisy-chain technol-... - Page 56 The cable for each serial device is similar to a phone cable and uses an RJ-14 connector. For the first module, connect the cable (provided) to the R-Port on the rear panel of the CABCONS1716I. Connect the opposite end to the DATA OUT (or similar) port on the Serial Remote Control unit.
- Page 57 All common baud rates between 300 and 115,200bps are supported. Mode: Sets the character framing scheme that the CABCONS1716I will use with the R-Port module. You can choose from the following...
-
Page 58: Advanced Configuration Using The Integrated Ssh Shell
Advanced Configuration Using the Integrated SSH Shell In most cases, configuring the CABCONS1716I to the same settings as the R-Port devices you are connecting should allow the devices to work with a minimum amount of configuration. However, you can also change the default settings on each R-Port device to fit your preferences and the... -
Page 59: Remote Login Via Ssh
Hardware handshaking (CTS/RTS) is required for speeds exceeding 9600 bps. It is enabled by default on the CABCONS1716I, but may need to be enabled on the other end of the connection. For Unix systems, the command is: stty –crtscts <... -
Page 60: About Security Certificate Warnings
Is my data safe? Yes. The security certificate does not affect encryption effectiveness in any way, nor does it make the CABCONS1716I any more vulnerable to outside attacks. Can I prevent the warning from occurring? Yes. You have two options that may prevent the warning from occurring. -
Page 61: Troubleshooting
Installing the new certificate… The following instructions detail how to install the certificate from the CABCONS1716I onto your local computer (in this case, when using Internet Explorer with Windows XP): Open your Web browser and go to the CABCONS1716I login screen. - Page 62 Certificate warning shown when connecting via HTTPS It is normal for a warning dialog to be shown when connecting via HTTPS. The SSL certificate CABCONS1716I uses is created when the unit is first produced. It does not contain the correct hostname (subject name) because you can change the hostname as required.
-
Page 63: Keyboard Replacement
Instruction Manual The keyboard is replaceable, in the event of language changes or maintenance. To replace the key-board, tilt it up, locate the mini-USB cable underneath the keyboard and unplug it gently. While installing the replacement keyboard, please ensure that you extend just enough of the cable to keep the keyboard flat inside the tray. - Page 64 Instruction Manual the latch, then slide it outwards until the Touch Pad can be lifted up clear from the notches, as shown in the figure below (right side). The Touchpad is attached by a piece of mini-USB cable. To install the Touchad, extend just enough mini-USB cable and slide the Touch Pad all the way in till you hear a click sound as it is locked in position.
-
Page 65: Specifications
Console Connectors Display Colors Host Computer Connectors Input Signal LCD Size Maximum Local Resolution Plug and Play VESA Power Management Maximum Cascaded Computers Maximum Number of Computers Maximum Number of Users On-Screen Display Instruction Manual VGA (1), PS/2 Mouse (1), PS/2 Keyboard (1) 16.2M (8 bits) HD-15 female (16), supports either PS/2 or USB clients based on cable used... -
Page 66: Technical Support
Limitation of Liability In no event shall the liability of StarTech.com Ltd. and StarTech.com USA LLP (or their officers, directors, employees or agents) for any damages (whether direct or indirect, special, punitive, incidental, consequential, or otherwise), loss of profits, loss of business, or any pecuniary loss, arising... - Page 68 StarTech.com has been making “hard-to-find easy” since 1985, providing high quality solutions to a diverse IT and A/V customer base that spans many channels, including government, education and industrial facilities to name just a few. We offer an unmatched selection of computer parts, cables, A/V products, KVM and Serv-...
Need help?
Do you have a question about the CABCONS1716I and is the answer not in the manual?
Questions and answers