
Related Manuals for StarTech.com RKCONS1708K


Summary of Contents for StarTech.com RKCONS1708K
- Page 1 16-Port VGA Rackmount LCD Console | 19 in. | 1U Actual product may vary from photos User Manual SKU#: RKCONS1708K For the latest information and specifications visit www.startech.com/RKCONS1708K Manual Revision: 01/18/2019...
-
Page 2: Compliance Statements
(1) l’appareil ne doit pas produire de brouillage, et (2) l’utilisateur de l’appareil doit accepter tout brouillage radioélectrique subi, même si le brouillage est susceptible d’en compromettre le fonctionnement. To view manuals, videos, drivers, downloads, technical drawings, and more visit www.startech.com/support... - Page 3 This manual may make reference to trademarks, registered trademarks, and other protected names and/or symbols of third-party companies not related in any way to StarTech.com. Where they occur these references are for illustrative purposes only and do not represent an endorsement of a product or service by StarTech.com, or an endorsement of the product(s) to which this manual...
-
Page 4: Safety Statements
• I cavi (inclusi i cavi di alimentazione e di ricarica) devono essere posizionati e stesi in modo da evitare pericoli di inciampo, rischi di scosse elettriche o pericoli per la sicurezza. To view manuals, videos, drivers, downloads, technical drawings, and more visit www.startech.com/support... -
Page 5: Warning Statements
• Make sure to assemble this product according to the instructions. Failure to do so might result in personal injury or property damage. • Never use this product if parts are missing or damaged. To view manuals, videos, drivers, downloads, technical drawings, and more visit www.startech.com/support... -
Page 6: Table Of Contents
Closing the LCD Console ........................13 Panel Controls and On-Screen Display (OSD) Functions ....14 Console Panel Menu ..........................14 OSD ......................15 Accessing the OSD ............................ 15 Operations/Menu Titles .......................... 15 Navigation ..............................16 To view manuals, videos, drivers, downloads, technical drawings, and more visit www.startech.com/support... - Page 7 Setting Quick View Ports ........................36 Logging Out of the OSD ......................... 37 Hotkeys ....................37 LED Indicator ..................38 Configuration ..................38 Testing the LCD Console ......................... 38 Configuring Display Settings ........................ 39 To view manuals, videos, drivers, downloads, technical drawings, and more visit www.startech.com/support...
- Page 8 Specifications ..................39 Important Considerations ..............41 To view manuals, videos, drivers, downloads, technical drawings, and more visit www.startech.com/support...
-
Page 9: Product Diagram (Rkcons1908K)
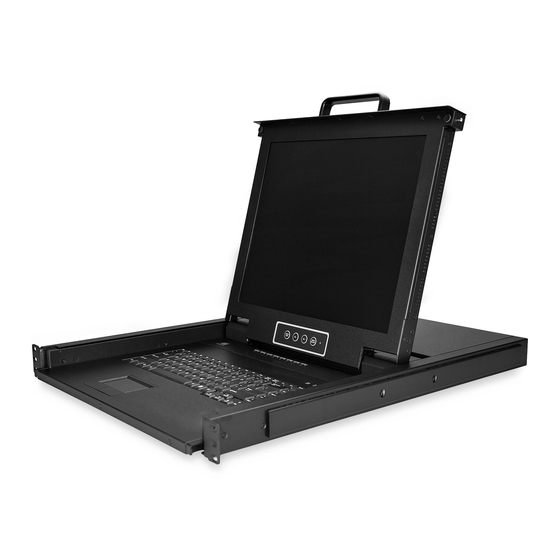
Product Diagram (RKCONS1708K) Front Mounting Bracket x 2 Release Switch Current Port Display Menu Buttons Port Select Buttons/LEDs Keyboard LEDs Display Rails x 2 Handle Touch pad To view manuals, videos, drivers, downloads, technical drawings, and more visit www.startech.com/support... -
Page 10: Rear
Power Switch PS2 Mouse and Keyboard Ports Daisy Chain Port Power Connection Port Ground Connection Screw USB Mouse and Keyboard Ports Console Monitor Port Host Port x 8 To view manuals, videos, drivers, downloads, technical drawings, and more visit www.startech.com/support... -
Page 11: Product Information
Requirements are subject to change. For the latest requirements, please visit www.startech.com/RKCONS1708K. 1U of Rack Space • Grounding Wire • Power Source • Computer, Server, or KVM • Phillips Head Screwdriver • To view manuals, videos, drivers, downloads, technical drawings, and more visit www.startech.com/support... -
Page 12: Installation
Insert an M5 Screw (two per mounting post) through the Front Mounting Bracket (rail) into the M5 Cage Nut. Use a Phillips Head Screwdriver to tighten the M5 Screws. To view manuals, videos, drivers, downloads, technical drawings, and more visit www.startech.com/support... -
Page 13: Grounding The Lcd Console
Connect the Power Cable to the Power Connection Port on the LCD Console and to an AC Electrical Outlet. Power on the LCD Console. Power the Computer or KVM back on. To view manuals, videos, drivers, downloads, technical drawings, and more visit www.startech.com/support... -
Page 14: Opening The Lcd Console
Release the two Switches and continue pushing the LCD Console the rest of the way into the Rack, until you hear an audible click. To view manuals, videos, drivers, downloads, technical drawings, and more visit www.startech.com/support... -
Page 15: Panel Controls And On-Screen Display (Osd) Functions
Press to scroll to the function you want to adjust. Open the LCD OSD menu. Menu/ Select Used to select an option on the OSD. Port Selection Used to quick select/change ports. Buttons To view manuals, videos, drivers, downloads, technical drawings, and more visit www.startech.com/support... -
Page 16: Osd
• BC: Indicates that the port is board casting. • @: Indicates that the port is only available to view. Name The name of the port. To view manuals, videos, drivers, downloads, technical drawings, and more visit www.startech.com/support... -
Page 17: Navigation
Up and Down Arrows Used to move up and down on the screen accessing menu options. Enter Select the highlighted option. Cancels operation and exits the current menu. To view manuals, videos, drivers, downloads, technical drawings, and more visit www.startech.com/support... -
Page 18: Administrator (Adm) Menu
Administrator (ADM) Menu Accessing the Administrator Menu On the OSD screen, press the F1 button, the ADM drop- • down menu will appear. Administrator screen To view manuals, videos, drivers, downloads, technical drawings, and more visit www.startech.com/support... -
Page 19: Setting Up A User Account
Select Set User Login from the Administrator drop-down menu and press Enter. User screen Select the Administrator to setup an administrator user or User to setup a normal user. To view manuals, videos, drivers, downloads, technical drawings, and more visit www.startech.com/support... - Page 20 A pop-up screen will appear indicating either “User setup OK” or “Password not match”. If you see “Password not match” you need to re-enter the password in both the Password and Confirm fields and press Enter. To view manuals, videos, drivers, downloads, technical drawings, and more visit www.startech.com/support...
-
Page 21: Setting Up User Access
The Permissions screen enables you to set a user’s access to a corresponding port, either: Full: Gives the user full access to perform all operations on • the port. View: Gives the user view only access. • To view manuals, videos, drivers, downloads, technical drawings, and more visit www.startech.com/support... -
Page 22: Turning On/Off Broadcast (Brc) Mode
On the OSD screen, press the F1 button. Select BRC Mode from the Administrator drop-down menu and press Enter and On icon will appear next to BRC Mode. BRC Mode To view manuals, videos, drivers, downloads, technical drawings, and more visit www.startech.com/support... -
Page 23: Scanning All Ports
Scanning All Ports On the OSD screen, press the F2 button. Select All from the Scan drop-down menu and press Enter to scan all the port. Scan menu To view manuals, videos, drivers, downloads, technical drawings, and more visit www.startech.com/support... -
Page 24: Scanning All Ports That Are Powered On
Scanning All Ports That Are Powered On On the OSD screen, press the F2 button. Select Power On from the Scan drop-down menu and press Enter to scan all the port. Scan menu To view manuals, videos, drivers, downloads, technical drawings, and more visit www.startech.com/support... -
Page 25: Scanning All Quick View Ports
Select Quick View from the Scan drop-down menu and press Enter to scan all the port. Scan menu Performing an Auto Scan On the OSD screen, press the F3 button. To view manuals, videos, drivers, downloads, technical drawings, and more visit www.startech.com/support... -
Page 26: Configuring The Port Id
Select Auto Scan from the Set drop-down menu and press Enter to perform an auto scan. Set Menu Configuring the Port ID On the OSD screen, press the F3 button. To view manuals, videos, drivers, downloads, technical drawings, and more visit www.startech.com/support... - Page 27 1-98s: The port ID is displayed for the specified amount of • time in seconds, from 1 - 98 seconds. 99s: The port ID is always displayed. • To view manuals, videos, drivers, downloads, technical drawings, and more visit www.startech.com/support...
-
Page 28: Setting A Default Hotkey
Setting a Default HotKey On the OSD screen, press the F3 button. Select OSD Hotkey from the Set drop-down menu and press Enter. Set Menu To view manuals, videos, drivers, downloads, technical drawings, and more visit www.startech.com/support... - Page 29 Right Mouse button will no longer bring up the OSD. OSD HOTKEY screen Press the Enter button while highlighting a Hotkey to set it as the new default Hotkey. To view manuals, videos, drivers, downloads, technical drawings, and more visit www.startech.com/support...
-
Page 30: Setting Logout Time Off
Select one of the following logout time options: 0: Deactivates the screen saver. • 01-99m: The screen saver is displayed for the specified • amount of time in minutes, from 01 - 99 minutes. To view manuals, videos, drivers, downloads, technical drawings, and more visit www.startech.com/support... -
Page 31: Resetting The Keyboard And Mouse
On the OSD screen, press the F4 button. Select Reset KM from the Tool drop-down menu and press Enter to rest the connected Keyboard and Mouse. Tool Menu To view manuals, videos, drivers, downloads, technical drawings, and more visit www.startech.com/support... -
Page 32: Turning The Beeper On/Off
Turning the Beeper On/Off On the OSD screen, press the F4 button. Select Beeper from the Tool drop-down menu and press Enter to turn the Beeper on/off. Tool Menu To view manuals, videos, drivers, downloads, technical drawings, and more visit www.startech.com/support... -
Page 33: Turning The Mouse On/Off
Turning the Mouse On/Off On the OSD screen, press the F3 button. Select Mouse Hot from the Tool drop-down menu and press Enter to turn the Mouse on/off. Tool Menu To view manuals, videos, drivers, downloads, technical drawings, and more visit www.startech.com/support... -
Page 34: Restoring Factory Settings
On the OSD screen, press the F3 button. Select Restore Values from the Tool drop-down menu and press Enter to reset the setting on the Console to factory defaults. Tool Menu To view manuals, videos, drivers, downloads, technical drawings, and more visit www.startech.com/support... -
Page 35: Viewing Console Information
Viewing Console Information On the OSD screen, press the F3 button. Select About KVM from the Tool drop-down menu and press Enter to view the Console’s version information. Tool Menu To view manuals, videos, drivers, downloads, technical drawings, and more visit www.startech.com/support... -
Page 36: Editing Port Names
Press the F6 button. Enter the port’s new name. Press the Enter button to save the new name. - or - Press the Esc button to cancel and exit. To view manuals, videos, drivers, downloads, technical drawings, and more visit www.startech.com/support... -
Page 37: Setting Quick View Ports
QV field, indicating the port is now set as a quick view port. Press the F7 button on the port a second time to deactivate the quick view status. To view manuals, videos, drivers, downloads, technical drawings, and more visit www.startech.com/support... -
Page 38: Logging Out Of The Osd
Scr Lck + F1 - F8 Skip ports from 9 - 16 Scr Lck + S Preform Auto Scan Brings up the OSD screen Scr Lck + Space Bar To view manuals, videos, drivers, downloads, technical drawings, and more visit www.startech.com/support... -
Page 39: Led Indicator
Testing the LCD Console To test that the LCD Console is working properly, perform the following steps: Power up the Rack Console, and then turn on the Computer. To view manuals, videos, drivers, downloads, technical drawings, and more visit www.startech.com/support... -
Page 40: Configuring Display Settings
Specification Description Panel Type Active Matrix TFT LCD Max. Resolution 1280 x 1024 Supported Colors 16M Colors (6-bit with FRC) Response Time Rising Time: 8ms Decay Time: 8ms To view manuals, videos, drivers, downloads, technical drawings, and more visit www.startech.com/support... - Page 41 Fahrenheit: 32 ° - 122 ° Storage Temperature Celsius: -20 ° - 60 ° Fahrenheit: -4 ° - 140 ° Humidity 10% - 90% RH Dimensions 447.5 x 482 x 44 mm To view manuals, videos, drivers, downloads, technical drawings, and more visit www.startech.com/support...
- Page 42 Appropriate consideration of equipment nameplate ratings should be used when addressing this concern. The LCD Console should be grounded appropriately during • installation. To view manuals, videos, drivers, downloads, technical drawings, and more visit www.startech.com/support...
- Page 43 Limitation of Liability In no event shall the liability of StarTech.com Ltd. and StarTech.com USA LLP (or their officers, directors, employees or agents) for any damages (whether direct or indirect, special, punitive, incidental, consequential, or otherwise), loss of profits, loss of business, or any pecuniary loss, arising out of or related to the use of the product exceed the actual price paid for the product.
- Page 44 StarTech.com is an ISO 9001 Registered manufacturer of connectivity and technology parts. StarTech.com was founded in 1985 and has operations in the United States, Canada, the United Kingdom and Taiwan servicing a worldwide market.
Need help?
Do you have a question about the RKCONS1708K and is the answer not in the manual?
Questions and answers