Table of Contents
Advertisement
Quick Links
Fire Garden™
Outdoor Linear Fireplace - Single-Sided
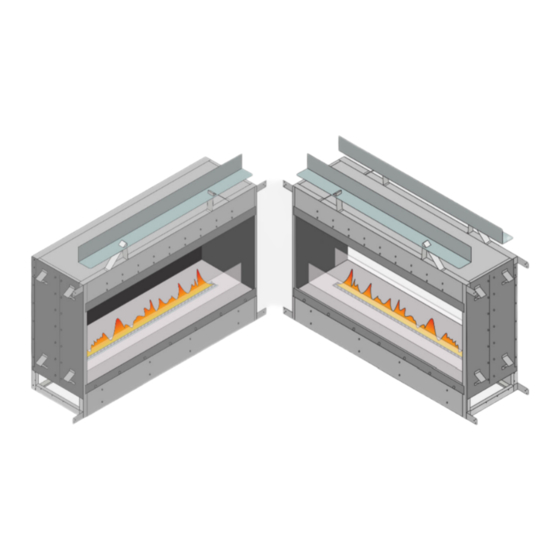
Outdoor Linear Fireplace - See-Through
40x24 Single Sided
40x24 See-Through 94900296
64x24 Single Sided
64x24 See-Through 94900306
Omni-Test Laboratories, Inc.
Report # 0028GM127S
ANSI Z21.97-2017 /CSA 2.41-2017, CSA 2.17-2017
Outdoor Decorative Gas Appliances
DANGER
This appliance can produce carbon
monoxide which has no odor.
Using it in an enclosed space can kill
you.
Never use this appliance in an
enclosed space such as a camper,
tent, car, or home.
French language manuals at firegarden.com. Manuels de langue Française à firegarden.com
Travis Industries, Inc.
$10.00
By Travis Industries, Inc.
94900290
94900300
Listed by
CARBON MONOXIDE HAZARD
12521 Harbour Reach Dr., Mukilteo, WA 98275
Copyright 2022, T.I.
DANGER
FIRE OR EXPLOSION HAZARD
If you smell gas:
Shut off gas to the appliance.
•
Extinguish any open flame.
•
If odor continues, leave the area
•
immediately.
After leaving the area, call your gas
•
supplier or fire department.
Failure to follow these instructions
could result in fire or explosion, which
could cause property damage, personal
injury, or death.
WARNING
Do not store or use gasoline or other
flammable vapors and liquids in the
vicinity of this or any other appliance
An LP cylinder not connected for use
shall not be stored in the vicinity of this
or any other appliance.
WARNING: For outdoor use only.
Installation and service must be
performed by a qualified installer,
service agency, or the gas supplier.
WARNING: Improper installation,
adjustment, alteration, service or
maintenance can cause injury or
property damage. Read the installation,
operating, and maintenance
instructions thoroughly before
installing or servicing this equipment.
WARNING: If the information in this
manual is not followed exactly, a fire or
explosion may result causing property
damage, personal injury, or loss of life.
INSTALLER: Leave this manual with the
appliance.
CONSUMER: Retain this manual for
future reference
www.travisproducts.com
Part # 100-01580
Advertisement
Table of Contents

Related Manuals for Travis Industries Fire Garden 40x24 Single Sided


Summary of Contents for Travis Industries Fire Garden 40x24 Single Sided
- Page 1 By Travis Industries, Inc. Fire Garden™ DANGER FIRE OR EXPLOSION HAZARD Outdoor Linear Fireplace - Single-Sided If you smell gas: Outdoor Linear Fireplace - See-Through Shut off gas to the appliance. • Extinguish any open flame. • If odor continues, leave the area...
-
Page 2: Overview
WARNING: This product can expose you to chemicals including Carbon Monoxide and Benzene, which are known to the State of California to cause cancer, birth defects, or other reproductive harm. For more information go to www.P65Warnings.ca.gov. © Travis Industries, Inc. 3/20/23 - 1580 ODL Fireplaces... -
Page 3: Table Of Contents
Wiring Multiple Appliances to One Transformer ....22 Wiring Diagram ..............45 Daisy-Chain Example ..........22 Index .................. 48 Direct-Run Example ............. 22 Daisy-Chain Wire Length Chart ........23 Direct-Run Wire Length Chart .......... 24 © Travis Industries, Inc. 3/20/23 - 1580 ODL Fireplaces... - Page 4 Always follow the instructions in this manual. Travis Industries, Inc. grants no warranty, implied or stated, for the installation or maintenance of your fireplace, and assumes no responsibility for any consequential damage(s).
-
Page 5: Features
Fireplace Orifice Size (DMS) (1) - #29 (1) - #41 Input Rating 64x24 Input Rating (BTU/h) 120,000 120,000 Fireplace Orifice Size (DMS) (2) - #30 (2) - #43 © Travis Industries, Inc. 3/20/23 - 1580 ODL Fireplaces... -
Page 6: Fireplace Dimensions
Features and Specifications Fireplace Dimensions: © Travis Industries, Inc. 3/20/23 - 1580 ODL Fireplaces... -
Page 7: Installation Warnings
LP Conversion Kit (see “LP Conversion” on page 19 for details. Wall Switch and wall switch cover. Gas Key Valve with Chrome Flange 3” & 18” Gas Key (2) Enclosure Vents © Travis Industries, Inc. 3/20/23 - 1580 ODL Fireplaces... -
Page 8: Lifting Handles (Optional)
Installation (qualified installers only) Lifting Handles (optional) Travis Industries makes an optional lifting handle kit (sku# 98500711) that can be helpful when moving the fireplace during installation (see illustrations to right). To use the lifting handles: remove the shipping bracket... -
Page 9: Additional Items Required
High voltage wire (from the house circuit to the transformer) Weatherproof enclosure for the wall switch (only needed if the switch is to be installed outdoors). Media (Crushed Glass, Rock Embers, or Tumbled Stones) Travis Industries offers the following Crushed Glass Options: Platinum sku# 94500580 ... -
Page 10: Weatherproofing The Fireplace
In places where the controls beneath the fireplace may be submerged underwater. Submerging any part of the fireplace controls may require the complete replacement of the controls. © Travis Industries, Inc. 3/20/23 - 1580 ODL Fireplaces... -
Page 11: Fireplace Placement Chart
CAN - 64” (1626mm) minimum alcove height 90” (2286mm) minimum width of alcove 90” (2286mm) NOTE: All clearances are measured from the closest point of the fireplace opening. © Travis Industries, Inc. 3/20/23 - 1580 ODL Fireplaces... -
Page 12: Clearances
Installation (qualified installers only) Clearances 40x24 Fireplace 51-1/2 (1308mm) 64x24 Fireplace 75-1/2” (1918mm) © Travis Industries, Inc. 3/20/23 - 1580 ODL Fireplaces... -
Page 13: Minimum Framing Dimensions- Fireplaces
Installation (qualified installers only) Minimum Framing Dimensions- Fireplaces © Travis Industries, Inc. 3/20/23 - 1580 ODL Fireplaces... -
Page 14: Corner Framing (Fireplaces)
Installation (qualified installers only) Corner Framing (Fireplaces) © Travis Industries, Inc. 3/20/23 - 1580 ODL Fireplaces... -
Page 15: Enclosure Ventilation Requirements
See-through unit chase must be vented on each end within 6” from the bottom of the chase (see left). Each vent must provide a minimum of 24 square inches of free area. © Travis Industries, Inc. 3/20/23 - 1580 ODL Fireplaces... -
Page 16: Enclosure Ventilation Grills
< 12" (the minimum) NOT LARGE ENOUGH Example: If (w) = 12" and (h) = 2" 6" x 2" = 12 square inches 12" > 12" (the minimum) LARGE ENOUGH © Travis Industries, Inc. 3/20/23 - 1580 ODL Fireplaces... -
Page 17: Fireplace Preparation
Use the (2) screws removed in step (k) to secure the nailing flange to the side of the fireplace. Repeat steps (k) through (m) for the other nailing flanges. © Travis Industries, Inc. 3/20/23 - 1580 ODL Fireplaces... -
Page 18: Gas Line Requirements
¾” MPT) 40x24 Fireplace 64x24 Fireplace 39-1/4” (997mm) 63-1/4” (1607mm) 5-1/2” (140mm) 5-1/2” (140mm) 5-1/2” (140mm) 5-1/2” (140mm) + Depth of framing + Depth of framing © Travis Industries, Inc. 3/20/23 - 1580 ODL Fireplaces... -
Page 19: Lp Conversion And Turndown Conversion
(if already installed) from the firebox. Remove the media trays (see “Removing the Media Trays” section on page Convert the appliance using the instructions to the right. © Travis Industries, Inc. 3/20/23 - 1580 ODL Fireplaces... -
Page 20: Electrical Connection Requirements
120VAC at approximately 0.9 amps - make sure the circuit and wiring is appropriately sized. The power supply must be routed through a switch to turn the appliance on and off (see pg. 45). Multiple Travis Industries, Inc. 24-volt appliances may be placed on a single circuit. Each appliance uses 24VAC at approximately 1.6 amps - Make sure the circuit and wiring is appropriately sized (see diagrams starting on pg. -
Page 21: Using More Than One 24-Volt Appliance
(qualified installers only) Using More than One 24-volt Appliance Travis Industries, Inc. manufactures additional 24-volt appliances that can add to the ambiance of your outdoor space (Tempest Torch™, Tempest Lantern™. Visit tempesttorch.com for more details). If using more than one appliance, make sure to think about how the appliances will be used and if they need to be able to be controlled separately or if it would be more convenient to control them all using one switch. -
Page 22: Wiring Multiple Appliances To One Transformer
Make sure to determine the wire configuration before installation. NOTE: You may use both direct-run and daisy-chain configurations. Polarity must be maintained in all multiple appliance installations. Failure to maintain polarity will result in damage to the control module. Daisy-Chain Example Direct-Run Example © Travis Industries, Inc. 3/20/23 - 1580 ODL Fireplaces... -
Page 23: Daisy-Chain Wire Length Chart
Daisy-Chain Wire Length Chart This type of wire configuration allows for multiple Travis Industries 24-volt products to be wired in a series, reducing the amount of wire used. Use the charts below to determine the correct wire gauge and length. In the example below, the transformer has 2 fire pits and a fireplace on one branch. -
Page 24: Direct-Run Wire Length Chart
The wire will also be printed with a gauge number (e.g. AWG#14 = 14 gauge, 10AWG = 10 gauge, etc.). Do not use wires of dissimilar gauges (do not use 14 gauge & 10 gauge wire on the same transformer). © Travis Industries, Inc. 3/20/23 - 1580 ODL Fireplaces... -
Page 25: Facing Requirements
NOTE: Screws may be used to secure cement board or tile backer to the fireplace. Do not penetrate the fireplace more than 1/2” (13mm). 40x24 Fireplaces 51-1/2 (1308mm) 64x24 Fireplaces 75-1/2” (1918mm) © Travis Industries, Inc. 3/20/23 - 1580 ODL Fireplaces... -
Page 26: Mantel Requirements
Combustible mantel columns (legs) that protrude 3/4” (19mm) or less from the fireplace opening must meet the facing clearances (minimum 4-3/4” (121mm) from the side of the fireplace). Non-combustible mantel columns do not have a minimum clearance. © Travis Industries, Inc. 3/20/23 - 1580 ODL Fireplaces... -
Page 27: Steps For Finalizing The Installation
Crushed Glass Installation Crushed glass is placed over the burners and center media trays. Use only ¼” crushed glass from Travis Industries and/or other media specifically approved by Travis Industries. Placing Crushed Glass on the Burner and Center Media Trays 40x24 Fireplaces 25 lbs. -
Page 28: Rock Ember Installation
Rock Ember Installation Rock embers can be placed over the burners and center media trays. Use only the Rock Ember material from Travis Industries and/or other media specifically approved by Travis Industries. Placing Rock Embers on the Burner and Center Media Trays 40x24 Fireplaces 5 lbs. -
Page 29: Tumbled Stone Installation
Tumbled Stone may be placed over the burners and media trays. Only use the Tumbled Stone media kit from Travis Industries. The amount of stone indicated on the chart below refers to the small stones used to cover the burner and media tray. Large stones may be placed anywhere over the media tray but should not be installed over the burner and are not included in the recommended weights in the chart below. -
Page 30: Assembling The Wind Guard
NOTE: Tighten the set screws just enough to support the glass, do not over tighten. WARNING: Failure to use the shims will cause the glass to break when the setscrews are tightened. © Travis Industries, Inc. 3/20/23 - 1580 ODL Fireplaces... -
Page 31: Fireback Installation
Dealer – sku# 94400914). See the illustration below for instructions on sliding it into place. The painted surface of the glass scratches easily and must be placed away from the fire. © Travis Industries, Inc. 3/20/23 - 1580 ODL Fireplaces... - Page 32 Next, place the center rear fireback (single- sided only). Finally, install the left and right side firebacks (single-sided & see-through). Right Side Left Side Reinstall the end media trays © Travis Industries, Inc. 3/20/23 - 1580 ODL Fireplaces...
- Page 33 When all the panels are in place and secured, replace the (2) media tray end pieces and proceed with the firebox setup. © Travis Industries, Inc. 3/20/23 - 1580 ODL Fireplaces...
-
Page 34: Before The First Fire
Inspect the fireplace, burner, and supply lines for any damage prior to operation. The burner must be replaced prior to the appliance being put into operation if it is evident that the burner is damaged. Use only Travis Industries replacement burners. It may be difficult to see the burner operating in direct sunlight. -
Page 35: Location Of Controls
If the wall switch will be located where it is not protected from precipitation, it must be installed in a weather resistant enclosure (not included). © Travis Industries, Inc. 3/20/23 - 1580 ODL Fireplaces... -
Page 36: Maintaining Your Appliance
The glass may be cleaned with a non- abrasive cleaner. To clean the inside of the glass, remove the glass place it on a non- scratching surface, and clean the inside surface. © Travis Industries, Inc. 3/20/23 - 1580 ODL Fireplaces... -
Page 37: Accessing Components
With the end sections of the media tray removed you grasp the remaining sections of the medIa tray and lift the burner assembly upward to remove it from the firebox. © Travis Industries, Inc. 3/20/23 - 1580 ODL Fireplaces... -
Page 38: Accessing The Pressure Tap
Locate the pressure tap shown to the right. It is approximately in the center of the appliance. © Travis Industries, Inc. 3/20/23 - 1580 ODL Fireplaces... - Page 39 Use a 1/4” nut driver to remove the two screws that secure the pilot bracket to the right end of the burner. Carefully set the pilot assembly aside for reinstallation. © Travis Industries, Inc. 3/20/23 - 1580 ODL Fireplaces...
- Page 40 Once maintenance or testing of components is complete, follow the above steps in reverse to return the fireplace to its proper configuration. © Travis Industries, Inc. 3/20/23 - 1580 ODL Fireplaces...
-
Page 41: Winterizing The Appliance
Start the main burner. After 15 minutes the flames should be orange/yellow. If the fireplace is not burning correctly, contact your dealer for service. If the igniter is not getting hot or lighting the fireplace properly contact your dealer for service. © Travis Industries, Inc. 3/20/23 - 1580 ODL Fireplaces... -
Page 42: Replacement Parts List
Maintenance Replacement Parts List Caution: Use only Travis Industries replacement parts. Do not use substitute materials. Warning: Do not operate the appliance with the glass wind guard removed, cracked, or broken. Replacement of the glass should be done by a licensed or qualified service person. -
Page 43: Troubleshooting Table
(spider webs, etc.) from the burner dirty or blocked and orifice area. Glass is Sooting Wind will influence the flame quality and, if Windy Condition persistent, may lead to sooting on the glass. © Travis Industries, Inc. 3/20/23 - 1580 ODL Fireplaces... - Page 44 Register your TRAVIS INDUSTRIES, INC. Limited 7 Year Warranty online at traviswarranty.com. TRAVIS INDUSTRIES, INC. warrants this gas appliance (appliance is defined as the equipment manufactured by Travis Industries, Inc.) to be defect-free in material and workmanship to the original purchaser from the date of purchase as follows: Check with your dealer in advance for any costs to you when arranging a warranty call.
-
Page 45: Wiring Diagram
Wiring Diagram Wiring Diagram © Travis Industries, Inc. 3/20/23 - 1580 ODL Fireplaces... - Page 46 Notes © Travis Industries, Inc. 3/20/23 - 1580 ODL Fireplaces...
- Page 47 Notes © Travis Industries, Inc. 3/20/23 - 1580 ODL Fireplaces...
-
Page 48: Index
Fireplace Preparation ........17 Using More than One 24-volt Appliance ..21 Gas Line Requirements ........18 Winterizing the Appliance ........ 41 Gas Specifications ..........5 Yearly Service Procedure ........ 41 Index © Travis Industries, Inc. 3/20/23 - 1580 ODL Fireplaces...
Need help?
Do you have a question about the Fire Garden 40x24 Single Sided and is the answer not in the manual?
Questions and answers