Advertisement
Quick Links
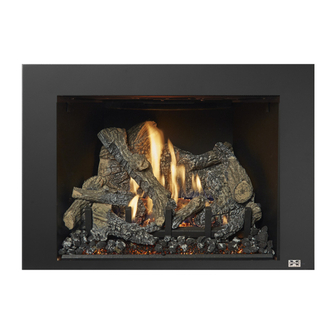
430/616 Ember-Glo™ Log Set Inst.
Compatibility
430 Ember-Glo Insert - Oak 94500957 - Birch - 94500956
616 Ember-Glo Insert - Oak 94500952 - Birch - 94500951
Installation Warnings
NOTE: Consult the installation manual for order of installation. If using propane (LP), convert the appliance
before installing the log set. If using firebacks, install them prior to installing the log set.
The logs are fragile, especially after being exposed to heat.
Make sure the gas control valve is OFF and the heater is cool prior to conducting service.
Failure to position the parts in accordance with these diagrams or failure to use only parts specifically
approved with this appliance may result in property damage or personal injury.
The burner must be correctly positioned before installing the log set. Make sure the burner is fully seated
and the pilot is properly aligned. See owner's manual for details on burner removal.
ORDER OF INSTALLATION
When setting up the insert, you will need to follow a specific order of installation to optimize installation time.
Failure to have all of the accessories available at the time of installation will delay installation and may lead to
unnecessary disassembly of components.
1. Run gas line to the fireplace
2. Remove the glass frame.
3. Run vent through fireplace chimney. On larger fireplaces, the vent connector may be left in place. For smaller
fireplaces, remove the vent connector. See "Vent Connector Removal and Installation" for details.
INSTALL THE LIGHT SHIELD (ALL FACES EXCEPT SHADOWBOX). The light shield (shipped
with the face) prevents light from exiting the upper grill area. Install this prior to placing the insert.
4. Place insert into position and attach the gas line and vent.
5. Remove the burner.
NOTE: If using propane (LP), convert the appliance at this time.
6. Install the firebacks.
7. Replace the burner.
8. Install the media (logs, stones - see instructions included with the media).
9. Install the surround panel (see instructions included with surround panel).
10. Replace the glass.
11. Install the face (see instructions included with the face).
12. Follow the instructions under "Finalizing the Installation."
Installation – Oak vs. Birch
Both log sets are nearly identical in shape. The only difference is the paint scheme and some textural details.
Below you will find pictures of both the birch and the oak log sets. The installation pictures show the classic
oak log set.
Page 1 of 13
430 = Oak - sku# 94500957 - Birch - sku# 94500956
616 = Oak - sku# 94500952 - Birch - sku# 94500951
17602084 — 8/22/19
Packing List
10 Piece Log Set
© Travis Industries, Inc.
Advertisement

Related Manuals for Travis Industries Ember-Glo 430


Summary of Contents for Travis Industries Ember-Glo 430
- Page 1 Both log sets are nearly identical in shape. The only difference is the paint scheme and some textural details. Below you will find pictures of both the birch and the oak log sets. The installation pictures show the classic oak log set. Page 1 of 13 17602084 — 8/22/19 © Travis Industries, Inc.
- Page 2 250-05240 Back Log 250-05237 Left Log 250-05243 Right Bottom Log 250-05244 Center Left Twig 250-05238 Center Twig Front Ember Chunk Left Twig 250-05242 250-05246 250-05241 Front Left Log 250-05245 Page 2 of 13 17602084 — 8/22/19 © Travis Industries, Inc.
- Page 3 250-05250 Back Log 250-05247 Left Log Right Bottom Log 250-05253 250-05254 Center Left Twig 250-05248 Center Twig Left Twig 250-05252 250-05251 Front Ember Chunk Front Left Log 250-05256 250-05255 Page 3 of 13 17602084 — 8/22/19 © Travis Industries, Inc.
- Page 4 Back Log 250-05173 250-05171 Left Log Right Bottom Log 250-05177 250-05178 Center Left Twig 250-05172 Center Twig Front Left Log 250-05176 Left Twig Front Ember Chunk 250-05179 250-05175 250-05180 Page 4 of 13 17602084 — 8/22/19 © Travis Industries, Inc.
- Page 5 Back Log 250-05183 250-05181 Left Log Right Bottom Log 250-05187 250-05188 Center Left Twig 250-05182 Center Twig 250-05186 Left Twig Front Ember Chunk Front Left Log 250-01585 250-05190 250-05189 Page 5 of 13 17602084 — 8/22/19 © Travis Industries, Inc.
-
Page 6: Log Set Installation
Push the log backwards until it is in contact with the sloped area between the front and rear burner. NOTE: Make sure the log does not obstruct any burner holes. Page 6 of 13 17602084 — 8/22/19 © Travis Industries, Inc. - Page 7 Stack ember chunks over any portion of the perforated metal along the front of the unit that IS NOT over the Ember-Glo lights (see picture below to the right). Do not cover Ember-Glo lights Page 7 of 13 17602084 — 8/22/19 © Travis Industries, Inc.
- Page 8 Use only a small amount and save the remainder. Over-use of rockwool will diminish the glow and may cause sooting or other adverse conditions. NOTE: Remove all rockwool from the pilot area (see below).. Page 8 of 13 17602084 — 8/22/19 © Travis Industries, Inc.
- Page 9 NOTE: If power is supplied, turn the rheostat to until the embers have a realistic and aesthetically pleasing appearance. Use the remote to turn the Ember-Glo lights on and off. Page 9 of 13 17602084 — 8/22/19 © Travis Industries, Inc.
- Page 10 10. The right top log have two slots on the back that fit over the pins on the rear and right log (see pictures below). Page 10 of 13 17602084 — 8/22/19 © Travis Industries, Inc.
- Page 11 12. The center log rests on a pin on the left end of the rear log and the on the left end of the center twig. There is a notch in the end of the log that rests against the grate. Page 11 of 13 17602084 — 8/22/19 © Travis Industries, Inc.
- Page 12 13. Place the right ember chunk as shown below. 14. The left twig sets on the left most pin on the front left log and the top rests on the left log. Page 12 of 13 17602084 — 8/22/19 © Travis Industries, Inc.
- Page 13 16. Place any remaining ember chunks on the ember glass and grate to create a realistic appearance. Page 13 of 13 17602084 — 8/22/19 © Travis Industries, Inc.
Need help?
Do you have a question about the Ember-Glo 430 and is the answer not in the manual?
Questions and answers