Table of Contents
Advertisement
Quick Links
Advertisement
Table of Contents

Related Manuals for Bender ISOMETER isoPV1685RTU


Summary of Contents for Bender ISOMETER isoPV1685RTU
- Page 1 ISOMETER® isoPV1685RTU / isoPV1686P Insulation monitoring device for unearthed photovoltaic systems isoPV1685RTU: software version D0532 V3.0x isoPV1685P: software version D0525 V2.0x From serial number 2108… Manual isoPV1685xxx_D00007_08_M_XXEN/03.2023...
- Page 2 Bender GmbH & Co. KG Londorfer Str. 65 • 35305 Grünberg • Deutschland Postbox 1161 • 35301 Grünberg • Deutschland Tel.: +49 6401 807-0 • Fax: +49 6401 807-259 E-Mail: info@bender.de • www.bender.de © Bender GmbH & Co. KG All rights reserved.
-
Page 3: Table Of Contents
Table of Contents Table of Contents 1. Important information .................... 7 1.1 How to use this manual ............7 1.2 Technical support . - Page 4 Table of Contents 5. Mounting and connection ..................23 5.1 Mounting ..............23 5.2 Connection.
- Page 5 Table of Contents isoPV1685xxx_D00007_08_M_XXEN/03.2023...
-
Page 7: Important Information
Important information 1. Important information 1.1 How to use this manual This manual is intended for qualified personnel working in electrical engineering and electronics! Read the manual before you begin to mount, connect, and commission the unit. Always keep the manual within easy reach for future reference following commissioning. -
Page 8: Technical Support
Important information 1.2 Technical support 1.2.1 End customer support and advice Technical support by phone or e-mail for all Bender products • Questions concerning specific customer applications • Commissioning • Troubleshooting +49 6401 807-760 (365 days from 07:00 - 20:00 Uhr [MEZ/UTC +1]) -
Page 9: Training Courses
Association) also applies. Amending the “General Conditions for the supply of Products and Services of the Electrical and Electronics Industry” (GL)* Sale and delivery conditions can be obtained from Bender in printed or electronic format. 1.5 Storage The devices must only be stored in areas where they are protected from dust, damp, and spray and dripping water, and in which the specified storage temperatures can be ensured. -
Page 10: Disposal
13 August 2005 must be taken back by the manufacturer and disposed of properly. For more information on the disposal of Bender devices, refer to our homepage at www.bender.de -> Service & Support. -
Page 11: Safety Instructions
2.1 General safety instructions Part of the device documentation in addition to this manual is the enclosed "Safety instruc- tions for Bender products". Read the operating manual before starting to mount, connect and com-mission the device. After successful commissioning, keep the manual within easy reach for future reference. -
Page 12: Device-Specific Safety Instructions
Safety instructions 2.3 Device-specific safety instructions Installation inside a control cabinet If the ISOMETER® is installed inside a control cabinet, the insulation fault message must be audible and/or visible to attract attention. IT systems with several ISOMETER®s Make sure that only one active ISOMETER® is connected in each interconnected system. -
Page 13: Function
Function 3. Function 3.1 Features isoPV1685RTU and isoPV1685P The device version isoPV1685P provides a locating current injector. • Insulation monitoring of large-scale photovoltaic systems • Measurement of low-resistance insulation faults • Separately adjustable response values R (alarm 1) and R (alarm 2) (both 200 Ω…1 MΩ) for prewarning and alarm. -
Page 14: Product Description
Function 3.2 Product description The ISOMETER® isoPV1685RTU is an insulation monitoring device for IT systems in ac- cordance with IEC 61557-8. The ISOMETER® isoPV1685P is an insulation monitoring device for IT systems in accordance with IEC 61557-8 and IEC 61557-9. The ISOMETER®s can be used in photovoltaic installations. -
Page 15: Insulation Monitoring
Function Following each start-up, a new log file is generated. If the current file size exceeds 10 MByte during operation, a new file is generated. The file name contains the time and date of the creation time. The typical time that is needed until the maximum file size is reached is ap- proximately 2 days. -
Page 16: Assignment Of The Alarm Relays K1, K2, K3
Function When permanently installed insulation fault locators (with master capability) such as the EDS440 are used, control and synchronisation of the locating current injector is carried out by one of the insulation fault locators in BMS master mode. For this purpose, the isoPV1685P has to communicate with the insulation fault locator via the BMS bus. -
Page 17: Self Test
Function 3.4 Self test 3.4.1 Self test after connection to the supply voltage Once connected to the supply voltage, all internal measurement functions, the compo- nents of the process control such as data and parameter memory as well as the connections to earth are checked. - Page 18 Function 3.4.3.2 Manual self test via CAN bus isoPV1685RTU and isoPV1685P: During the insulation fault measurement test, the alarm relay K1 (11-12-14) and the alarm relay K2 (21-22-24) are switched. K3 won't be switched. Once a month, carry out a manual self test via the CAN or RS-485 interface to ensure that the device functions correctly! isoPV1685xxx_D00007_08_M_XXEN/03.2023...
-
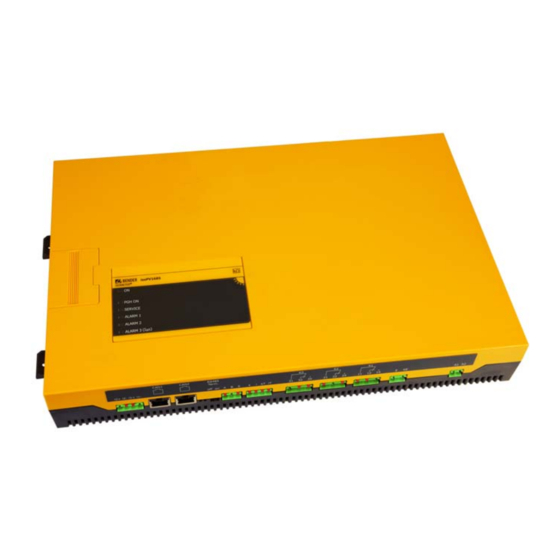
Page 19: Device Overview
Device overview 4. Device overview 4.1 Dimensions iso1685 ® ISOMETER 39,8 40,75 55,7 401,5 All dimensions in mm isoPV1685xxx_D00007_08_M_XXEN/03.2023... -
Page 20: Connections
Device overview 4.2 Connections CAN 1 CAN 2 RS-485 Term. I2+ I2- I1+ I1- off on A B S k l kT IT 31 32 34 21 22 24 11 12 14 E KE A1 A2 I2+ I2- I1+ I1- 32 34 22 24 11 12 14... -
Page 21: Display And Operating Controls
Device overview 4.3 Display and operating controls 4.3.1 Display elements PGH ON SERVICE SERVICE ALARM 1 ALARM 1 ALARM 2 ALARM 2 ALARM 3 (I ∆ Power On indicator: Flashes with a pulse duty factor of approx. 80 %. Device error: Lights continuously when the device stops functioning (device stopped). -
Page 22: Operating Elements In The Service Lid
Device overview 4.3.2 Operating elements in the service lid The representation below shows the position of the operating elements Operating Function elements SS8103 isoPV1685RTU: • Switching between BMS and Modbus: A4 ST6101 • BMS /Modbus address setting: A3…A0 • Leakage capacitance setting DIP switch •... -
Page 23: Mounting And Connection
Mounting and connection 5. Mounting and connection 5.1 Mounting Mount the device using four M5 screws, refer also to the dimension diagram where the dril- ling holes are illustrated (see "Dimensions" on page 19). Mount the device so that the dis- play can be read during operation and the mains connection is (L1/+, L2/–) positioned at the top. - Page 24 Mounting and connection Ensure disconnection from the IT system! When insulation or voltage tests are to be carried out, the device must be isolated from the system for the test period. Otherwise the device may be damaged. Check proper connection! Prior to commissioning of the installation, check that the device has been properly connected and check the device functions.
-
Page 25: Wiring Diagram
Mounting and connection 5.2.2 Wiring diagram Connect the device with the help of the connection and terminal diagram. Use the adjacent legend. L1/+ L2/- L1/+ L2/- L1/+ L2/- L2/- L2/- RS-485 A1 A2 A B S k l kT lT 31 32 34 21 22 24 11 12 14... - Page 26 Mounting and connection Make sure that the operating voltage is correct! Prior to insulation and voltage tests, the ISOMETER® must be disconnected from the IT system for the duration of the test. In order to CAUTION check the correct connection of the device, a functional test has to be carried out before starting the system.
-
Page 27: Connecting The Eds To The Isometer® Isoxx1685Dp
Mounting and connection 5.2.3 Connecting the EDS to the ISOMETER® isoxx1685DP Risk of malfunctions due to excessive locating current on sensitive system parts! The locating current flowing between the IT system and earth can CAUTION cause controller faults in sensitive parts of the system, such as the PLC or relay. -
Page 28: Commissioning
Commissioning 6. Commissioning 6.1 Commissioning flow chart insulation fault monitoring System = IT system ? isoPV1685… not suitable isoPV1685… not suitable U n ≤ DC1500 V ? isoPV1685RTU not suitable U n ≤ AC1000 V ? Deenergize the installation before connecting the device Device connection Optional device connection BMS bus / Modbus to A, B, S... -
Page 29: Commissioning Flow Chart Insulation Fault Location (Isopv1685P Only)
Commissioning 6.2 Commissioning flow chart insulation fault location ( isoPV1685P only Deenergize the installation Install the Insulation fault locator before connecting the device EDS44x and the appropriate CTs Connect the BMS bus cable of the EDS system to the isoPV1685P Address all BMS components, a bus master with address 1 is required Connect supply voltage... -
Page 30: Settings
Settings 7. Settings 7.1 Setting BMS address Refer to "Setting the BMS address" on page 7.2 Setting an alarm for insulation faults You can set the limit values for alarm 1 and alarm 2 of the ISOMETER® via the BMS bus by means of a BMS gateway (e.g. -
Page 31: Setting The System Leakage Capacitance Or Measurement Speed
Settings 7.3 Setting the system leakage capacitance or measurement speed These settings may only be changed when the PV voltage is switched off. is set to When the maximum system leakage capacitance C e max 2000μF the upper limit of measuring range for the insulation resistance decreases from 1MΩ... -
Page 32: Parameter Setting Of The Insulation Fault Location
Settings 7.4 Parameter setting of the insulation fault location (isoPV1685P only) Set the value of the locating current required for insulation fault location to 1...50 mA. You can make this setting via the BMS bus by means of a BMS gateway (e.g. COM460IP) or a ter- minal program. -
Page 33: Resetting Alarm Messages
Bender provides this software free of charge and without any warranty. By using this software you agree that you are using the software at your own risk. Bender does not assume any responsibility for possible software errors or defects and does not guarantee that the software works error-free and reliably. -
Page 34: Device Communication
Device communication 8. Device communication Over the RS-485 interface of the device, data can be transferred either via the BMS protocol or the Modbus RTU protocol. The protocol and the protocol parameters are set in the "In- terface" menu 8.2 (6.3). The isoPV1685P uses the RS-485 interface for the BMS bus. -
Page 35: Bms Protocol
Bender recommends the use of a DI1 repeater. 8.1.2 BMS protocol This protocol is an essential part of the Bender measuring device interface (BMS bus proto- col). Data transmission generally makes use of ASCII characters. Interface data are: •... -
Page 36: Bms Master
Device communication 8.1.3 BMS master A master can query all measured values, alarm and operating messages from a slave. If bus address 1 is assigned to a device, this device automatically operates as master, i.e. all addresses between 1 and 150 are cyclically scanned for alarm and operating messages via the BMS bus. -
Page 37: Setting The Bms Address
Device communication 8.1.6 Setting the BMS address The ISOMETER® cannot switch on a potential termination at the BMS bus. Even though this is not expected to cause communication problems, the ISOMETER® should be operated as BMS slave if possible (BMS address > 1). If no other device with master capabilities is available on the bus, the ISOMETER®... -
Page 38: Alarm And Operating Messages Via Bms Bus
Device communication isoPV1685RTU: DIP switch SS8103 BMS addr. Switch position: Up = Off Down = On 8.1.7 Alarm and operating messages via BMS bus Messages are transmitted via up to 12 BMS channels. All alarm and operating messages that may occur are described below. 8.1.7.1 Alarm messages Alarm... -
Page 39: Performing A Firmware Update Via The Bms Bus
Performing a firmware update via the BMS bus The firmware can be updated via the BMS bus using the BMS Update Manager which can be obtained from Bender. 8.2 CAN bus Independently of this manual, communication via CAN interface is specified in a separate document. -
Page 40: Error Codes Bms And Can Bus
With a write command, data can be written into a register address. The register addresses of the individual measured values and parameters can be found in the "isoxx1685Dx_D00272_00_A_XXDE" manual with the title "ISOMETER® isoxx1685Dx device family - Modbus settings" at https://www.bender.de/en/service-support/download- area/. isoPV1685xxx_D00007_08_M_XXEN/03.2023... -
Page 41: Diagrams
Diagrams 9. Diagrams 9.1 The leakage capacitance depends on the ins. resistance & 1000 & Fault resistance [k ] 9.2 Response time for insulation measurement isoPV1685 1000 & 1 μF 500 μF 2000 μF 10,0 20,0 40,0 100,0 200,0 isoPV1685xxx_D00007_08_M_XXEN/03.2023... -
Page 42: Example Of Alarms Stored In The History Memory
Diagrams 9.3 Example of alarms stored in the history memory Index Idx 231 Index history memory ID43 Entry ID Alarm Insulation fault ALarm type < 200 Minimum alarm value = 200 Maximum alarm value Unit Unit Test None Alarm during test Start Time 27.04.12 13:59 Start time of the alarm... -
Page 43: Technical Data
Technical Data 10. Technical Data 10.1 Factory settings Value isoPV1685P: isoPV1685RTU: Parameters Status can be set via can be set via Insulation response value R 10 kΩ BMS, CAN BMS, Modbus, CAN Insulation response value R 1 kΩ BMS, CAN BMS, Modbus, CAN Fault memory insulation measure- BMS, Modbus... - Page 44 Technical Data Measuring circuit for insulation monitoring Measuring voltage U (peak value)..........................±50 V Measuring current I (at R = 0 W )........................... ≤ 1.5 mA Internal DC resistance R ..............................≥ 70 kΩ Impedance Z at 50 Hz..............................≥ 70 kΩ Permissible extraneous DC voltage U ........................
- Page 45 Technical Data CAN: Protocol.......................... acc. to SMA/Bender specification V2.5 Frame format ............................ CAN 2.0A 11-bit identifier Baud rate..................................500 kBit/s Connection via 2 x RJ45 acc. to CiA-303-1 connected in parallel ................ Pin 1: CAN-H ....................................Pin 2: CAN-L ..................................Pin 3, 7: CAN-GND CAN identifier permanently set acc.
- Page 46 Technical Data Connection of the system coupling Connection type ........................pluggable push-wire terminals Connection, rigid/flexible........................0.2...10 mm /0.2...6 mm Connection, flexible with ferrule, without/with plastic sleeve ............ 0.25...6 mm /0.25...4 mm Conductor sizes (AWG)..............................24…8 Stripping length ................................15 mm Opening force ................................
-
Page 47: Standards, Approvals And Certifications
Technical Data 10.3 Standards, approvals and certifications The isoPV1685 was designed according to the following standards: • DIN EN 61557-8 (VDE 0413-8) • IEC 61557-8 • IEC 61557-9 • IEC 61326-2-4 • IEC 60730-1 • DIN EN 60664-1 (VDE 0110-1) •... - Page 48 Bender GmbH & Co. KG Postbox 1161 • 35301 Grünberg • Germany Londorfer Str. 65 • 35305 Grünberg • Germany Tel.: +49 6401 807-0 Fax: +49 6401 807-259 E-Mail: info@bender.de www.bender.de Fotos: Bender archive...
Need help?
Do you have a question about the ISOMETER isoPV1685RTU and is the answer not in the manual?
Questions and answers