
Subscribe to Our Youtube Channel
Related Manuals for Bender ISOMETER isoPV1685DP


Summary of Contents for Bender ISOMETER isoPV1685DP
- Page 1 ISOMETER® isoPV1685DP Insulation monitoring device for unearthed systems in photovoltaic systems Software version: D0650 V3.1x Manual isoPV1685DP_D00479_00_M_XXEN/02.2023...
- Page 2 Bender GmbH & Co. KG Londorfer Str. 65 • 35305 Grünberg • Deutschland Postbox 1161 • 35301 Grünberg • Deutschland Tel.: +49 6401 807-0 • Fax: +49 6401 807-259 E-Mail: info@bender.de • www.bender.de © Bender GmbH & Co. KG All rights reserved.
-
Page 3: Table Of Contents
Table of Contents Table of Contents 1. Important information .....................7 1.1 How to use this manual ............7 1.2 Technical support . - Page 4 Table of Contents 8. Settings ........................40 8.1 Device menu structure ............40 8.2 Settings in the device menu .
- Page 5 Table of Contents 11. Alarm messages ....................70 12. Technical data ......................71 12.1 Device profiles ............. . . 71 12.2 Diagrams of the leakage capacitance .
-
Page 7: Important Information
Important information 1. Important information 1.1 How to use this manual This manual is intended for qualified personnel working in electrical engineering and electronics! Read the manual before you begin to mount, connect, and commission the unit. Always keep the manual within easy reach for future reference following commissioning. -
Page 8: Technical Support
Important information 1.2 Technical support 1.2.1 End customer support and advice Technical support by phone or e-mail for all Bender products • Questions concerning specific customer applications • Commissioning • Troubleshooting Telephone: +49 6401 807-760 (365 days from 07:00 - 20:00 Uhr [MEZ/UTC +1]) -
Page 9: Training Courses
Association) also applies. Amending the “General Conditions for the supply of Products and Services of the Electrical and Electronics Industry” (GL)* Sale and delivery conditions can be obtained from Bender in printed or electronic format. 1.5 Storage The devices must only be stored in areas where they are protected from dust, damp, and spray and dripping water, and in which the specified storage temperatures can be ensured. -
Page 10: Disposal
13 August 2005 must be taken back by the manufacturer and disposed of properly. For more information on the disposal of Bender devices, refer to our homepage at www.bender.de -> Service & Support. -
Page 11: Safety Instructions
2.1 General safety instructions Part of the device documentation in addition to this manual is the enclosed "Safety instruc- tions for Bender products". Read the operating manual before starting to mount, connect and com-mission the device. After successful commissioning, keep the manual within easy reach for future reference. -
Page 12: Device-Specific Safety Instructions
Safety instructions 2.3 Device-specific safety instructions Installation inside a control cabinet If the ISOMETER® is installed inside a control cabinet, the insulation fault message must be audible and/or visible to attract attention. IT systems with several ISOMETER®s Make sure that only one active ISOMETER® is connected in each interconnected system. -
Page 13: Function
• Remote setting of certain parameters via the Internet (COMTRAXX® gateway) • Remote diagnosis by the Bender service via the Internet • RS-485 interface for data exchange with other Bender devices • Measurement of insulation faults 200 Ω…1 MΩ... -
Page 14: Functional Description
Function 3.3 Functional description Insulation monitoring is carried out using an active measuring pulse which is superimpo- sed onto the IT system to earth via the integrated coupling. If the insulation resistance bet- ween the IT system and earth falls below the set prewarning response value R , the "ALARM 1"... - Page 15 Function Malfunctions due to excessive locating current on sensitive system parts! The locating current flowing between the IT system and earth can cause controller faults in sensitive parts of the system, such as the PLC or relay. CAUTION Ensure that the level of the locating current is compatible with the system to be monitored.
-
Page 16: History Memory
Function 3.4 History memory All warnings, alarms and device errors are stored in the internal history memory with date and time stamp. The time the event started, the time of acknowledgement and the end of the event are recorded. The history memory can be called up and reset via the device menu. (see "History"... - Page 17 Function 3.5.3 Manual self test The self test is started via the TEST button of the ISOMETER®. The following tests are only carried out in the manual self test mode: • Internal flash • CPU register • Watchdogs • Oscillator •...
-
Page 18: Device Overview
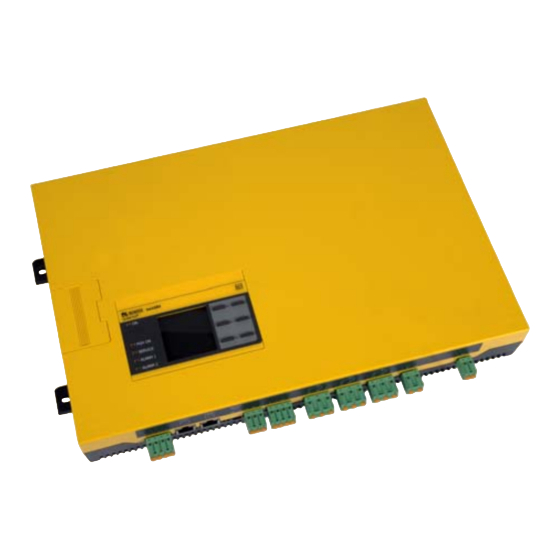
Device overview 4. Device overview 4.1 Dimensions iso1685 ® ISOMETER 39,8 40,75 55,7 401,5 All dimensions in mm isoPV1685DP_D00479_00_M_XXEN/02.2023... -
Page 19: Connections
Device overview 4.2 Connections CAN 1 CAN 2 RS-485 Term. I2+ I2- I1+ I1- off on A B S k l kT IT 31 32 34 21 22 24 11 12 14 E KE A1 A2 I2+ I2- I1+ I1- 32 34 22 24 11 12 14... -
Page 20: Display And Operating Elements
Device overview 4.3 Display and operating elements PGH ON 4.3.1 Display elements The operation indicator lights up continuously. (green) The device display shows information regarding the device and the mea- surements. For further information, refer to the chapter 7. "Display”. The "PGH ON"... - Page 21 Device overview 4.3.2 Device buttons Adjust the device settings in the respective menu using the device buttons. Depending on the menu entry, one of the options displayed below is assigned to the buttons. MENU Opens the device menu. Cancels the current process or navigates one step back in the device menu.
-
Page 22: Operating And Navigating
Device overview 4.4 Operating and navigating Navigate through the device menu using the device buttons. The functions of the device buttons are described in the chapter "Device buttons" on page Navigation in lists Language x.x.x To make a selection in a list, navigate •... -
Page 23: Mounting And Connection
Mounting and connection 5. Mounting and connection 5.1 Mounting Mount the device using four M5 screws, refer also to the dimension diagram where the dril- ling holes are illustrated (see "Dimensions" on page 18). Mount the device so that the dis- play can be read during operation and the mains connection is (L1/+, L2/–) positioned at the top. - Page 24 Mounting and connection Ensure disconnection from the IT system! When insulation or voltage tests are to be carried out, the device must be isolated from the system for the test period. Otherwise the device may be damaged. Check proper connection! Prior to commissioning of the installation, check that the device has been properly connected and check the device functions.
- Page 25 Mounting and connection 5.2.3 Connecting the EDS to the ISOMETER® isoxx1685DP Risk of malfunctions due to excessive locating current on sensitive system parts! The locating current flowing between the IT system and earth can CAUTION cause controller faults in sensitive parts of the system, such as the PLC or relay.
- Page 26 Mounting and connection Wiring diagram 3 kV 6 kV 3 kV L1/+ L2/- L1/+ L1/+ L2/- L1/+ L2/- L2/- L2/- A B S k l kT lT 31 32 34 21 22 24 11 12 14 E KE A1 A2 I2+ I2- I1+ I1- Connection isoPV1685DP to 3AC Connection isoPV1685DP to AC...
-
Page 27: Connection To A 3Ac System With An Eds440 And And Iom441
Mounting and connection Injury, fire and damage to property due to a short circuit in isoHV1685D-425 and isoHR1685D-925 According to DIN VDE 0100-430, protective devices (fuses) used to WARNING protect against short circuits when terminals L1/+ and L2/- are coupled to the IT system to be monitored can be omitted if the wiring is designed in such a manner that the risk of a short circuit is kept to a minimum. -
Page 28: Commissioning
Commissioning 6. Commissioning 6.1 Commissioning flow chart insulation fault monitoring System = IT system ? iso1685Dxx not suitable iso1685DP not suitable, < AC 1000/DC 1500 V ? check if iso1685D-HV is suitable < AC 2000/DC3 000 V ? iso1685D-HV not suitable Deenergize the installation before connecting the device Device connection... -
Page 29: Commissioning Flow Chart With Insulation Fault Location
Commissioning 6.2 Commissioning flow chart with insulation fault location Make sure that the system is Install the insulation fault locator disconnected from any electrical and the appropriate CTs source before connecting the device! Connect the RS-485 interface (BMS bus) of the EDS with the iso1685DP Adress all BMS components. -
Page 30: Initial Commissioning
Commissioning 6.3 Initial commissioning Follow the instructions of the commissioning wizard on the display. Use the device buttons to navigate. For a description of the device buttons, refer to "Device buttons" on page 6.3.1 Setting the language The language selected here will be used in the menu and for device messages. Language x.x.x •... - Page 31 Commissioning for alarm 1 6.3.4 Setting response value Set the prewarning response value here. Alarm 1 Commissioning x.x.x Please set 40 kΩ the response value R(an1) for Alarm 1. Min. 1 kΩ Max. 10 MΩ x/xx 6.3.5 Setting response value for alarm 2 Set the response value for the main alarm here.
-
Page 32: Recommissioning
Commissioning 6.3.7 Setting the EDS current Set the maximum locating current. EDS441: 1-5 mA EDS440: 10-50 mA For further information, refer to "Current" on page 48. Commissioning Current x.x.x o 1mA • 2.5mA Please select the EDS current now o 5mA o10mA o25mA x/xx... -
Page 33: Commissioning Eds
Commissioning 6.5 Commissioning EDS Proceed as follows to put into operation an EDS after commissioning the ISOMETER®: 1. Set the mode for the insulation fault location to manual, automatic or 1 cycle. For a description of the different modes, refer to "Mode"... -
Page 34: Display
Display 7. Display 7.1 Standard display During normal operation, the ISOMETER® displays the message "OK" and below, the cur- rently measured insulation resistance. The signal quality of the measurement suits the selected profile. The better the signal quality, the faster and more exact the device can measure. -
Page 35: Fault Display (Active)
Display 7.2 Fault display (active) An active fault is displayed by The upper part of the display turns orange and displays the fault message. Depending on the type of fault, the LEDs "ALARM 1", "ALARM 2" or "SERVICE" are activated. In the following example, a resistance has been detected. -
Page 36: Fault Display (Inactive)
Display 7.3 Fault display (inactive) An inactive fault is indicated by . If several faults have occurred, the number of faults will also be indicated. The message shown on the display below means that there has been a fault in the past but the device is no longer in fault condition. -
Page 37: Acknowledging A Fault Message
Display 7.4 Acknowledging a fault message In order to acknowledge the fault message and return to the ISOMETER®'s standard display, all faults must be acknowledged by means of the "RESET" button. This means that fault messages can only be reset when the cause of the fault has been elim- inated. -
Page 38: Data-Isograph
Display 7.6 Data-isoGraph The isoGraph represents the chronological sequence of the insulation resistance over time. This graphical representation can be displayed over the following time periods: hour, day, week, month and year. The measured values for individual representations are stored in a separate memory. Up to 100 measured values are available to represent each graph. - Page 39 Display Insulation fault location in auto mode and 1 cycle. IT system PGH ON Ins. fault search 43 s Insulation fault location has been started manually. IT system PGH ON Ins. fault search For further information regarding the different modes, refer to "Mode"...
-
Page 40: Settings
Settings 8. Settings 8.1 Device menu structure Alarm settings 1. Insulation alarm 1. Alarm 1 2. Alarm 2 3. Memory 4. Start alarm 2. Profile 3. Device 4. Coupling monitor 5. System frequency 6. Single pole operation -> isoHV1685DP-425 only 6. - Page 41 Settings Menu item EDS 1. General 1. Mode only for following devices: 2. Current - isoxx1685DP 2. Scan for channels 3. Enable channel 4. Group settings 1. Channel (select 1 … x) 1. CT 2. CT Monitor 3. IΔL Response value 4.
-
Page 42: Settings In The Device Menu
Settings 8.2 Settings in the device menu (1 ) Alarm settings The limit values for the insulation resistances of alarm 1 and alarm 2 can be specified in the alarm settings menu and the profile of the ISOMETER® can be adjusted. If the password que- ry has been enabled in the device menu (refer to "Password"... -
Page 43: Profile
Settings (1.1.4) Start Alarm Ω •Start Alarm ON Device start with alarm message and a measured value of 0 k ∞ •Start Alarm OFF Ω Device start without alarm message and a measured value of (1.2) Profile Adapt the area of application of the ISOMETER® to your system profile. For a description of the profiles, refer to "Device profiles"... -
Page 44: Inputs
Settings (1.6) Inputs The ISOMETER® provides 2 digital inputs (I1, I2) that are freely configurable. (1.6.1) Digital 1 The following parameters can be set for the digital input: (1.6.1.1) Mode The operating mode for the digital input can be set to the following values: An event is carried out on the falling edge of the digital input (low to Active high high). -
Page 45: Outputs
Settings (1.6.1.4) Function The functions of the digital inputs of the ISOMETER®: Digital input without function • off Device self test • TEST Reset of fault and alarm messages • RESET The device DOES NOT measure the insulation resistance, • Deactivating the device the message appears on the dis- Device inactive... - Page 46 Settings (1.7.3) Relay 3: Relay 3 does not appear in the device menu. The operating mode is set to N/C operation and the parameters cannot be adjusted. (1.7.4) Buzzer The following parameters can be set for the buzzer: (1.7.4.1) TEST The functional test of the buzzer can be activated or deactivated.
-
Page 47: Eds
Settings (2 ) EDS For insulation fault location, the protocol of the RS-485 interface must be set to BMS (menu 8.2 (6.3) "Interface" ). Insulation fault location via the Modbus RTU protocol is not possible. (2.1) General (2.1.1) Mode Inactive insulation fault location (insulation measurement) New insulation fault No insulation fault... -
Page 48: Scanning Channels
Settings (2.1.2) Current Risk of malfunctions due to excessive locating current on sensitive system parts! The locating current flowing between the IT system and earth can cause controller faults in sensitive parts of the system, such as the PLC or CAUTION relay. -
Page 49: Group Settings
Settings (2.4) Group settings Use group settings to adjust the settings for several EDS or EDS channels simultaneously or to read out settings. If you would like to make settings for each EDS or each EDS channel individually, please refer to the menus from chapter 8.2 (2.5) "Channel”... - Page 50 Settings (2.4.1.3) Response value ∆L Set the response value for I (main alarm for insulation fault location) between 200 μA and ΔL 10 mA. The response value must be below the set locating current (refer to 6.3.7 "Setting the EDS current" on page 32 The permissible response value and the response sensitivity depend on the connected EDS (EDS440x or EDS441x).
- Page 51 Settings (2.4.2.1.3) Function 1 Up to three functions can be assigned to one output. The functions are linked to an OR ope- rator: Function 1 ≥ 1 Function 2 Reaction Function 3 Set the function for the outputs: The function is not used. •off The status of the output changes if an insulation fault is detec- •I...
- Page 52 Settings (2.4.2.3) Buzzer Select the buzzers to be configured. All buzzers are selected. •Select all No buzzer is selected. •No selection The current selection is inverted. •Invert selection A single buzzer is selected. •Buzzer 1 (BS 2/1) Afterwards, assign the selected buzzers to the events on which they should trip. (2.4.2.3.1) TEST chapter 8.2 (2.4.2.1.1)
- Page 53 Settings (2.4.2.4) Digital output Select the digital outputs of the EDS to be configured. All digital outputs are selected. •Select all No digital output is selected. •No selection The current selection is inverted. •Invert selection •Dig. output 1 (BS 2/1) A single digital output is selected. Afterwards, make the settings for the selected digital inputs of the EDS.
- Page 54 Settings (2.4.3.2) t(on) The response time t(on) after a switch-on signal can be set between 100 milliseconds and 5 minutes. For a description, refer to "Setting the EDS mode (isoxx1685DP only)" on page (2.4.3.3) t(off) The response time t(off) after a switch-off signal can be set between 100 milliseconds and 5 minutes.
-
Page 55: Channel
Settings (2.4.4.3) Trigger The locating current pulse of the ISOMETER® is synchronised with the measurement tech- nology in the EDS via the BMS bus. This allows a more reliable detection of the locating cur- rent pulse in the event of disturbances. Disturbances can be caused e.g. by variable-speed drives, rectifiers, actuators, noise filters, PLCs, or control electronics. -
Page 56: Outputs
Settings (2.6) Outputs In this menu, each output can be configured. See also chapter 8.2 (2.4.2) "Outputs”. (2.6.1) Common relay Submenues see chapter 8.2 (2.4.2.1) "Common relay” (2.4.2.1.1) to (2.4.2.1.5) (2.6.2) Channel relay Select the relay to be configured. •Relay 1 (BS 2/1) Submenu see chapter 8.2 (2.4.2.1) "Common relay"... -
Page 57: Device
8.2 (2.4.4.4) "Fault memory”. (2.9) Service The service menu can only be accessed by Bender service staff. (3 ) Data measured values The ISOMETER® stores certain measured values for a specific period of time. These data can be viewed at the "Data meas. values" menu item. Navigate through the different views... -
Page 58: Device Settings
Settings (6 ) Device settings The device settings menu allows configuring the basic settings for the ISOMETER®: (6.1) Language Choose the display language of the ISOMETER®. For example, the following languages can be set: •Deutsch •English •... (6.2) Clock In the clock menu, the display format of date and time of the ISOMETER® can be set: (6.2.1) Time Based on the selected time format, set the current time to display 24-hour or 12-hour nota- tion (am/pm). -
Page 59: Interface
Settings (6.2.4) Date Based on the selected date format, the current date can be set. (6.2.5) Format (date) Select the date format to be displayed: day, month, year •dd.mm.yy month, day, year •mm-dd-yy (6.3) Interface Set the parameters for connection of other devices to the ISOMETER® in the interface menu. •Mode •BMS •Modbus RTU... -
Page 60: Display
Decide whether the password query should be used: Password query active •on Password query inactive •off (6.6) Commissioning In the commissioning menu, the ISOMETER®'s commissioning wizard can be started again. (6.7) Factory settings (6.8) Service The service menu can only be accessed by Bender service staff. isoPV1685DP_D00479_00_M_XXEN/02.2023... - Page 61 Settings (7 ) Info The ISOMETER®'s current settings can be viewed in the info menu. Navigate through the different views using the buttons: Device name, serial number, article number •Info - Device Software version measurement technology, software version •Info - Software •Info - Measurement Set profile, locating current and EDS mode technology...
-
Page 62: Device Communication
Device communication 9. Device communication Over the RS-485 interface of the device, data can be transferred either via the BMS protocol or the Modbus RTU protocol. The protocol and the protocol parameters are set in the "In- terface" menu 8.2 (6.3). Communication with EDS devices Communication with EDS devices is only possible with the BMS protocol. - Page 63 Shielded cable, core diameter 0.8 mm (e.g. J-Y(St)Y 2x0.8), shield connected to earth (PE) on one end. The max number of bus nodes is restricted to 32 devices. If more devices are to be connec- ted, Bender recommends the use of a DI1 repeater. isoPV1685DP_D00479_00_M_XXEN/02.2023...
- Page 64 Device communication 9.1.2 BMS protocol This protocol is an essential part of the Bender measuring device interface (BMS bus proto- col). Data transmission generally makes use of ASCII characters. Interface data are: • Baud rate: 9600 baud • Transmission: 1 start bit, 7 data bits, 1 parity bit, 1 stop bit (1, 7, E, 1) •...
-
Page 65: Alarm 1
Device communication 9.1.5 Address setting and termination Correct address setting and termination is essential for proper functioning of the isoxx1685xx-xxx series insulation monitoring device. Risk of bus errors! Double assignment of addresses on the respective BMS busses can cause serious malfunctions. CAUTION •... - Page 66 Device communication Overtemperature coupling Overtemperature coupling terminal L2/– Overtemperature PGH Overtemperature of the locating current (isoxx1685DP only) injector 9.1.7.2 Operating messages Alarm Channel Description Current insulation resistance R Insulation resistance (when R > (R + hysteresis)) Current insulation resistance R Insulation resistance (when R >...
- Page 67 Device communication Component Error Action Error code 8.31 Hardware PGH: locating current too high Replace device PGH: locating current cannot be swit- 8.32 Hardware Replace device ched off 8.42 Hardware Supply voltage ADC Replace device 8.43 Hardware Supply voltage +12 V Replace device 8.44 Hardware...
-
Page 68: Rs-485 Interface With Modbus Protocol
With a write command, data can be written into a register address. The register addresses of the individual measured values and parameters can be found in the "isoxx1685Dx_D00272_00_A_XXDE" manual with the title "ISOMETER® isoxx1685Dx device family - Modbus settings" at https://www.bender.de/en/service-support/download- area/. isoPV1685DP_D00479_00_M_XXEN/02.2023... -
Page 69: Insulation Fault Location
Insulation fault location 10. Insulation fault location 10.1 General description An additional function of the ISOMETER® in combination with the EDS is the selective insu- lation fault location. The insulation faults detected in the IT system by the ISOMETER® can be located by means of an EDS and measuring current transformers. -
Page 70: Alarm Messages
Alarm messages 11. Alarm messages isoPV1685DP_D00479_00_M_XXEN/02.2023... -
Page 71: Technical Data
Technical data 12. Technical data 12.1 Device profiles 12.1.1 PV up to 500 µF Profile for PV systems with a leakage capacitance of up to 500 μF. Suitable for both central inverter and string inverter applications. Power frequency System leakage Measuring Response value range capacitance... - Page 72 Technical data 12.1.2 PV up to 4000 µF Profile for PV systems with a leakage capacitance of up to 4000 μF. Suitable for both central inverter and string inverter applications Power frequency System leakage Measuring Response value range capacitance voltage DC;...
-
Page 73: Diagrams Of The Leakage Capacitance
Technical data 12.2 Diagrams of the leakage capacitance The determination of the leakage capacitance depends on the size of the insulation re- sistance. The following diagrams show the relationship. Example: Insulation resistance 50 kOhm => min. measurable leakage capacitance 35 μF Insulation resistance 5 kOhm =>... -
Page 74: Factory Settings
Technical data 12.3 Factory settings Parameter Value Response values/alarms Measurement profile PV up to 500 μF Response value R (ALARM 1) 40 kΩ Response value R (ALARM 2) 10 kΩ Fault memory Coupling monitoring Switching elements Operating mode: N/C operation Relay 1 (11, 12, 14) Function: Insulation measurement Operating mode: N/C operation... -
Page 75: Tabular Data Isopv1685Dp-425
Technical data 12.4 Tabular data isoPV1685DP-425 Insulation coordination acc. to IEC 60664-1/IEC 60664-3 Definitions: Measuring circuit (IC1) ........................(L1/+, L2/-), (E, KE) Supply circuit (IC2)..............................A1, A2 Output circuit 1 (IC3) ............................11, 12, 14 Output circuit 2 (IC4) ............................21, 22, 24 Output circuit 3 (IC4) ............................ - Page 76 Technical data Voltage ranges Nominal system voltage range U iso1685DP ..............AC 0…1000 V; DC 0…1500 V Tolerance of U ............................AC +10 %/DC +5% Frequency range of U ............................DC; 50 Hz; 60 Hz Supply voltage U (see also device nameplate) ...................... DC 18...30 V Frequency range of U ................................
- Page 77 Technical data Digital inputs Operating mode, adjustable ........................active high, active low Functions ..................off, test, reset, deactivate device, insulation fault location High level ................................... 10…30 V Low level ..................................0…0.5 V Serial interface Interface/protocol..........................RS-485 / BMS / Modbus RTU Connection................................terminals A/B Cable length .................................≤...
- Page 78 Technical data Contact data acc. to IEC 60947-5-1: Utilisation category ....................AC 13 / AC 14 / DC-12 / DC-12 / DC-12 Rated operational voltage ....................230 V / 230 V / 24 V / 10 V / 20 V Rated operational current ......................
-
Page 79: Standards And Certifications
Technical data 12.5 Standards and certifications The isoxx1685Dx devices were designed according to the following standards: - DIN EN 61557-8 (VDE 0413-8) - IEC 61557-8 - IEC 61557-8 Annex C (for Fast 2000 μF profile only) - DIN EN 61557-9 (VDE 0413-9) - IEC 61557-9 (not for isoHV1685D) - IEC 61326-2-4 - DIN EN 60664-1 (VDE 0110-1) - Page 80 Bender GmbH & Co. KG Postbox 1161 • 35301 Grünberg • Germany Londorfer Str. 65 • 35305 Grünberg • Germany Tel.: +49 6401 807-0 Fax: +49 6401 807-259 E-Mail: info@bender.de www.bender.de Fotos: Bender archive...
Need help?
Do you have a question about the ISOMETER isoPV1685DP and is the answer not in the manual?
Questions and answers