Table of Contents
Advertisement
Quick Links
Advertisement
Table of Contents

Related Manuals for Siemens WM14UP40


Summary of Contents for Siemens WM14UP40
- Page 1 Translated from German to English - www.onlinedoctranslator.com Washing machine WM14UP40 Instructions for use and assembly Register your product on My Siemens and discover exclusive services and offers. siemens-home.bsh-group.com/welcome The future moving in. Siemens Home Appliances...
-
Page 2: Table Of Contents
table of contents 1 Security ........4 10 Before using for the first time ... 39 1.1 General information ....4 10.1 Starting the empty wash cycle ..39 1.2 Intended 11 Laundry ........41 use ........4 11.1 Preparing the laundry ....41 1.3 Restriction of the user 11.2 Sorting laundry .... - Page 3 21 Customer service ......76 16.2 Device with WLAN home 21.1 Product number (E no.) network (Wi-Fi) with WPS radio And production number connect tion ......50 (FD) ........76 16.3 Device with WLAN home network (Wi-Fi) without WPS 22 Consumption values ...... 77 Link function ....
-
Page 4: Security
de safety 1 security Please note the following safety instructions. 1.1 General information ¡ Read this guide carefully. ¡ Keep the instructions and the product information for later use or for a subsequent owner. ¡ Do not connect the device in the event of transport damage. 1.2 Intended use Use the device only: ¡... -
Page 5: Safe Installation
safety de 1.4 Secure installation When installing the device, follow the safety instructions. WARNING - Risk of Electric Shock! Improper installations are dangerous. ▶ Only connect and operate the device in accordance with the information on the nameplate. ▶ Only connect the device to a power supply with alternating current via a properly installed socket with earthing. - Page 6 de safety WARNING - Risk of Fire! Using an extended power cord and unapproved adapters is dangerous. ▶ Do not use extension cables or multiple socket strips. ▶ If the power cord is too short, contact customer service. ▶ Use only adapters approved by the manufacturer. WARNING - Risk of Injury! The heavy weight of the device can lead to injuries when lifting.
-
Page 7: Safe Use
safety de CAUTION - Risk of Injury! The device can vibrate or move during operation. ▶ Set up the device on a clean, level and firm surface. ▶ Align the device with the device feet and a spirit level. There is a risk of tripping if the hoses and mains connection cables are improperly laid. - Page 8 de safety Penetrating moisture can cause an electric shock. ▶ Use the device only in closed rooms. ▶ Never expose the device to extreme heat and moisture. ▶ Do not use steam cleaners, high pressure cleaners, hoses or showers to clean the device. WARNING - Risk of damage to health! Children can lock themselves in the device and endanger their lives.
- Page 9 safety de CAUTION - Risk of Injury! The cover plate can break when climbing or climbing on the device. ▶ Do not step on or climb onto the device. The device can tip over if you sit or lean on the open door. ▶...
-
Page 10: Safe Cleaning And Maintenance
de safety 1.6 Safe cleaning and maintenance When cleaning and maintaining the device, please observe the safety instructions. WARNING - Risk of Electric Shock! Improper repairs are dangerous. ▶ Only trained specialists are allowed to carry out repairs on the device. -
Page 11: Avoid Property Damage
Avoid property damage de Make sure that the interior ▶ Avoid property damage the diameter of the tap is at least 17 mm. Make sure that the length of the ▶ Thread at the connection to the Follow these instructions to avoid water tap is at least 10 mm. -
Page 12: Environmental Protection And Saving
de Environmental protection and saving No hard abrasive pads or ▶ Dose detergent according to the degree of soiling of the laundry → Use cleaning sponges. The device only with water and a ▶ Page 43. clean with a soft, damp cloth. a For light to normal soiling a smaller amount of detergent is ▶... -
Page 13: Energy Saving Mode
Set up and connect de CAUTION! The device has an aqua sensor. Objects left in the drum that are not intended for use in the device can a The aquasensor checks during cause property damage and damage the degree of cloudiness of the to the device. -
Page 14: Scope Of Delivery
de Set up and connect 4.2 Scope of delivery After unpacking, check all parts for transport damage and the complete consistency of delivery. Washing machine WARNING Risk of electric shock! Accompanying documents The device contains live parts. Touching live parts is dangerous. Water inlet hose Cover caps Not the device without a cover plate... -
Page 15: Remove Transport
Set up and connect de CAUTION! requirements Installation site If the device is installed in areas In a kitchen ¡ It's a line width where there is a risk of frost or outdoors, residual frozen water can from 60 cm damage the device and frozen hoses conducive. - Page 16 de Set up and connect Pull the hoses out of the holders. Remove the 4 sleeves. Insert the 4 cover caps. Loosen and remove all screws of the 4 transport locks with a SW13 spanner. distant . Press down the 4 cover caps.
-
Page 17: Connecting The Device
Set up and connect de 4.5 Connect the device Connect the water inlet hose to the tap (26.4 mm = 3/4 "). Water inlet hose connect Hints ¡ Note the information ¾˝ on the subject of security → page 4 and avoid property damage min. -
Page 18: Aligning The Device
close Loosen the lock nuts clockwise with a 17 mm spanner. Expiration in a The water drainage sink running hose with a bend → Page 39 fixation ren and secure. Expiration in a The water drainage To align the device, the Plastic pipe running hose with Turn the device feet. -
Page 19: Connecting The Device Electrically
Set up and connect de Tighten the lock nuts hand-tight against the housing with an SW17 wrench. Hold the device base firmly and do not adjust the height. 4.7 Connect the device electrically Note: Note the information on security → page 4 and avoid property damage the →... -
Page 20: Getting To Know Each Other
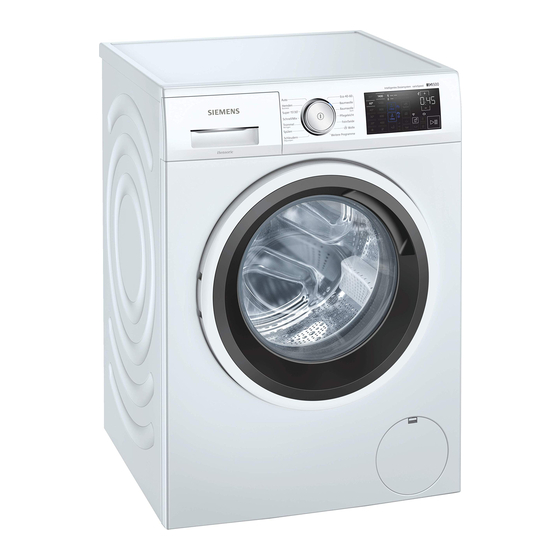
de To get to know 5 Getting to know each other 5.1 Device Here you will find an overview of the components of your device. Depending on the device type, details in the picture may differ, e.g. B. Color and Shape. -
Page 21: Detergent Drawer
To get to know de 5.2 Detergent drawer Chamber for manual dosing /: Dosing container for fabric softener or detergent : Dosing container for detergent 5.3 Control elements You can set and maintain all functions of your device via the control panel Information on the operating status. - Page 22 de To get to know Not with pointed or sharp ones ▶ Objects on the display. 22nd...
-
Page 23: Display
Display de 6 display The display shows the current setting values, selection options or Note texts. designation description advertisement 0:40 Approximate estimated program duration or Program duration / remaining time of the program. Remaining time of the pro gram The end of the program has been set and Ready in - time the remaining hours are displayed. - Page 24 de Display designation description advertisement Energy consumption for the set program. power consumption ¡ : low energy consumption ¡ : high energy consumption Water consumption for the set program. Water consumption ¡ : low water consumption ¡ : high water consumption End signal Basic setting Key signal...
- Page 25 Display de designation description advertisement Voltage con- flashes: The automatic voltage control system detects impermissible voltage troll system shortfalls. The program pauses. Note: The program is continued when the voltage is permissible again. Voltage con- flashes: The program was paused due to an impermissible voltage shortfall.
-
Page 26: Buttons
de Keys 7 buttons The selection of the program settings depends on the set program. You can see the selection options for each program in the view for → "Programs", page 29. selection description button (Start pause) ¡ start Start, cancel or pause the program. ¡... - Page 27 Keys de selection description button - 1400 (sluice - 1400 rpm Adjust the spin speed or deactivate the spin. dern) With the selection, the water becomes and the spin is deactivated at the end of the wash cycle. The laundry stays wet in the drum.
- Page 28 de Keys selection description button (Prewash) ¡ activate Activate or deactivate prewash, e. B. for washing heavily soiled laundry. ¡ deactivate Note: When the intelligent dosing system is activated, the detergent is automatically dosed for the prewash and the main wash. If the intelligent dosing system is deactivated, put the detergent for the prewash directly into the drum.
-
Page 29: Programs
Programs de i-Dos i-Dos Speed max. 1400 number (rpm) max.temperature (° C) 90 max.load (kg) - Page 30 de Programs i-Dos i-Dos Speed 1400 max. 1400 number (rpm) max.temperature (° C) 90 max.load (kg) 30th...
- Page 31 Programs de i-Dos i-Dos Speed 1200 1400 max. number (rpm) max.temperature (° C) max.load (kg)
- Page 32 de Programs i-Dos i-Dos Speed max. 800 number (rpm) max.temperature (° C) 40 max.load (kg)
- Page 33 Programs de i-Dos i-Dos Speed 1400 1400 max. number (rpm) max.temperature (° C) max.load (kg)
- Page 34 de Programs i-Dos i-Dos Speed 1000 max. number (rpm) max.temperature (° C) max.load (kg)
- Page 35 Programs de i-Dos i-Dos Speed max. 1200 number (rpm) max.temperature (° C) - max.load (kg)
- Page 36 de Programs i-Dos i-Dos Speed max. number (rpm) max.temperature (° C) max.load (kg)
- Page 37 Programs de i-Dos i-Dos Speed 1200 max. number (rpm) max.temperature (° C) max.load (kg)
- Page 38 de Programs i-Dos i-Dos Speed max. number (rpm) max.temperature (° C) max.load (kg)
-
Page 39: Accessories
equipment de 9 accessories V use original accessories. It is tailored to your device. Order number Cold water or Aquastop WZ10131 Extension of water supply water inlet running hose extend hose (2.50 m). Improve the stability of WX975600 Retaining tabs the device. - Page 40 de Before first use Pull out the detergent drawer. Pour the powder detergent into the manual dispensing compartment. Pour approx. 1 liter of tap water To avoid foam formation, only use into the manual dispensing half the amount of detergent chamber.
-
Page 41: Laundry
Laundry de - Unfold and loosen the laundry 1 wash - Wash large and small items of laundry together 11.1 Prepare laundry - Dab fresh stains with soapy water (do not rub) CAUTION! - Some stubborn, dried-in stains Objects left in the laundry can can be removed by washing damage the laundry and the drum. -
Page 42: Care Symbols On The Care Labels
de Detergents and care products Polluting pollution Examples Degree Pollution or ¡ T-shirts, or shirts normal slight stains are visible Blouses are sweat or have been worn several times ¡ Towels or sheets that have been used for up to a week Soiling or stains are clearly Dish towels, baby linen or strong... -
Page 43: Recommended Detergents
Detergents and care products de ¡ no detergents or fabric softeners ¡ Use dye sparingly, Salt can attack stainless steel ¡ no overlaid and heavily ¡ no decolourants in the device Use thick products turn around ¡ no solvent-based, corrosive or outgassing agents, e.g. -
Page 44: Basic Operation
de Basic operation These examples relate to a standard Example of manufacturer information for load of 4 - 5 kg. laundry detergent easy pollution normal strong 40 ml 55 ml 80 ml Water hardness: soft / medium 55 ml 80 ml 105 ml water hardness: hard / very hard 1 3 basic... -
Page 45: Setting The Program
Basic operation de 13.2 Setting the program 13.4 Save program settings Turn the program selector to the desired program → Page 29 You can save your individual place. program settings as favorites. requirements ¡ A program is set. ¡ The program settings are customized. -
Page 46: Detergents And Care Products Fill In Tel
de Basic operation Unfold the laundry and place it in 13.7 Start the program the drum. Note: If you want to change the time 4. Note: Make sure that no laundry until the end of the program, first is jammed in the door. set the Ready in time. -
Page 47: Removing The Laundry
Parental controls de - If the temperature is high, start Wipe the rubber sleeve dry and the program Wash. remove any foreign bodies. - If the water level is high, start the program sling or Pumping out. Remove the laundry. 13.10 Remove laundry Note: Note the information on security... -
Page 48: Intelligent Dosing System
de Intelligent dosing system Liquid detergent and soft 1 5 intelligent dosing Fill the detergent into the system appropriate dispenser. → "Detergent drawer", Page 21 Depending on the program and the settings, the optimum quantities for liquid detergent and fabric softener are automatically dosed. -
Page 49: Basic Dosage
Home Connect again to i-Dos to press. the Home Connect services in your Around country. You can find information on this at: www.home-connect.com. Wait briefly to finish the setting. ¡ → " Device with a WLAN home network (Wi-Fi) with WPS function ", page 50 15.3 Basic dosage ¡... -
Page 50: Connect Tion
de Home Connect Connect the device to the Home 16.2 Device with WLAN home Connect app. → Page 51 network (Wi-Fi) with Connect the WPS function 16.3 Device with WLAN home network (Wi-Fi) without Use the WPS function of your router to connect the device to the home Connect the WPS function network. -
Page 51: Device With The Home Connect The Connect App
Home Connect Connect the mobile device to 16.4 Connect the device to the the HomeConnect WiFi network Home Connect app and enter the HomeConnect WiFi password (key). requirements a Your mobile device connects ¡ The device is connected to the WLAN home yourself with the device. -
Page 52: Deactivating Wi-Fi On The Device
de Home Connect a The network settings are 16.6 Deactivate Wi-Fi on the set back. device a When the display End shows are reset the network settings. at least 3 seconds to press. Set the program to position 4. Tip: If you want to operate your device a The display shows Con. - Page 53 Home Connect Data protection can be found in the Home Connect app can be called up.
-
Page 54: Basic Settings
de Basic settings 1 7 basic settings You can adjust your device to your needs. 17.1 Overview of the basic settings Here you will find an overview of the basic settings of the device. Basic symbol description value position End signal 0 (off) Adjust the volume of the signal at the end of the program. -
Page 55: Cleaning And Care
Cleaning and care de To change the value, press. 18.2 Cleaning the drum If you often wash at 40 ° C or lower To leave the basic settings, switch or have not used the device for a off the device. long time, clean the drum. - Page 56 de Cleaning and care Press down the insert and remove Empty the detergent drawer. the detergent drawer. 7. ATTENTION! The pump unit Remove the pump unit. contains electrical components. Not the pump unit in the ▶ Clean the dishwasher or immerse it in water.
-
Page 57: Descaling
Cleaning and care de Clean the detergent drawer and Clean the housing of the 8th. the lid with a soft, damp cloth or detergent drawer in the machine. the hand shower. Slide in the detergent drawer. Dry and insert the detergent 18.4 Descaling drawer, the lid and the pump unit. - Page 58 de Cleaning and care Switch off the device. Take the drainage hose out of the holder. Disconnect the device's power plug from the power supply. Open the maintenance hatch. 8th. CAUTION - scalding drive! The detergent solution becomes Remove the maintenance hatch. hot when washing at high temperatures.
- Page 59 Cleaning and care de Clamp the drainage hose into Clean the interior, the thread of the the holder. pump cover and the pump housing. Clean the drain pump Make sure that the impeller of the drain pump turns Note: Note the information on security leaves.
-
Page 60: Clean The Water Drainage Hose On The Siphon
de Cleaning and care Close the maintenance hatch. Clean the water drainage hose and the siphon socket. Before the next wash To prevent unused detergent from flowing into the drain during the next wash, run the program Pumping out after you have emptied the drain pump. - Page 61 Cleaning and care de Connect the water inlet hose and Clean the strainer on the tap check for leaks. Note: Note the information on security → page 4 and avoid property damage the → Page 11, to use your device safely.
- Page 62 de Cleaning and care Take out the sieve with a pair of tongs. Clean the sieve with a small brush. Put the sieve back in place. Connect the hose and check for leaks.
-
Page 63: Eliminating Malfunctions
Troubleshooting de 9 Eliminating malfunctions You can rectify minor faults on your device yourself. Use the information on troubleshooting before contacting customer service. This will avoid unnecessary costs. WARNING Risk of electric shock! Improper repairs are dangerous. Only trained specialists are allowed to carry out repairs on the device. ▶... - Page 64 de Troubleshooting Cause and troubleshooting disturbance "E: 36 / -10" Inadmissible extension mounted on the water drainage hose. Remove impermissible extensions from the water ▶ drain hose. Connect device "E: 36 / -25 / -26" The drain pump is blocked. →...
- Page 65 Troubleshooting de Cause and troubleshooting disturbance If the voltage drops below this limit, the program can flashes. be extended. No fix possible. Detergent dosage is too high. Immediate action: Mix one tablespoon ▶ Softener with 0.5 liters of water and pour the mixture into the compartment for manual dosing (not for outdoor, sportswear and down textiles).
- Page 66 de Troubleshooting Cause and troubleshooting disturbance Program starts Door is not closed. not. Close the door. To start the program, press Child lock is activated. → " Deactivating childproof lock ", page 47 ▶ / is activated. check if is activated. ▶...
- Page 67 Troubleshooting de Cause and troubleshooting disturbance The detergent solution does not come out. Drain pipe or water drainage hose is blocked. Clean the drain pipe and water drain pumped out. ▶ running hose. The drain pipe or water drainage hose is kinked or pinched.
- Page 68 de Troubleshooting Cause and troubleshooting disturbance Repeated arrival The unbalance control system compensates for the unbalance sling. by distributing the laundry several times. No mistake - no action required. ▶ Note: When loading, place large and small items of laundry together in the drum. Laundry items of different sizes are better distributed during spinning.
- Page 69 Troubleshooting de Cause and troubleshooting disturbance Strong foaming Detergent dosage is too high. Immediate action: Mix one tablespoon ▶ manure. Softener with 0.5 liters of water and pour the mixture into the compartment for manual dosing (not for outdoor, sportswear and down textiles). When intelligent dosing is activated, ▶...
- Page 70 de Troubleshooting Cause and troubleshooting disturbance Spin program The unbalance control system has stopped spinning due to uneven distribution of the laundry. does not start. Redistribute the laundry in the drum. ▶ Note: Place large and small items of laundry together in the drum.
- Page 71 Troubleshooting de Cause and troubleshooting disturbance Spin result is The low spin speed is set. not satisfied- Set a higher one for the next wash cycle ▶ lend. The laundry is Spin speed. too wet / too damp. Start the program Sling. ▶...
- Page 72 de Troubleshooting Cause and troubleshooting disturbance Detergent residue Empty the dosing container. → "Cleaning the detergent drawer", page 55 de on the damp laundry. Clean the dosing container. Refill the dosing container. → "Filling the dosing tank", page 48 Basic dosage not set correctly. When intelligent dosing is activated, ▶...
- Page 73 Troubleshooting de Cause and troubleshooting disturbance Inadequate cleaning Check whether the detergent used is suitable. effect. → "Detergents and care products", page 42 Empty the dosing container. → "Cleaning the detergent drawer", page 55 Clean the dosing container. Refill the dosing container. →...
-
Page 74: Transport, Storage And Disposal
de Transport, storage and disposal Unplug the device from the 19.1 Emergency release mains. Unlock the door Drain off the remaining detergent solution. Pre-condition: The drain pump → "Clean the drain pump", is empty. → Page 57 Page 57 1. ATTENTION! Leaking water can Remove the hoses. -
Page 75: Again
Transport, storage and disposal de Insert all screws of the 4 transport 20.3 Put the device into locks and tighten slightly. operation again Remove the transport locks. Pour approx. 1 liter of water into the manual dispensing chamber in the detergent drawer. The program Pumping out start. -
Page 76: Device With Wlan Home 21 Customer Service
de Customer service You can obtain detailed information This device corresponds about the guarantee period and the to the European guarantee conditions in your country Directive 2012/19 / EU from our customer service, your Via electrical and electronic dealer or on our website. If you appliances (waste contact customer service, you will electrical and electronic... -
Page 77: Consumption Values
Consumption values de 2 consumption values The following information is provided in accordance with the EU Ecodesign Regulation. The values given for programs other than Eco 40-60 are only guide values and were determined on the basis of the applicable standard EN60456. The automatic dosing function has been deactivated for this purpose. -
Page 78: Technical Data
1.20 W A detailed RED declaration of ¡ At least: Water pressure conformity can be found on the 100 kPa Internet at www.siemens-home.bsh- (1 bar) group.com on the product page of your ¡ Maximum: device with the additional documents. 1000 kPa... - Page 79 Declaration of Conformity de Tbsp 5 GHz WLAN (Wi-Fi): For indoor use only.
- Page 80 BSH Hausgeräte GmbH Carl-Wery-Strasse 34 81739 Munich GERMANY www.siemens-home.bsh-group.com Manufactured by BSH Hausgeräte GmbH under a trademark license from Siemens AG * 9001494180 * 9001494180 (001130)
Need help?
Do you have a question about the WM14UP40 and is the answer not in the manual?
Questions and answers