
Subscribe to Our Youtube Channel
Related Manuals for Wexiodisk WD-B 550S


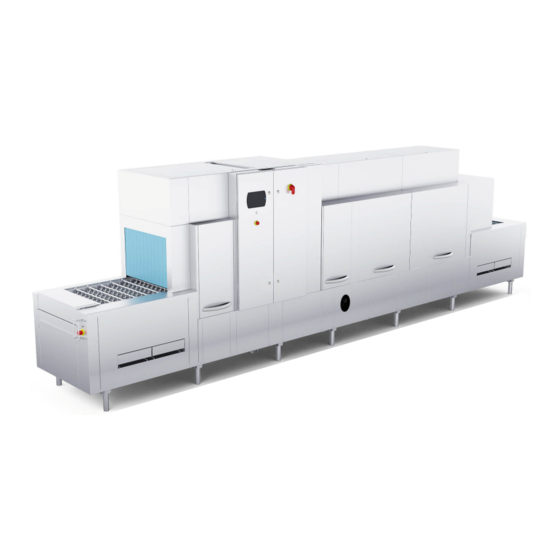
Summary of Contents for Wexiodisk WD-B 550S
- Page 1 FLIGHT-TYPE DISHWASHER WD-B 550S - WD-B 950S (translation of the original documentation) Read the manual before using the machine! Installation and user manual S/N: (En) Valid from: 202209 Rev.:...
-
Page 3: Table Of Contents
WD-B 550S - WD-B 950S Rev. (202209) 1. General instructions ................ 1 1.1 Symbols used ....................2 1.2 Machine rating ....................3 1.3 Checking that the machine and manual correspond ........3 1.4 EU Declaration of Conformity ................4 2. Safety instructions ................5 2.1 General information .................. - Page 4 WD-B 550S - WD-B 950S Rev. (202209) 3.6 Connections ....................20 3.6.1 Electrical connection ................21 3.6.2 Water connection, regardless of any options .......... 21 3.6.3 Ventilation ....................22 3.6.4 Steam (optional) ..................22 3.6.5 Drain/waste pipe ..................23 3.6.6 Detergent and drying agent ..............23 3.7 Checking and setting the final rinse flow ............
-
Page 5: General Instructions
WD-B 550S - WD-B 950S Rev. (202209) General instructions 1. General instructions Read the instructions in this manual carefully as they contain important information regarding the correct, effective and safe installation, use and servicing of the machine. Service personnel should have access to all documentation for the machine. -
Page 6: Symbols Used
WD-B 550S - WD-B 950S Rev. (202209) General instructions 1.1 Symbols used This symbol warns of situations where a safety risk may arise. The instructions given should be followed in order to prevent injury and dangerous situations. This symbol on a machine part warns of electrical equipment. The machine must... -
Page 7: Machine Rating
WD-B 550S - WD-B 950S Rev. (202209) General instructions 1.2 Machine rating The machine has two rating plates, one of which is placed at the bottom of one side of the machine and the other in the electrical cabinet. The technical information on the plates is also included on the machine’s wiring diagram. -
Page 8: Eu Declaration Of Conformity
WD-B 550S - WD-B 950S Rev. (202209) General instructions 1.4 EU Declaration of Conformity A so-called EU Declaration of Conformity is provided on delivery of the machine. CE_16_2 Contact details of the manufacturer (Wexiödisk AB, Mårdvägen 4, SE- 35245 Växjö, SWEDEN, Tel.: +46 470 771200, Fax: +46 470 23752, E- mail: wexiodisk@wexiodisk.com). -
Page 9: Safety Instructions
WD-B 550S - WD-B 950S Rev. (202209) Safety instructions 2. Safety instructions Read the chapter GENERAL INSTRUCTIONS carefully before starting work. 2.1 General information The machine is CE marked, which means that it complies with the requirements of the EU Machinery Directive with regard to product safety. Product safety means that the design of the machine will prevent personal injury or damage to property. -
Page 10: Transport
WD-B 550S - WD-B 950S Rev. (202209) Safety instructions In order to avoid dangerous situations, the following must be followed: • Switch off the machine immediately in the event of failure or malfunction. • Make sure the machine is non-live before removing the cover plate. Turn off the power using the power switch or the main switch. -
Page 11: Operation
WD-B 550S - WD-B 950S Rev. (202209) Safety instructions 2.5 Operation Be very careful around the machine when it is in operation. 2.5.1 High temperatures • The temperature of the washing and rinsing water is 60° C and 85°C. Do not open the machine until the washing and rinsing phases have finished. -
Page 12: Installation Instructions
WD-B 550S - WD-B 950S Rev. (202209) Installation instructions 3. Installation instructions Read the chapters GENERAL INSTRUCTIONS and SAFETY INSTRUCTIONS carefully before starting work. 3.1 General information Read these instructions carefully, as they contain important information regarding the correct installation method. -
Page 13: Power Supply
WD-B 550S - WD-B 950S Rev. (202209) Installation instructions 3.2.3 Power supply Electrical connections are made by qualified personnel in a way that complies with local and national regulations. The machine’s capacity requirements are stipulated in TECHNICAL SPECIFICATIONS. 3.2.4 Water Water connections are made by qualified personnel in a way that complies with local and national regulations. -
Page 14: Transport And Storage
WD-B 550S - WD-B 950S Rev. (202209) Installation instructions 3.3 Transport and storage Always transport the machine in an upright position. • Take care during transport, as there is a risk of tipping. N.B.! The machine must not be transported without a pallet or other support. Some form of support beam must always be used along the sides of the machine during transport. -
Page 15: Marking Of Sections
WD-B 550S - WD-B 950S Rev. (202209) Installation instructions Uppackn A = Stand cross-bar B = Leg C = Pallet D = Handtruck 3.4.1 Marking of sections The machine is normally divided into two sections. In some cases, the machine can be delivered in more than two sections. -
Page 16: Installation
WD-B 550S - WD-B 950S Rev. (202209) Installation instructions 3.5 Installation 3.5.1 Preparing for the installation Check that there is sufficient room for the machine at the installation location. • Check that correct connections are available for water, electricity, drainage and possibly steam at the installation location. -
Page 17: Assembly Of Sections
WD-B 550S - WD-B 950S Rev. (202209) Installation instructions Cover plate Drainage plate Lower track Belt tensioner Cover plate Overflow pipe 3.5.3 Assembly of sections • Remove any transport supports. • Position section 2 where you want it and adjust the height (see machine drawing). - Page 18 WD-B 550S - WD-B 950S Rev. (202209) Installation instructions • Apply plenty of silicone around the openings of both sections and around all screw holes; see the figure below. 35-1-00-006 The figure shows the application of silicone to section 1...
- Page 19 WD-B 550S - WD-B 950S Rev. (202209) Installation instructions • Check that the section is horizontal using a spirit level against the tank body. • Fit the stainless steel clamp strips inside the machine above the rim of the hood and tank, and above the joints between both sections (see the arrows in the figure below).
- Page 20 WD-B 550S - WD-B 950S Rev. (202209) Installation instructions • Fit together all pipes for water, steam, condensation water and drain (pipe for steam and condensation water on steam-heated machines only). The pipes are split at the section join. The necessary parts for joining the pipes together are fitted to the pipes at the joint.
- Page 21 WD-B 550S - WD-B 950S Rev. (202209) Installation instructions • Fit the overflow pipe between the chemical wash tank and final rinse tank. The overflow pipe between the pre-wash tank and first chemical wash tank is kinked in the middle. This ensures that water in the dishwasher flows as intended.
- Page 22 WD-B 550S - WD-B 950S Rev. (202209) Installation instructions • Join the ends of the conveyor belt if it is in position in the machine on delivery (see drawing of the conveyor belt supplied with the dishwasher documentation). If the conveyor belt is delivered separately, it is fitted in the machine as follows: –...
-
Page 23: Positioning The Machine
WD-B 550S - WD-B 950S Rev. (202209) Installation instructions • Fit the chain (A) to the drive motor. 35-1-00-014 Drive motor with drive shaft in outfeed section A = Chain • Pull out and connect the electric cables for the pumps and other components. -
Page 24: Connections
WD-B 550S - WD-B 950S Rev. (202209) Installation instructions 3.6 Connections The picture below shows a machine with the feed direction from left to right. The length of the infeed and outfeed and the number of washing and drying zones vary depending on the size of the machine. -
Page 25: Electrical Connection
WD-B 550S - WD-B 950S Rev. (202209) Installation instructions 3.6.1 Electrical connection Information about electrical connections (1 or 2) is available on the machine’s wiring diagram which is provided on delivery. Store the diagrams in the plastic pocket, located in the electrical cabinet, even after installation. -
Page 26: Ventilation
WD-B 550S - WD-B 950S Rev. (202209) Installation instructions When installing a connection from the ceiling, the pipes must be fed from above down through the cable duct behind the cover plate (A) next to the electrical cabinet. Remove the cover plate, break away the perforated plate on top of the cover plate and debur any sharp edges. -
Page 27: Drain/Waste Pipe
WD-B 550S - WD-B 950S Rev. (202209) Installation instructions 3.6.5 Drain/waste pipe The waste water system connected to (7) should consist of a 50 mm metal pipe that will withstand mechanical impacts. The waste pipe must run to a floor drain, where its opening must be above the water level. - Page 28 WD-B 550S - WD-B 950S Rev. (202209) Installation instructions Connection for drying agent Drying agent connection for dishwasher equipped with demineralised water (option) Water outlet for detergent For information about electrical connections, see the wiring diagram. Drilling holes to connect the equipment...
- Page 29 WD-B 550S - WD-B 950S Rev. (202209) Installation instructions 35-1-04-003 Back panel, chemical wash zone Holes must be drilled through the back and rear hood panel of the chemical wash section for a detergent device for this type of detergent. The chemical wash sections are prepared for drilling by equipping the back panels with a breaker block (A).
-
Page 30: Checking And Setting The Final Rinse Flow
WD-B 550S - WD-B 950S Rev. (202209) Installation instructions Electrical connection of the equipment For information about wiring diagram, see the machine's electrical diagram. 3.7 Checking and setting the final rinse flow “Diagnosis” tab The final rinse flow is set in the factory but should be checked after the machine has been installed. -
Page 31: Adjusting The Air Flow In The Drying Zone
WD-B 550S - WD-B 950S Rev. (202209) Installation instructions 3.8 Adjusting the air flow in the drying zone The air flow through the machine is dependent on a number of factors, e.g.: • machine size • type of heating in the dishwasher •... - Page 32 WD-B 550S - WD-B 950S Rev. (202209) Installation instructions If the dishwasher has more than one drying zone, always adjust the drying zone closest to the rinse zone first. Also adjust the next drying zone if the desired result is not achieved after adjusting the first.
- Page 33 WD-B 550S - WD-B 950S Rev. (202209) Installation instructions 35-1-02-001_R1 35-1-02-002_R1 1 = Guide plate (reversible) 2 = Spreader plate 3 = Fan outlet • A somewhat lesser strengthening effect on the air flow is achieved by placing the angled plate on the side where the gap between the fan outlet and the spreader plate is narrowest.
-
Page 34: Installation And Connection Of Auxiliary Equipment And Options
WD-B 550S - WD-B 950S Rev. (202209) Installation instructions 35-1-02-006_R1 The angled side of the guide plates faces downwards and points in the direction in which a stronger air flow is required. This provides maximum strengthening of the air flow in the required direction... -
Page 35: Trial Operation
WD-B 550S - WD-B 950S Rev. (202209) Installation instructions 3.10 Trial operation Prepare the machine for trial operation with the help of OPERATING INSTRUCTIONS. The instructions describe the measures that must be taken to prepare the machine for operation. 3.10.1 Commissioning protocol This should be completed when the machine is started up and used. -
Page 36: Documentation
WD-B 550S - WD-B 950S Rev. (202209) Installation instructions 3. Check the setting of the reference values: All the reference values have been set to the recommended values on delivery. • Check that all reference values are correctly adjusted. •... -
Page 37: Operating Instructions
WD-B 550S - WD-B 950S Rev. (202209) Operating instructions 4. Operating instructions Read the chapters GENERAL INSTRUCTIONS and SAFETY INSTRUCTIONS carefully before starting work. The machine’s touch panel contains built-in guides on what and how things must be done. The use of the machine is dependent on how the machine is equipped. -
Page 38: Before Washing
WD-B 550S - WD-B 950S Rev. (202209) Operating instructions 4.1 Before washing 4.1.1 Machine design WDB_11_T Emergency stop Curtain Touch panel Main switch Start / Stop of conveyor belt Limit switch Light bar for alarm signals (option) Final rinse nozzle... - Page 39 WD-B 550S - WD-B 950S Rev. (202209) Operating instructions Nozzle, intermediate rinse Wash arm Nozzle, intermediate rinse (option) Lever for switching between normal and heavily soiled loads (option) Filter Photocell Rubber sleeve Outlet seal Filter Filter for the final rinse...
-
Page 40: Touch Panel
WD-B 550S - WD-B 950S Rev. (202209) Operating instructions 4.1.2 Touch panel General The panel comprises four fields: • A = Top bar • B = Process bar • C = Activity field • D = Bottom bar Active (clickable) symbols are in blue. Inactive symbols are in grey. The activity... - Page 41 WD-B 550S - WD-B 950S Rev. (202209) Operating instructions Top bar (A) This indicates the machine status using text and symbols (2, 3, 4) and the date and time (1). Alarm and information messages are displayed here. More information about these is shown in the activity field (C).
- Page 42 WD-B 550S - WD-B 950S Rev. (202209) Operating instructions Symbols The following symbols and a brief description may be displayed in the various fields of the panel (some depending on machine type). Symbol Description Symbol Description Black: Information Change the water...
- Page 43 WD-B 550S - WD-B 950S Rev. (202209) Operating instructions Symbol Description Symbol Description Logged in Logged out Low flow Machine status No / Cancel No flow Other Alarm for operator START / ON Protocol Glass Plates Pots Relay test Repeat / Machine is in...
-
Page 44: Preparations Before Filling
WD-B 550S - WD-B 950S Rev. (202209) Operating instructions 4.1.3 Preparations before filling In this chapter, figures are given in brackets from the figure beneath chapter 4.1.1 Machine design. Check: • that the machine and removable parts have been cleaned. If not – clean them! •... -
Page 45: Filling And Heating The Machine
WD-B 550S - WD-B 950S Rev. (202209) Operating instructions 4.1.4 Filling and heating the machine Start button Activity text • Press the ON/OFF button beneath the touch panel to start the machine. It may take up to 10 seconds before the screen on the touch panel illuminates. -
Page 46: Washing
WD-B 550S - WD-B 950S Rev. (202209) Operating instructions 4.2 Washing In this chapter, figures are given in brackets from the figure beneath chapter 4.1.1 Machine design. Proceed as follows: • When washing is to start, the dishwasher must be prepared, i.e. the washing tanks must be filled, the water in them heated and the conveyor belt started. -
Page 47: Quick Setting, Washing Pressure (Option)
WD-B 550S - WD-B 950S Rev. (202209) Operating instructions 4.2.1 Quick setting, washing pressure (option) The dishwasher can also be equipped with the option to adjust the washing pressure depending on whether you are washing normally or heavily soiled loads. -
Page 48: Selecting The Contact Time/Washing Time
WD-B 550S - WD-B 950S Rev. (202209) Operating instructions 4.2.2 Selecting the contact time/washing time When the machine's feed has started, it is indicated on the display that the machine is ready to wash and specifying a contact time in seconds. -
Page 49: Feeding Loads Into The Machine
WD-B 550S - WD-B 950S Rev. (202209) Operating instructions 4.2.3 Feeding loads into the machine • Before feeding the item into the machine, soak dried-on food and remove large food particles. Ordinary washing-up liquid must not be used for soaking or pre-washing. -
Page 50: Emergency Stop
WD-B 550S - WD-B 950S Rev. (202209) Operating instructions 4.2.6 Emergency stop The machine has three emergency stop buttons. One of the emergency stop buttons (1) is located beneath the touch panel. The other emergency stops (1) are located at the infeed and outfeed. -
Page 51: Checking The Wash Result
WD-B 550S - WD-B 950S Rev. (202209) Operating instructions 4.2.9 Checking the wash result The dishware should be checked after each wash for: PROBLEM CAUSES & MEASURES Starch spots • Scraping: Important to remove as much food particles as possible before washing. -
Page 52: After Use - Cleaning
WD-B 550S - WD-B 950S Rev. (202209) Operating instructions 4.3 After use – Cleaning HACCP is a preventive inspection system to ensure hygiene requirements are met during the washing process and cleaning of the machine. As a result of its design, the machine meets strict hygiene requirements. -
Page 53: Daily Cleaning
WD-B 550S - WD-B 950S Rev. (202209) Operating instructions 4.3.3 Daily cleaning Internally The machine should be cleaned at least once a day when in normal operation. Go to the menu icon and select “Cleaning”. Follow the instructions displayed on the machine's touch panel. -
Page 54: Operating Problems
WD-B 550S - WD-B 950S Rev. (202209) Operating instructions 4.3.5 Operating problems Troubleshooting If the touch panel screen gives no indication of whether the ON/OFF button has been pressed, check the main switch to see whether it is turned on. If the problem persists, contact authorised service personnel. - Page 55 WD-B 550S - WD-B 950S Rev. (202209) Operating instructions Troubleshooting Problem Cause Action Dishware does not dry. The rinse nozzles are blocked. Check and clean the nozzles. Too little drying agent. Check the quantity of drying agent. All errors displayed on the touch panel have an error code, which is displayed in the alarm.
- Page 56 WD-B 550S - WD-B 950S Rev. (202209) Operating instructions Follow the instructions on the touch panel, which are displayed by clicking on the symbol (6). The information alarm can normally be reset using the X button (7), if you do not wish to click through the entire guide.
- Page 57 WD-B 550S - WD-B 950S Rev. (202209) Operating instructions Critical error alarms (red) A critical error alarm is generated because a serious error has occurred. The majority of these alarms cannot be reset by the operator, and service personnel must be contacted.
-
Page 58: Technical Specifications
WD-B 550S - WD-B 950S Rev. (202209) Technical specifications 5. Technical specifications The manufacturer reserves the right to make changes to the technical data. TECHNICAL DATA 550S 600S 650S 700S 750S 800S 850S 900S 950S Pump motor, pre-rinsing (kW) 0.74 0.74... - Page 59 WD-B 550S - WD-B 950S Rev. (202209) Technical specifications CAPACITY 550S 600S 650S 700S 750S 800S 850S 900S 950S OPERATING DATA Capacity, HC conveyor, normal wash 3017 3516 4349 4848 5681 4848 5681 6180 7013 (plates/h) Capacity, HC conveyor, as per DIN...
- Page 60 WD-B 550S - WD-B 950S Rev. (202209) Technical specifications CONNECTION, STEAM- 550S 600S 650S 700S 750S 800S 850S 900S 950S HEATED MACHINE Total connected load (kW) Main fuse 400-415 V 3N~ (A) * Max. connection area 400-415V 3N~ (L1-L3, N, PE) (TN-S) Cu (mm²)
Need help?
Do you have a question about the WD-B 550S and is the answer not in the manual?
Questions and answers