
Related Manuals for Wexiodisk WD-6C


Summary of Contents for Wexiodisk WD-6C
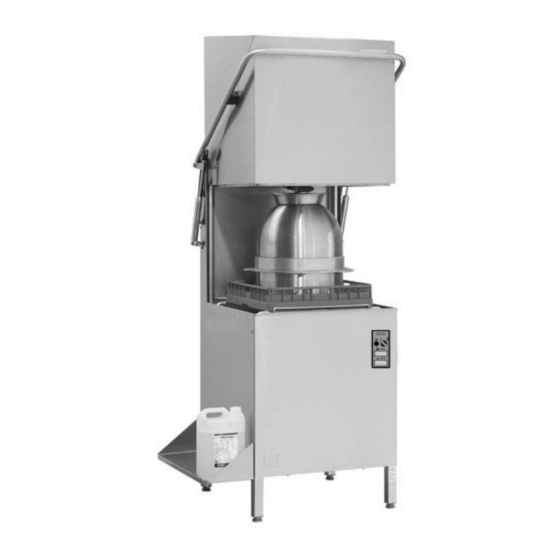
- Page 1 HOOD TYPE DISHWASHER WD-6C (translation of the original documentation) Installation and operationmanual S/N: (En) Valid from: 201305 Rev.: 3.0...
-
Page 3: Table Of Contents
WD-6C Rev. 1. General instructions ................ 1 1.1 Symbols used in this manual ................1 1.2 Symbols on the dishwasher ................2 1.2.1 Machine marking ..................2 1.3 Checking agreement between the appliance and the manual ......2 2. Safety instructions ................3 2.1 General ...................... - Page 4 WD-6C Rev. 3.4 Installation ......................8 3.4.1 Position of the machine ................8 3.4.2 Installing auxiliary equipment ..............9 3.4.3 Connections .................... 12 3.4.4 Anti-siphoning device (option) ..............13 3.4.5 Steam hood with extractor (option) ............14 3.4.6 Electricity connection ................15 3.4.7 Water connection ..................
-
Page 5: General Instructions
WD-6C Rev. 3.0 (201305) General instructions 1. General instructions Read the instructions in this manual carefully as they contain important informa- tion regarding correct, effective and safe installation, use and service of the dish- washer. Keep this manual in a safe place for eventual use by other operators of the dish- washer. -
Page 6: Symbols On The Dishwasher
WD-6C Rev. 3.0 (201305) General instructions 1.2 Symbols on the dishwasher This symbol on a machine part warns of electrical equipment. The part may only be removed by a qualified electrician or trained personnel. 1.2.1 Machine marking The machine has two rating plates, one of which is placed at the bottom of one side of the machine and the other in the electrical cabinet. -
Page 7: Safety Instructions
WD-6C Rev. 3.0 (201305) Safety instructions 2. Safety instructions 2.1 General The machine is CE marked, which means that the machine complies with the re- quirements of the EU machinery directive with regards to product safety. Product safety means the machine has a design which prevents personal injury or dam- age to property. -
Page 8: Detergent And Rinsing Agent
WD-6C Rev. 3.0 (201305) Safety instructions 2.4 Detergent and rinsing agent Only detergent and drying agent intended for industrial dishwashing machines are to be used. Ordinary washing-up liquid must not be used in the machine or for soaking. Contact your detergent supplier regarding the selection of a suitable de- tergent. -
Page 9: Cleaning The Floor
WD-6C Rev. 3.0 (201305) Safety instructions 2.7 Cleaning the floor When the floor is washed, water can splash up under the machine and damage the components. These have not been designed to withstand being washed with water. Do not wash the floor within a distance of 1 metre from the dishwasher. -
Page 10: Installation
WD-6C Rev. 3.0 (201305) Installation 3. Installation 3.1 General information The machine must be installed by authorised personnel only. Read these instructions carefully. They contain important information which will help to ensure that the machine is installed correctly. The level pipe in the dishwasher has been replaced with a bottom filter. -
Page 11: Transport And Storage
WD-6C Rev. 3.0 (201305) Installation 3.3 Transport and storage Always transport the machine upright. Take care during transport as there is a risk of the machine tipping over. NOTE: The machine must not be transported without a pallet or other support. -
Page 12: Installation
WD-6C Rev. 3.0 (201305) Installation 3.4 Installation Check that the overheating protection on the booster heater is set to zero. If holes need to be made in the machine, each hole must be fitted with an edge strip or similar protection. -
Page 13: Installing Auxiliary Equipment
WD-6C Rev. 3.0 (201305) Installation 3.4.2 Installing auxiliary equipment Once the machine is in place and has been adjusted horizontally and vertically, the auxiliary equipment can be fitted. The machine can be positioned so that it can be straight-loaded or corner-loaded. - Page 14 WD-6C Rev. 3.0 (201305) Installation Connection to the left- or right-hand side of the machine 300730_C_R2b A - A Water connection Electrical connection Floor drain • Attach the sink connection to the machine and then adjust. • Drill two ø 4.5 mm holes through the sink connection and the machine, ap- prox.
- Page 15 WD-6C Rev. 3.0 (201305) Installation Connection to the front of the machine NOTE: When connecting sinks and conveyors, no holes must be drilled on the front of the machine. If the machine is to be corner-loaded, there must be at least 300 mm of free space in front of the machine to allow the electrical cabinet and the door of the storage cabinet for detergent and drying agent (option) to be opened.
-
Page 16: Connections
WD-6C Rev. 3.0 (201305) Installation 3.4.3 Connections min.20 301860_C_r3 • A=Steam hood with extractor (option) Power connection Water connection Drain connection Plugged hole for a detergent hose Water outlet for detergent dosing Water connection from below (option) -
Page 17: Anti-Siphoning Device (Option)
WD-6C Rev. 3.0 (201305) Installation 3.4.4 Anti-siphoning device (option) 301750_2 • The pipe is connected to the machine's water connection (A). • The pipe (B) must be cut to the correct length during the installation. -
Page 18: Steam Hood With Extractor (Option)
WD-6C Rev. 3.0 (201305) Installation 3.4.5 Steam hood with extractor (option) 45089 Steam hood with extractor Existing screws Steam hood Bracket Connection for ventilation ø 160 mm • Undo the existing M4 screws at (1). • Replace the existing screws and washers with the longer M4 screws and the larger washers provided. -
Page 19: Electricity Connection
WD-6C Rev. 3.0 (201305) Installation 3.4.6 Electricity connection This symbol on a component is a warning of electrical equipment. The component may only be removed by a qualified electrician. The machine is sensitive to elec- trostatic discharge (ESD), which is why a static electricity wristband must be used when handling the electronics. -
Page 20: Detergent And Drying Agent Connection
WD-6C Rev. 3.0 (201305) Installation 3.4.9 Detergent and drying agent connection Drying agent equipment is included with the machine. Connect the suction hose on the drying agent injector to the drying agent container. The equipment for liquid detergent is option. If the machine is supplied with deter- gent equipment, connect the suction hose on the detergent pump to the detergent container. -
Page 21: Trial Run
WD-6C Rev. 3.0 (201305) Installation 3.5 Trial run Read the INSTRUCTIONS FOR USE before preparing the machine for the trial run. They contain a description of the actions to be taken to prepare the machine for operation. 3.5.1 Start-up schedule This should be completed and signed by the customer on start-up. - Page 22 WD-6C Rev. 3.0 (201305) Installation 1. Check: • Water and drain connections • That the machine is evenly balanced • Detergent and drying agent • Filters and level pipe are in place • The overheating protection on the booster heater is set to zero.
-
Page 23: Technical Documentation
WD-6C Rev. 3.0 (201305) Installation 3.6 Technical documentation To ensure that the machine is operated and serviced correctly, it is important that the documentation supplied with the machine is made available to the personnel using it. The installation and user manual, which describes how to operate and maintain the machine, must be kept near the machine. -
Page 24: Instructions For Use
WD-6C Rev. 3.0 (201305) Instructions for use 4. Instructions for use All personnel using the machine should be trained in how the machine works by the person responsible for staff safety. The dishwasher should not be used by anyone suffering from a physical or mental illness. -
Page 25: Preparations Before Filling Fyllning
WD-6C Rev. 3.0 (201305) Instructions for use Symbol for tank level. Green pilot lamp. The lamp lights when the water reaches the correct level. Thermometer for washing temperature. Symbol for final rinse. Thermometer for final rinse temperature. Symbol for filling. -
Page 26: Using The Machine
WD-6C Rev. 3.0 (201305) Instructions for use 4.2 Using the machine 4.2.1 Washing The dishware must not be soaked or pre-washed in washing up liquid. Make sure that the dishes are in a position where they cannot move out of the wash basket during the wash and rinse phases. -
Page 27: Change Water
WD-6C Rev. 3.0 (201305) Instructions for use 4.2.2 Change water For the best washing results, it is important to change water often. When the dish- es are normally dirty, the dish water should be replaced after about 50 washes. Always change the water if there are problems with foam in chemical tank. -
Page 28: Weekly Cleaning
WD-6C Rev. 3.0 (201305) Instructions for use 4.3.2 Weekly cleaning Weekly cleaning must be more thorough than daily cleaning. In addition to the daily cleaning tasks, the following tasks must be carried out each week: • Remove the washing arms. Loosen the lock nut (B) in the centre of the washing arm and remove the washing arm. -
Page 29: Incorrect Cleaning Methods
WD-6C Rev. 3.0 (201305) Instructions for use 4.3.4 Incorrect cleaning methods NOTE: Using the wrong cleaning methods can result in damage to the machine. Please note the following points: • Do NOT use steel wool as it will cause rust to form on the machine. -
Page 30: Malfunctions
WD-6C Rev. 3.0 (201305) Instructions for use 4.3.5 Malfunctions Troubleshooting The following faults can be dealt with by the operator. If the problems remains, call the service. PROBLEM CAUSE ACTION The machine does not start. The circuit breaker is switched off. - Page 31 WD-6C Rev. 3.0 (201305) Instructions for use If you need to contact service personnel, be prepared to provide the following in- formation about the machine: • machine type and model • machine number and date on which the machine was installed •...
-
Page 32: Technical Information
WD-6C Rev. 3.0 (201305) Technical information 5. Technical information We reserve the right to change technical data. TECHNICAL DATA Wash pump (kW) Booster heater (kW) Tank heat (kW) Tank volume (l) Machine in operation (kg) 150 / 160* IP-class (IP) - Page 33 WD-6C Rev. 3.0 (201305) Technical information SIZE AND WEIGHT FOR TRANSPORT *, LxWxH (mm) Size 765x710x1560 * (kg) Weight 105 / 115 * Including packaging ** Machine with insulated hood...
Need help?
Do you have a question about the WD-6C and is the answer not in the manual?
Questions and answers