Hettich EBA 280 Operating Manual
Hide thumbs
Also See for EBA 280:
- Operating instructions manual (190 pages) ,
- Operating manual (166 pages) ,
- Operating instructions manual (52 pages)

Related Manuals for Hettich EBA 280


Summary of Contents for Hettich EBA 280
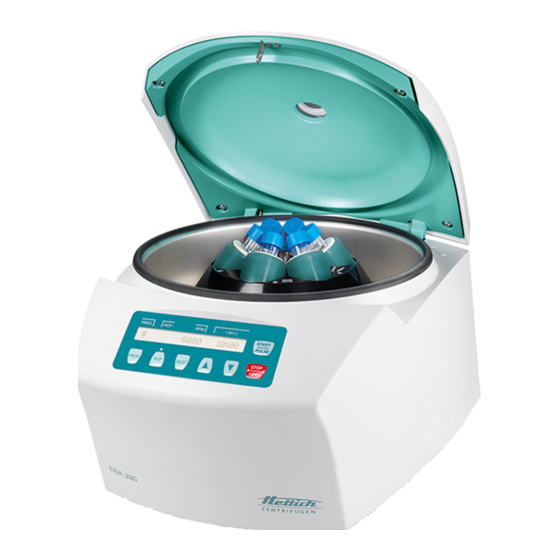
- Page 1 EBA 280 EBA 280 S Operating Manual............3 Rev. 01 / 11.2022 Andreas Hettich GmbH & Co. KG AB1101EN_SA...
- Page 2 Single Registration Number: DE-MF-000010680 © 2014 by Andreas Hettich GmbH & Co. KG All rights reserved. No part of this publication may be reproduced without the prior written permission of the copyright owner. Änderungen vorbehalten! , Modifications reserved! , Sous réserve de modifications ! , Con riserva di modifiche! AB1101EN_SA / Rev.
-
Page 3: Table Of Contents
Contents How to use these operating instructions .........................5 Symbol meanings ..............................5 Intended use ................................6 Remaining risks ..............................6 Technical specifications ............................7 Notes on safety...............................8 Transport and storage.............................9 Transport .................................9 Storage ................................9 Scope of delivery ..............................9 Removing the transport securing device.......................10 Initial operation ..............................10 Opening and closing the lid ..........................11 11.1 Opening the lid ............................11... - Page 4 Centrifugation of materials or mixtures of materials with a density higher than 1.2 kg/dm .......34 Emergency unlocking ............................34 Maintenance and servicing..........................35 24.1 Centrifuge (housing, lid and centrifuging chamber)..................35 24.1.1 Surface cleaning and care ........................35 24.1.2 Surface disinfection ..........................35 24.1.3 Removal of radioactive contaminants ....................35 24.2 Rotors and Attachments ..........................36 24.2.1...
-
Page 5: How To Use These Operating Instructions
How to use these operating instructions Before using the centrifuge, read the operating instructions and observe them. The operating instructions are a part of the device. They must always be kept readily available. If the device is set up at a different location, the operating instructions must be provided with it. Symbol meanings Symbol on the device: Attention, general hazard area. -
Page 6: Intended Use
The centrifuge is only meant for this purpose. Another use or one which goes beyond this, is considered to be non-intended. The company Andreas Hettich GmbH & Co. KG is not liable for damage resulting from this. -
Page 7: Technical Specifications
Technical specifications Andreas Hettich GmbH & Co. KG Manufacturer D-78532 Tuttlingen Model EBA 280 280 S Basic-UDI-DI 4050674010008QE Type 1101 1101-01 1102 1102-01 Mains voltage ( 10%) 200 - 240 V 1 100 - 127 V 1 - 240 V 1... -
Page 8: Notes On Safety
Notes on safety No claim of warranty will be considered by the manufacturer unless ALL instructions in this manual have been followed. Reports of serious incidents involving the device Report any serious incidents involving the device to the manufacturer and, if necessary, to the competent authority. -
Page 9: Transport And Storage
Repairs must only be carried out by personnel authorised to do so by the manufacturer. Only original spare parts and original accessories licensed by the Andreas Hettich GmbH & Co. KG company are allowed to be utilised. -
Page 10: Removing The Transport Securing Device
Removing the transport securing device It is imperative that the transport securing device be removed. Keep the transport securing device in a safe place since it must be installed again before transporting the device. The device may only be transported with the transport securing device installed. To protect the device from damage during transport, the motor is fixed in place. -
Page 11: Opening And Closing The Lid
Opening and closing the lid 11.1 Opening the lid The lid can only be opened if the centrifuge is switched on and the rotor is stationary. If this shouldn't be possible, see the "Emergency unlock" chapter. When the cycle counter is activated, after a centrifugation run, while opening the lid, the remaining number of running cycles (centrifugation runs) is briefly displayed. -
Page 12: Inserting And Removing The Rotor
Inserting and removing the rotor Rotor with unlocking knob Inserting the rotor: Dirt particles between the motor shaft and rotor prevent the rotor from having a perfect seat and cause it to run unsteadily. If necessary, clean the motor shaft (B) and the rotor hub before inserting the rotor. -
Page 13: Loading The Rotor
Loading the rotor Standard centrifuge containers of glass will not stand RCF values exceeding 4000 (DIN 58970, pg. 2). Hold the rotor firmly at the left and right and pull up lightly to check whether it has properly engaged on the motor shaft. -
Page 14: Operating And Display Elements
Operating and display elements PROG t/min:s START PULSE STOP PROG OPEN 14.1 Displayed symbols Lid unlocked. Lid locked. Rotation display. The rotation display lights up, rotating counter clockwise, as long as the rotor is turning. 14.2 Control panel keys Calling up programs PROG ... -
Page 15: Setting Options
14.3 Setting options PROG RCL Program location of the program to be called The program locations 1 to 9 and # can be called. t/min Runtime. Adjustable from 1 - 99 min, in steps of 1 minute. t/sec Runtime. Adjustable from 1 - 59 s, in steps of 1 second. Continuous run "--:--". -
Page 16: Programming
Programming No programs should be saved at program location #. The program location # serves as intermediate memory for changed centrifugation parameters. If centrifugation parameters are changed, but are not saved to a program location afterwards, the display shows a dash "-" instead of the program location number. After starting the centrifugation run, these centrifugation parameters are then automatically saved at program location #. - Page 17 Example: Example: RPM display (RPM) RCF display ( RCF ) Press the key to activate the RPM display PROG t/min:s PROG t/min:s (RPM) or the RCF display ( RCF ) as needed. The LED above the key is illuminated if the RCF display ( RCF ) is activated.
-
Page 18: Calling Up Programs
15.2 Calling up programs Example: Example: RPM display (RPM) RCF display ( RCF ) Press the key. PROG t/min:s PROG t/min:s PROG PROG RCL : Program location of the displayed centrifugation parameters. With the keys, set the program location PROG t/min:s PROG... -
Page 19: Centrifugation
Centrifugation In accordance with EN / IEC 61010-2-020, no persons, hazardous substances or objects may be within a safety range 300 mm around the centrifuge during a centrifugation run. After each centrifugation run, while the lid is unlocking, the remaining number of running cycles (centrifugation runs) will be briefly displayed. -
Page 20: Continuous Run
Example: Example: RPM display (RPM) RCF display ( RCF ) After the time elapses or if the centrifugation run is PROG t/min:s PROG t/min:s STOP OPEN aborted by pressing the key, the run-out occurs with the set brake stage. The brake stage is displayed. -
Page 21: Short-Term Centrifugation
16.3 Short-term centrifugation Example: Example: RPM display (RPM) RCF display ( RCF ) Press the key to activate the RPM display PROG t/min:s PROG t/min:s (RPM) or the RCF display ( RCF ) as needed. The LED above the key is illuminated if the RCF display ( RCF ) is activated. -
Page 22: Rotor Detection
Rotor detection The centrifuge is equipped with automatic rotor detection. Rotor detection is carried out after starting each centrifugation run. If the rotor code of a rotor is read in for the first time by the rotor detection, the centrifugation run then stops automatically after rotor detection. -
Page 23: Cycle Counter
Cycle counter The period of use of certain rotors and hangers is limited to a maximum number of run cycles (centrifugation runs). The rotors and hangers in question are labeled with the maximum permissible number of run cycles. The centrifuge is equipped with a cycle counter, which counts the running cycles (centrifugation runs) of the various rotor codes (see also the "Rotor detection"... -
Page 24: Settings And Queries
Example: Check whether the displayed maximum number of run PROG t/min:s cycles matches the specifications on the rotor/hangers. If not, the maximum permissible number of run cycles specified on the rotor/hangers must be set. For rotors and hangers whose period of use is not limited to a maximum number of run cycles (centrifugation runs), zero must be set. -
Page 25: Querying System Information
20.1 Querying system information The following system information can be queried: Centrifuge model The maximum speeds of the various rotor codes, Centrifuge program version Frequency converter type Frequency converter program version With the rotor at a standstill, the query can proceed as follows: STOP OPEN The procedure can be aborted at any time by pressing the... -
Page 26: Acoustic Signal
20.2 Acoustic signal The acoustic signal sounds: after a malfunction occurs in a 2-second interval. after ending the centrifugation run and the rotor is at a standstill in a 30-second interval. The acoustic signal is ended by pressing any key. If the rotor is at a standstill, the acoustic signal can be set as follows: STOP OPEN... -
Page 27: Optical Signal After Ending The Centrifugation Run
Press the key to save the setting. START PROG t/min:s PULSE PROG t/min:s Press the key once to exit the " Example: STOP OPEN Settings" PROG t/min:s PROG t/min:s menu or press twice to exit the " MACHINE MENU ". -
Page 28: Automatic Unlocking Of The Lid After The Centrifugation Run
20.4 Automatic unlocking of the lid after the centrifugation run It can be set whether the lid should automatically unlock or not after the centrifugation run. With the rotor at a standstill, this can be set as follows: STOP OPEN The procedure can be aborted at any time by pressing the key. -
Page 29: Backlighting Of The Display
20.5 Backlighting of the display To save energy, it can be set that, after a centrifugation run, the backlighting of the display switches off after 2 minutes. With the rotor at a standstill, this can be set as follows: STOP OPEN The procedure can be aborted at any time by pressing the key. -
Page 30: Displayed Centrifugation Parameters After Switching On The Device
20.6 Displayed centrifugation parameters after switching on the device It can be set whether the centrifugation parameters of the last used program or of program 1 should be displayed after switching on the device. With the rotor at a standstill, this can be set as follows: STOP OPEN The procedure can be aborted at any time by pressing the... -
Page 31: Activating/Deactivating The "Dual Time" Function
20.7 Activating/deactivating the "Dual time" function In order to be able to set the runtime counter (parameter Begins at START and parameter Begins at SPEED), the "Dual time" function must be activated. This function is activated ex works. With the rotor at a standstill, this can be set as follows: STOP OPEN The procedure can be aborted at any time by pressing the... -
Page 32: Querying The Hours Of Operation And The Number Of Centrifugation Runs
20.8 Querying the hours of operation and the number of centrifugation runs The hours of operation are divided into internal and external hours of operation. Internal hours of operation: Total time the device was switched on. External hours of operation: Total time of the previous centrifugation runs. With the rotor at a standstill, the query can proceed as follows: STOP OPEN... -
Page 33: Resetting The Cycle Counter To Zero
20.9 Resetting the cycle counter to zero After the rotor/hanger has been exchanged, the cycle counter of the respective rotor code must be reset to zero again. The cycle counter may only be reset to zero if the rotor/hanger has been exchanged for a new rotor/hanger first. -
Page 34: Relative Centrifugal Force (Rcf)
Relative centrifugal force (RCF) The relative centrifugal force (RCF) is given as a multiple of the acceleration of gravity (g). It is a unit-free value and serves to compare the separation and sedimentation performance. These values are calculated using the formula below: ... -
Page 35: Maintenance And Servicing
Maintenance and servicing The device can be contaminated. Pull the mains plug before cleaning. Before any other cleaning or decontamination process other than that recommended by the manufacturer is applied, the user has to check with the manufacturer that the planned process does not damage the device. ... -
Page 36: Rotors And Attachments
24.2 Rotors and Attachments 24.2.1 Cleaning and care In order to avoid corrosion and changes in materials, the rotors and accessories have to be cleaned regularly with soap or with a mild cleaning agent and a moist cloth. Cleaning is recommended at least once a week. Contaminants must be removed immediately. -
Page 37: Autoclaving
24.3 Autoclaving The following accessory can be autoclaved at 121°C / 250°F (20 min): Swing-out rotors without hangers Reductions No statement can be made about the degree of sterility. Autoclaving accelerates the ageing process of plastics. In addition, autoclaving may discolour plastics. 24.4 Centrifuge containers ... -
Page 38: Faults
Faults If the fault cannot be eliminated with the help of the fault table, please inform Customer Service. Please specify the type of centrifuge and the serial number. Both numbers can be found on the name plate of the centrifuge. Perform a MAINS RESET: ... - Page 39 Message / fault Cause Remedy Perform a MAINS RESET when the CTRL ERROR 22 – 25.4 Error / defect electronics rotor has been stationary. CRC ERROR 27, 27.1 COM ERROR 31 – 36 FC ERROR 61.1 – 61.21, 61.64 – 61.142 ...
-
Page 40: Change Mains Input Fuses
Before returning the device, a transport securing device has to be installed. If the device or its accessories are returned to Andreas Hettich GmbH & Co. KG, in order to provide protection for people, the environment and materials, it has to be decontaminated and cleaned before being shipped. -
Page 41: Anhang / Appendix
1147 1147 1063-6 Ausschwingrotor 6-fach / Swing out rotor 6-times 2078 0536 0518 90° EBA 280: 4700 RPM EBA 280S: 6000 RPM 4,5 - 7,5 – 9 – 8,5 - Kapazität / capacity 4 – 7 13 x 11 x... - Page 42 1142 1127-A Ausschwingrotor 12-fach / Swing out rotor 12-times 0553 60° 1,6 - 5 2,6 – 3,4 2,7 - 3 Kapazität / capacity Maße / dimensions x L 13 x 75 13 x 75 13 x 65 11 x 66 Anzahl p.
- Page 43 1137 1634 1633 1635 Winkelrotor 6-fach / Angle rotor 6-times 0521 0546 0519 0545 0518 36° 4 - 7 Kapazität / capacity 9-10 16 x 15 x Maße / dimensions x L 34 x 100 29 x 107 24 x 100 26 x 95 17 x 100 13 x 100...
- Page 44 1139 1054-A Winkelrotor 12-fach / Angle rotor 12-times 0518 0553 0701 35° 4,5 - Kapazität / capacity 1,6 – 5,0 1,1 – 1,4 – 12 x 13 x 11 x 13 x Maße / dimensions x L 17 x 102 13 x 75 8 x 66 12 x 60...
- Page 45 1133 Winkelrotor 12-fach / (mit Dekantierhilfe) Angle rotor 12-times with decanter aid 0553 0501 0578 35° Kapazität / capacity Maße / dimensions x L 12 x 75 12 x 82 12 x 100 Anzahl p. Rotor / number p. rotor Drehzahl / speed 5000 2879...
Need help?
Do you have a question about the EBA 280 and is the answer not in the manual?
Questions and answers