
Related Manuals for Gainscha GA-2408T Series


Summary of Contents for Gainscha GA-2408T Series
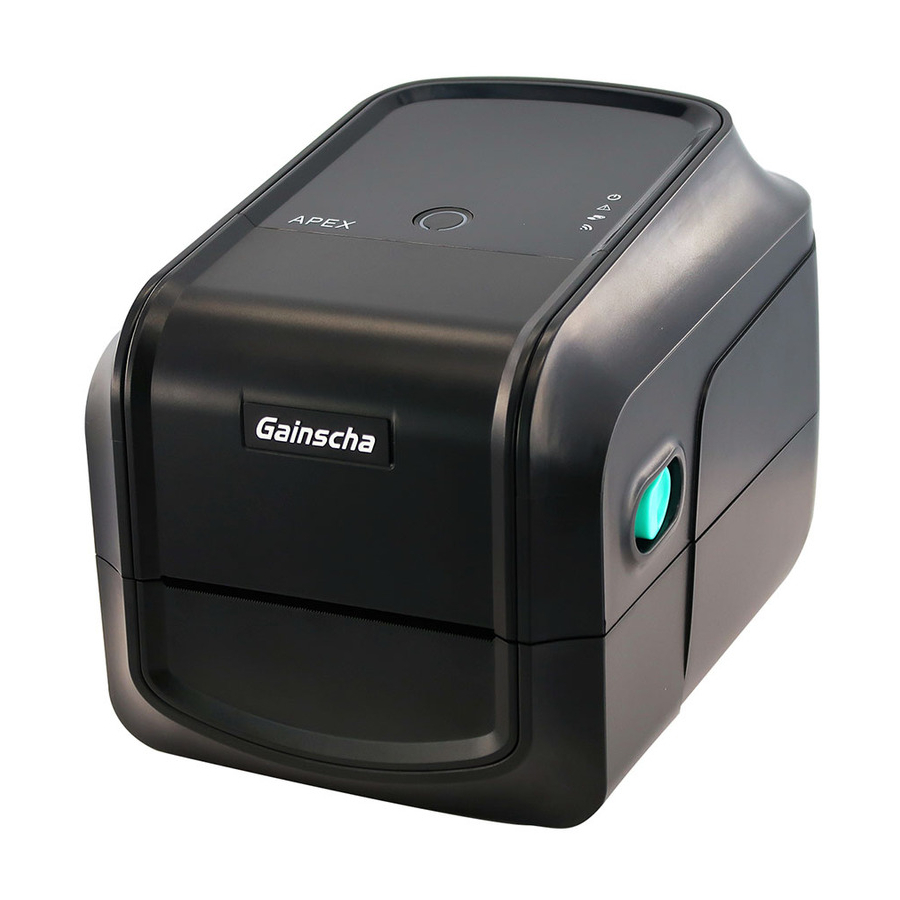
- Page 1 GA-2408T / GA-3406T / GA-6404T / Series THERMAL TRANSFER / DIRECT THERMAL APEX LABEL PRINTER USER’S MANUAL Ver.1.1.0...
- Page 2 This transmitter shall not be in the same position or work in conjunction with any other antenna or transmitter . Environmental protection Do not dispose of this product in an unsorted public trash can. You should recycle this product according to local regulations. For more information, please browse our website: http://www.gainscha.com.tw...
-
Page 3: Table Of Contents
Contents 1. Introduction ..............................7 1.1 Product Introduction........................... 7 1.2 Product Features ........................... 9 1.2.1 Printer Standard Features ......................9 2. Operations Overview ..........................13 2.1 Unpacking and Inspection ......................13 2.2 Printer Overview ..........................14 2.2.1 Front View ............................14 2.2.2 Interior View all Series (Contains Eco-friendly printing solutions introduction)19 2.2.3 Front View (All Series) ....................... - Page 4 3.4.1 Loading the Roll Labels ......................28 3.4.2 Ribbon and print media loading diagram ................28 3.5 Loading the Cutter ..........................29 3.6 Loading the Peeler ..........................32 4. Button Functions ............................35 4.1 Regular Button Functions ........................35 4.2 Power-on Utilities ..........................35 5.
- Page 5 5.12 Setting File ............................48 5.13 Printer Utility - Command Tool....................49 1. Send Command ..........................49 2. Send File............................... 49 5.14 Printer Utility – Printer Function ................... 50 5.15 Printer Utility – File Manager ....................51 1. File Lists ..............................51 2. Add File ..............................51 5.16 Printer Utility –...
- Page 6 6. Read Kill Password ........................... 57 7. Remove Tag ............................57 6. Label editing software - BarTender ....................58 1. Design labels and print contents on labels ................58 2. Import the database ..........................59 3. Call database batch printing ......................61 4.
- Page 7 3.2 Set Kill Password ..........................71 8. RFID data is written in BarTender ......................72 8.1 Writes Open Data in EPC Area....................72 8.2 Rules for writing data in LOCK state ..................73 8.3 EPC Area Writes Locking Data ....................73 8.4 Data read rule in LOCK state ..................... 73 9.
- Page 8 13. Troubleshooting ............................88 13.1 Common Problems......................... 88 14. Maintenance ............................. 90 15. Revise History ............................91...
-
Page 9: Introduction
1. Introduction 1.1 Product Introduction Thank you very much for purchasing Gainscha bar code label printer. The T series printer features the single motor that is capable of handling a large capacity of 300 meters ribbon and large rolls of media inside its sleek design. If the 5”... - Page 10 Applications o Manufacturing & Warehousing o Healthcare Work in Progress Patient Identification Item Labels Pharmacy Instruction labels Specimen Identification Agency labels o Retail Marking Compliance labels Price tags Logistics management Shelf labels ...
-
Page 11: Product Features
1.2 Product Features 1.2.1 Printer Standard Features PRINTER GA-2408T GA-3406T GA-2408T GA-3406T GA-6404T MODEL Grade Standard Standard Empower Empower Empower Resolution 8dots/mm 12dots/mm 8dots/mm 12dots/mm 23.6dots/mm (203DPI) (300DPI) (203DPI) (300DPI) (600DPI) Printing Thermal Transfer & Direct Thermal Method Max. print 203mm(8”)/ 152mm(6”)/ 203mm(8”)/... - Page 12 • Peeler Sensors • Head open sensor, Ribbon end sensor, Reflective sensor (moveable), Transmissive sensor (moveable) • Guillotine cutting system with a peel-off sensor Power External universal switching power supply Input: AC 100-240V, 2.5A, 50-60Hz, Output: DC 24V, 2.5A, 60W User •...
- Page 13 Media 0.06~0.254mm (2.36 ~ 10 mil) thickness Media core 25.4 mm (1”) diameter Label roll 127 mm (5“) OD capacity Label length 5 ~25,400 mm 5 ~11,430 mm 5 ~25,400 mm 5 ~11,430 mm 5 ~11,430 mm (0.2“ ~450“) (0.2“ ~ 1,000“) (0.2“...
- Page 14 1.2.2 Printer Optional Features Product option feature User Dealer Factory options options options Peeler module ○ ○ Regular full cut cutter (Guillotine cutter) ○ ○ Media thickness: 0.06~0.19 mm Media type: receipt and label liner w/o glue Regular full/partial cutter (TextileCare Cutter) ○...
-
Page 15: Operations Overview
2. Operations Overview 2.1 Unpacking and Inspection This printer has been specially packaged to withstand damage during shipping. Please carefully inspect the packaging and printer upon receiving the bar code printer. Please retain the packaging materials in case you need to reship the printer. Unpacking the printer, the following items are included in the carton. -
Page 16: Printer Overview
2.2 Printer Overview 2.2.1 Front View GA-2408T、GA-3406T Series(Contains LED indicator’s function introduction) 1. ONLINE indicator 2. ERROR indicator 3. RIBBON indicator 4. Comm. indicator Operation buttons Buttons Function FEED/PAUSE/ERROR In the ready state, press this button, the printer will spit a CANCLE button sheet of paper, in the printing state, press this button, the printer will stop immediately, in the error state, press this... - Page 17 LED Indicator Event Description Thermal transfer mode Blue(ONLINE) and Green(RIBBON) solid, and the device is ready to use. ready Direct thermal mode Blue(ONLINE) solid, and the device is ready to use. ready Open cover When the cover is open, a beep sound will be made, and Blue(ONLINE), Red (ERROR), and Green(RIBBON) will flash.
- Page 18 Other errors When other errors ,a beep sound will be made, and Red(ERROP) and Green(RIBBON) alternately flash Ethernet ready When the RJ45 network cable is plugged in and the connection is normal, the Orange(COMM) flash WIFI ready When the WIFI’s AP or STA mode is connected, the orange(COMM) solid Ethernet +WIFI ready When the RJ45 network cable is plugged in, and the connection is normal, and the WIFI’s AP or STA mode is connected, the orange (COMM) will be...
- Page 19 GA-2408T、GA-3406T、GA-6404T Series (Contains LCD monitor operation introduction) 1. LCD monitor operation 2. FEED/PAUSE/ERROR CANCLE button time/da FE Ver: printer firmware version Printer Emulation: Simulation model instruction category Printer ETH IP: Ethernet IP status address WIFI IP: Wi-Fi IP address...
- Page 20 Operation buttons Buttons Function FEED/PAUSE/ERROR In the ready state, press this button, the printer will spit a CANCLE button sheet of paper, in the printing state, press this button, the printer will stop immediately, in the error state, press this button, the printer will cancel the error state and restore printing function.
-
Page 21: Interior View All Series (Contains Eco-Friendly Printing Solutions Introduction)19
2.2.2 Interior View all Series (Contains Eco-friendly printing solutions introduction) 1. Printer top cover 2. Top cover open tab 3. The place for new ribbon 4. top cover support 5. Media guide 6. Gap sensor 7. Black mark sensor 8. Platen roller 9. - Page 22 Eco-friendly printing solutions Introduction Used for printing on linerless label, which saves consumables and improves the environment. application...
-
Page 23: Front View (All Series)
2.2.3 Front View (All Series) 1. Paper tearing edge 2. Front bezel; Accessory assembly ( Cutter / 2.2.4 Rear View (All Series) 1. Power jack socket 2. USB interface 3. USB host (For USB keyboard or scanner) 4. RJ-45 Ethernet interface 5. -
Page 24: The Antenna Part
2.2.5 The Antenna Part Yellow Light Power indicator: When the RFID module is connected to the power supply, the yellow light is long on, if not, it means that the RFID module is not energized. Blue Light Operation indicator: When the printer performs RFID command operation, the blue light flashes once(The blue light flashed once in each RFID command operation.) -
Page 25: Setup
3. Setup 3.1 Setting up the Printer Place the printer on a flat, secure surface, then follow the steps below: 1. Plug the power cord into the AC power cord socket at the rear of the printer. Then, plug the other side into a properly grounded power outlet. 2. -
Page 26: Install Printer Driver (All Series)
3.2 Install Printer Driver (All Series) (GA-2408T/GA-3406T/GA-6404T) Read the license agreement, click [I Select a installation directory and click accept the terms in license agreement], [Next]. and click [Next]. Click [Finish]. Go to installation process, please click [Install Printer Driver], and then click [Next]. - Page 27 Click [Other] and click [Next]. Select printer model name, click to install and click [Next]. Please use a USB cable to connect the Change the printer name as per need, printer to the computer, click the and click [Next]. corresponding USB interface, and click [Next].
- Page 28 click [Close]. 11. Users can check whether the installation 12. Users can change printer interface is completed through the following through the following ways: ways: a. In Windows 10, [Windows Settings] → a. If Windows 10, check from [Windows [Printers and Scanners] → [Devices] → Settings] →...
-
Page 29: Loading The Ribbon
3.3 Loading the Ribbon Insert black ribbon roller into new Load ribbon left side first and then ribbon. right side, fix it well. Insert blue ribbon roller into the Open the font cover. empty roll for ribbon collecting after printed. Load the empty roll left side first, then Pull out ribbon and stick into the right side. -
Page 30: Loading The Media
3.4 Loading the Media 3.4.1 Loading the Roll Labels Press two buttons on printer two sides Load print media into the printer; to lift and open the cover. adjust the paper guide to be same width of print media. Pull out the print media till it pass gap sensor and cutter (cutter is optional), complete media loading. -
Page 31: Loading The Cutter
3.5 Loading the Cutter Depending on the purchase, there will be two different cutters. 1. Textile Care Cutter 2. Guillotine cutter 1. Push the cover button backwards with both hands to open the printer cover. 2. Remove the two screws located on the front bezel, and push it out. - Page 32 3. Align the cutter with the tenon, and place the wire of the cutter into the hole 4. When attaching the cutter, take care not to press it on the wire, lock the cutter with the screw, and cover the upper cover.
- Page 33 5. After closing the upper cover, turn the printer upside down, remove a screw located on the bottom cover, and open the bottom cover. 6. After opening, pull out the wire just put into the hole and insert it into the wafer 1x10P on the main board.
-
Page 34: Loading The Peeler
3.6 Loading the Peeler Peeler. Push the cover button backwards with both hands to open the printer cover. Remove the two screws located on the front bezel, and push it out. - Page 35 Align the peeler with the tenon and place the wire of the peeler into the hole. When closing the peeler, be careful not to press it on the wire, and lock the peeler with screws. Turn the printer upside down, remove a screw located on the bottom cover, and open the bottom cover.
- Page 36 After opening, pull out the wire just put into the hole and insert it into the wafer 1x10P on the main board. After inserting it, cover the bottom cover and lock the screw. Finish. Note: Please clamp the label roll with the fixing tabs and clamp the media with the media guide, so as not to cause the media to roll into the peeler and cause the phenomenon that the media cannot be peeled off.
-
Page 37: Button Functions
4. Button Functions 4.1 Regular Button Functions This printer has one button for feed, pause or cancel errors. There are different functions in different modes, as shown in the following table: Button Printer Function Description status Feed Ready Feed When the printer is ready (Blue LED ON), press button this button once, and the label will advance to the front of the next label... - Page 38 C. Press and hold the FEED button, and turn on the printer power. When the ribbon Green solid alone, release the button. At this time, the printer will print a self-test page after turning on the printer. Enter USB A. Power off the printer storage B.
-
Page 39: Printer Utility
After opening the main screen, you can see the following function items: (5) Command Tool (1) Port Settings (6) Language (2) Printer Information (7) About (3) Printer Configuration (8) Exit (4) Printer Function NOTE: If you need more detailed information, please refer to Gainscha official website http://www.gainscha.com.tw/... -
Page 40: Printer Utility(Obtain Printer Status & Information)
5.2 Printer Utility( obtain printer status & information Ensure that the power supply of the printer is connected and the printer is in the state of starting up, and the printer and the computer are normally connected through the USB cable. Click the “Load”... - Page 41 communication interface. Click the Set button to write the setting value to the printer (please execute the reading function before writing). Printing speed: The speed of printing labels (1-7 inch/s,1 inch≈2.45cm) Density: The density of printing content. (1-15. The higher the value is, the deeper the print content density is.
- Page 42 Gap Distance(mm): The gap distance can be set when using the gap label Gap Offset(mm): The gap offset can be set when using the special gap label Black Mark Thickness(mm): The thickness can be set when using the black line label Black Mark FeedLen(mm): The label offset can be set when using the special black line label.
-
Page 43: System Setup
Reserve Blank: Set whether to leave blank at the end of continuous paper printing. Select “Yes” to stop printing the content. Select "No" to leave a blank after printing the content. Blank Length(mm): Set the length of blank content at the end of continuous paper printing Cut Number: Set the number of consecutive labels reserved after cutting. -
Page 44: Gap Sensor Setup
Automatic: The printer can automatically recognize the command language into the printer, and printing according to the command language. Manual: You can manually select the instruction language that is sent into the printer. If you use this function, you cannot recognize other instructions except the selected instruction language. -
Page 45: Rfid Module Setup
5.6 RFID Module Setup The RFID module can obtain module information and set the RFID module. Please refer to following figure 5.6: Type: Information about the module frequency band Protocol: Displays: The protocol currently supported by the module Power Level: The power of RFID can be adjusted Version: Indicates the current module version Serial Number: Indicates the serial number of the current module Regulation: The ability to adjust the frequency band of RFID to suit RFID... - Page 46 Tag Settings: Tag type: Sets the type of tag (for example, Class 1 Gen 2). Adaptive Antenna: Set the antenna for RFID work. Position Tag(mm): Set the write position of the RFID tag (Starting from the front edge of the tag). If it is automatic calibration, the Read/Write position after automatic calibration will be displayed.
-
Page 47: Wi-Fi Setup
Handling Errors: Write Retries Times: Set the number of label rewrites if a write error occurs. Try Encoding Labels: Set the maximum number of invalid labels that can be repeatedly written to if a write error occurs. Void Printout Len. (mm): Set the length to print VOID on the label in case of write errors. -
Page 48: Bluetooth Setup
STA Mode: In this mode, click as a client and connect to WIFI of other routers. After the printer is connected to WIFI, devices on the same LAN as the router can search for the printer and communicate with it. The IP address set cannot conflict with other devices on the LAN. -
Page 49: Rs232 Setup
5.10 RS232 Setup This function can set the Serial port (RS232) in the printer. Please refer to following figure 5.11: 5.11 Baud Rate: Set the baud rate of the serial port. The device that communicates with the printer must be the same as that set for the printer. Parity Check: Set the parity check. -
Page 50: Setting File
IP address of other devices in the LAN where the communication device is located. Ethernet Setup Manual can be downloaded on website directly here: https://www.gainscha.com.tw/ Click here to view 5.12 Setting File This function can access files in the current Settings of the printer. Please refer to following figure 5.13:... -
Page 51: Printer Utility - Command Tool
5.13 Printer Utility - Command Tool 1. Send Command The box can input instructions. After clicking the “Send Command”, the command can be transmitted to the printer, so that the printer can execute the incoming command. Please refer to following figure 5.14: 5.14 2. -
Page 52: Printer Utility - Printer Function
5.14 Printer Utility – Printer Function This function can set the functions of the printer. Please refer to following figure 5.16: 5.16 Factory Default: Click the button to restore the printer to factory Settings. Print Test Page: Click the button to print test page for printer. RTC Setup: Click this button to calibrate the time in the printer. -
Page 53: Printer Utility - File Manager
5.15 Printer Utility – File Manager 1. File Lists This function can read or delete files in the corresponding memory device. Please refer to following figure 5.17: 5.17 DRAM: After the printer is shut down, the files in this storage area will be deleted automatically. -
Page 54: Printer Utility - Port Settings
Select File: Click "Select File" and the file selection box will appear. After selecting the corresponding file, the file size will automatically calculate and display the storage size of the file. The selected file cannot exceed the maximum storage capacity of the memory device to be stored. -
Page 55: Ethernet
PIN of the device that communicates with the printer and the type of data that the device sends, and set the baud rate to the same as that of the printer. 3. Ethernet The maximum transmission rate is the same as that of Serial port (RS232) and WIFI port. The printer can be connected to the LAN. -
Page 56: Read Data
5.19 Memory Bank: Select data write area. (EPC, UESR, TID, some labels do not support UESR and TID area) Unlock: To unlock or permanently unlock a label, enter the Access Password on the right side. Write Data: HEX format data entry box in which the user enters the data to be written. Lock: To lock or permanently lock labels, enter the Access Password to be set on the right. -
Page 57: Access Password Setup
Num. of Char. Read: Enter a value (a multiple of 4) based on the number of data to be read. Read Data: The data box will display the corresponding read RFID data Return Result: The return result of a successful or failed operation. For details about return error codes, please check Appendix A 3. -
Page 58: Rfid-Read Access Password
4. RFID-Read Access Password This part can read the Access password. Please refer to following figure 5.22: 5.22 Access Pwd.: Data Access Password is required to read Access Password. 5. RFID-Kill Password Setup This part can carry out relevant operation about Kill password. Please refer to following figure 5.23: 5.23 Unlock: To unlock or permanently... -
Page 59: Read Kill Password
6. Read Kill Password This part can read Kill Password. Please refer to following figure 5.24: 5.24 Access Pwd.: Data Access Password is required to read Kill Password. 7. Remove Tag This part can Remove Tag (Kill). Please refer to following figure 5.25: 5.25 Remove Tag: Enter the Kill Password and click “Send”... -
Page 60: Label Editing Software - Bartender
6. Label editing software - BarTender BarTender is an excellent barcode printing software from American Seagull Technology. It is the most used software in the industry. It is the fastest and easiest barcode printing software to design professional and high-quality labels. 1. -
Page 61: Import The Database
7. Enter the corresponding label 8. Select a background based on size the label content 9. Add barcode or text on the 10. After the design is completed, menu bar to design labels. click the “Print” button submitted or use the shortcut key “Ctrl+P” 11. - Page 62 1. Prepare the required Excel table in. XLS format. The. XLSX format cannot be imported Click the “Database Settings” button in the upper left corner, or the shortcut “Ctrl+D” 3. Click the “Next” button 4.Database platform select the corresponding Excel and click “Next”.
-
Page 63: Call Database Batch Printing
5.Select the file path and click “Test Connection”. Click “Next” when successful. 6. All the table names in the current Excel file will be displayed on the left. Double-click the left mouse button to select the available table and the table will be added to the right. - Page 64 1. Create labels you need. In this case, labels in red boxes represent data to be called from the database, and data in non-red boxes represent fixed values. Double-click or right-click the text box to import the database and choose Properties. 2.
-
Page 65: Batch Serialized Print
the database. Select records: You can make a custom selection of the data to be called in the database. Queried Records: Displays the data records of the currently invoked database. After the data selection is complete, click print in the lower left corner to print the database called. -
Page 66: Add Rfid Tags In Bartender
3.Click the top “Transform”, then go to the bottom serialization, and click the “Options” button on the right 4.Select increment or decrement to start serialization. Methods: The ability to serialize the way to choose, such as increasing or decreasing 0-9, A to Z, increasing or decreasing the hex increasing or decreasing. -
Page 67: Rifd Option In Bartender
1. Turn on the BarTender to choose a printer with RFID function. If you choose a printer without RFID function, you cannot open and add RFID label. 2. Click the “RFID” above BarTender and select the corresponding label type to add a label. Repeat this action to add multiple RFID labels. - Page 68 3. Click “Printer properties”, then click “Tools” in the popup window, and click the configure drop-down box below to select “RFID” options...
-
Page 69: The Use Of Rfid Function
7. The Use of RFID Function 1. ISO 18000-6C protocol introduction 1) Abstract The ISO18000-6C Electronic Label refers to an electronic label that complies with the ISO18000-6C Air Interface Protocol 2)Data Storage Area According to the protocol, the label memory is logically divided into four memory banks, each of which can be composed of one or more memory. -
Page 70: Rfid Driver Installation
The storage length is the largest of the four memory banks, depending on the material, and some do not have user storage, storing user-specified data. The storage is organized as user defined. 2. RFID Driver Installation 1.Open Printer Utility to view the current USB port number. -
Page 71: Rfid Calibration
3. RFID Calibration 1)Auto Calibration Method One: In standby state, long press the FEED button (About 4s) until the printer automatically removes paper, then release, and the printer automatically carries out paper detection calibration. When the paper is stopped and the blue light is on, the paper detection calibration is completed. -
Page 72: Manual Calibration
2)Manual Calibration Method one: From Bartender, press Ctrl+P to enter the pre-print interface, click “Printer Properties”, select the Configuration drop-down box in the Tools section, select RFID options, find the transceiver location in the General menu, you can manually set the probe read/write location (starting from the label front). -
Page 73: Set Access Password
3.1 Set Access Password Method one: Set the Access Password in BarTender Open BarTender and add the RFID tag (Detailed in Chapter 6, Section After adding the RFID tag, open the RFID option (Detailed in Chapter 6, Section 6). In EPC Gen 2, select an area to lock and the Access password box will change from dark to light. -
Page 74: Rfid Data Is Written In Bartender
8. RFID data is written in BarTender 8.1 Writes Open Data in EPC Area Method one: Write data in BarTender Open Data can be written and read on the label without Access password. In this case, RFID write is made on the label in ASCII format with the content "EXAMPLE ONE". By BarTender, the steps are as follows 1. -
Page 75: Rules For Writing Data In Lock State
written in the Write Access Pwd. input box, click the “Write” button on the lower right corner to write. Return error code details can be referred to Appendix A. 8.2 Rules for writing data in LOCK state Access Password Area Check whether the Access Password is required to write data in LOCK state Access Password... -
Page 76: Other Rfid Function Setting
Other RFID Function Setting Other RFID function Settings can assist the printer to better complete RFID operations. There are two modes of operation. While the PrinterUtility Settings (details are available in Chapter 5, Section 3) and the RFID options in BarTender (how to open the RFID options is available in Chapter 6, Section 6). -
Page 77: Printer Program Upgrade
10. Printer Program Upgrade Gainscha printers support program upgrade, if you need to upgrade, please contact relevant personnel for upgrade guidance. 1. Printer status upgrade 1.1 Prepare for the upgrade 1. The printer is correctly connected to the computer through USB interface;... -
Page 78: Debug Mode Upgrade Program
300DPI model, 300DPI model cannot be the printer upgrade). upgraded to 200DPI model. Please confirm the DPI of the printer to be upgraded and select the correct program 2. Debug mode upgrade program When the printer can obtain port information, but cannot run abnormally, you can choose to enter the debugging mode for upgrade. - Page 79 ----> ----> ----> ----> ----> --------> When the light is red and blue steady on for the second time, release the button and the printer light will be off. Press the FEED button once the blue light will strobe-flash, that is to enter the debugging mode.
- Page 80 Appendix A: Printer Utility Return Code Return result error code description table Error code Description Error code Description RFID module initialization Nonspecific error failed Read error CRC error An error occurred while writing, Command parameter error sending back the number of written words If the Tag returns an error, add the Operation timed out...
-
Page 81: Lcd Menu Function For Ga-2408T , Ga- 3406T, Ga-6404T Series
11. LCD Menu Function for GA-2408T , GA- 3406T, GA-6404T Series 11.1 Enter the Menu... -
Page 82: Menu Overview
11.2 Menu Overview There are 6 categories for the menu. You can easy to set the settings of the printer without connecting the computer. Please refer to below for more details. Button icon function This "Setting" option can set the printer function. This "Device"... - Page 83 This "Interface" option can set the interface. This "System" option can set the system parameters.
- Page 84 This "Tools" option can set the printer operation tool.
-
Page 85: Error And Screen Message Introduction
This "Information" option can inquire about the printer information. 11.3 Error and screen message introduction Screen message Description This message is head open. This message is ribbon out. This message is gap out. - Page 86 This message is label out. This message is no print head. This message is no cutter. This message is no peeler. This message is cutter jam. This message is memory error.
- Page 87 This message is label error. This message is print head over heat. This message is pause. This message is demand. This message is waiting for take. This message is printing.
-
Page 88: Communication Interfaces
12. Communication interfaces 1)USB (A Type) Pin No. Pin Name VBUS 2)USB (B Type) Pin No. Pin Name VBUS... -
Page 89: 3)Serial Port
3)Serial Port Pin No. Pin Name Description Transmit Data Receive Data Connect to Equipment to Judge Pin6 System Ground Connect to Equipment to Judge Pin4 Clear to Send Request to Send Reserve (No output) 4)Ethernet Port Pin No. Pin Name... -
Page 90: Troubleshooting
13. Troubleshooting 13.1 Common Problems The following guide lists the most common problems that may be encountered when operating this bar code printer. If the printer still does not function after all suggested solutions have been invoked, please contact the Customer Service Department of your purchased reseller or distributor for assistance. - Page 91 Poor print quality Ribbon and media is loaded Reload the supply. incorrectly. Clean the print head. Dust or adhesive accumulation on Clean the platen roller. the print head. Adjust the print density and print speed.
-
Page 92: Maintenance
14. Maintenance This session presents the clean tools and methods to maintain your printer. 1. Please use one of following material to clean the printer. Cotton swab Lint-free cloth Vacuum / Blower brush 100% ethanol 2. The cleaning process is described as following, Printer Part Method Print Head... -
Page 93: Revise History
15. Revise History Date Version Content 2020/8/10 Ver.1.0.1 Modify chapter 4.2 Power-on Utilities Modify GA-2406TM / GA-3405TM renamed to GA-2408TM / GA-3406TM Delete Extended plate in chapter 1.2.2 Printer Optional Features Delete chapter 3.4.3 External Label Roll Mount Installation (Option) Modify 4.1 Regular Button Function 2021/1/15 Ver.1.0.2...
Need help?
Do you have a question about the GA-2408T Series and is the answer not in the manual?
Questions and answers