
Related Manuals for Gainscha GS-2206T Series


Summary of Contents for Gainscha GS-2206T Series
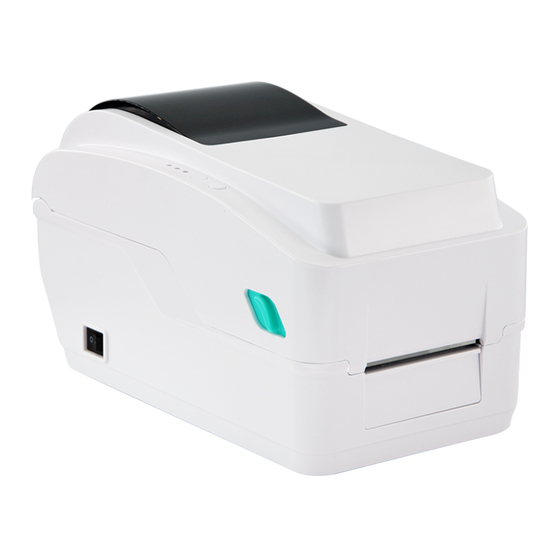
- Page 1 GS-2206T/GS-3205T Series THERMAL TRANSFER/DIRECT THERMAL THERMAL LABEL PRINTER USER’S MANUAL Ver.1.0.4...
- Page 2 Information in this document is subject to change without notice and does not represent a commitment on the part of Gainscha No part of this manual may be reproduced or transmitted in any form or by any means, for any purpose other than the purchaser’s personal use, without the...
-
Page 3: Table Of Contents
Contents 1. Introduction ................................. 5 1.1 Product Introduction ............................5 1.2 Product Features..............................7 1.2.1 Printer Standard Features ........................7 2. Operations Overview ............................10 2.1 Unpacking and Inspection .......................... 10 2.2 Printer Overview .............................. 11 2.2.1 Front View ..............................11 2.2.2 Interior View .............................. - Page 4 3.3 Loading the Ribbon ............................17 3.4 Loading the Media ............................18 3.4.1 Loading the Roll Labels ........................18 3.4.2 Ribbon and print media loading diagram ................... 19 4. LED and Button Functions ..........................20 4.1LED Indicator ..............................20 4.2 Regular Button Functions..........................21 4.3 Power-on Utilities ............................
-
Page 5: Introduction
1. Introduction 1.1 Product Introduction Thank you for purchasing Gainscha bar code printer. Although the printer has a small footprint, it delivers reliable, superior performance. This printer provides direct thermal printing at user selectable speed of: 2.0, 3.0, 4.0, 5.0 or 6.0 ips for 203 dpi;... - Page 6 ⚫ Applications o Parcel Post o Manufacturing & Warehousing Shipping/ Receiving Labels ◼ Work in Progress o Small Office/ Home Office ◼ Item Labels o Retail Marking ◼ Instruction labels Price tags ◼ ◼ Agency labels Shelf labels ◼ ◼ o Healthcare Jewelry tags ◼...
-
Page 7: Product Features
1.2 Product Features 1.2.1 Printer Standard Features PRINTER GS-2206T GS-3205T GS-2206TM GS-3205TM MODEL Level Economic Economic Empower Empower Resolution 8dots/mm(203 12dots/mm(300 8dots/mm(203D 12dots/mm(300 DPI) DPI) DPI) Printing Thermal Transfer &Direct Thermal Method Max. print 152mm(6”)/second 127mm(5”)/second 152mm(6”)/second 127mm(5”)/second speed Max. print 54 mm (2.13“) 54 mm (2.13“) 54 mm (2.13“) - Page 8 Sensors Head open sensor, Ribbon end sensor, Reflective sensor (moveable), Front-Reflective sensor Power External universal switching power supply Input: AC 100-240V, 2.5A, 50-60Hz, Output: DC 24V, 2.5A, 60W User 1 power switch, 2 buttons(Feed & Pause), 3 LEDs (Online, Error, Ribbon status) Interface 8 alpha-numeric bitmap fonts ➢...
- Page 9 Enclosure ABS plastic Safety FCC Class A, CE Class A, CCC, BIS, CB certification Environment Operation: 5 ~ 40°C, 25 ~ 85% non-condensing condition Storage: -40 ~ 60°C, 10 ~ 90% non-condensing Environment Comply with RoHS, REACH, WEEE al concern...
-
Page 10: Operations Overview
2. Operations Overview 2.1 Unpacking and Inspection This printer has been specially packaged to withstand damage during shipping. Please carefully inspect the packaging and printer upon receiving the bar code printer. Please retain the packaging materials in case you need to reship the printer. Unpacking the printer, the following items are included in the carton. -
Page 11: Printer Overview
2.2 Printer Overview 2.2.1 Front View 1. WINDOWS (The windows can look through) 2. ONLINE indicator 3. ERROR indicator 4. RIBBON indicator 5. PAUSE button 6. FEED button 2.2.2 Interior View 1. Printer top cover 2. Top cover open tab 3. -
Page 12: Front View
2.2.3 Front View 1. Paper tearing edge 2. Front bezel 2.2.4 Rear View 1. Power jack socket 2. USB interface 3. USB host (For HID keyboard or scanner) 4. RJ-45 Ethernet Street 10 / 100M bps 5. Paper inlet... -
Page 13: Setup
3. Setup 3.1 Setting up the Printer 1. Place the printer on a flat, secure surface. 2. Make sure the power switch is set to “off”. 3. Connect the printer to the computer with the provided USB cable. 4. Plug the power cord into the AC power cord socket at the rear of the printer, and then plug the power cord into a properly grounded power outlet. -
Page 14: Install Printer Driver
3.2 Install Printer Driver 1. Read the license agreement, click [I accept the 2. Select a installation directory and click [Next]. terms in license agreement], and click [Next]. 3. Click [Finish]. 4. Go to installation process, please click [Install Printer Driver], and then click [Next]. - Page 15 5. Click [Other] and click [Next]. 6. Select printer model name, click to install and click [Next]. 7. Please use a USB cable to connect the printer to 8. Change the printer name as per need, and click the computer, click the corresponding USB [Next].
- Page 16 9. Click [Finish]. 10. The installation is complete, please click [Close]. 11. Users can check whether the installation is 12. Users can change printer interface through the completed through the following ways: following ways: a. If Windows 10, check from [Windows Settings] → a.
-
Page 17: Loading The Ribbon
3.3 Loading the Ribbon 2. Load ribbon left side first and then right 1. Insert blue ribbon roller into new ribbon. side, fix it well. 4. Open the print head Insert blue ribbon roller into new ribbon. 6. Pull out ribbon and stick into the empty roll. 5. -
Page 18: Loading The Media
3.4 Loading the Media 3.4.1 Loading the Roll Labels 1. Press two buttons on printer two sides to lift Load the label into the label roll holder. and open the cover. 3. Load print media into the printer. 4. Adjust the paper guide to be same width of print media. -
Page 19: Ribbon And Print Media Loading Diagram
3.4.2 Ribbon and print media loading diagram Print head Empty ribbon roll Print head Ribbon Label... -
Page 20: Led And Button Functions
4. LED and Button Functions 4.1LED Indicator Event Status Status Description Beep Icon lights 1 lights 2 Thermal transfer Blue(ONLINE) and Green(RIBBON) solid, mode ready the device is ready to use. Direct thermal Blue(ONLINE) solid, the device is ready mode ready to use. -
Page 21: Regular Button Functions
4.2 Regular Button Functions This printer has two buttons for feed, pause or cancel errors. There are different functions in different modes, as shown in the following form: Button Printer Function Description status Feed Ready Feed When the printer is ready (Blue LED ON), press this button button once, and the label will advance to the front of the next label... -
Page 22: Power-On Utilities
4.3 Power-on Utilities This printer has six power-on functions for setting or testing the printer's hardware. Press these buttons at the same time when the power is turned on, and release the buttons with the light signal to activate these functions. Follow these steps to enable the boot function: Event Description... -
Page 23: Printerutility
After opening the main screen, you can see the following function items: (5) Command Tool (1) Port Settings (6) Language (2) Printer Information (7) About (3) Printer Configuration (8) Exit (4) Printer Function NOTE: If you need more detailed information, please refer to Gainscha official website http://www.gainscha.com.tw/... -
Page 24: Printer Function
5.2 Printer Function 1. Click the Printer Configuration and Printer Setup Can open and close the printer general settings screen. Button to bring out all printer general setting information through the selected 2. Click the Load communication interface. Click the set button to write the setting value to the printer (please execute the reading function before writing). -
Page 25: Troubleshooting
6. Troubleshooting 6.1 Common Problems The following guide lists the most common problems that may be encountered when operating this bar code printer. If the printer still does not function after all suggested solutions have been invoked, please contact the Customer Service Department of your purchased reseller or distributor for assistance. - Page 26 Turn off the printer and plug the connector again. ⚫ Please confirm whether connection cable of the stepping motor is connected correctly. ⚫ ⚫ Poor print quality Ribbon and media is loaded Reload the supply. ⚫ incorrectly. Clean the print head. ⚫...
- Page 27 ⚫ ⚫ Irregular printing The printer is in Hex Dump mode. Turn off and on the printer to skip the dump mode. ⚫ ⚫ No print on the label Label loaded not correctly Follow the instructions in loading the media...
-
Page 28: Maintenance
7. Maintenance This session presents the clean tools and methods to maintain your printer. Please use one of following material to clean the printer. ⚫ Cotton swab ⚫ Lint-free cloth ⚫ Vacuum / Blower brush ⚫ 100% ethanol The cleaning process is described as following, Printer Part Method 1. -
Page 29: Revise History
8. Revise History Date Version Content 2020/6/24 Ver.1.0.1 Add chapter 3.4.3 External Label Roll Mount Installation (Option) note 2020/6/29 Ver.1.0.2 Modify chapter 4.1 LED Indicator 2020/6/30 Ver.1.0.3 Delete chapter 3.4.3 External Label Roll Mount Installation (Option) 2020/8/10 Ver.1.0.4 Modify chapter 4.3 Power-on Utilities...
Need help?
Do you have a question about the GS-2206T Series and is the answer not in the manual?
Questions and answers