CARDIOSTRONG EX60 Assembly And Operating Instructions Manual
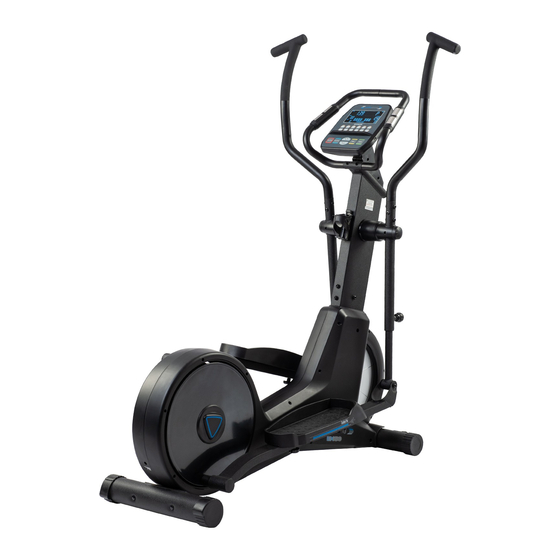
Elliptical cross trainer
For more information, please visit cardiostrong.com, sport-tiedje.com
Hide thumbs
Also See for EX60:
- Assembly and operating instructions manual (52 pages) ,
- Assembly and operating instructions manual (40 pages)

Related Manuals for CARDIOSTRONG EX60


Summary of Contents for CARDIOSTRONG EX60
- Page 1 Assembly and Operating Instructions CSTEX60.01.03 Art. No. CST-EX60 Elliptical cross trainer EX60...
- Page 2 EX60...
-
Page 3: Table Of Contents
Content GENERAL INFORMATION Technical Data Personal Safety Electrical Safety Set-Up Place ASSEMBLY General Instructions Scope of Delivery Assembly OPERATING INSTRUCTIONS Console Display Button Functions Turning On and Setting the Equipment Programs 3.4.1 MAN. - Manual Program 3.4.2 PROG - Pre-Set Programs 3.4.3 RECOVERY - Fitness Test 3.4.4 WATT - Watt Controlled Program 3.4.5 USER - User Defined Program... - Page 4 ORDERING SPARE PARTS Serial Number and Model Name Parts List Exploded Drawing WARRANTY CONTACT EX60...
- Page 5 With cardiostrong® fitness equipment, the focus is on what sport is all about: maximum performance! Therefore, the equipment is developed in close consultation with athletes and sports scientists.
- Page 6 This notice indicates potentially hazardous situations which, if not avoided, will result in death or serious injuries! NOTICE This notice indicates further useful information. Retain these instructions in a safe place for future reference, maintenance or when ordering replacement parts. EX60...
-
Page 7: General Information
GENERAL INFORMATION Technical Data LED display of speed in km/h training time in min training distance in km cadence (rotations per minute) calories burnt in kcal heart rate (when using the hand sensors or a chest strap) Watt resistance level Resistance system: electronic magnetic brake system Resistance levels: Watt:... -
Page 8: Personal Safety
Make sure that nobody is within the range of motion of the equipment during training so as not to endanger you or other persons. ࣑ ATTENTION Do not insert any objects of any kind into the openings of the device. EX60... -
Page 9: Electrical Safety
Electrical Safety ⚠ DANGER In order to reduce the risk of an electric shock, always unplug the equipment from the mains socket immediately after your workout, before assembly or dismantling, and before maintenance or cleaning. Do not pull on the cable. ⚠... -
Page 10: Set-Up Place
(over 70%) like swimming pools. A floor protective mat/equipment underlay can help to protect high-quality floor coverings (parquet, laminate, cork, carpets) from dents and sweat and can help to level out slight unevenness. EX60... -
Page 11: Assembly
ASSEMBLY General Instructions ⚠ DANGER Do not leave any tools, packaging materials such as foils or small parts lying around, as otherwise there is a danger of suffocation for children. Keep children away from the equipment during assembly. ⚠ WARNING Pay attention to the instructions attached to the equipment in order to reduce the risk of injuries. -
Page 12: Scope Of Delivery
In the event of complaints, the contractual partner must be contacted directly. ⚠ CAUTION If parts of the scope of delivery are missing or damaged, the assembly must not be carried out. EX60... -
Page 13: Assembly
Assembly Before assembly, take a close look at the individual assembly steps shown and carry out the assembly in the order given. NOTICE First loosely screw all parts together and check that they fit properly. Tighten the screws using the tool only when you are instructed to do so. Step 1: Assembly of the rear base First remove washers (C2),... - Page 14 Connect sensor cable (A1) with sensor cable (B1). ࣑ ATTENTION Pay attention to not pinch the cable during the next step. Then mount console mast (B) on main frame (A) with screws (J4), spring washers (J2) and washers (J3). EX60...
- Page 15 Step 4: Assembly of the handles Mount handles (G1 and G2) on the console mast (B) with two 8mm Allen wrench and all screws (J5 and J6) (see view F).
- Page 16 (G3). ⚠ CAUTION Make sure to tighten the pin (G3) in order to avoid falls. For safety reasons, we recommend adjusting the left and right sides of the handles to the same height. EX60...
- Page 17 Step 6: Assembly of the pedals Mount right pedal (H2) with washers (J9), spring washers (J11) and star grip nuts (H4). There are three positions. Repeat the step with the left pedal (H1). ⚠ CAUTION Make sure that you tighten the star grip nuts (H4) in order to avoid a fall.
- Page 18 Place the small handles (F1 and F2) in the fixture on the console mast and mount it with screws (J10/12) on the bar. Remove pre-mounted screws (J13). Mount bottle holder (H6) on the console mast (B) with the screws (J13). NOTICE The user can adjust the console angle according to his/her needs. EX60...
- Page 19 Step 8: Alignment of the feet If the floor is uneven, you can stabilize the equipment by turning the two setting screws under the main frame. Lift the equipment on the desired side and rotate the setting screws under the main frame. Rotate the screws clockwise in order to remove them and to raise the equipment.
-
Page 20: Operating Instructions
OPERATING INSTRUCTIONS NOTICE Familiarise yourself with all the functions and setting options of the device before starting training. Have the proper use of this product explained to you by a specialist. Console Display EX60... - Page 21 Time 0:00 - 99:00 minutes Speed 0.0 - 99.9 km/h RPM (cadence; rotations per minute) 15 - 999 RPM Distance 0.0 - 99.95 km Calories 0 - 990 Cal Male/Female (m/f ) Pulse (heart rate; beats per minute) 60 - 220 BPM Heart rate symbol on/off - blinking Programs...
-
Page 22: Button Functions
Select training mode or lower functional MINUS value Press the button in the stop mode to RESET return to the main menu QUICK KEY Quick selection of the pre-set programs P1 - P12 (12 programs) MODE Confirm setting EX60... -
Page 23: Turning On And Setting The Equipment
Turning On and Setting the Equipment Connect monitor to the power or press RESET for three seconds and the LCD display will show all segments with a long beep (1-second-long) and display, i. e., 78.0 (software version) (see fig. 1 and 2). With the +/- buttons, the user can select the programs User 0 to 4 and confirm with MODE (see fig. -
Page 24: Programs
Press STOP to stop the training. Press RESET in order to return to the selected mode or press RESET for three seconds in order to return to the main menu (see fig. 16). Figure 9 Figure 10 Figure 11 Figure 12 EX60... - Page 25 Figure 13 Figure 14 Figure 15 Figure 16 Procedure for setting the manual training programs:...
-
Page 26: Prog - Pre-Set Programs
Press STOP to stop the training. Press RESET to return to the main menu or hold for three seconds in order to get to the standby mode. Figure 17 Figure 18 Figure 19 Figure 20 Figure 21 Figure 22 Figure 23 Figure 24 EX60... - Page 27 Profiles from pre-set training programs:...
- Page 28 Procedure for setting the pre-set training programs: EX60...
-
Page 29: Recovery - Fitness Test
3.4.3 RECOVERY - Fitness Test Hold RESET for three seconds, select user and enter data. Alternatively, press RESET to return to the main menu. Select the FITNESS mode with +/- buttons and confirm with MODE (see fig. 25-26). Press START to begin the training. Set load level with +/- buttons. After 12 minutes, the display will automatically show the training results. -
Page 30: Watt - Watt Controlled Program
Press START to begin the training. Watt can be adjusted through +/- buttons. Press STOP to stop the training. Press RESET to return to the main menu or hold for three seconds to get to the standby mode. Figure 27 Figure 28 Figure 29 Figure 30 Figure 31 Figure 32 EX60... - Page 31 Procedure for setting the Watt-controlled program:...
-
Page 32: User - User Defined Program
Press START to begin the training. Adjust load level with +/- buttons. Press STOP to stop the training. Press RESET to return to the main menu or hold for three seconds to get to the standby mode. Figure 33 Figure 34 Figure 35 Figure 36 Figure 37 Figure 38 EX60... - Page 33 Procedure for setting the user-defined program:...
-
Page 34: H.r.c. - Heart Rate Controlled Programs
Press START to begin the training. Load level adjusts to your current heart rate. Press STOP to stop the training. Press RESET to return to the main menu or hold for three seconds to get to the standby mode. Figure 39 Figure 40 Figure 41 Figure 42 EX60... - Page 35 Figure 43 Figure 44 Figure 45 Figure 46 Procedure for setting the heart rate controlled programs:...
-
Page 36: Storage And Transport
After that, you easily can move the equipment to a new position. For long transport distances the equipment should be disassembled and safely packed. Select the new location by following the instructions in the section 1.4 of this manual. EX60... -
Page 37: Troubleshooting, Care And Maintenance
TROUBLESHOOTING, CARE AND MAINTENANCE General Instructions ⚠ WARNING Do not make any improper changes to the equipment. CAUTION ⚠ Damaged or worn components may affect your safety and the life of the equipment. Therefore, immediately replace damaged or worn components. In such a case, contact the contract partner. -
Page 38: Maintenance And Inspection Calendar
The materials can be recycled as per their symbols. Through the reuse, recycling of materials or other forms of recovery of old equipment, you make an important contribution to the protection of the environment. EX60... -
Page 39: Recommended Accessories
RECOMMENDED ACCESSORIES To make your training experience even more efficient and pleasant, we recommend that you add suiting accessories to your fitness equipment. This could be a floor mat, for example, which makes your fitness equipment stand more securely and also protects the floor from falling sweat, but it could also be additional handrails on some treadmills or silicone spray to keep moving parts in good shape. - Page 40 The exact position of this sticker is shown in the following illustration. Enter the serial number in the appropriate field. Serial number: Brand / Category: cardiostrong / elliptical cross trainer Model Name: EX60 Article Number: CST-EX60 ...
- Page 41 Parts List Description Qty. Description Qty. MAIN FRAME AXLE 3/8" *26* Ø10*128L SENSOR WIRE 1000mm BEARING 6300 2RS MOTOR NUT 3/8"-26*3.8T SCREW M5xP0.8x12L BUSH Ø10xØ15.8x9mm SPRING Ø1xØ8.5x48L WASHER Ø8xØ19x2T SENSOR W IRE HOUSING SCREW 2/8"-26x7T SENSOR WIRE 900mm PLATE COVER SCREW M5x10mm SCREW ST3.5x16L PULLEY Ø30*8...
- Page 42 WHEEL Ø76 AXLE Ø15x50.5L(M8) SCREW M5x16 SCREW M8xP1.25x20L CONSOLE WASHER Ø8xØ22x2T HANDLE BAR (L) Ø25.4x1.5Tx660L SPRING WASHER Ø8.1x8.5x2.5T HANDLE BAR (R) Ø25.4x1.5Tx660L SCREW M8xP1.25x20L IRON BRACKET 2.5T SCREW M8xP1.25x90LxS20L HANDLE BAR SPONGE SPRING WASHER Ø8.5x13.5x2.5T Ø23x3Tx280L STR WASHER Ø8.1xØ16x2T EX60...
- Page 43 SCREW M8x20mm SCREW M8x16mm SCREW M8x20mm SCREW M8xP1.25x20L WASHER Ø6xØ12x1.5T SCREW M8x40mm SPRING WASHER Ø6.1x1.6T SCREW M5x12mm SPRING WASHER Ø8.5xØ13.5x2.5T WASHER Ø8xØ16x2T SCREW...
- Page 44 Exploded Drawing EX60...
- Page 45 WARRANTY Training equipment from Taurus® is subject to strict quality control. However, if a fitness equipment purchased from us does not work perfectly, we take it very seriously and ask you to contact our customer service as indicated. We are happy to help you by phone via our service hotline. Error Descriptions Your fitness equipment is developed for long-term, high-quality training.
- Page 46 For that reason, we also want to resolve your queries quickly and in a straightforward manner. Thus, please always keep your customer number and the serial number of the faulty equipment handy. EX60...
- Page 47 CONTACT TECHNICAL SUPPORT TECHNICAL SUPPORT & SERVICE TECHNICAL SUPPORT & SERVICE �� �� �� +49 4621 4210-900 80 90 16 50 +33 (0) 172 770033 +49 4621 4210-945 +49 4621 4210-933 �� +49 4621 4210-698 �� �� info@fitshop.dk service-france@fitshop.fr �� technik@sport-tiedje.de ��...
- Page 48 The company employs numerous sports scientists, fitness trainers and competitive athletes. Visit us also on our social media platforms or our blog! EX60...
- Page 49 Notes...
- Page 50 Notes EX60...
- Page 52 Elliptical cross trainer EX60...
Need help?
Do you have a question about the EX60 and is the answer not in the manual?
Questions and answers