Quadratec QuadraTop Adventure Top S Manual
For 2007-2018 4 door jeep wrangler jku
Hide thumbs
Also See for QuadraTop Adventure Top S:
- Installation manual (21 pages) ,
- Manual (16 pages) ,
- Manual (13 pages)
Advertisement
Quick Links
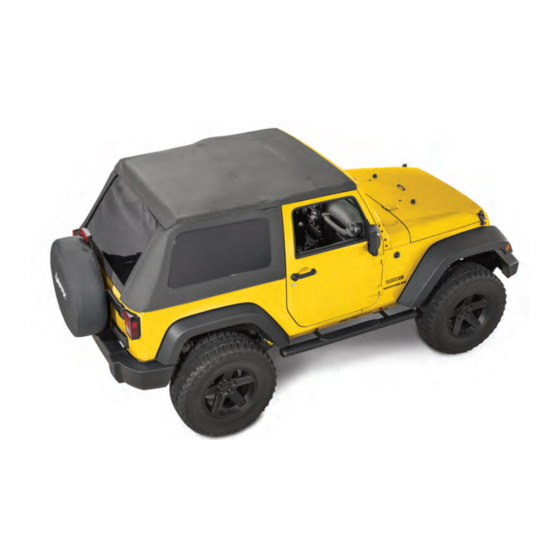
QuadraTop
With Flip Back Sunroof
Loss of vehicle control involves risk of death or serious injury, particularly to parts
of your body not restrained within vehicle. This product is intended for weather
protection only and should not be relied upon to contain occupants in the event of
an accident or to protect from either ground contact or falling objects. To reduce
risk of accident or injury:
•
ALWAYS WEAR SEATBELTS
WARNING
•
Always keep head, arms & body parts within vehicle.
•
Fully secure or stow the soft top before driving according to instructions. Ne-
ver try to latch or fold soft top while driving. Do not use if damaged or worn.
•
Read and follow all instructions & warnings accompanying this product, in
your vehicle owner's manual and Off Road Driving Supplement.
RISK OF EYE INJURY. Safety glasses should be worn at all times while installing or
CAUTION
maintaining this product.
PART LIST:
TOP DECK/HEADER ASSEMBLY
DRIVER SIDE QUARTER WINDOW
PASSENGER SIDE QUARTER WINDOW
REAR WINDOW
REAR BOW ASSSEMBLY
CENTER BOW ASSEMBLY
DRIVER'S SIDE DOOR SURROUND
PASSENGER SIDE DOOR SURROUND
DOOR SURROUND KNOBS
REAR STRAP ASSEMBLIES
OVER DOOR BOW QUICK RELEASE
4MM ALLEN HEAD WRENCH
Adventure Top
®
For 2007-2018
4 Door Jeep® Wrangler JKU
#
Item
11113.1535
QTY 1
QTY 1
QTY 1
QTY 1
QTY 1
QTY 1
QTY 1
QTY 1
QTY 6
QTY 2
QTY 2
QTY 1
S
REQUIRED TOOLS:
SAFETY GLASSES
PHILLIPS SCREW DRIVER
FLAT HEAD SCREW DRIVER
SOCKET WRENCH
13mm SOCKET
PLIERS
Advertisement

Related Manuals for Quadratec QuadraTop Adventure Top S


Summary of Contents for Quadratec QuadraTop Adventure Top S
- Page 1 QuadraTop Adventure Top ® With Flip Back Sunroof For 2007-2018 4 Door Jeep® Wrangler JKU Item 11113.1535 Loss of vehicle control involves risk of death or serious injury, particularly to parts of your body not restrained within vehicle. This product is intended for weather protection only and should not be relied upon to contain occupants in the event of an accident or to protect from either ground contact or falling objects.
- Page 2 Careful attention is required to this instruction or operation but does generally not NOTICE relate to personal injury. Damage to your Quadratec® product or other property may result if you don’t follow instructions. Before you begin Installation: or worn over the years.
- Page 3 FIG3 FIG2 Passenger Side Door Surround Screw and washer kit Driver Side Door Surround Screw and washer kit Door Surround Knobs FIG4 FIG5 FIG6 FIG7 FIG7a Line up the Driver’s side rear over door Step 2: Rear Door Surround Assembly assembly and the driver’s side Pillar assembly Locate the driver’s side rear over door assembly as shown in Fig 4 making sure the holes line...
- Page 4 FIG8 FIG10 FIG9 FIG11 FIG12 "C" Attachment FIG13 Step 3: Install Rear Door Surrounds to Jeep body tub as shown in FIG11. (With the rubber Locate the assembled Driver’s side rear door seal still on the vehicle). After inserting the pin, surround (Fig 8).
- Page 5 FIG16 FIG17 FIG15 FIG14 Step 4: Secure Front & Rear Door Surrounds the hole in the front door surround (FIG14). Ti- to Roll Bar ghten the knob securing the front door surround. Locate the two sets of screw knobs in each Door Repeat this procedure on the back of the rear surround box.
- Page 6 FIG24 FIG25 Rear Door Surround Velcro Flap Bolt Location FIG27 FIG27a FIG26 FIG29 FIG28 FIG30 Step 6: Installing the Rear Bow in FIG24. There will be a factory mounted bolt just under this flap. Using a 13mm socket and Locate he rear bow as circled in FIG22. This bow is curved at the end and has a flat bracket driver, remove this bolt from the roll bar (FIG25).
- Page 7 FIG33 FIG34 Bow is towards rear of V ehicle Rear Door Surround Step 7: Installing the Two Center Bows hole over the door surround hole (FIG33). Make Locate the second center bow as circled in sure the bow is rear of the Door Surround Knob. FIG31.
- Page 8 Step 8: Installing the Two Center Bows The expose the bow mount brackets installed on the first center bow as circled in FIG35 has been first bow.The bow ends on the first bow have a permanently installed to the deck assembly. multi piece bracket welded to the end of the bow To install this bow, you will need to place the (FIG39).
- Page 9 FIG49 FIG50 FIG51 FIG52 Cable and pocket must be on the outside of the door surround FIG53 Thread the end of the D-Ring through the flap/ Step 10: Installing the Top Deck tube sewn into the top deck (FIG50) and attach With the rear of the header secured the D-Ring to the spring assembly that is han- and the front header resting back towards the...
- Page 10 FIG59 FIG58 FIG60 FIG61 FIG62 FIG63 FIG64 FIG65 window are secured to the top deck, line up the Step 11: Installing the Side and Rear Windows driver’s side rear zipper on the Quarter window To ensure the top is centered on the vehicle you to the zipper on the rear window and zip will be installing the two quarter windows and the it down a few inches (FIG59).
- Page 11 When removing the quarter and rear windows from the Top deck be sure to slide them out completely before pulling down. Disengage the side hook and loop befo- re sliding the windows out. DO NOT “Peel” the windows out! See Fig 64. Failure to NOTICE completely disengage the windows from the “C”...
- Page 12 FIG74 FIG75 FIG76 FIG77 FIG78 FIG79 FIG80 into the mounts with the outside of the fabric Step 13: Securing the tailgate bar & top to the vehicle facing towards the rear rear of the Vehicle Open the tailgate. Take the factory bar and (FIGS74 &...
- Page 13 Replacement Hardware & Soft Top Accessories available at Quadratec.com Please review this set of instructions, and > Complete Bow Assemblies: #11132.95XX > Soft Top Emergency Repair Kit: #91083.4201 examine your original equipment hardware. > Zipper Slick Zipper Lubricant: #91083.4200 Is any hardware is missing or damaged? >...
- Page 14 Page 15) will help prevent damage and window polish listed on page 15 (Available keep the zippers in a smooth working con- at Quadratec.com). dition. If zipper opens behind the slider, the slider may have been spread apart. Water/Fabric: In the event of seeping This problem can usually be fixed through the seams, 3M Scotchgard®...
- Page 15 Quadratec, Inc. 1028 der shall, upon Quadratec inspection and Saunders Lane, West Chester, PA 19380. at Quadratec’s option, be either repair or replacement of product or parts (new or This Limited Warranty is the only warranty refurbished) covered under this Limited made in connection with purchase.
Need help?
Do you have a question about the QuadraTop Adventure Top S and is the answer not in the manual?
Questions and answers