Table of Contents
Advertisement
Quick Links
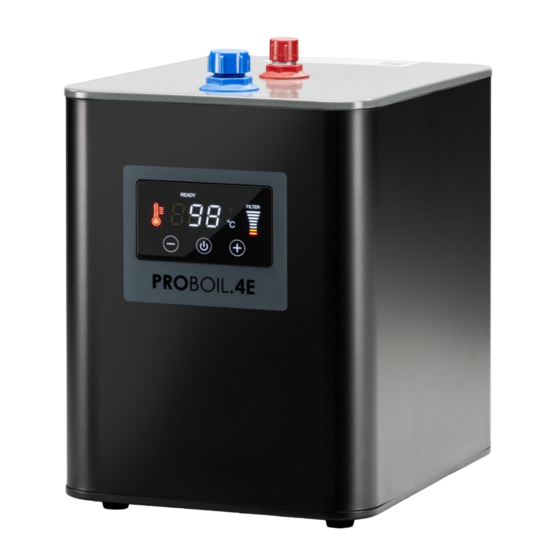
PROBOIL.4E
User & Installation Guide
www.proboil.co.uk
See top of boiler unit for contact details
Please read these instructions carefully before
installation or use and retain for future reference.
You must install the tap and filter before the boiler.
We have a policy of continued product and quality development and improvement.
Accordingly, we reserve the right to amend the specification at any time. All errors and omissions excepted.
PROBOIL.4E user & installation guide v1d
1
Advertisement
Table of Contents

Subscribe to Our Youtube Channel
Related Manuals for PROBOIL PROBOIL.4E

Summary of Contents for PROBOIL PROBOIL.4E
- Page 1 You must install the tap and filter before the boiler. We have a policy of continued product and quality development and improvement. Accordingly, we reserve the right to amend the specification at any time. All errors and omissions excepted. PROBOIL.4E user & installation guide v1d...
-
Page 2: Table Of Contents
1.2.3 PROBOIL : ............................... 16 ESCALING THE SYSTEM The aerator on the end of the tap/dispenser spout: ........................16 The water tank within the PROBOIL.4E boiler: ..........................17 1.2.4 PROBOIL : ....................21 LEANING AND STERILISING THE SYSTEM INTERNAL TANK TROUBLESHOOTING:................................ -
Page 3: Proboil.4E User Guide
Thank you for choosing PROBOIL.4E. By reading this entire guide you will ensure that the product is installed and used safely and will give its best performance, this guide should be used in conjunction with any additional product guides. 1 1 1 1 PROBOIL. -
Page 4: Electrical Safety
⚠ WARNING This appliance must be connected to a grounded / earthed power outlet only. ⚠ WARNING This appliance must be installed respecting local plumbing and electrical regulations. PROBOIL.4E user & installation guide v1d... -
Page 5: Intended Purpose
We only warrant the original filter type supplied with your boiler which is formulated specifically for the PROBOIL product. If the filter is removed or exchanged for an alternative model it may have a detrimental effect to your system and accordingly will invalidate your warranty. If you have specific or unusual incoming water conditions, please contact the service number on the boiler for further advice. -
Page 6: Day To Day Usage Considerations
Whilst the flow rate from the product has a maximum flow rate limitation inbuilt the flow rate may vary in use due to fluctuations in pressure or air pockets. When the water is dispensed it may take a brief moment to dispense as it refills previously emptied pipes. PROBOIL.4E user & installation guide v1d... -
Page 7: To Dispense Hot Water (Design May Vary By Model)
5) Hot (boiled & filtered) water - This is delivered when the ‘Hotkey’ key fob is moved close to or rested on the front of the tap below the spout (near the steaming cup indicator symbol). PROBOIL.4E user & installation guide v1d... -
Page 8: Reducing The Risk Of Splashing
Once filled remove the hotkey before removing the pan. ⚠ Always exercise due care when handling larger volumes of hot water. PROBOIL.4E user & installation guide v1d... -
Page 9: Periods Of Non-Use
(see using the product section), do not turn off the power at the mains socket or unplug the boiler as this may reset the filter counter. PROBOIL.4E user & installation guide v1d... -
Page 10: Aesthetic Cleaning
11. dispense 4 litres of boiled water using the Hotkey (approximately 4 minutes) 12. Allow the boiler to reheat fully and display “ready” before use ⚠ For very long extended periods of non-use please also refer to section ”Cleaning and sterilising the PROBOIL system internal tank” Aesthetic c... -
Page 11: Using The Product
Displays when the boiler is not in a heating phase indicating the water is at or near the pre-set target temperature. Blue colour, constant illumination when unit not in standby mode or the boiler is heating. PROBOIL.4E user & installation guide v1d... - Page 12 3) Troubleshooting error codes: In the event of the boiler self-diagnosing a problem it will display an “E” code to help to diagnose the fault, see troubleshooting section. Blue colour, constantly illuminated when the unit is not in standby mode. PROBOIL.4E user & installation guide v1d...
-
Page 13: Filter Replacement Guide
Each installation will have a different number of people using it, a different usage pattern and an individual water hardness “GB Clark rating”. Because of this the PROBOIL can only remind you when to check the filter, you must judge for yourself if the filter needs changing or not, as no two installations are the same use the guide below. -
Page 14: Replacing Your Proboil Filter
(C3), have your cloth to hand in case a small amount of water remains in the pipework. Note: Please dispose of the old filter in an appropriate manner, your PROBOIL filter is part our filter recycle scheme and can be returned to us following the instructions in the leaflet that will come with your new replacement filter. - Page 15 We only warrant the original filter type supplied with your boiler, which is formulated specifically for the PROBOIL product. If the filter is removed or exchanged for an alternate model it may have a detrimental effect to your system and accordingly will invalidate your warranty. If you have specific or unusual incoming water conditions, please contact the service number on the boiler for further advice.
-
Page 16: Descaling The Proboil System
⚠ If your PROBOIL is noisier that normal or the flow rate is reduced this is typically a good practical indicator that the filter may need replacing and the boiler and aerator may need to be descaled, there are two key parts of the product that likely will need regular descaling. -
Page 17: The Water Tank Within The Proboil.4E Boiler
The filter system provided with PROBOIL will help to prevent of the calcification (scaling) of the boiler however it will be required from time to time that the PROBOIL unit will need to be descaled, drained and refilled to ensure the maximum energy efficiency and service life from the product especially in hard water areas. - Page 18 (J) connector from the top of the boiler (C). 8) If the 3/8” rubber seal (I) becomes detached from the red outlet wing nut (J) connector then reinsert it the seal inside connector (J). PROBOIL.4E user & installation guide v1d...
- Page 19 (G) then use a cocktail stick (or similar) to remove it. 9. Whilst taking care, lift the PROBOIL.4E out from the cabinet and place it on the countertop. You can empty the boiler faster from the outlet (C) by depressing 10.
- Page 20 16. Fill the PROBOIL unit with cold water using the Hotkey, keep the Hotkey in place until you see water exit the spout of the tap then turn it off immediately so the boiler is filled with cold water and descaling solution.
-
Page 21: Cleaning And Sterilising The Proboil System Internal Tank
1.2.4 ⚠ Periodically it is prudent to clean the PROBOIL.4E boiler this might because the boiler has been left switched off for very long extended periods, possible contamination from dirt or debris, unwanted taste. When you clean the boiler we recommend you follow the descaling procedure first. - Page 22 (G), rinse the washer in cold water, and use a toothbrush to clean any debris from it. If meshed seal (H) is compressed inside inlet (B) or adaptor (G) then use a cocktail stick (or similar) to remove it. PROBOIL.4E user & installation guide v1d...
- Page 23 15. Whilst taking care, lift the PROBOIL.4E out from the cabinet and place it on the countertop. You can empty the boiler faster from the outlet (C) by depressing 16. Tip the boiler upside down so the the centre of the check valve insert found in the boiler inlet (B) whilst boilers centre outlet (C) is over the the boiler is upside down using a blunt household object like a pencil.
- Page 24 Change the pre-set water target temperature to 98°C 22. Wait for the PROBOIL.4E unit to display “READY” onscreen 23. Take note of the time and wait for no longer than a further 10 minutes maximum (or as described on the solution usage label) for the sterilising solution to work.
-
Page 25: Troubleshooting
Follow “Periods of non-use” (1.1.5) guide to ensure water is heated. Water temperature is lower than expected. The centre spout tube in the tap may be disconnected from the aerator, see “descaling-aerator” section for more detail. PROBOIL.4E user & installation guide v1d... -
Page 26: Water Dripping From The Spout End
Contact the service agent for when the Hotkey is placed near parts. the tap. The boiler is not switched on. Check the boiler has power and the display is not showing any error messages. PROBOIL.4E user & installation guide v1d... -
Page 27: Leaking From The Boiler
Other than as described in the maintenance, care, descaling, troubleshooting and cleaning sections of this user guide, this appliance must not be opened, serviced or repaired by anyone other than an authorised service agent. PROBOIL.4E user & installation guide v1d... -
Page 28: Warranty Terms And Conditions
No installer, dealer, agent or employee of PROBOIL has the authority to modify the obligations or limitations of this warranty. Where any additional service or maintenance contract is subscribed to and is valid then these terms and conditions may be superseded and or improved. -
Page 29: Proboil.4E Installer Guide
2 2 2 2 PROBOIL. PROBOIL. PROBOIL.4E 4E 4E 4E installer guide PROBOIL. installer guide installer guide installer guide 2.1 Important technical data: Important technical data: Important technical data: Important technical data: Boiler: Boiler: Boiler: Boiler: Measure: Comments: PROBOIL.4E Model... -
Page 30: Tap / Dispenser
5 micron nominal rating Carbon bock, dealk resin, polyphospahte Primary filter contents Tap / dispenser Tap / dispenser: : : : Tap / dispenser Tap / dispenser Varies by model installed, please refer to instructions supplied separately. PROBOIL.4E user & installation guide v1d... -
Page 31: Boiler Box Parts And Contents
8mm barbed stem x 3/8” male tap connector ASPT1180-L1 Installation and user guide (boiler only, tap supplied download from separately) registration card www.proboil.co.uk Installation screws and plugs M & N ASPT1180-M1 Tap data lead ASPT1030-R1 PROBOIL.4E user & installation guide v1d... -
Page 32: Installation
Now you have completed the preparation stage of the installation, complete this checklist as an aid to yourself and your customer, complete or circle the appropriate answers below, if any questions are answered as “no” then you must rectify this before commencing the installation. PROBOIL.4E user & installation guide v1d... -
Page 33: About The Product
A domestic hot and cold supply is available with separate isolation valves on both feed pipes The cold mains water is supplied known safe source of drinking water The domestic hot and cold supply is thoroughly flushed before installation PROBOIL.4E user & installation guide v1d... -
Page 34: Install The Tap
⚠ With all handles in the off position, blow through the tap boiled water hose (X5). If connected correctly air should pass freely to the centre spout channel. PROBOIL.4E user & installation guide v1d... -
Page 35: Install The Filter
2.3.3 Install the filter The premium quality filter provided with the PROBOIL system provides protection for the boiler and also give great tasting drinks. It is important to set up the filter correctly, according to the water hardness to get the best results. - Page 36 (F11) is in the closed position and that the lever is accessible to the customer. 6) Screw the ¾” x 3/8” push fit (F1) onto the three way tee (F11), ensuring the isolation valve lever is in the off position as shown in the diagram. PROBOIL.4E user & installation guide v1d...
-
Page 37: In 1 Tap Installation Only (Taps Including Cold Filtered Water Function)
The remaining pipe (E3) will connect to the boiler (see boiler instructions) Make pipe (E2) longer than the length required to reach the tap, as it can always be trimmed to length later. PROBOIL.4E user & installation guide v1d... -
Page 38: In 1 Tap Installation Only (Taps Excluding Cold Filtered Water Function)
⚠ The water hoses supplied are manufactured from WRAS approved materials. Please do not substitute or extend the hoses supplied with unknown hoses, as you risk tainting the taste of your water. PROBOIL.4E user & installation guide v1d... -
Page 39: Install The Proboil Boiler
½” inlet transport cap 3/8” outlet transport cap (X5) 3/8” female flexible (braided/silicone) hose tap connector assembly and fibre seal (supplied with tap) Data connection extension lead (1.0M) Built-in signal wire (X4) Boiler data connection PROBOIL.4E user & installation guide v1d... - Page 40 5mm from flush to allow you to mount the boiler. 5. Insert the ½” rubber meshed seal (H) into the ½” boiler inlet (B), ensure the orientation of the seal is as shown. PROBOIL.4E user & installation guide v1d...
- Page 41 10. Plug the power cable (D) securely into the socket on the left-hand side of the boiler (A). 11. Hook the boiler keyhole slots onto its wall fixing screws (M) and check it is secure. PROBOIL.4E user & installation guide v1d...
- Page 42 (supplied separately with the tap) is in this connection. ⚠ WARNING: You must not directly connect the tap hose (X5) directly to the boiler output (C). You must always use output adaptor (J) and silicone hose (K) to connect the tap. PROBOIL.4E user & installation guide v1d...
- Page 43 19. Your boiler is now plumbed to the tap and the filter, plug the power cord into the mains outlet but do not switch on the mains power outlet at this time. 20. Ensure any isolation valves to the tap and filter are now fully opened and check connections for leaks. PROBOIL.4E user & installation guide v1d...
-
Page 44: Commissioning And Testing
All pluming connections have been adjusted to length to avoid unnecessary dead legs and prevent accidental snagging The boiler is fixed to the cabinet wall to avoid accidental tipping Check valves have been installed as required by local law PROBOIL.4E user & installation guide v1d...
Need help?
Do you have a question about the PROBOIL.4E and is the answer not in the manual?
Questions and answers