
Related Manuals for LinMot PR02-88 Series


Summary of Contents for LinMot PR02-88 Series
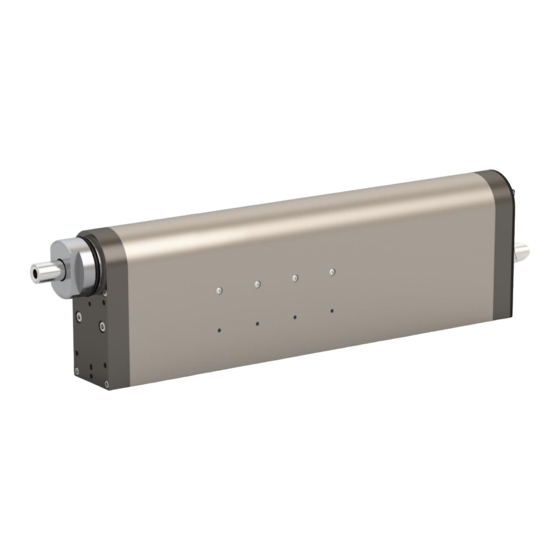
- Page 1 Installation Guide Linear Rotary Motors PR02-88 NTI AG / LinMot Dok-Nr. 0185-0100-E_1V6_IG_Linear_Rotary_Motors_PR02-88...
-
Page 2: Table Of Contents
Torque Measuring Shaft ........................17 6.3.1 Torque Operating Direction ......................17 Magnetic Spring MagSpring® ......................17 6.4.1 Force Direction..........................17 Plug and Play Function for Linear Rotary Motors ................17 Setting Motor Parameters ........................ 18 Page 2 / 34 PR02-88 NTI AG / LinMot... - Page 3 Calibration of Torque Measuring Shaft and Force Sensor .............. 28 Transport and Storage ........................... 28 Dimensions............................29 10.1 PR02-88x76-C_48x240F-HP-C-150 ....................29 10.2 PR02-88x76-C_48x240F-HP-C-300 ....................30 Declaration of Conformity and CE-marking ..................31 NTI AG / LinMot PR02-88 Page 3 / 34...
-
Page 4: General Information
1.4 Liability NTI AG (as manufacturer of LinMot linear motors and MagSpring products) excludes all liability for damages and expenses caused by incorrect use of the products. This also applies to false applications, which are caused by NTI AG's own data and notes, for example in the course of sales, support or application activities. -
Page 5: Safety Instructions
• For non-anti-magnetic watches, keep the double minimum distance. Burn hazard The shaft of LinMot linear rotary motors can reach temperatures of 80 °C, which may cause burns upon contact. Grounding All metal parts that are exposed to contact during any user operation or servicing and likely to become energized shall be reliably connected to the means for grounding. - Page 6 For your own safety, avoid constant contact with magnets. • Store large magnets at least one meter away from your body. Temperature resistance Keep motors away from unshielded flame or heat. Temperature above 120°C will cause demagnetization. Page 6 / 34 PR02-88 NTI AG / LinMot...
-
Page 7: Intended Use
Housing Pusher LinMot linear rotary motors are direct electric drives for use in industrial and commercial installations. For correct handling, observe the warnings listed in chap. 2. The PR02 motor series is characterized by a slim design in which a linear and a rotary motor including additional components are integrated in a common housing.OptionThis features a high-precision and... -
Page 8: Internal Mechanical Stops
By combining linear and rotary motion, highly complex motion patterns, such as those required in sealing and assembly applications, can be easily realized using LinMot linear rotary motors. In addition to the two motors, further options such as an air feed-through, a magnetic spring "MagSpring", a torque sensor and a force sensor can be integrated in the housing. - Page 9 With this option, a suitable, galvanically isolated measuring amplifier is automatically integrated in the linear rotary motor and provides a measuring signal of +-10 VDC suitable for the LinMot drive. Factory calibrations of integrated torque sensors are always carried out in the installed state. This has the advantage that the influences of the mechanics and the linear rotary motor are included.
-
Page 10: Installation Instructions
(see explanation above). In addition, the front of the motor should be fixed using the 4 tapped holes. The positions of the tapped holes can be found in the "Dimensions" section. Page 10 / 34 PR02-88 NTI AG / LinMot... -
Page 11: Mounting The Load On The Shaft
The use of drivers or the production of grooves is completely eliminated. The suitable shaft-hub clamping type can be ordered from LinMot. Mounting instructions and ordering information can be found in the "Accessories" chapter. -
Page 12: Connections
Only connect or disconnect the motor connector and sensor cable if no voltage is applied to the servo drive! Only original LinMot cables may be used for wiring the motor and sensor! Even assembled cables may only be manufactured from the original LinMot accessories and must be... -
Page 13: Wiring Linear Rotary Motor
The following schema shows the connection of the linear actuator and the torque measuring shaft with the LinMot Drive. 5.1.3 Overview of the Connectors Pos. 1: Torque sensor Pos. 2: Rotary motor Pos. 3: Linear motor NTI AG / LinMot PR02-88 Page 13 / 34... -
Page 14: Connector Wiring Linear Rotary Motor
(not at the transducer) if required. • External EMC circuitry A ceramic capacitor 100nF / 50V can be soldered between pins 4 - 5 on the evaluation to avoid wirebound interference. Page 14 / 34 PR02-88 NTI AG / LinMot... -
Page 15: Connection Of Air
The through bore-hole in the rotating shaft is Ø 4 mm. In the case of vacuum application, it is recommended to use a unit with sufficient power, as experience has shown that all air coupling points generate small losses. NTI AG / LinMot PR02-88 Page 15 / 34... -
Page 16: Start-Up
Installation Guide Linear Rotary Motors 6 Start-up Please note that motors of the PR02-88 family are only fully supported from LinMot-Talk version 6.8 onwards. It is therefore strongly recommended not to use an older LinMot-Talk version. 6.1 Linear Motor and Rotary Motor Linear motor and rotary motor are electrically independent units. -
Page 17: Torque Measuring Shaft
6.5 Plug and Play Function for Linear Rotary Motors LinMot linear rotary motors of the latest generation are Plug and Play capable (see motor label "PnP"). This means that they register with the drive independently. The module- and motor-specific parameters are automatically stored in the drive and the motor is ready for operation. -
Page 18: Setting Motor Parameters
The various parameters for the linear motor and the rotary motor are set via the corresponding motor wizard in the LinMot Talk configuration program. To open the wizard, select the "Motor Wizard" icon in the task bar. 6.6.1 Selection of the Motor Data Files If the connected motor is a module with plug and play functionality, the following step can be skipped. -
Page 19: Inverting The Coordinate System
Installation Guide Linear Rotary Motors 6.6.3 Inverting the Coordinate System Starting with LinMot-Talk version 6.8 the direction of the coordinate system can be selected. Default value for rotary motors: Positive counting direction = counterclockwise (see figure chapter 6.2.1) Default value for linear motors: Positive direction of movement = Regular (see figure in chapter 6.2.2) If the coordinate system is reversed, this has an influence on the current and the force/torque of the motor. -
Page 20: Selection Of The Linear And Rotary Unit System
6.6.4 Selection of the Linear and Rotary Unit System In step 4 of the Motor Wizard the GUI (Graphical User Interface) of the LinMot-Talk software can be set. This setting only affects the display of the LinMot-Talk software. The resolution and scaling of the transmission data (raw data) to the higher-level PLC are retained. -
Page 21: Referencing The Rotary Motor
“TF Force Control” software package cannot be used. If the signal of the torque measuring shaft / force sensor is only evaluated (PLC or LinMot Drive), the software package is not necessary. -
Page 22: Initial Test Of A Torque Measuring Shaft / Force Sensor
6.7.3 Initial Test of a Torque Measuring Shaft / Force Sensor It’s recommended to proceed an initial test of a sensor using the LinMot-Talk Variable before entering operational state. 1. Log into the drive using LinMot-Talk software and open the control panel. - Page 23 If the value of variable “Measured Force” is changing its value within different direction as variable “Motor Current” shows please check wiring or parameter setting “Analog Force Feedback Setting”. DON’T ENTER FORCE CONTROL MODE! NTI AG / LinMot PR02-88 Page 23 / 34...
-
Page 24: Accessories
Trailing Chain Cable Y/C, 8 m 0150-2441 KS10-Y-Fe/C- Trailing Chain Cable KS10-Y-Fe/C, Custom length 0150-3511 Robot Cable Item Description Item-No. KR10-W/C- Robot Cable KR10-W/C, Custom length 0150-3199 KR10-Y-Fe/C- Robot Cable KR10-Y-Fe/C, Custom length 0150-3515 Page 24 / 34 PR02-88 NTI AG / LinMot... -
Page 25: Sensor Cable
A friction-locked connection is created with the aid of a shaft-hub clamping. Ordering information Item Item Item RS02-SS25x47 Shaft-hub clamping for 25mm shaft 0230-0516 NTI AG / LinMot PR02-88 Page 25 / 34... -
Page 26: Dimensions And Technical Data
Slightly oil the shaft-hub clamping before mounting, do not use molybdenum disulphide or fat. • Tighten screws opposite each other 180 degrees offset in several steps to tightening torque T (see above for details). Page 26 / 34 PR02-88 NTI AG / LinMot... -
Page 27: Maintenance And Test Instructions
Maintenance or disassembly of the linear rotary motors may only be carried out by trained companies: • LinMot • Companies qualified by LinMot If the linear rotary motor is not opened by one of the above-mentioned companies, the warranty claim expires. NTI AG / LinMot... -
Page 28: Preventive Inspection Every 6'000H
Replacement and maintenance of ball bearings / plain bearings, if necessary e) Calibration of torque measuring shaft, if necessary (The calibration of built-in torque measuring shafts is carried out at the NTI AG / LinMot factory.) 8.2.2 Inspection after each 12'000h Maintenance is recommended every 12,000 hours of operation or every two years. -
Page 29: Dimensions
Installation Guide Linear Rotary Motors 10 Dimensions 10.1 PR02-88x76-C_48x240F-HP-C-150 NTI AG / LinMot PR02-88 Page 29 / 34... -
Page 30: Pr02-88X76-C_48X240F-Hp-C-300
Installation Guide Linear Rotary Motors 10.2 PR02-88x76-C_48x240F-HP-C-300 Page 30 / 34 PR02-88 NTI AG / LinMot... -
Page 31: Declaration Of Conformity And Ce-Marking
0150-3772 PR02-88x76-C_48x240F-HP-C-300-L05_MS08_TS00 0150-3773 PR02-88x76-C_48x240F-HP-C-300-L05_MS08_TS02 0150-3774 PR02-88x76-C_48x240F-HP-C-150-L00_MS04_TS00 0150-3775 PR02-88x76-C_48x240F-HP-C-150-L00_MS04_TS02 0150-3776 PR02-88x76-C_48x240F-HP-C-150-L00_MS08_TS00 0150-3777 PR02-88x76-C_48x240F-HP-C-150-L00_MS08_TS02 0150-3778 PR02-88x76-C_48x240F-HP-C-150-L01_MS04_TS00 0150-3779 PR02-88x76-C_48x240F-HP-C-150-L01_MS04_TS02 0150-3780 PR02-88x76-C_48x240F-HP-C-150-L01_MS08_TS00 0150-3781 PR02-88x76-C_48x240F-HP-C-150-L01_MS08_TS02 0150-3782 PR02-88x76-C_48x240F-HP-C-150-L05_MS08_TS00 0150-3783 PR02-88x76-C_48x240F-HP-C-150-L05_MS08_TS02 0150-3784 PR02-88x76-C_48x240F-HP-C-150-L00_MS00_TS00 0150-3803 PR02-88x76-C_48x240F-HP-C-300-L00_MS00_TS00 0150-3805 PR02-88x76-C_48x240F-HP-C-150-L01_MS00_TS00 0150-3891 NTI AG / LinMot PR02-88 Page 31 / 34... - Page 32 EN61000-6-2:2005 EN61000-6-4:2007 Jahr der CE-Kennzeichnung: Year of CE marking: Annee du marquage CE: 2019 Spreitenbach, 10.03.2022 Dr.-Ing. Ronald Rohner / CEO NTI AG Page 32 / 34 PR02-88 NTI AG / LinMot...
- Page 33 Installation Guide Linear Rotary Motors Notes NTI AG / LinMot PR02-88 Page 33 / 34...
- Page 34 Tech. Support: +41-(0)56-544 71 00 Tech. Support: usasupport@linmot.com support@linmot.com Tech. Support (Skype): skype:support.linmot E-Mail: usasales@linmot.com Web: http://www.linmot-usa.com/ Fax: +41-(0)56-419 91 92 Web: http://www.linmot.com/ Visit http://www.linmot.com/ to find a distributor next to you. © 2022 NTI AG / LinMot Subject to alterations...
Need help?
Do you have a question about the PR02-88 Series and is the answer not in the manual?
Questions and answers