Table of Contents
Advertisement
Quick Links
Advertisement
Table of Contents

Related Manuals for IONODES ION-R200

Summary of Contents for IONODES ION-R200
- Page 1 ION-R200 User Manual Dual Monitor HD Secure Display Station Document Version 5.0...
- Page 2 The information in this publication is provided “as is” without warranty of any kind. The entire risk arising out of the use of this information remains with the recipient. In no event shall IONODES be liable for any direct, consequential, incidental, special, punitive, or other damages whatsoever (including without limitation,...
-
Page 3: Table Of Contents
Equipment Installation ..........................9 Connections ................................9 Front Panel ..............................9 Rear Panel ..............................10 Powering the ION-R200 for the first time......................11 Device Configuration ............................. 15 Network Configuration Basics........................15 Setting Up the Initial Network Configuration Locally ................16 Setting Up the Initial Network Configuration Remotely ................. - Page 4 12 Performing a Firmware Update ..........................70 12.1 Batch Firmware Update ..........................71 13 Diagnostics ................................73 13.1 View Stream Details ..........................73 13.2 Safe Mode ..............................74 Annex A – Statement Limited Warranty ........................78 support@ionodes.com | www.ionodes.com | 450-696-1060...
-
Page 5: Important Safety Instructions
Do not attempt to perform hardware service on this product yourself. Opening the equipment casing • may expose you to dangerous voltage or other risks. Refer servicing to IONODES technical service personnel. Never open the device yourself as this will void the warranty. -
Page 6: Cleaning Instructions
Using the product in a humid place. • Warning: Do not use the product when moisture or condensation may occur. If the product is used in such an environment, it may damage discs and internal parts. support@ionodes.com | www.ionodes.com | 450-696-1060... -
Page 7: Before You Begin
ION-R200 uses highly efficient hardware-based stream decompression. The ION-R200 is fully compatible with H.265, H.264 and MJPEG video streams provided by most third-party IP cameras and video encoders on the market. Combined with the IONODES line of IP-based video encoders, the ION-R200 can also decode video streams provided by most third-party analog cameras. - Page 8 IONODES representative should you find any damages or defects. Note: The product serial number label helps the IONODES product support team identify your device and its factory configuration if your ION-R200 or its components require service. The label is attached on the underside of the enclosure.
-
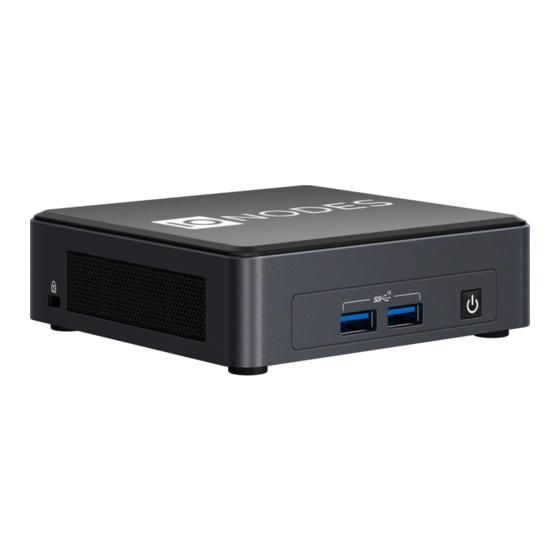
Page 9: Hardware Installation
6.1 Equipment Installation The ION-R200 can be placed on a flat surface, such as a desktop, or mounted via the available mounting bracket. When installing the ION-R200, position the unit to allow for cable clearance at the front and rear of the unit. -
Page 10: Rear Panel
Please ensure air vents are clear to allow for proper device ventilation. 4. POWER Appliance power connector. Connect to the power supply block provided with the appliance (19V). 5. USB-C Display Output Dual Display port 1.4a for video output to an HD digital display. support@ionodes.com | www.ionodes.com | 450-696-1060... -
Page 11: Powering The Ion-R200 For The First Time
Dual Display port 1.4a for video output to an HD digital display. Note: The ION-R200 has been qualified using 2 monitors on the 2 HDMI ports. Any combination of HDMI and USB-C display ports is allowed as long as a maximum of 2 monitors are used. - Page 12 Once all the required cabling is connected, press the POWER ON / OFF button on the front panel of the ION- R200. After a few seconds, the image below appears on all connected displays: When the device is ready to be used, the displays switch to the main user interface: support@ionodes.com | www.ionodes.com | 450-696-1060...
- Page 13 The ION-R200 is now ready to be configured. Currently Displayed View • In the top left corner appears the view currently displayed. You can select a different view by clicking the down arrow beside the view name. Views are configured using the device’s web interface or by switching to configuration view (see below).
- Page 14 GPU: shows the graphics adapter’s activity Mem: shows the system’s RAM memory utilization Video: shows the video streaming data rate Eth: shows the traffic on the Ethernet interface Wifi: shows the traffic on the Wireless interface support@ionodes.com | www.ionodes.com | 450-696-1060...
-
Page 15: Device Configuration
9 Device Configuration Before the ION-R200 can be used on your video network, it must undergo an initial setup step during which its network configuration is determined. This initial configuration setup step is required so that the ION-R200 can communicate with computers and cameras on the network. -
Page 16: Setting Up The Initial Network Configuration Locally
When the network configuration is set manually, the ION-R200 skips all the steps above and always uses the user-provided configuration. It is then the responsibility of the user to ensure that the network configuration in the ION-R200 is compatible with the computers and cameras on the network. - Page 17 (0-9), lowercase (a-z), uppercase (A-Z) and special character (!@#$%*()+=). Please note that the same screen will also be displayed when doing the initial setup remotely, over the LAN. The following screen is then displayed: support@ionodes.com | www.ionodes.com | 450-696-1060...
- Page 18 Network tab to display the network configuration. The Ethernet network configuration is shown in the first section Network Interfaces on the LAN 1 button. The first information displayed is the connection status of the Ethernet cable. If the configuration reports the support@ionodes.com | www.ionodes.com | 450-696-1060...
- Page 19 By default, the ION-R200 is configured in DHCP mode. If a DHCP server is present on the network, the network configuration provided by the DHCP server is displayed. In that case, nothing needs to be done; the device is ready to communicate with computers and cameras on your network.
- Page 20 ID: Enter the username in 802.1x ID field for authentication Password / Private Key: Enter the password in 802.1x Password field for authentication. Click Save The device is now ready to communicate with computers and cameras on your network. support@ionodes.com | www.ionodes.com | 450-696-1060...
-
Page 21: Setting Up The Initial Network Configuration Remotely
9.3 Setting Up the Initial Network Configuration Remotely Initial device network configuration can also be done via the ION Configuration Tool (ICT), a tool provided by IONODES and that can be found on the IONODES web site at www.ionodes.com. The ICT plays several roles:... - Page 22 IP address in the configured ranges. Discovery can be a long process if the range of IP addresses is large. To accelerate the discovery, add several small ranges of IP addresses. The ping timeout option can be increased for a high latency network. support@ionodes.com | www.ionodes.com | 450-696-1060...
- Page 23 If no DHCP server was able to assign an IP address to an ION-R200, it will appear in the ICT device list with an APIPA address (169.254.*.*). If an ION-R200 displays an APIPA address it must be configured with a valid IP address before it can be used on the network.
- Page 24 Once the network settings are set, the web-based configuration interface of the ION-R200 can be launched from the ICT or directly in your web browser by typing the device’s IP address in the address bar. support@ionodes.com | www.ionodes.com | 450-696-1060...
-
Page 25: Setting Up The Wireless Network
9.4 Setting Up the Wireless Network The ION-R200 can also connect to wireless networks. In the Configuration page, select the Network tab and in the Network Interfaces section, click on the Interface 2 button. The SSID field represents the name of the wireless network. The ION-R200 automatically detects available wireless networks;... -
Page 26: Setting Up The Ntp Time Server
Some networks use a time server, also named NTP time server (Network Time Protocol). The role of a time server is to synchronize the time for all devices on the network. The ION-R200 can be configured to use such a time server to synchronize its internal clock. -
Page 27: Setting Up The Security Policy
X failed ones, until the timeout of Y seconds runs out (X and Y are user-configurable). 9.7 Configuring the System Features In the Configuration page, select the System tab and go down to the section Features. support@ionodes.com | www.ionodes.com | 450-696-1060... - Page 28 Note: Enabling “Additional Data Sources” will increase the number of datasources that can be configured from the default 32 to 96. When going back from 96 to 32 (by disabling the feature), all of the data sources above 32 will be lost. support@ionodes.com | www.ionodes.com | 450-696-1060...
- Page 29 | www.ionodes.com | 450-696-1060...
-
Page 30: Video Configuration Concepts
Views determine how you want to group and display data. For example, if you wanted to display video from all the building entrances on one screen in a 2x2 layout, you could configure a view to do so. The ION-R200 supports up to 5 separate views. -
Page 31: Configuring Video Connections
To configure an RTSP video connection, set Data Source Type to Video over RTSP. To connect to a video stream, the ION-R200 needs to know the Connection URI and Stream Mode, as well as any Username and Password required by the camera or encoder. If you know the exact connection URI of the video stream, you can type it in manually. - Page 32 Step 2 – Camera Selection Select the camera you want by clicking on the desired entry in the list. Then, enter the Username and Password required to connect to the camera. Press the Next button. support@ionodes.com | www.ionodes.com | 450-696-1060...
- Page 33 In this step, the wizard displays a list of all video streams available from the camera that are supported by the ION-R200. Click on the desired video stream. The Stream Mode field shows a list of network connections supported by the camera. Select the desired streaming mode and press Next. You can also check Enable PTZ to have access to PTZ controls when viewing video from the camera.
- Page 34 Here the wizard displays the details of the video stream you have selected. To confirm that this is the video stream that you want, click on Finish. The wizard then closes, and the data source configuration is automatically populated. support@ionodes.com | www.ionodes.com | 450-696-1060...
- Page 35 To finalize the data source configuration, type in a name (optional) for the data source and press Save at the bottom to save the new configuration. support@ionodes.com | www.ionodes.com | 450-696-1060...
-
Page 36: Testing A Connection
Note: The ION-R200 connects to a video stream ONLY when that video stream is displayed. Enabling a data source indicates that the ION-R200 can establish this connection when needed, not that it needs to do so right away. Disabling a data source prevents the ION-R200 from connecting to the video stream for any reason. -
Page 37: Video Over Http Data Sources
To configure an MJPEG over HTTP video connection, set Data Source Type to Video over HTTP. There is no standardized method to query the list of available HTTP video streams in a camera and thus the discovery support@ionodes.com | www.ionodes.com | 450-696-1060... -
Page 38: Video Over Passive Rtp Data Sources
Stream Mode and Stream Port to match the passive video stream. If the passive video is sent to a multicast group, you must also enter the Stream Multicast Group. If the passive video is sent using SSM (Source-Specific Multicast), you must enter the Stream Multicast Group and Stream Source. support@ionodes.com | www.ionodes.com | 450-696-1060... -
Page 39: Decoding Priority
Video Smoothness – A 250ms buffer is added to the incoming video stream before it is displayed. Although this implies a minimal latency, it also ensures an almost perfect video playback. support@ionodes.com | www.ionodes.com | 450-696-1060... -
Page 40: Displaying A Data Source
4 data sources in a 2x2 layout. How to configure views will be discussed in full details in section 9.13. For now, scroll down to the View Tiles Content section. Each tile is identified by its position in the currently selected layout. support@ionodes.com | www.ionodes.com | 450-696-1060... - Page 41 If you are configuring the ION-R200 from your computer through the device’s web interface, the video is now displayed. If you are configuring the ION-R200 locally, click on Switch to Display View at the top of the screen to view the video.
-
Page 42: On-Screen Displays
Screen Preview is a visual representation of the area where the OSD will be displayed. As you configure the OSD, the preview will be automatically updated. Each OSD can display up to 4 strings of text, located as you wish over the video. support@ionodes.com | www.ionodes.com | 450-696-1060... - Page 43 To configure other OSD strings, click on 2, 3 or 4 and set the appropriate text, alignment and size. Note: The ION-R200 provides a wide range of possible text sizes to ensure readability on a wide variety of display sizes with resolutions from HD-720 all the way to 4K.
- Page 44 The ION-R200 supports a list of custom OSD strings to display dynamic information (ex: the camera name or the current time). Click on Custom String Formats to see the complete list. Note: Using custom OSD strings allows for greater flexibility. For example, displaying “Parking Lot” in your OSD makes sense only for the camera pointed at the parking lot.
-
Page 45: Displaying An On-Screen Display
If you are configuring the ION-R200 from your computer through the device’s web interface, the OSD is now displayed over the video. If you are configuring the ION-R200 locally, click on Switch to Display View at the top of the screen. -
Page 46: Configuring Web Connections
Type in the address of the web page in Connection URL. Type in a name (optional) for the data source, check Enabled to enable this data source and press Save at the bottom to save the new configuration. support@ionodes.com | www.ionodes.com | 450-696-1060... - Page 47 Note: The ION-R200 connects to a web page ONLY when that web page is displayed. Enabling a data source indicates that the ION-R200 can establish this connection when needed, not that it needs to do so right away. Disabling a data source prevents the ION-R200 from connecting to the web page for any reason.
- Page 48 Warning: Modern web pages are often filled with highly dynamic media content. Displaying such content require a lot of resources. Displaying multiple web pages WILL affect the video decoding performance of the ION-R200. support@ionodes.com | www.ionodes.com | 450-696-1060...
-
Page 49: Image Carousel
9.11 Image Carousel The IONODES Secure Display Station allow you to program a fully configurable image carousel as a data source that can be displayed on a video output tile of your choosing. 1- Select the Configuration page 2- Select the Data Sources tab 3- Select a data source to be configured in the Data Source Selection section support@ionodes.com | www.ionodes.com | 450-696-1060... - Page 50 1- Select the Data Source Type as Image Carousel support@ionodes.com | www.ionodes.com | 450-696-1060...
- Page 51 1- Enable the data source 2- Modify the Name field to a custom name or description 3- Click Add to open the Media Library dialog support@ionodes.com | www.ionodes.com | 450-696-1060...
- Page 52 1- Click on Add New Files to open the File Explorer dialog 2- Navigate to the directory containing the image(s) to upload to the ION-R200 3- Select an image 4- Click Open to automatically upload it to the ION-R200 Image Carousel...
- Page 53 5- Re-order the selected image in the image list by clicking the Move Up or Move Down buttons Note: A maximum of 50 images may be uploaded to the ION-R200 per data source. Images must be in JPG, PNG or GIF (not animated in ION-R200 video output) formats with a maximum size of 2 MB (2048 kb).
-
Page 54: Video File Playback
When unchecked, images will take as much space as possible in the view tile while preserving the images’ aspect ratio. 9.12 Video file playback Secure Display Stations allow the user to playback within a tile a selected video file stored on the internal memory of the device. support@ionodes.com | www.ionodes.com | 450-696-1060... - Page 55 In order to access this function please follow these steps: 1- Select the Configuration page 2- Select the Data Sources tab 3- Select a data source to be configured in the Data Source Selection section 4- Set the Data Source Type to Video File support@ionodes.com | www.ionodes.com | 450-696-1060...
-
Page 56: Configuring Views
1024 MB (all uploaded media files combined). 9.13 Configuring Views In the Configuration page, select Views tab. Views have the following configuration: Name • User friendly name. Also displayed in the view selector in the top-left corner of the screen. support@ionodes.com | www.ionodes.com | 450-696-1060... - Page 57 Note: Stretching the content of a video tile can visibly deform the video, as shown in the images below. Web pages simply adjust their layout based on the available space, so they are generally not affected in the same way. support@ionodes.com | www.ionodes.com | 450-696-1060...
-
Page 58: View Sequences
Once you have configured two or more views to display your various video streams, you can configure the ION-R200 to cycle through each of your views automatically on a timer. In the Configuration page, select Views tab. Select the Sequence 1, 2 or 3 view in order to customize. - Page 59 Back in Display Mode, you can now select the view sequence start the sequence. When a view sequence is selected, the name of the view currently displayed will also be shown. support@ionodes.com | www.ionodes.com | 450-696-1060...
-
Page 60: Configuring Video Outputs
9.15 Configuring Video Outputs In the Configuration page, select the Video Outputs tab. The configuration of each display output is as follows: Connected (read only) • Indicates whether the display output is connected to a physical display. support@ionodes.com | www.ionodes.com | 450-696-1060... - Page 61 When a single display is connected to the ION-R200, that display is always referred to as Video Output 1 regardless of the connector (HDMI or Mini DisplayPort) the display is connected to. If two displays are connected to the ION-R200, click on...
- Page 62 By default, display outputs are configured to automatically select the best resolution supported by the TV or monitor. In most cases, this is the desired behavior. If you want to use a different resolution, click on Output Resolution to display the list of supported resolutions. support@ionodes.com | www.ionodes.com | 450-696-1060...
- Page 63 Note: If the ION-R200 is connected to two displays and you disconnect Display Output 1, the other display automatically becomes Display Output 1. Display Output 2 is then considered disconnected. A common mistake is to try to configure a disconnected output.
-
Page 64: Ptz Control
9.16 PTZ Control The ION-R200 allows you to send PTZ and presets commands directly from any video tile window showing video from a PTZ-enabled data source. You just need to connect any standard keyboard and mouse to your ION-R200. Once done, you simply need to select the video tile to display the PTZ control. -
Page 65: Ptz Keyboard
9.17 PTZ Keyboard The ION-R200 can be operated remotely, over the LAN, via a network keyboard (an optional joystick may or may not be attached to the keyboard). In order to get started you need to select the keyboard type and input the IP address of the keyboard. If everything is configured correctly, it only takes a couple of seconds to connect to the keyboard. - Page 66 There are 2 custom string options supported: %#: displays the tile number in the format « Tile {OutputNum}-{OutputTileNum} » • Ex: Tile 2-16 The numbering of the tiles starts from 1 on each video output. support@ionodes.com | www.ionodes.com | 450-696-1060...
- Page 67 If the layout on video output #1 changes (ex.: 2x2 -> 3x3), the numbering of the tiles on video output #2 will also change dynamically as a consequence (the first tile from video output #2 will move from 5 to 10). support@ionodes.com | www.ionodes.com | 450-696-1060...
-
Page 68: Media Library
2) Delete files – select the files that you wish to delete and then click on the Delete button that appears on the bottom of the page to remove those files from the Media Library 3) Show Image previews – this is only possible for static images (not available for videos) support@ionodes.com | www.ionodes.com | 450-696-1060... -
Page 69: Live Ptz
Note: The Live PTZ feature is useful for cases where the user can’t connect an USB mouse & keyboard to the Secure Display Station to control the PTZ from the Display View section. Here the control is done remotely, directly from the machine running the Secure Display Station’s web interface. support@ionodes.com | www.ionodes.com | 450-696-1060... -
Page 70: Performing A Firmware Update
12 Performing a Firmware Update This section describes how to update your ION-R200 to newer firmware versions from the web interface. 1. On the device, switch to configuration view OR navigate to your device’s web interface. 2. If not currently logged in, log in using an administrator account’s credentials. -
Page 71: Batch Firmware Update
12.1 Batch Firmware Update This section describes how to perform a batch update of multiple ION-R200 devices to newer firmware versions from the ION Configuration Tool (ICT). The batch firmware update works by starting a firmware update session. Only one session at time is allowed and only 20 devices can be selected by session. - Page 72 If closed, the progress of the current session can be followed by reopening the “Firmware Update Session” window by clicking the button from the “Tools” toolbar. Once done, clear the current session from the “Firmware Update Session” window and restart a new session if needed. support@ionodes.com | www.ionodes.com | 450-696-1060...
-
Page 73: Diagnostics
13 Diagnostics 13.1 View Stream Details In order to help diagnose connectivity or performance problems, the ION-R200 can display live details about the video displayed in each tile. To display the stream details, click on the button at the top of the screen. -
Page 74: Safe Mode
13.2 Safe Mode It is possible to configure the ION-R200 in such a way that there is just too much video to decode. Whether it is due to the number of concurrent video streams or the combined bitrate of all video streams being too high, in such scenarios the ION-R200 may run at maximum capacity and it may not be enough to decode all the video. - Page 75 Note: It takes only a few seconds for the ION-R200 to start the system services and safe mode can be enabled only during that step of the boot-up sequence. If the device finishes booting up before you press the key combination, you can simply shut down and restart the device and try again.
- Page 76 Once you fix the configuration of the ION-R200, you need to restart the device to return to its normal mode of operation. When the device is in Safe Mode, the user is also presented an option to perform a reset to factory default settings.
- Page 77 Once you click on the “Reset to factory settings”, a pop-up window will appear asking for confirmation and weather to include or not the network settings. After the process is started the unit will reboot and reload the factory settings. support@ionodes.com | www.ionodes.com | 450-696-1060...
-
Page 78: Annex A - Statement Limited Warranty
ION-R200 Official Published Specifications (See http://www.ionodes.com for details). The warranty period for an ION-R200 is a specified, fixed period commencing on date of billing by IONODES for the Product. If a valid proof of billing cannot be found, the warranty may be void by IONODES Inc. or measured from the date the ION-R200 has shipped from a IONODES Depot center based on its serial number. - Page 79 ION-R200 under warranty, such as assistance via telephone with "how–to" questions and those regarding ION-R200 set–up and installation, will be provided WITHOUT WARRANTIES OF ANY KIND. support@ionodes.com | www.ionodes.com | 450-696-1060...
Need help?
Do you have a question about the ION-R200 and is the answer not in the manual?
Questions and answers