Table of Contents
Advertisement
Available languages
Available languages
GE Consumer & Industrial
Appliances
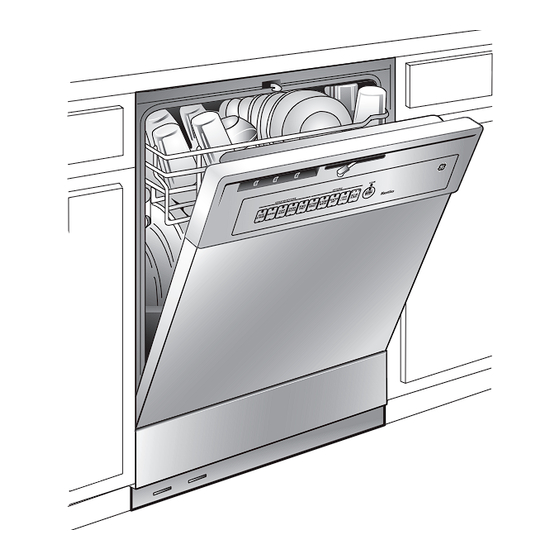
Installation Instructions
Built-In Dishwasher
If you have questions, call 800.GE.CARES (800.432.2737) or visit our website at: GEAppliances.com
In Canada, call 1.800.561.3344 or visit www.GEAppliances.ca
BEFORE YOU BEGIN
Read these instructions completely and
carefully.
IMPORTANT
Observe all governing codes
–
and ordinances.
• Note to Installer – Be sure to leave these
instructions for the consumer and local inspector's
use.
• Note to Consumer – Keep these instructions with
your Owner's Manual for future reference.
• Skill Level – Installation of this dishwasher requires
basic mechanical, electrical and plumbing skills.
Proper installation is the responsibility of
the installer. Product failure due to improper
installation is not covered under the GE
Appliance Warranty. See warranty information.
GSD2000
• Completion Time – 1 to 3 Hours. New installations
require more time than replacement installations.
IMPORTANT
installed to allow for future removal from the
enclosure if service is required.
If you received a damaged dishwasher, you should
immediately contact your dealer or builder.
Optional Accessories – See the Owner's Manual for
available custom panel kits.
FOR YOUR SAFETY
Read and observe all CAUTIONS and WARNINGS
shown throughout these instructions. While
performing installations described in this booklet,
gloves and safety glasses should be worn.
READ CAREFULLY.
KEEP THESE INSTRUCTIONS.
The dishwasher MUST be
–
206C1559P195 31-30255 07-09 JR
Advertisement
Table of Contents

Related Manuals for GE 206C1559P195


Summary of Contents for GE 206C1559P195
-
Page 1: Installation Instructions
GE Consumer & Industrial Appliances Installation Instructions Built-In Dishwasher If you have questions, call 800.GE.CARES (800.432.2737) or visit our website at: GEAppliances.com In Canada, call 1.800.561.3344 or visit www.GEAppliances.ca BEFORE YOU BEGIN Read these instructions completely and carefully. IMPORTANT Observe all governing codes –... - Page 2 PARTS SUPPLIED IN INSTALLATION PACKAGE: Two 8-18 x 5/8" Phillips-head wood screws ■ Junction box cover and #10 hex head ■ screw Drain hose (78" long) and hose clamp ■ Cord protector (Power Cord Models Only) ■ Conversion leads (Power Cord Models Only) ■...
-
Page 3: Prepare Dishwasher Enclosure
• For a corner installation, allow 2" minimum clearance between the dishwasher and the adjacent wall. • Provide at least 27" in front of the dishwasher to allow the dishwasher door to open fully. Refer to Figure B. Figure A •... -
Page 4: Prepare Drain Plumbing
Special consideration for a dishwasher installed on a pedestal lf the dishwasher is installed on an elevated platform, a high drain loop of at least 32" above the platform must be provided in addition to the air gap requirement determined above. -
Page 5: Prepare Electrical Wiring
Protector 1-1/2" Maximum (Provided with Power Cord Models Only) Electrical Connection to Dishwasher Electrical connection is on the right front of dishwasher. • For permanent connections, the cable must be routed as shown in Figure E. The cable must extend a minimum of 24"... - Page 6 • The water connection is on the left side of the dishwasher. Install the hot water inlet line, using 3/8" or larger copper tubing. Route the line as shown in Figure F and extend forward at least 19"...
-
Page 7: Dishwasher Installation
• Conversion leads (Factory-equipped power cord models only) – Appendix STEP 2: CHECK DOOR BALANCE • With the dishwasher on the wood base, check the door balance by opening and closing the door. • The door is properly balanced if it gently drops from a 1/2 open position and does not rise from the full open position. -
Page 8: Step 5: Install Power Cord
National Electrical Code, Section 422 and/ or local codes and ordinances. Maximum power cord length is 6 feet. Power Cord Kit WX09X70910, available for purchase from an authorized GE appliance dealer, meets these requirements. Figure J • Install strain relief in the junction box bracket. -
Page 9: Step 8: Position Water Line And Power Supply
Dishwasher Installation Note: The drain hose supplied with the dishwasher is approximately 78" long. If a longer hose is needed, a 10-foot-long hose may be purchased from an authorized GE appliance dealer. The 10-foot-long hose is part number GPF10S. Strain Relief... -
Page 10: Step 11: Slide Dishwasher Into Cabinet
• Remove the lower dish rack and place a level on the door and lower rack track as shown in Figure R. Figure R • Adjust the level of the dishwasher by individually turning the four legs on the bottom of the dishwasher as illustrated in Figure S. -
Page 11: Step 14: Connect Water Supply
Figure T Tip: Avoid unnecessary service charges for leaks or control panel damage. Make sure the dishwasher is centered in the cabinet and the door opens and closes freely without hitting the adjacent cabinets. Drive mounting screws straight and flush. -
Page 12: Step 15: Connect Drain Line
Figure Y IMPORTANT Figure W line to a disposer, check to be sure that the drain plug has been removed. Dishwasher will not drain if plug is left in place. Tip: Avoid unnecessary service call charges for a “no drain” complaint. -
Page 13: Step 16: Connect Power Supply
Steps 13 and 14. Pull lower rack about halfway out. Check to be ■ sure it does not roll back into dishwasher or further out. If it does, relevel the dishwasher. See Step 12. Check to be sure control panel does not touch ■... - Page 14 2 4 8 EATED ELAY TART (2 T OURS IMES ESET Check for leaks under the dishwasher. If a leak is ■ Hot Start Option S ta r t S ta r t Delay found, turn off power, tighten connections and (HRS) Light W ash restore power.
-
Page 15: Step 20: Replace Access Panel And Toekick
• Align the access panel to the dishwasher. • Select the two 8-32 x 1/4" machine-thread screws just removed and insert them through the top holes in the access panel and into the dishwasher frame. • Tighten these screws. • Align the toekick and make sure the bottom edge is against the floor. - Page 16 EQUIPPED POWER CORD TO A PERMANENT CONNECTION This procedure requires the conversion leads set aside in Step 1. • Make sure the power cord for the dishwasher is unplugged from the wall outlet. • Remove screw from junction box cover and remove cover if present.
-
Page 17: Avant De Commencer
L’installateur est responsable de la qualité de l’installation. Toute défaillance du produit attribuable à une installation inadéquate n’est pas couverte par la garantie de GE. Reportez- vous à la garantie du produit. • Durée de l’installation – Entre 1 et 3 heures. -
Page 18: Air Gap
Couvercle de la boîte de jonction et vis à tête ■ hexagonale n° 10 Boyau de vidange (198 cm [78 po] de long) ■ et collier Protège-cordon d’alimentation (modèles dotés ■ d’un cordon d’alimentation seulement) Fils pour la conversion (modèles dotés d’un ■ cordon d’alimentation seulement) Documentation, échantillons et(ou) bons... - Page 19 Dans le cas d’une installation Comptoir Countertop dans un coin, veuillez prévoir un dégagement d’au moins 5,1 cm (2 po) entre le lave- Lave-vaisselle Dishwasher vaisselle et les armoires, le mur ou un électroménager adjacent. 27" Minimum 69 cm (27 po) Veuillez prévoir un minimum dégagement d’au moins...
- Page 20 Préparation pour l’installation – Vidange PRÉPARATION DE LA PLOMBERIE POUR LA VIDANGE Exigences relatives au système de vidange • Veuillez observer les ordonnances et les codes locaux en vigueur. • Le boyau de vidange doit avoir une longueur maximale de 3 mètres (10 pieds). •...
- Page 21 Préparation pour l’installation – Alimentation électrique PRÉPARATION DU CÂBLAGE ÉLECTRIQUE AVERTISSEMENT POUR VOTRE SÉCURITÉ PERSONNELLE : Enlevez le fusible ou déclenchez le disjoncteur au panneau de distribution principal avant de commencer l'installation. N'utilisez pas une rallonge électrique ou un adaptateur de fiche avec cet appareil.
-
Page 22: Préparation De L'alimentation En Eau Chaude
Préparation pour l’installation – Alimentation en eau chaude PRÉPARATION DE L’ALIMENTATION EN EAU CHAUDE Conduite d’eau chaude • La conduite peut entrer du côté gauche, du côté droit, de l’arrière ou du plancher dans la partie ombrée indiquée dans la Figure F. •... - Page 23 Installation du lave-vaisselle ATTENTION N’enlevez pas la base de bois avant d’être prêt à installer le lave-vaisselle. Si vous enlevez la base de bois, le lave- vaisselle pourrait basculer lorsque vous ouvrez la porte. ÉTAPE 1 : PRÉPARATION Prenez les pièces fournies dans l’emballage et mettez-les de côté...
-
Page 24: Étape 5 : Installation Du Cordon D'alimentation
Le cordon d’alimentation doit avoir une longueur maximale de 1,8 m (6 pi). Le cordon d’alimentation n° WX09X70910, que vous pouvez vous procurer auprès d’un détaillant autorisé d’électroménagers GE, répond à cette exigence. Mise à la terre Blanc Support de la boîte... - Page 25 Si vous avez besoin d’un boyau plus long, vous pouvez vous procurer un boyau de 3 mètres (10 pieds) auprès d’un détaillant autorisé d’électroménagers GE. Le numéro de pièce du boyau de 3 mètres de long est le GPF10S. Strain...
- Page 26 Installation du lave-vaisselle ÉTAPE 11 : INSTALLATION DU LAVE- VAISSELLE DANS L’OUVERTURE IMPORTANT Ne poussez pas sur le – panneau avant avec vos genoux. Vous pourriez endommager l’appareil. • Saisissez le panneau avant de l’appareil par les côtés et faites glisser le lave-vaisselle dans l’ouverture de quelques centimètres ou pouces à...
-
Page 27: Étape 14 : Raccordement De L'alimentation En Eau
ÉTAPE 13 : FIXATION DU LAVE-VAISSELLE AU-DESSOUS DU COMPTOIR OU AUX CÔTÉS DES ARMOIRES Au cours de cette étape, vous aurez besoin des deux vis à bois Phillips de 15,8 mm (5/8 po) mises de côté à l’étape 1. IMPORTANT Le lave-vaisselle doit être –... - Page 28 Dishwasher Installation ÉTAPE 15 : RACCORDEMENT DU BOYAU DE VIDANGE L’extrémité moulée du boyau de vidange est conçue pour s’installer sur l’orifice d’entrée d’un diamètre variant entre 15,8 mm (5/8 po) et 25,4 mm (1 po) de la coupure anti-refoulement, du raccord en T ou du broyeur à...
-
Page 29: Étape 16 : Branchement De L'alimentation Électrique
Installation du lave-vaisselle ÉTAPE 16 : BRANCHEMENT DE L’ALIMENTATION ÉLECTRIQUE Si un cordon d’alimentation pourvu d’une fiche est déjà installé sur l’appareil, passez à l’étape 17. Si le lave-vaisselle est doté d’un cordon d’alimentation installé à l’usine et que vous désirez le transformer en vue d’un branchement permanent, reportez-vous aux directives données à... - Page 30 Installation du lave-vaisselle ÉTAPE 19 : LISTE DE CONTRÔLE DE L’ESSAI DU LAVE-VAISSELLE AVEC DE L’EAU Rétablissez l’alimentation électrique ou ■ si l’appareil est doté d’un cordon d’alimentation, branchez-le dans la prise de courant murale. Verrouillez la porte du lave-vaisselle. ■...
- Page 31 Installation du lave-vaisselle ÉTAPE 20 : RÉINSTALLATION DU PANNEAU D’ACCÈS ET DU PANNEAU INFÉRIEUR Au cours de cette étape, vous aurez besoin des panneaux et des deux vis mis de côté à l’étape 4. Deux types de vis sont utilisés. Les vis n° 8-32 x 6,3 mm (1/4 po) sont utilisées à...
- Page 32 Reportez-vous à la Figure CC. • Retournez à l’étape 16 des présentes directives pour terminer la conversion. LES SPÉCIFICATIONS PEUVENT ÊTRE MODIFIÉES SANS PRÉAVIS GE Consumer & Industrial General Electric Company Louisville, Kentucky 40225 GEAppliances.com Débranchez le cordon...
Need help?
Do you have a question about the 206C1559P195 and is the answer not in the manual?
Questions and answers