Table of Contents

Related Manuals for ElectrIQ eiQCURV60EN


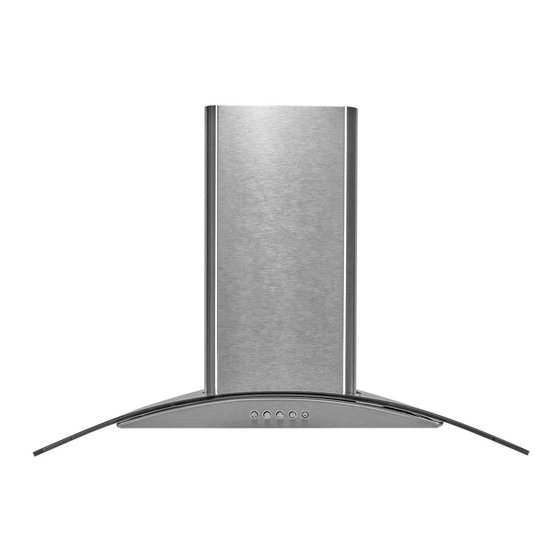
Summary of Contents for ElectrIQ eiQCURV60EN
- Page 1 USER MANUAL COOKER HOOD eiQCURV60/90EN eiQCURV60/90ENBL Please read this manual before using or installing the cooker hood and keep it safe for future reference. Visit our page www.electriQ.co.uk for our entire range of electricals...
-
Page 2: Table Of Contents
CONTENTS IMPORTANT SAFETY INFORMATION PARTS INSTALLATION OF FLAPS EXTERNAL VENTILLATION INSTALLATION EXHAUST INSTALLATION OPERATION GREASE MESH FILTERS CARBON FILTER REPLACING THE BULB CLEANING AND MAINTENANCE TROUBLESHOOTING SPECIFICATION AND SUPPORT PRODUCT FICHE... -
Page 3: Important Safety Information
IMPORTANT SAFETY INFORMATION Please read this instruction manual carefully and retain for future reference. It contains important information concerning the safe operation, installation and maintenance of the appliance. There must be adequate ventilation of the room when • the hood is used at the same time as appliances burning gas or other fuels. - Page 4 sensory or mental capabilities or lack of experience and knowledge if they have been given supervision or instruction concerning use of the appliance in a safe way and understand the hazards involved. Children must not play with the appliance. • Cleaning and user maintenance must not be carried out •...
-
Page 5: Parts
PARTS DESCRIPTION ILLUSTRATION QTY Cooker Hood Glass Canopy Chimney Sections (Pair) Outlet Air Flap Chimney bracket Canopy Anti vibration ring Canopy Mounting washer Bolt (M4*20) Screw (ST4*40) Screw (ST4*30) Wall plug Screw (ST4*8) Exhaust Adaptor... -
Page 6: Installation Of Flaps
INSTALLATION OF THE FLAPS The 2 air flaps should now be installed on the top of the unit, as access is easier before the unit is wall mounted. The flaps should be carefully installed, bending them slightly so the lugs at each end locate into the holes in the outlet vent. -
Page 7: External Ventillation
OPTIONS FOR VENTILATION This hood can be set up for either external venting or recirculation of the air. The type of setup should be decided before commencing installation. EXTERNAL VENTING If you have an outlet leading outside, your cooker hood can be connected as shown in the diagram using a flexible exhaust pipe. - Page 8 INSTALLATION • Unpack the hood and check that all functions are working. Ensure that the voltage (V) and the frequency (Hz) indicated on the serial plate match the voltage and frequency at the installation site. • Check that the area behind the installation surface is clear of any electrical cables or pipes, etc to avoid damage when drilling.
- Page 9 1. Before installation, ensure you have not connected the appliance to the mains supply. 2. The cooker hood should be placed at a distance of 65~75cm above the cooking plane for best effect. 3. After confirming the height of the cooker hood measure the position of the holes inside and...
- Page 10 6. Place the glass canopy on to the hood, aligning the screw holes. Place the anti-vibration rings into the 4 holes before securing the glass canopy into place by tightening the 4 bolts (M4*20) through the mounting rings into the hood. 7.
-
Page 11: Exhaust Installation
EXHAUST INSTALLATION The following rules must be strictly followed to obtain optimal air extraction: • Keep the expansion pipe short and straight. • Do not reduce the size or restrict expansion pipe. • When using an expansion pipe always install the pipe pulled taut to minimize pressure loss. -
Page 12: Operation
Leave to dry naturally out of direct sun light. Filters should be washed separately to crockery and kitchen utensils. it is advisable not to use rinse aid. Replacement grease filters are available from the retailer under code: eiQGFA60 for eiQCURV60EN/ ENBL;eiQGFA90 for eiQCURV90EN/ENBL INSTALLING GREASE MESH FILTERS 1. -
Page 13: Carbon Filter
Grease filters are available from the retailer and directly from the manufacturer under stock code: eiQCF152 for eiQCURV60EN/ENBL;eiQCF15290 for eiQCURV90EN/ ENBL. The installation procedure is as below. 1. Remove the grease filter. -
Page 14: Replacing The Bulb
REPLACING THE BULB 1. Switch off the extractor hood and ensure it is also switched off at the mains supply. 2. Remove the grease filters. 3. Disconnect the wiring connector on the lead running from the lamp holder. 4. Replace the holder and lamp with an identical unit available from the retailer/manufacturer. -
Page 15: Cleaning And Maintenance
CLEANING AND MAINTENANCE Disconnect range hood from power supply before cleaning or servicing. Clean the hood surface frequently using mild detergent and a warm damp sponge or cloth. Do not use harsh alkalis or abrasives. Avoid the use of scouring powers or dishwasher compounds. If the optional carbon filter is being used, these cannot be cleaned and require replacing every 2-3 months depending on frequency of use. -
Page 16: Troubleshooting
TROUBLESHOOTING Fault Cause Solution The fan blade is Light on, but Switch off the unit. Repair to jammed. fan does not be carried out by qualified The motor is work service personnel only. damaged. Replace the lamp with correct Both light Light has blown. -
Page 17: Specification And Support
UK Support Office hours: 9AM - 5PM Monday to Friday 0330 390 3061 www.electriQ.co.uk Unit J6, Lowfields Business Park Lowfields Way, Elland West Yorkshire, HX5 9DA PRODUCT DISPOSAL Do not dispose this product as unsorted municipal waste. Collection of such waste must be handled separately as special treatment is necessary. -
Page 18: Product Fiche
PRODUCT FICHE eiQCURV60EN/ENBL... - Page 19 eiQCURV90EN/ENBL...
Need help?
Do you have a question about the eiQCURV60EN and is the answer not in the manual?
Questions and answers