Table of Contents

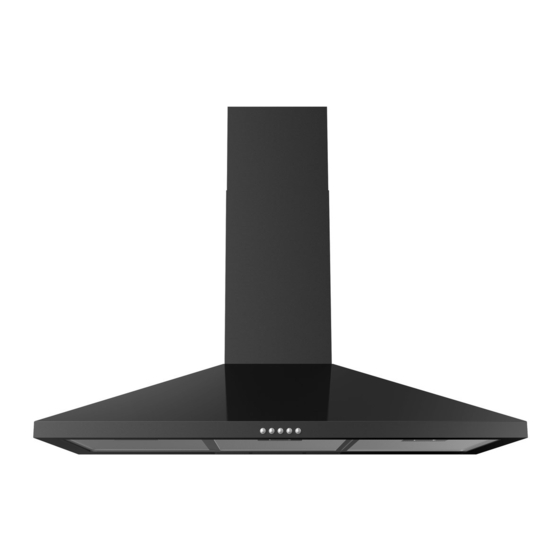
Summary of Contents for ElectrIQ eiq90chimbl
- Page 1 USER MANUAL COOKER HOOD eiq90chimbl / eiq90chimss Thank you for choosing electriQ Please read this user manual before using this product and keep it safe for future reference. Visit our page www.electriQ.co.uk for our entire product range...
-
Page 2: Table Of Contents
CONTENTS SAFETY OPTIONS FOR VENTILLATION PARTS INSTALLATION OPERATION CLEANING AND MAINTENACE BULB REPLACEMENT TROUBLESHOOTING SUPPORT TECHNICAL SPECIFICATION... -
Page 3: Safety
SAFETY PRECAUTIONS Whilst this product is compliant with all safety requirements, incorrect or inappropriate use can lead to both personal injury and potential damage to property. Please read the contents of this instruction booklet thoroughly before fitting or using this appliance. •... - Page 4 • The plug must be accessible after installation for isolation in case of an emergency – or an appropriate fused switch if the unit is hard-wired to the mains via a spur. • The minimum distance between the surface of the hob and the lowest part of the hood should be at least 65cm.
-
Page 5: Options For Ventillation
OPTIONS FOR VENTILATION This hood can be set up for either external venting or recirculation of the air. The type of setup should be decided before commencing installation. EXTERNAL VENTING If you have an outlet to the outside, your cooker hood can be connected as shown in the diagram using any suitable extraction duct (enamel, aluminium, flexible pipe or inflammable material with an interior diameter of 150mm) can... -
Page 6: Parts
BEFORE USAGE Before usage, read all the instructions and make sure that the voltage (V) and the frequency (Hz) indicated on the identification plate (found inside the cooker hood) and all the data inside the appliance are exactly the same as the voltage and frequency in your home. -
Page 7: Installation
INSTALLATION... - Page 8 POSITIONING • The bending of the ventilation tube should be less than 120⁰. Ensure the installation plate is fixed horizontally to avoid grease and muck collecting at one end. • After installation, make sure that the power can be disconnected if necessary. •...
- Page 9 6 x Wall plugs Follow the diagram on the previous page for measurements and fix installation plate and screw two suspension screws (ST5*50) into the wall plugs. 4 x screws (ST 5*50) If you are using an exhaust pipe (not included) fit the pipe before hanging the hood.
- Page 10 Hang the range hood on the previously installed suspension screws. Lock the suspension screws (ST5*50) into place to prevent the range hood from accidently falling during installation. 2 x Screws (ST 5*50)
- Page 11 2 x Screws Fix the chimney into place with two (M4*8) M4x8 Screws. 2 x Screws (M4*8) Fix the inner chimney to the extension plate extension to the chimney with two M4x8 screws.
-
Page 12: Operation
OPERATION Stop The motor will stop running The motor runs at low speed The motor runs at medium speed High The motor runs at high speed Light Turn the light on and off MAINTENANCE Before cleaning, switch the unit off and pull out the plug, or switch off at the relevant mains switch if the unit has been hard-wired in. -
Page 13: Bulb Replacement
CHARCOAL FILTER REPLACEMENT Remove the metal grease filters. Remove the saturated activated charcoal filter. Fit the new filters. Replace the metal grease filters. LIGHT BULB REPLACEMENT Before changing the bulb, ensure the hood is turned off and the power is disconnected before attempting to change the bulb. -
Page 14: Troubleshooting
TROUBLESHOOTING Fault Cause Solution Light on, but fan The fan blade is jammed. Switch off the unit. Repair to be carried out does not work by qualified service personnel only. The motor is damaged. Both light and fan Light has blown. Replace the lamp with correct rating. -
Page 15: Support
UK SUPPORT INFORMATION FOR DISMANTLING Do not dismantle the appliance in any way which is not shown in the user manual. The appliance must not be dismantled by an unqualified person. At the end of its life, the appliance should not be disposed of with general household waste. Check with your Local Authority or retainer for recycling advice. -
Page 16: Technical Specification
PRODUCT FICHE Model Identification eiQ90CHIMSS、eiQ90CHIMBL Symbol Value Unit Annual Energy Consumption AEChood 26.3 kWh/A Standard Annual Energy SAEChood 43.2 kWh/a Consumption Time increase factor Fluid Dynamic Efficiency FDEhood 15.8 Energy Efficiency Index EEIhood 60.9 Measured air flow rate at best QBEP 188.2...


Need help?
Do you have a question about the eiq90chimbl and is the answer not in the manual?
Questions and answers