Table of Contents
Advertisement
Quick Links
Advertisement
Table of Contents

Subscribe to Our Youtube Channel
Related Manuals for ElectrIQ eiQCHFGBSS60


Summary of Contents for ElectrIQ eiQCHFGBSS60
- Page 1 ANGLED GLASS AND STEEL DESIGNER CHIMNEY COOKER HOOD eiQCHFGBSS60/ eiQCHFGBSS90 Thank you for choosing electriQ Please read this user manual before using this product and keep it safe for future reference. Visit our page www.electriQ.co.uk for our entire product range...
-
Page 2: Table Of Contents
CONTENTS SAFETY PRODUCT OVERVIEW VENTING OPTIONS INSTALLATION FILTER OPTIONS OPERATION CLEANING AND MAINTENANCE LIGHT REPLACEMENT TROUBLESHOOTING PRODUCT FICHE SUPPORT... -
Page 3: Safety
SAFETY PRECAUTIONS Whilst this product is compliant with all safety requirements, incorrect or inappropriate use can lead to both personal injury and potential damage to property. Please read the contents of this instruction booklet thoroughly before fitting or using this appliance. •... - Page 4 • The plug must be accessible after installation for isolation in case of an emergency – or an appropriate fused switch if the unit is hard-wired to the mains via a spur. • The minimum distance between the surface of the hob and the lowest part of the hood should be at least 65cm.
-
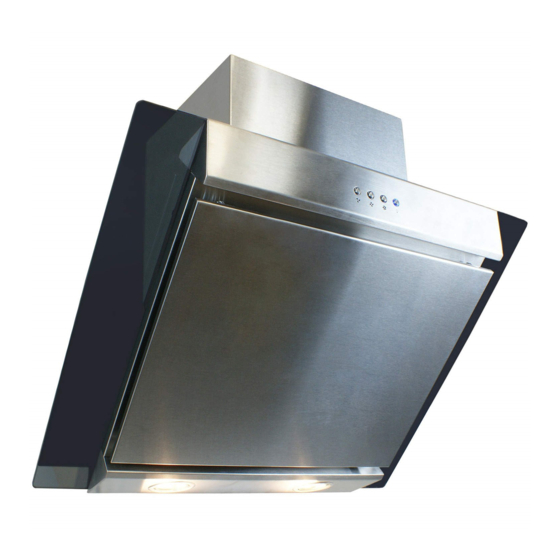
Page 5: Product Overview
PRODUCT OVERVIEW - PARTS SUPPLIED Description Illustration Qty. Cooker hood glass Outer chimney Inner chimney Wall bracket Plate I Płate II Screw (4mm x 40mm) Screw (4mm x 30mm) Wall plug Rubber cushion Screw 4x25mm Screw (4mm x 8mm) Exhaust Pipe cable tie Adaptor Air Flaps... -
Page 6: Venting Options
EXTERNAL VENTING If you have an outlet to the outside, your cooker hood can be connected as shown in the diagram using any suitable extraction duct (enamel, aluminium, flexible pipe or inflammable material with an interior diameter of 150mm) can be used. -
Page 7: Installation
UNPACKING YOUR APPLIANCE • Please take great care when unpacking; a sharp blade should not be used to open the box, as it may go deep enough inside to damage components. Components damaged or marked by careless unpacking are not covered under the guarantee. - Page 8 3. Insert the glass into the panel glove of the cooker hood, then use 4 screws (4 x 25mm), inserting them through the 4 x rubber cushions to fix the glass into the cooker hood (see diagrams). 4. The 2 x air flaps should be installed at this stage, as access is easier before the unit is wall mounted.
- Page 9 5. Attach the exhaust pipe onto the outlet as shown below, and fix the pipe on the outlet by cable tie. The adaptor can be used at this stage, if you already have existing smaller diameter venting in place to connect. 6.
- Page 10 8. Put the inner chimney on the outer chimney. Install plate I on the chimney by two screws (4 mm x 8mm). Drill holes on the wall to accommodate plate I. NOTE: Remember not to fix the screws (4 mm x 8mm) too tightly; 1mm loose is recommended, so that later height adjustment can be done more easily.
- Page 11 9. Drill 2 holes to accommodate plate II. Screw and tighten the plate II onto the wall with the screws (4mm x 40 mm) and wall plugs provided. Note: Plate II is used to fix the chimney. The below diagram is for reference. Fixing the chimney to wall plate is done at the end of installation.
- Page 12 10. Put the installed chimneys on the cooker hood. Fix the Plate I to the wall by using 2 (4mm x 40 mm) screws and wall plugs. Pull out extensible pipe till it feeds through the hole on the wall. Lift the inner chimney onto the plate II, fix the inner chimney to the plate II by using 2 screws (4mm x 8mm).
-
Page 13: Filter Options
CARBON FILTER(OPTIONAL) Activated carbon filters should be used to trap odours (optional – available from the same stockist you purchased the hood from) and must be used if the hood is not vented to the outside. reference: eiQCF110 (Carbon Filter Pack of 2 – fits both 60cm and 90cm models) In order to install the activated carbon filters, the aluminium filter should be removed first. -
Page 14: Operation
OPERATION There are five buttons: (Low), (Mid), (High), (Light), (Power). 1. After connecting the hood, the indicator light will turn on and the hood will enter standby mode. 2. Power on: Press power button once, and the power indicator light will be turn on, the hood will automatically begin at low speed. -
Page 15: Cleaning And Maintenance
MAINTENANCE Before cleaning, switch the unit off and pull out the plug, or switch off at the relevant mains switch if the unit has been hard-wired in. Make sure the unit has no power being fed to it. Regular Cleaning Use a soft cloth moistened with hand-warm mildly soapy water or household cleaning detergent. -
Page 16: Light Replacement
LIGHT REPLACEMENT IMPORTANT: The light fitting must be replaced by the manufacturer, its service agent or similarly qualified persons LED lamp: 1. Use the correct light: 2 x 1.5W LED. 2. Carefully take out the lamp with a suitable tool. 3. -
Page 17: Product Fiche
PRODUCT FICHE Symbol Value Unit eiQCHFGBSS60 Model identification eiQCHFGBSS90 Annual Energy 81.6 kWh/a hood Consumption Time increase factor Fluid Dynamic 15.9 hood Efficiency Fluid Dynamic Class D Efficiency class Energy Efficiency 80.0 hood Index Energy Efficiency Class C class Measured airflow rate at the best 274.8... - Page 18 Grease Filtering Efficiency (GFE Class E hood) class Measured power consumption on 0.53- standby mode Measured power consumption on off 0.38 mode Sound power level (Highest setting) Sound power level (Lowest setting) The following shows how to reduce total environmental impact (e.g. energy use) of the cooking process).
-
Page 19: Support
At the end of life, the appliance should not be disposed of with household waste. Check with you Local Authority or retainer for recycling advice. electriQ UK SUPPORT www.electriQ.co.uk/support Call: 03303903061 Office hours: 9AM - 5PM Monday to Friday www.electriQ.co.uk...
Need help?
Do you have a question about the eiQCHFGBSS60 and is the answer not in the manual?
Questions and answers