Table of Contents
Advertisement
Quick Links
INSTALLATION AND
USER MANUAL
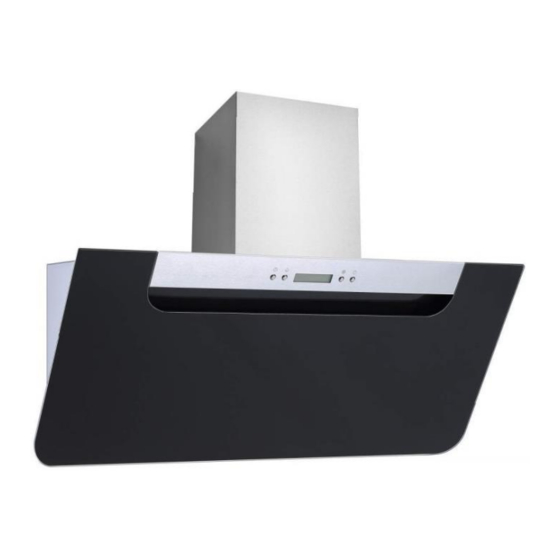
SLOPING BLACK GLASS
COOKER HOOD
eiQCHB60B
eiQCHB90B
Thank you for choosing your electriQ cooker hood.
This instruction manual is designed to provide you with all required instructions related to
the installation, use and maintenance of the appliance. In order to operate the unit correctly
and safely, please read this instruction manual carefully before installation and usage.
Advertisement
Table of Contents

Related Manuals for ElectrIQ eiQCHB60B


Summary of Contents for ElectrIQ eiQCHB60B
- Page 1 COOKER HOOD eiQCHB60B eiQCHB90B Thank you for choosing your electriQ cooker hood. This instruction manual is designed to provide you with all required instructions related to the installation, use and maintenance of the appliance. In order to operate the unit correctly...
-
Page 2: Table Of Contents
CONTENTS SAFETY PRECAUTIONS OPTIONS FOR VENTILATION UNPACKING YOUR APPLIANCE PRODUCT OVERVIEW DIAGRAM INSTALLATION OPERATION MAINTENANCE CARBON FILTERS (OPTIONAL) LIGHT BULB REPLACEMENT TROUBLESHOOTING TECHNICAL INFORMATION SUPPORT... -
Page 3: Safety Precautions
SAFETY PRECAUTIONS Whilst this product is compliant with all safety requirements, incorrect or inappropriate use can lead to both personal injury and potential damage to property. Please read the contents of this instruction booklet thoroughly before fitting or using this appliance. •... - Page 4 • The air must not be discharged into a flue that is used for exhausting fumes from appliances burning gas or other fuels. • When the hood is vented externally and used with appliances which burn fuel (e.g. gas, oil, wood) the area must be sufficiently ventilated to ensure safe operation.
-
Page 5: Options For Ventilation
OPTIONS FOR VENTILATION This hood can be set up for either external venting or recirculation of the air. The type of setup should be decided before commencing installation. EXTERNAL VENTING If you have an outlet to the outside, your cooker hood can be connected as shown in the diagram using the flexible exhaust pipe (supplied). -
Page 6: Product Overview
PRODUCT OVERVIEW - PARTS SUPPLIED Description Illustration Qty. Cooker hood Chimney Exhaust Pipe Adaptor cable tie Plate I Plate II Screw (4mm x 40mm) Wall plug Screw (4mm x 8mm) Screw (4mm x 30mm) Air Flaps... -
Page 7: Diagram
DIAGRAMS eiQCHB60B eiQCHB90B... -
Page 8: Installation
INSTALLATION 1. Before installation, ensure you have not connected the appliance to the mains supply. 2. The base of the cooker hood should be placed at a distance of 65~75cm above the cooking plane for best effect. 3. Install the hanging screws on a suitable wall once the installation height is decided, ensuring they are level. - Page 9 6. Hang on the cooker hood on to the two screws previously installed. 7. If venting externally attach the vent pipe onto the one-way- valve, and fix the pipe on the valve using the cable tie. The adaptor can be used at this stage, if you already have existing smaller diameter venting in place to connect.
- Page 10 10. Pull up the inner chimney and fix it into inner chimney bracket with 2 x screws (4mm x 8mm). 11. Remove the Aluminium filter and fix to the wall with 2 x screws (4mm x30mm) through the safety holes. 12.
- Page 11 CARBON FILTER(OPTIONAL) Activated carbon filters should be used to trap odours (optional – available from the same stockist you purchased the hood from) and must be used if the hood is not vented to the outside. Reference: eIQCF160 Carbon Filter Pack In order to install the activated carbon filters, the aluminium filter should be removed first.
-
Page 12: Operation
OPERATION POWER BUTTON While the hood is turned off, press the POWER button to start the hood at the previously used speed. While the hood is turned on, press the POWER button to turn the hood off. LAMP BUTTON Press the LAMP button to illuminate the display. Press the LAMP button again to turn off the display. - Page 13 REMOTE CONTROL LAMP Press the button to turn on the backlight. Press the button again to turn off the backlight. TURN ON / INCREASE FAN SPEED With the hood turned off, press the + button to start the fan at low speed. While the fan is running, press the + button to increase the fan speed.
-
Page 14: Maintenance
Replacement grease filters are available from the same stockist from which you purchased the hood: Replacement grease filters are available: eiQCHB60B: eiQAL03D660-T & eiQAL03D660-B eiQCHB90B: eIQAL03D690-T & eiQAL03D690-B REPLACEMENT OF THE ACTIVATED CARBON FILTER These are only required in units that have been installed in recirculation mode (not vented to the outside). -
Page 15: Light Bulb Replacement
LIGHT REPLACEMENT Important: The light fitting must be replaced by the manufacturer, its service agent or similarly qualified persons. Always switch off the electricity supply before carrying out any operations on the appliance. When handling the light fitting, make sure it has completely cooled down before any direct contact to hands. -
Page 16: Technical Information
TECHNICAL INFORMATION Symbol Value Unit Model identification eiQCHB60B Annual Energy 97.3 kWh/a hood Consumption Time increase factor Fluid Dynamic 21.9 hood Efficiency Energy Efficiency 71.9 hood Index Measured airflow rate 463.8 at the best efficiency Measured air pressure at best efficiency point Maximum airflow at 796.1... - Page 17 Symbol Value Unit Model identification eiQCHB90B Annual Energy 93.9 kWh/a hood Consumption Time increase factor Fluid Dynamic 24.8 hood Efficiency Energy Efficiency 66.5 hood Index Measured airflow rate 537.6 at the best efficiency Measured air pressure at best efficiency point Maximum airflow at 836.4 boost position...
-
Page 18: Support
At the end of life, the appliance should not be disposed of with household waste. Check with your Local Authority or retailer for recycling advice. electriQ UK SUPPORT www.electriQ.co.uk/support Call: 0871 984 4416 Office hours: 9AM - 5PM Monday to Friday...
Need help?
Do you have a question about the eiQCHB60B and is the answer not in the manual?
Questions and answers