Table of Contents

Related Manuals for ElectrIQ eiQ60PBSLIMEN


Summary of Contents for ElectrIQ eiQ60PBSLIMEN
- Page 1 USER MANUAL COOKER HOOD eiQ60PBSLIMEN eiQ90PBSLIMEN Thank you for choosing electriQ Please read this user manual before using this product and keep it safe for future reference. Visit our page www.electriQ.co.uk for our entire product range...
-
Page 2: Table Of Contents
CONTENTS SAFETY PRODUCT OVERVIEW PARTS LIST INSTALLATION V-FLAP INSTALLATION OPTIONS FOR VENTILATION INSTALLING THE UNIT OPERATION FILTER INFORMATION BULB REPLACEMENT CLEANING AND MAINTENANCE TROUBLESHOOTING SUPPORT PRODUCT FICHE... -
Page 3: Safety
SAFETY PRECAUTIONS Whilst this product is compliant with all safety requirements, incorrect or inappropriate use can lead to both personal injury and potential damage to property. Please read the contents of this instruction booklet thoroughly before fitting or using this appliance. •... - Page 4 • A partial vacuum can starve the heating appliance of oxygen, impairing combustion. It can also prevent toxic fumes from leaving the room, or can cause fumes to be sucked into the room from outside. • Safe operation is only possible when the partial vacuum within the working area does not exceed 4 Pa (0.04 mbar).
-
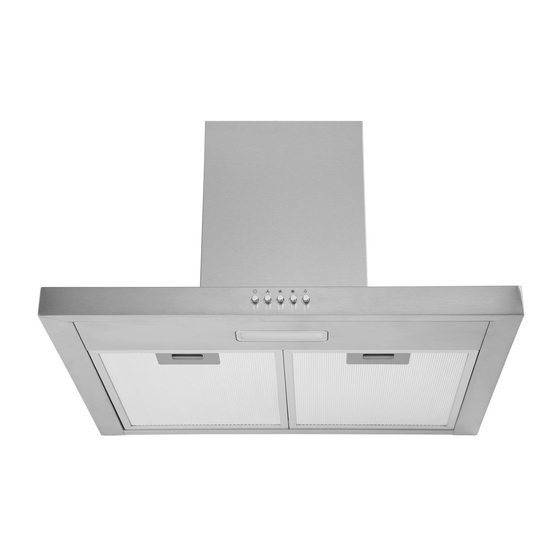
Page 5: Product Overview
PRODUCT OVERVIEW... -
Page 6: Parts List
PARTS LIST Ref. Quantity Description Hood Body Lower decorative chimney Upper decorative chimney V-flap Exhaust pipe (Not included) Charcoal filter Screws 4,2 x 9,5 / Screws 4x8 Wall Plugs Chimney fixing bracket Screws 5 x 50... -
Page 7: Installation
INSTALLATION (VENT OUTSIDE) MOUNTING OF THE V-FLAP If the cooker hood does not have an assembled V-flap 1, you should mount the half-parts to its body. The images only show an example of how to mount the V-flap, the outlet may be various according to different models and configuration. -
Page 8: Options For Ventilation
OPTIONS FOR VENTILATION This hood can be set up for either external venting or recirculation of the air. The type of setup should be decided before commencing installation. INSTALLATION If you have an outlet to the outside, your cooker hood can be connected as below picture by means of an extraction duct (enamel, aluminum, flexible pipe or non-flammable material with an interior diameter of 150mm) 1. -
Page 9: Installing The Unit
INSTALLATION • Draw a vertical line up to the ceiling or up to the upper limit, at the centre of the area in which the hood is to be fitted. • A horizontal line A at 790– 890 mm above the cooker top. •... -
Page 10: Operation
HOOK THE HOOD BODY Hook the hood body to the 2 screws 10 (5 x 50) at the horizontal line A. ⚫ Level the hood body itself. ⚫ Remove the filter from the inside of the hood body, fix the screws 10 to Wall Plugs 11 at the points ⚫... -
Page 11: Filter Information
INSTALLING GREASE MESH FILTERS • To install filters for the following four steps. • Angle the filter into slots at the back of the hood. • Push the button on handle of the filter. • Release the handle once the filter fits into a resting position. •... -
Page 12: Bulb Replacement
BULB REPLACEMENT Before changing the bulb, ensure the hood is turned off and the power is disconnected before attempting to change the bulb. Wait until the flitting has cooled down before commencing replacement. • Open the LED light plate assembly and take away the grease filter. See pic 1. •... -
Page 13: Troubleshooting
TROUBLESHOOTING Fault Possible Cause Solution Fan switch turned off Select a fan switch position. Light on, but motor Fan switch failed Contact service center. does not work Motor failed Contact service center. House fuses blown Reset/Replace fuses. Light does not work, motor does Power cord loose or Refit cord to power outlet. -
Page 14: Support
Do not dismantle the appliance in a way which is not shown in the user manual. The appliance could not be dismantled by user. At the end of life, the appliance should not be disposed of with household waste. Check with your Local Authority or retailer for recycling advice. electriQ UK SUPPORT www.electriQ.co.uk/support Call: 0871 984 4416 Office hours: 9AM - 5PM Monday to Friday... -
Page 15: Product Fiche
PRODUCT FICHE Model Identification eiQ60PBSLIMEN eiQ90PBSLIMEN Symbol Value Unit Annual Energy AEChood 25.6 kWh/A Consumption Standard Annual Energy SAEChood 42.5 kWh/a Consumption Time increase factor Fluid Dynamic Efficiency FDEhood 15.9 Energy Efficiency Index EEIhood 60.2 Measured air flow rate at QBEP 191.4...
Need help?
Do you have a question about the eiQ60PBSLIMEN and is the answer not in the manual?
Questions and answers