Advertisement
Quick Links
Advertisement

Subscribe to Our Youtube Channel
Related Manuals for H-KING Seagull


Summary of Contents for H-KING Seagull
- Page 1 SEAGULL 1570MM SEAPLANE BUILDING INSTRUCTIONS...
-
Page 2: Contents Of Kit
CATALOG Contents of Kit --------------------------------------------------------------------------------P1 BUILDING INSTRUCTION-------------------------------------------------------------------------P2-P20... - Page 3 CONTENTS 1 x Un-assembled Seagull kit. INCLUDES: 1 x Plywood sheets pack 1 x Paulownia strips 1 x Balsa sheets pack 1 x Construction drawing 1 x Balsa sticks pack 1 x Operation manual 1 x Hardwood strips 1 x Set of Connecting rods...
-
Page 4: Building Instructions
KIT FEATURES High quality balsa and plywood construction. • Easy to fly floatplane design. • Excellent flight performance and handling qualities. • Capable of taking off from water, grass and snow. • Complete accessory pack. • Extensive clear drawings and step by step instructions with pictures. •... - Page 5 3. Glue parts A24 & A22 to part A13, the front fuselage top and battery access hatch. 4. Glue together as a laminate the 2 x A20 parts to form part the keel. 5. Glue together as shown the 4 off different shaped A29 pieces to make one fuselage side. Repeat this process to make the second fuselage side.
- Page 6 6. Glue formers A1/A2/A3/A5 and A6 to the keel A20. 7. Glue the battery mount A15 to the above assembly and the add the 3 off A16 to form the dummy windshield front bracing. 8. Glue the battery access hatch A13 assembly to the top of the front of the fuselage. Page 4...
- Page 7 10. Glue strips A21 to front base of fuselage. 9. Glue part A7 to former A6. 11. Glue strips A25 to the sides from the front nose former A1 back to the rear former A8. 12. Glue in place the radio tray part A17. 13.
- Page 8 14. Laminate together the 2 off wing fixing plates 15. Glue the prepared wing fixing plate A19 to the top A19, when dry install the four-pronged blind nut as former A8. Then add the 2 off wing seating strips A18. shown.
- Page 9 18. When these have set add the center bottom 19. At this point add the horizontal stabilizer seat A12 to 6x6mm balsa strip from former A7 and shape it to fit the rear of former A11. in between the 2 outer strips as shown below. 20.
- Page 10 24. Sheet in the underneath of the fuselage to form the hull using 2 off A31. Once again use a PVA type glue and hold in place with pins as the glue dries. 25. Sheet in the top rear of the fuselage using part A32. 26.
- Page 11 28. Glue a pair of magnets to the battery 29. Glue another pair of magnets to the corresponding hatch part A14. part of the fuselage where the battery hatch fits. Ensure the polarity of the magnets are correct so that they attract and not repel.
- Page 12 34. Glue the reinforcing ribs B6 to the insides of ribs 35. Add the lower trailing edge sheeting to underneath B5 so that they face each other. the rear of the wing ribs. Sand the B9 balsa blocks to a taper and glue in between the rear of ribs B6.
- Page 13 40. At this point the wings should 41. Glue to the front of the spar at the root the look like this. separate front part of rib B1. Then add the front wing dowel plate B11 and the half rib B12. 42.
- Page 14 45. Add the top trailing edge sheeting B23 and the 46. Glue into place the leading edge B15. When the glue has rib capping strips B24. The capping strips are glued dried sand to the profile shown. to the top and bottom of the wing ribs in between the leading edge and trailing edge sheeting.
- Page 15 51. At this point you need to cut out the ailerons from 52. Draw the cutting lines on the wing in pencil as the wings. Carefully measure this distance back from shown above. Note: Do not cut them off right to the trailing edge to the point between the 2 spars as the root, cut them so that the first rib in from the shown.
- Page 16 55. Glue the 2 off B25 plywood parts together to form the 56. When the glue has set on the dihedral brace in the wing dihedral brace. Before you join the wings test fit first wing you are now ready to join the wings. Slide each one onto the fuselage, adjust as necessary.
-
Page 17: Tail Assembly
59. Drill the necessary holes for the aileron servo extension leads to pass through into the radio compartment. Please note that the aileron leads will need to be installed before wing is covered with film. Tail Assembly. Build the the tail parts over the plan. Use a flat surface to avoid any twisting and use pins to hold to building board as glue dries. - Page 18 Rudder. 65. Glue parts D4/D5/D6 66. Add the horizontal 67. Mark the leading edge 68. Sand or plane the and D7 to form the frame of braces D12 and D13. of the rudder with a V as edges of the rudder in a V the rudder.
- Page 19 72. Mark the leading edge of the elevators 73. Sand or plane the edges of the elevators with a V as shown above for the hinge line. in a V to form the hinge line. 74. Hinge the elevators but do not glue the 75.
- Page 20 Wing Float Assembly. 78. Add to this sub assembly the 2 sides of the 77. Glue together parts E3/E4 floats parts E6. and E8 as shown above. 81. Cap the backend of the 80. Form the underneath of the floats 79.
- Page 21 Motor Pylon Assembly. 85. Construct the motor pylon using 2 off 86. Laminate together to off F1 to form the parts F2 and 2 pieces of 6x8mm hardwood. motor mount. 88. Cut the middle part of the wing at the 87.
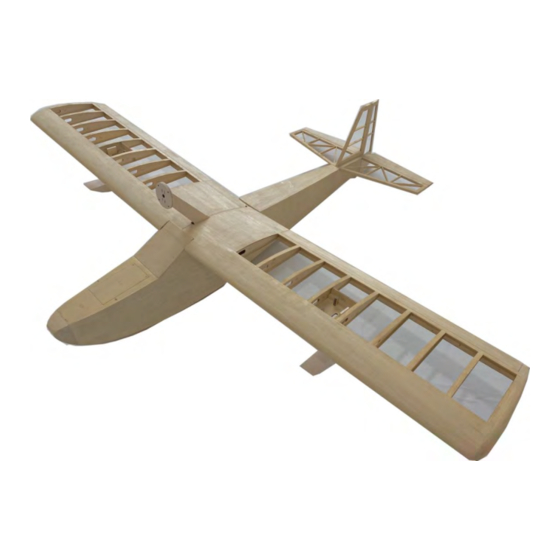
- Page 22 90. Your Seagull Seaplane basic construction is finished, check it over and give it a final sanding where necessary. If you plan to fly it off of water then we recommend that you seal around all the glue joints with a waterproof sealer before covering.
Need help?
Do you have a question about the Seagull and is the answer not in the manual?
Questions and answers