Table of Contents
Advertisement
English
フジノン和文
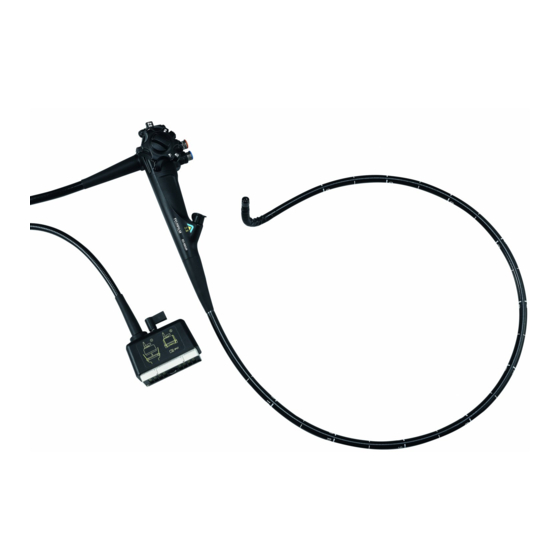
Ultrasonic Endoscope
EG-580UR
OPERATION MANUAL
This Operation Manual describes details on how to operate the ultrasonic endoscope and cautions
to be observed when operating it. Please read this manual thoroughly before actually operating the
ultrasonic endoscope.
After reading this manual, store it nearby the ultrasonic endoscope so that you can see it whenever
necessary.
202B1262871D
Advertisement
Table of Contents

Related Manuals for FujiFilm EG-580UR


Summary of Contents for FujiFilm EG-580UR
- Page 1 English フジノン和文 Ultrasonic Endoscope EG-580UR OPERATION MANUAL This Operation Manual describes details on how to operate the ultrasonic endoscope and cautions to be observed when operating it. Please read this manual thoroughly before actually operating the ultrasonic endoscope. After reading this manual, store it nearby the ultrasonic endoscope so that you can see it whenever necessary.
- Page 2 202B1262871D...
-
Page 3: Introduction
Introduction Introduction Ultrasonic Endoscope EG-580UR is an upper gastrointestinal endoscope intended for the observation and diagnosis of the esophagus, stomach and duodenum, and for the observation, diagnosis and endoscopic treatment of submucosal and peripheral organs at medical facilities under the management of physicians. - Page 4 FUJIFILM Corporation. FUJIFILM Corporation shall not be liable for malfunctions and damages of FUJIFILM Corporation products due to products of other manufacturers not supplied by FUJIFILM Corporation.
-
Page 5: Endoscope Manuals
This manual describes the cleaning, disinfection, sterilization and storage methods of the ultrasonic endoscope. [Note] In this manual, the Ultrasonic Endoscope EG-580UR Operation Manual is referred to as “this manual”, and the Ultrasonic Endoscopes EG-580UT and EG-580UR Reprocessing Manual as “Reprocessing Manual”. -
Page 6: Contents At A Glance
Contents at a Glance Contents at a Glance Chapter 1 Precautions This chapter describes the warnings and cautions for safe operation of the ultrasonic endoscope. Chapter 2 Product Overview This chapter describes the composition of the ultrasonic endoscope set of accessories and system configuration. -
Page 7: Table Of Contents
Contents Contents Introduction ........................3 Endoscope Manuals .....................5 How to Read This Manual ...................5 Contents at a Glance ....................6 Chapter 1 Precautions ....................10 1.1 For Safe Operation ...............10 1.2 Classification ................11 1.3 Safety ....................12 1.3.1 Infection ................12 1.3.2 Preventing Electrical Shock ..........15 1.3.3 Treatment with Electrosurgical Instruments ....16 1.3.4... - Page 8 Contents 2.6 Operating Bending Section ............40 2.6.1 Operating the Bending Section ........40 2.6.2 Angle Lock Function ............42 2.7 Control Valves ................44 2.8 Scope Switches ................45 2.9 Ultrasonic Image ................46 Chapter 3 Preparation and Inspection Before Use ............47 3.1 Preparing Forceps Valve ..............47 3.1.1 Cleaning and Disinfecting (or Sterilizing) the Forceps Valve ............47...
- Page 9 Contents Chapter 5 Troubleshooting ..................85 5.1 Troubleshooting................85 Main Specification .....................93 Service ........................100 Disposal of Electric and Electronic Equipment ............101 Index ........................102 Service Centers ......................103 202B1262871D...
-
Page 10: Chapter 1 Precautions
Do not modify this product or its components, and do not disassemble, repair or in any other way reverse-engineer these products. Even if you find a defect, do not attempt to repair these products yourself. FUJIFILM Corporation shall not be liable for any defects or device failures caused by such modifications, disassembly, repairs or reverse-engineering. -
Page 11: Classification
Chapter 1 Precautions 1.2 Classification <Classification of Medical Electrical Equipment> 1. Type of protection against electric shock : Class I equipment (power supply: protected ground fault receptacle) 2. Degree of protection against electric shock : Type BF applied part 3. Degree of explosion protection : Use is prohibited in an oxygen-rich environment or in a flammable gas atmosphere. -
Page 12: Safety
Chapter 1 Precautions 1.3 Safety Read the following precautions before using this product to ensure proper handling. 1.3.1 Infection WARNING This product has not been cleaned or disinfected (or sterilized). It must be cleaned and disinfected (or sterilized) for the first time prior to use and after any subsequent use as per instructions provided in the Reprocessing Manual. - Page 13 FUJIFILM recommendations. Once the balloon evacuation channel is clogged, it cannot be cleaned, disinfected or sterilized properly and can be a source of infection.
- Page 14 Chapter 1 Precautions WARNING Slowly insert an endotherapy device (e.g. forceps) or syringe straight into the ultrasonic endoscope. Also, when withdrawing it, slowly pull straight out. If it is inserted or withdrawn quickly, body fluid may be splattered around due to breakage or accidental detachment of the instrument, leading to infection.
-
Page 15: Preventing Electrical Shock
Chapter 1 Precautions 1.3.2 Preventing Electrical Shock WARNING Insert the AC plug into a hospital grade receptacle. Not doing so may cause an electric shock accident. Use an electrosurgical instrument conforming to EN 60601-2-2. Refer to the manual of the electrosurgical instrument for how to operate the electrosurgical instrument. -
Page 16: Treatment With Electrosurgical Instruments
Chapter 1 Precautions 1.3.3 Treatment with Electrosurgical Instruments WARNING This product is not intended to stop bleeding with diathermic treatment equipment. Prepare an endoscope and diathermic treatment equipment that can be used with it, so as to take necessary actions in emergencies such as bleeding. - Page 17 Chapter 1 Precautions CAUTION We recommend use of only those peripheral products specified in this manual to avoid adverse outcomes such as electric shock when this product is used in combination with other devices. Prevent patient’s body from touching electric conductor such as metal part of bed while using an electrosurgical instrument and an accessory instrument.
-
Page 18: Direct Harm To Human Body
Chapter 1 Precautions 1.3.4 Direct Harm to Human Body WARNING This product is used with a product that contains natural rubber as a material. Natural rubber may rarely cause allergy symptoms, such as itching, reddening, hives, swelling, fever, dyspnea, asthma-like symptoms, drop in blood pressure and shock. - Page 19 Chapter 1 Precautions CAUTION Take extreme care when inserting the ultrasonic endoscope into the oral cavity. Otherwise, it may cause pain to the patient. Do not forcibly advance or withdraw the ultrasonic endoscope into/ from the patient. It may cause damage to the body lumen, bleeding or perforation.
- Page 20 Chapter 1 Precautions CAUTION When the ultrasonic endoscope projects light at high brightness and transmission of ultrasonic waves for a long time, the temperature may exceed 41°C at the distal end. Turn off the lamp and stop transmission of ultrasonic waves (Freeze the ultrasonic processor) when you hang the ultrasonic endoscope on the cart hanger.
-
Page 21: Electromagnetic Compatibility (Emc)
• Consult the manufacturer or dealer of other devices. If the problem cannot be solved with the above measures, stop using this product and consult the manufacturer or your local FUJIFILM dealer for help. WARNING Do not place any objects that emit strong electromagnetic waves near this product. -
Page 22: Location Of Each Label
Chapter 1 Precautions 1.5 Location of Each Label The positions where the labels are affixed on this product are shown below. The relevant safety signs are also described. 1.5.1 Location of Labels <Control Portion> Model Label Instrument Channel Diameter Label <LG Connector>... - Page 23 Chapter 1 Precautions <US Connector> Caution Label 202B1262871D...
-
Page 24: Symbols
Chapter 1 Precautions 1.5.2 Symbols Symbol Description Do not re-use / Single patient use only Use by date / Expiration date of use Lot number Serial number Date of manufacture Manufacturer Authorised representative in the European Community Consult instructions for use Temperature limitation Keep dry Non-sterile... - Page 25 Chapter 1 Precautions Symbol Description Atmospheric pressure limitation Super CCD model Minimum diameter of the instrument channel: 2.8 mm Applicable for autoclave [Note 1] This product shall not be treated as household waste. [Note 2] This symbol indicates that this specific type of medical device contains dibutyl phthalate (DBP).
-
Page 26: Possible Combinations For Use
Chapter 1 Precautions 1.6 Possible Combinations for Use 1.6.1 Accessories Use this product in combination with the accessories described in “Main Specification”. WARNING Do not use the ultrasonic endoscope in combination with accessories other than those described in this manual. Otherwise, it is unable to ensure its functionality, and creates a risk of patient injury or equipment damage. -
Page 27: Cautions/Warnings
If any abnormality is noticed during use, carry out safety checks and discontinue use immediately. If any abnormality occurs with this product, refer to “Chapter 5 Troubleshooting”. Should any questions arise regarding information contained in the operation manuals or any safety concerns, contact your local FUJIFILM dealer. 202B1262871D... -
Page 28: Transportation And Storage
Chapter 1 Precautions 1.7.2 Transportation and Storage WARNING Contact your local FUJIFILM dealer when this product is returned for repair. Be sure to clean and disinfect (or sterilize) this product before returning for repair. A returned product which is not cleaned and disinfected (or sterilized) may increase infection control risks to users, service personnel or other persons in contact with it. -
Page 29: General Warnings
Chapter 1 Precautions 1.7.4 General Warnings WARNING Make sure to inspect the equipment before use according to the procedures provided in this manual to avoid unexpected accidents and to take full advantage of the equipment’s capabilities. If the inspection result shows any abnormality, do not use the same equipment. This product is an ultrasonic endoscope for the upper digestive tract. -
Page 30: Chapter 2 Product Overview
Chapter 2 Product Overview Chapter 2 Product Overview 2.1 Composition of Standard Set The standard ultrasonic endoscope set is provided in a carrying case and consists of the following items. [Note] Figures in parentheses indicate the number of articles. Suction Valve SB-604 (1) Air/Water Valve AW-602 (1) - Page 31 Chapter 2 Product Overview Air/Water Channel Cleaning Adapter CA-609 (1) Injection Tube Channel Plug WA-007 WA-008 Cleaning Adapter CA-608 (1) Cleaning Brush Cleaning Brush Cleaning Brush WB2221FW2 (1) WB11003FW (1) WB7024FW (1) US Waterproof Cap Ventilation Adapter WA-7000 (1) AD-7 (1) 202B1262871D...
-
Page 32: System Configuration
• Endoscopic treatment • Recording video images • Printing still images Water Tank WT-4 Ultrasonic Processor WT-2 SU-1 Ultrasonic Endoscope EG-580UR Light Source XL-4450 Processor Balloon VP-4450HD B20UR Foot Switch Data Keyboard DK-4450E Forceps/Endotherapy Device... - Page 33 Chapter 2 Product Overview [Note] The devices described here may have already been discontinued. For details on the devices used in combination with this product, contact your local FUJIFILM dealer. [Note 1] Electrosurgical Unit ICC 200 (ERBE) [Note 1] For details, refer...
-
Page 34: Nomenclature And Functions Of Ultrasonic Endoscope
Chapter 2 Product Overview 2.3 Nomenclature and Functions of Ultrasonic Endoscope This product consists of the following parts. [Note 1] Use the processor to assign functions on each scope switch. For details, see the operation manual of the processor. Lock Handle Fixes the US connector to LG Flexible Portion the ultrasonic processor. - Page 35 Chapter 2 Product Overview Scope Switch 3 [Note 1] [Note 1] Scope Switch 2 [Note 1] Scope Switch 1 Up-down Angulation Lock Suction Valve Locks the up/down angulation of the bending A l l o w s s u c t i o n t h r o u g h t h e section.
-
Page 36: Ultrasonic Endoscope Distal End
Chapter 2 Product Overview 2.4 Nomenclature and Functions of Ultrasonic Endoscope Distal End The distal end of the EG-580UR consists of the following parts. Imaging Section (Inside) Balloon Attachment Grooves Transducer This portion is used to attach This portion transmits and receives the balloon ring. -
Page 37: Nomenclature And Functions Of Accessories
Chapter 2 Product Overview 2.5 Nomenclature and Functions of Accessories 2.5.1 Forceps Valve The forceps valve is provided without sterilization and must be cleaned and disinfected (or sterilized) prior to use following the instructions of the Reprocessing Manual. Reprocessing Manual “7.1 Cleaning and Disinfecting (or Sterilizing) Forceps Valve” Slit Circular Hole Entire Forceps Valve... -
Page 38: Balloon
Chapter 2 Product Overview 2.5.2 Balloon Balloon Ring Balloon B20UR 2.5.3 Cleaning Adapter The cleaning adapter (CA-608) is comprised of the injection tube (WA-007) and channel plug (WA-008). <Injection Tube (WA-007)> Tube for Instrument/Suction Channel Connects to the suction channel. Air Supply Tube Port Connects to the air Air/Water Channel Connector... - Page 39 Chapter 2 Product Overview <Channel Plug (WA-008)> Balloon Channel Port Suction Plug The syringe is attached to this port to feed air or fluid to the balloon This plug is inserted into the channel of the ultrasonic endoscope. suction valve cylinder of the ultrasonic endoscope.
-
Page 40: Operating Bending Section
Chapter 2 Product Overview 2.6 Operating Bending Section 2.6.1 Operating the Bending Section CAUTION Do not forcibly twist or bend too sharply the insertion tube and the bending section by hand. It may cause a failure. The bending section is operated by using up-down/left-right angulation knobs. <Up-down Angulation Knob>... - Page 41 Chapter 2 Product Overview <Left-right Angulation Knob> Turn the left-right angulation knob in the direction of L to angulate the bending section to the left. Turn it in the direction of R to angulate the bending section to the right. 202B1262871D...
-
Page 42: Angle Lock Function
Chapter 2 Product Overview 2.6.2 Angle Lock Function This angle lock function is used to maintain a bent condition of the bending section. With the up-down angulation lock operation, it switches between lock and free (unlock) of the up/down angulation. With the left-right angulation lock operation, it switches between lock and free (unlock) of the left/right angulation. - Page 43 Chapter 2 Product Overview <Left-right Angulation Lock> Rotate the knob in the direction of F to unlock the bending section. [Note] Free (unlock) : Allows external force to angulate the bending section freely. Rotate the knob in the direction opposite to F to lock the bending section.
-
Page 44: Control Valves
Chapter 2 Product Overview 2.7 Control Valves <Suction Valve> Used for suction from the instrument channel outlet at the distal end. Also used to discharge water from the balloon. When the suction valve is pressed halfway, suction continues while the valve is pressed. When the suction valve is fully pressed, water is discharged from the balloon. -
Page 45: Scope Switches
Chapter 2 Product Overview 2.8 Scope Switches CAUTION Use the processor to assign functions on each scope switch. For details, see the operation manual of the processor. Scope Switch 4 Scope Switch 5 Scope Switch 3 Scope Switch 2 Scope Switch 1 For details, see the operation manual of the processor. -
Page 46: Ultrasonic Image
Chapter 2 Product Overview 2.9 Ultrasonic Image This section describes the functions specific to this ultrasonic endoscope. The following image is an overview image of the ultrasonic image. [Note] The ultrasonic image is a radial image extending from the point approximately 10 mm ahead of the distal end of the ultrasonic endoscope. -
Page 47: Chapter 3 Preparation And Inspection Before Use
Chapter 3 Preparation and Inspection Before Use Chapter 3 Preparation and Inspection Before Use CAUTION Do not use the ultrasonic endoscope if the inspection result shows any abnormality. Doing so can negatively affect the functionality of the instrument or increase risks to patient safety. 3.1 Preparing Forceps Valve WARNING Ensure that the forceps valve is properly attached to the instrument... -
Page 48: Inspecting The Forceps Valve
Chapter 3 Preparation and Inspection Before Use 3.1.2 Inspecting the Forceps Valve The forceps valve is intended for single use. If any abnormality is found, do not use the product, and use a new disinfected (or sterilized) forceps valve. (1) Visually check that the slit in the cap (a) and hole in the main body (b) of the forceps valve are free from abnormalities such as tears, cracks, discoloration, etc. -
Page 49: Preparing Air/Water Valve And Suction Valve
Chapter 3 Preparation and Inspection Before Use 3.2 Preparing Air/Water Valve and Suction Valve WARNING Use a cleaned and disinfected (or sterilized) air/water valve and suction valve. An inadequately cleaned and disinfected (or sterilized) valve may pose an infection risk. CAUTION Do not apply silicone oil to the air/water valve or suction valve. -
Page 50: Attaching The Air/Water Valve And Suction Valve
Chapter 3 Preparation and Inspection Before Use 3.2.2 Attaching the Air/Water Valve and Suction Valve Attach the air/water valve and suction valve to the control portion of the ultrasonic endoscope. (1) Attach the air/water valve to the ultrasonic endoscope's air/water valve cylinder and push in the valve firmly. [Note] The air/water valve and the air/water valve cylinder have a blue mark. -
Page 51: Preparing Peripheral Devices
Chapter 3 Preparation and Inspection Before Use 3.3 Preparing Peripheral Devices For details on preparation and inspection of peripheral devices, refer to their manuals. 202B1262871D... -
Page 52: Preparing System
Chapter 3 Preparation and Inspection Before Use 3.4 Preparing System WARNING This product is not intended to stop bleeding with diathermic treatment equipment. Prepare an endoscope and diathermic treatment equipment that can be used with it, so as to take necessary actions in emergencies such as bleeding. - Page 53 Chapter 3 Preparation and Inspection Before Use (3) Prepare the suction unit. [Note] For details on the suction unit, refer to the manual of the suction unit. Collection canister Suction unit (4) Mount the water tank, 80% filled with sterile water, on the hook.
-
Page 54: Connecting Ultrasonic Endoscope (Attachment)
Chapter 3 Preparation and Inspection Before Use 3.5 Connecting Ultrasonic Endoscope (Attachment) CAUTION Set the suction pressure between 40 and 53 kPa. If the suction pressure is too high, the ultrasonic endoscope may adhere to mucous membrane, resulting in damage to the mucous membrane. 3.5.1 Connecting the Ultrasonic Endoscope (Processor, Light Source, Water Tank and Suction Unit) (1) Before attaching the LG connector to the light source, Light incident distal face... - Page 55 Chapter 3 Preparation and Inspection Before Use (4) Make sure that the forceps valve is attached to the instrument channel inlet of the ultrasonic endoscope. (5) Insert the connector of the water tank to the water feed connector of the ultrasonic endoscope. Align the groove on the connector and the pin of the water feed connector on the ultrasonic endoscope, and attach it firmly by turning the connector clockwise until it stops.
-
Page 56: Inspecting Ultrasonic Endoscope
If the adhesive surfaces are rough, pitted or flaking, return the instrument to your local FUJIFILM dealer. (2) Hold the insertion tube with both hands to make a semicircle with a diameter of approximately 200 mm, referring to the figure at right. -
Page 57: Inspecting The Bending Mechanism
Chapter 3 Preparation and Inspection Before Use 3.6.2 Inspecting the Bending Mechanism [Note] For information on how to operate the bending mechanism, refer to “2.6 Operating Bending Section” of this manual. “2.6 Operating Bending Section” (1) Unlock both up-down and left-right angulation locks by turning them in the “Free”... -
Page 58: Inspecting The Air/Water And Instrument Channels
Chapter 3 Preparation and Inspection Before Use 3.6.3 Inspecting the Air/Water and Instrument Channels (1) Turn on the suction unit, cart, processor and light source. Keep the lamp off. (2) Prepare a clean basin of sterile water. (3) Place the distal end of the ultrasonic endoscope without touching the floor, etc., depress the air/water valve halfway, and check that sterile water comes out of the nozzle. -
Page 59: Inspecting The Instrument Channel
Chapter 3 Preparation and Inspection Before Use (6) Attach the forceps valve to the instrument channel inlet. While immersing the distal end of the ultrasonic endoscope in water, check that the water is sucked in when the suction valve is pressed halfway and the suction stops when the finger is released from the valve. -
Page 60: Inspecting Distal End Of Ultrasonic Endoscope
Chapter 3 Preparation and Inspection Before Use 3.7 Inspecting Distal End of Ultrasonic Endoscope CAUTION Turn off the lamp and stop the transmission of ultrasonic waves (freeze the ultrasonic processor) except during a procedure, inspection, etc., when necessary. If the lamp is left on, the distal end may become hot, causing burn injury to the operator, assistant or patient. - Page 61 Chapter 3 Preparation and Inspection Before Use (3) Touch the transducer with a finger and check that it is not heated. (4) Visually check the transducer, the US connector and the cables for abnormalities such as cracks or dents etc. 202B1262871D...
- Page 62 [Note] If the distal adhesives are missing, peeling, deteriorated or if any lens is damaged or missing, contact your local FUJIFILM dealer. (6) If the objective lens and the light guides are dirty or stained, thoroughly clean them. [Note]...
- Page 63 Chapter 3 Preparation and Inspection Before Use (7) Press the Lamp button on the light source to turn on the lamp, and observe the endoscopic image on the monitor. Check that image is clear and nothing obstructs endoscopic view. [Note] If wiping does not remove cloudiness from objective lens, it is possible that ultrasonic endoscope is not sufficiently watertight.
-
Page 64: Inspecting Ultrasonic Image
Chapter 3 Preparation and Inspection Before Use 3.8 Inspecting Ultrasonic Image (1) Prepare a cup of water and immerse the distal end of the ultrasonic endoscope into water. (2) Press the [FREEZE] key on the keyboard of the ultrasonic processor to cancel the freeze mode. (3) Check that an ultrasonic image appears. -
Page 65: Attaching And Inspecting Balloon
Chapter 3 Preparation and Inspection Before Use 3.9 Attaching and Inspecting Balloon WARNING Do not use this product with an endoscopic CO regulator. If used, air bubbles may be generated in the sterile water inside the water tank and enter the balloon channel. This could prevent water discharge from the balloon and disable deflation of the balloon. - Page 66 Chapter 3 Preparation and Inspection Before Use (2) Prepare a balloon and balloon attachment tool. [Note] Do not use the balloon if the expiration date has expired. (3) Immerse the balloon into sterile water. (4) Hold the balloon ring with your fingers and put it around the balloon attachment tool.
- Page 67 Chapter 3 Preparation and Inspection Before Use (6) Press the balloon ring on the other side with your thumb to fit it into the balloon attachment groove on the distal end side. (7) Point the distal end of the ultrasonic endoscope downward. Press down the air/water valve fully to feed sterile water of 5 ml or less.
- Page 68 Chapter 3 Preparation and Inspection Before Use (10) Press the suction valve fully, and check that all of the sterile water is sucked out, and the balloon shrinks. 202B1262871D...
-
Page 69: Chapter 4 Method Of Use
Chapter 4 Method of Use Chapter 4 Method of Use WARNING Wear personal protective equipment during a procedure as well as during cleaning and disinfection (or sterilization) to protect your eye and skin and to prevent infection. Use a cleaned and disinfected (or sterilized) endotherapy device. An inadequately cleaned and disinfected (or sterilized) endotherapy device may pose an infection risk. -
Page 70: Preparation
Chapter 4 Method of Use 4.1 Preparation 4.1.1 Preparing Necessary Equipment Prepare the accessories and endotherapy devices, etc. to be used, and a spare forceps valve as well. [Note] Use a cleaned and disinfected (or sterilized) mouthpiece only. 4.1.2 Pretreatment of Patient Prepare the patient in the normal endoscopy regimen. -
Page 71: Insertion And Observation
FUJIFILM recommendations. Once the balloon evacuation channel is clogged, it cannot be cleaned, disinfected or sterilized properly and can be a source of infection. - Page 72 Chapter 4 Method of Use CAUTION If the balloon or other parts fall into a body cavity due to a malfunction of the device, immediately stop the procedure and retrieve the parts by following appropriate measures. There is a risk of damaging the inside of the body cavity.
-
Page 73: Preparing The Mouthpiece
Chapter 4 Method of Use 4.2.1 Preparing the Mouthpiece (1) Have the patient hold the mouthpiece in his/her mouth. [Note] If you choose to have the patient hold the mouthpiece after insertion, attach the mouthpiece to the insertion portion in advance. - Page 74 Chapter 4 Method of Use (3) When necessary, apply lens cleaner to the objective lens and light guides. [Note] Use lint-free sterile gauze to prevent fibers from entering the air/water nozzle. (4) Apply lubricant (Xylocaine jelly or the like) to the insertion portion.
- Page 75 Chapter 4 Method of Use (7) Stop the center hole in the air/water valve with a finger to supply air to the digestive tract. The mucous membrane of the digestive tract is displayed clearly. (8) Steer the distal end of the ultrasonic endoscope to the region of interest by turning the up-down and left-right angulation knobs.
-
Page 76: To Suck Mucus
FUJIFILM recommendations. 4.2.4 If Mucus Adheres to the Distal Objective Lens or If the Image is Obscured If mucus adheres to the distal objective lens or if the image is obscured, clean the surface of the lens by pressing the air/water valve halfway. -
Page 77: How To Use Balloon
Chapter 4 Method of Use 4.3 How to Use Balloon WARNING Do not use this product with an endoscopic CO regulator. If used, air bubbles may be generated in the sterile water inside the water tank and enter the balloon channel. This could prevent water discharge from the balloon and disable deflation of the balloon. - Page 78 Chapter 4 Method of Use (3) To move or pull out the ultrasonic endoscope, deflate the balloon beforehand. [Note] If the balloon does not deflate while depressing the suction valve fully, remove clogs in the balloon channel using the cleaning brush (WB2221FW2). Reprocessing Manual “4.9.4 Brushing the Balloon Channel”...
-
Page 79: Biopsy
Chapter 4 Method of Use 4.4 Biopsy WARNING Do not strongly press the forceps onto the digestive tract wall. There is a risk of perforation and bleeding. Do not insert the forceps if you cannot see the instrument channel outlet on the endoscopic image. There is a risk of perforation and bleeding. - Page 80 Chapter 4 Method of Use (3) Stop the insertion of the forceps when its tip appears on the field of view. (4) Slowly move the forceps to the biopsy site. (5) Perform a biopsy by controlling the forceps and the angulation knobs.
-
Page 81: Endoscope Withdrawal
Chapter 4 Method of Use 4.5 Endoscope Withdrawal (1) When a procedure is over, discharge any excessive air from the body cavity. (2) Unlock the up-down and left-right knobs. (3) If the balloon is attached, deflate it completely. [Note] If the balloon does not deflate while depressing the suction valve fully, remove clogs in the balloon channel using the cleaning brush (WB2221FW2). - Page 82 Chapter 4 Method of Use (5) Slowly pull out the ultrasonic endoscope. (6) Press the Lamp button on the light source to turn off the lamp. 202B1262871D...
-
Page 83: Removing Balloon
Chapter 4 Method of Use 4.6 Removing Balloon WARNING When removing the balloon, wear personal protective equipment and slowly remove the balloon. There is a risk of infection. (1) Remove the balloon ring from the balloon attachment groove. (2) Roll the balloon slowly toward the distal end of the ultra- sonic endoscope to remove. -
Page 84: Pre-Cleaning (Primary Cleaning)
Chapter 4 Method of Use 4.7 Pre-cleaning (Primary Cleaning) Pre-cleaning (primary cleaning) means cleaning performed at bedside immediately after use of the ultrasonic endoscope. The ultrasonic endoscope is removed after pre-cleaning. [Note] For details on pre-cleaning and removal of the ultrasonic endoscope, refer to the Reprocessing Manual. -
Page 85: Connecting The Ultrasonic Endoscope
7) The light guide cable is broken. 7) Contact your local FUJIFILM dealer. [Note] To reset the processor and the light source, turn them off, and wait for at least 5 seconds. Turn on the processor and the light source again, and then light the lamp by pressing the Lamp button. - Page 86 Chapter 5 Troubleshooting Problem Cause Remedy [Note] Halation 1) The imaging section is damaged. 1) Reset the processor and the light source. If an appropriate image does not appear even after resetting, turn them off, straighten the bending section to unlock, release the angulation knobs, and then withdraw the ultrasonic endoscope slowly 2) The brightness level is set around “MAX.”...
- Page 87 Chapter 5 Troubleshooting Problem Cause Remedy Live image is not The system is malfunctioning possibly due to If the problem occurred during treatment, stop treatment and remove the endotherapy displayed after image static charge. device from the ultrasonic endoscope. Then, freezing is canceled [Note] reset...
- Page 88 Chapter 5 Troubleshooting Problem Cause Remedy [Note] Distorted image 1) The imaging section is damaged. 1) Reset the processor and the light source. If an appropriate image does not appear even after resetting, turn them off, straighten the bending section to unlock, release the angulation knobs, and then withdraw the ultrasonic endoscope slowly from the patient.
- Page 89 If air/water supply amount is still low, replace with a spare ultrasonic endoscope. 2) The air/water channels are damaged. 2) Contact your local FUJIFILM dealer. Air/water supply does 1) Foreign matters have adhered to the air/ 1) After pulling out ultrasonic endoscope from not stop.
- Page 90 Chapter 5 Troubleshooting Problem Cause Remedy Endotherapy device 1) The endotherapy device (such as biopsy 1) Close the endotherapy device for insertion. cannot be inserted. forceps) is left open. 2) The handle of the endotherapy device (such 2) Loosen the grip to insert the endotherapy as biopsy forceps) is held firmly.
- Page 91 Do not forcibly withdraw the ultrasonic endoscope from the patient, or it may cause damage to tissues in the body cavity. Contact your local FUJIFILM dealer. The bending section The angle wire is damaged. Immediately stop using the ultrasonic cannot bend by endoscope.
- Page 92 Chapter 5 Troubleshooting Problem Cause Remedy The ultrasonic image 1) High-frequency interference. 1) Stop power supply to the diathermic receives interference. treatment equipment to restore image output. The ultrasonic endoscope is working properly. 2) The US connector is poorly connected. 2) Redo the scope connection.
-
Page 93: Main Specification
[Note] Use in combination with the VP-4450HD processor, XL-4450 light source and SU-1 ultrasonic processor. <Applied Part> Insertion portion <Data about Main Unit> Model EG-580UR Viewing direction 0° Observation range 3 to 100 mm Field of view 140° Distal end diameter 11.4 mm... - Page 94 Main Specification Model EG-580UR Color Doppler , Power Doppler, Pulse wave, Scanning mode B mode, M mode Scanning method Electronic radial scanning method Perpendicular to the insertion direction of the Scanning direction ultrasonic endoscope Scanning angle 360° (Combination with SU-1)
- Page 95 Main Specification <Term of Validity, Period for Use (Durability)> The term of validity (durability) is six years after beginning of use, if proper maintenance and inspection are performed. “Based on our company’s criteria” [Note] Except consumable supplies <Compatible Processor, etc.> Ultrasonic processor SU-1 Processor...
- Page 96 Cleaning DC2318S Washing tube WT1720ST [Note] For combination with accessories other than those above, contact your local FUJIFILM dealer. <Image Size> <Direction of Forceps> <Medical Device Directive> This product complies with the requirements of European Directive 93/42/EEC. Classification : Class II a...
- Page 97 Main Specification <Electromagnetic Compatibility (EMC) Information> This product is intended for use in the electromagnetic environments specified below. The customer or the user of this product should assure that it is used in such an environment. Electromagnetic emission compliance information and guidance Emission standard Compliance Guidance...
- Page 98 Main Specification Electromagnetic immunity compliance information and guidance Compliance EN 60601-1-2 Immunity test Guidance Test level level Floors should be wood, concrete, or Electrostatic discharge (ESD) ± 6kV: contact ceramic tile. If floors are covered with Same as left EN 61000-4-2 ±...
- Page 99 Main Specification Electromagnetic immunity compliance information and guidance Compliance EN 60601-1-2 Immunity test Guidance Test level level Portable and mobile RF communications equipment should be used no closer to any part of this product, including cables, than the recommended separation distance calculated from the equation applicable to the frequency of transmitter.
-
Page 100: Service
1) If this product does not work properly, check it first by reading this manual again and follow all instructions and troubleshooting tips. 2) If this product is still not working well, contact your local FUJIFILM dealer. Contact your local Fujinon/Fujifilm dealer when this product is returned for repair. -
Page 101: Disposal Of Electric And Electronic Equipment
The recycling of materials will help to conserve natural resources. For more detailed information about recycling of this product, contact your local FUJIFILM dealer. In Countries outside the EU: If you wish to discard this product, contact your local authorities and ask for the correct way of disposal. -
Page 102: Index
Index Index <A> <T> Accessories ............95 Transducer ............60, 36 Air/water valve ............35 Transport environment ..........94 Angulation knob ........35, 40, 41 <U> <B> Ultrasonic image ...........46 Bending section .........35, 40, 41 Up-down angulation knob .......35, 40 Up-down angulation lock ........35, 42 <C>... -
Page 103: Service Centers
Contact our regional representative below or the distributor from which you purchased the product. <Europe> FUJIFILM Europe GmbH http://www.fujifilm.eu/eu/ See our website to locate our representative in your country. <USA> Fujifilm Medical Systems U.S.A., Inc http://www.fujifilmendoscopy.com/ (800) 385-4666 <Australia> FUJIFILM Australia Pty Ltd. http://www.fujifilm.com.au/ 1800 060 209 <Asia>... - Page 104 FUJIFILM Corporation 26-30, Nishiazabu 2-chome, Minato-ku, Tokyo 106-8620, Japan FUJIFILM Europe GmbH Heesenstrasse 31, 40549 Duesseldorf, Germany 202B1262871D 160704 - 5.0 - DT - E2 FU48A Printed in Japan...
Need help?
Do you have a question about the EG-580UR and is the answer not in the manual?
Questions and answers