FujiFilm Revoria Press SC180 Reference Manual
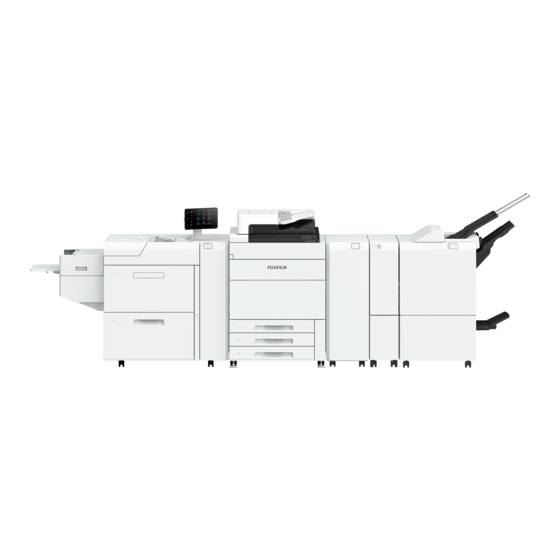
Main unit
Hide thumbs
Also See for Revoria Press SC180:
- Error code list (124 pages) ,
- Quick reference notes (18 pages) ,
- User manual (16 pages)

Related Manuals for FujiFilm Revoria Press SC180


Summary of Contents for FujiFilm Revoria Press SC180
- Page 1 Reference Guide Main Unit Revoria Press SC180 Revoria Press SC170 April 2023 GM1778E2-1 Edition 1 FUJIFILM Business Innovation Corp.
- Page 2 Other company names or product names are registered trademarks or trademarks of each company. FUJIFILM and FUJIFILM logo are registered trademarks or trademarks of FUJIFILM Corporation. Revoria, Revoria logo, and Revoria Press are registered trademarks or trademarks of FUJIFILM Business Innovation Corp.
- Page 3 Notations in Manual The following symbols are used in this manual. Indicates important information you have to know or be reminded before Important operations. Indicates supplemental information useful for operations. Note Indicates reference destinations. Refer “ ” Names and inputs of folders, files, apps, and functions. Also reference pages of the manual.
-
Page 4: Before Using The Machine
Before Using the Machine Device Components Front Component Function Document Cover Holds a document in place. Document Glass Load a document here. USB memory slot A USB memory stick can be connected to copy and move data. Insert a USB memory device directly here. Note A memory card reader or a USB memory device cannot be connected to the USB memory slot with a USB cable. - Page 5 Component Function Paper Clip Tray Used for placing paper clips and staples. Toner Cover Open this cover to replace toner. Front Cover Open this cover to clear paper jams or replace the consumables. Waste Toner Open this cover to replace the Waste Toner Container. Container Cover Paper Trays 1, 2, 3 Load paper here.
-
Page 6: Lan Connection
Component Function USB 3.0 interface Connects to a USB cable for printing. connector Network Port Connects to a network cable. (optional) EP interface Used for connecting related products such as Attention Light II and Attention Light. LAN connection When connecting to the network port, keep the machine power switched off. Note When a connection failure occurs, it may be improved by setting [Disabled] in >... -
Page 7: Control Panel
Component Function Bottom right door Open this door to clear paper jams. Waste toner Open this door to replace the waste toner container. container door Waste Toner Collects waste toner. Container Decurler (handle Flattens curled paper. Open this decurler when clearing paper jams. [2b]) Fusing Unit Fuses toner on paper. -
Page 8: Print Area
Component Function Data Indicator This indicator blinks while data is being sent from the machine or data is being received from the client computer. Also, it lights up when documents are stored in the machine. NFC touch area This is an area for you to hold up your NFC-supported mobile devices over. -
Page 9: Recommended Paper
Except for the long paper tray 488 mm Rear edge 2 mm Front edge 4 mm Top 3.5 mm 6.5mm 482 mm Image Printable Area Image Printable Area Image Printable Area 320 mm 323 mm Assured Image Area Assured Image Area Assured Image Area 317 mm Feed Direction... - Page 10 Usable paper types Basis Weight Selection Group (Unit: gsm) Paper Type 52-63 64-80 81-90 91-105 106-135 136-157 Uncoated Uncoated Reload Coated Coated Reload Punched Recycled Transparency Labels Precut Tab (Embossed) Postcard Adhesive Cast Coated Mat Coated Embossed Tab Stock (Embossed) Film Transfer Paper O: Guaranteed paper handling capability...
- Page 11 Basis Weight Selection Group (Unit: gsm) Paper Type 158-176 177-220 221-256 257-300 301-350 351-400 Uncoated Uncoated Reload Coated Coated Reload Punched Recycled Transparency Labels Precut Tab (Embossed) Postcard Adhesive Cast Coated Mat Coated Embossed Tab Stock (Embossed) Film Transfer Paper O: Guaranteed paper handling capability X: Paper handling capability is not guaranteed -: Cannot input paper basis weight...
-
Page 12: Storing And Handling Paper
Important Printing with paper that is different from the paper size or paper type selected in the printer driver or Print Server, or printing with paper loaded in an unsuitable paper tray, may cause paper jams. Select the correct paper size, paper type, and paper tray for proper printing. Note Metric basis weight is the mass of one sheet of paper of 1 m ... -
Page 13: Loading Paper
Basic Operations of the Machine Loading Paper After loading paper, configure the Paper Tray settings on the Home screen. Important Do not place paper or other objects in the reserved space of the tray. It may cause paper jams or machine malfunction. - Page 14 Pinch the two Guide Clips, and adjust to the correct paper size. Fan a stack of paper, face the print surface down, and then load the paper with edges aligned according to the direction of the arrow. Important Do not load paper above the maximum fill line. It may cause paper jams or machine malfunction.
- Page 15 Paper Tray 5 (Bypass) The Paper Tray 5 (Bypass) allows you to use a variety of paper sizes and types that cannot be used in Paper Trays 1 to 3. The top face of loaded paper is the surface printed on. Loadable paper Paper size (mm) Standard size...
-
Page 16: Document Feeder
Postcards Paper orientation: SEF Envelopes Paper orientation when the flaps are open: Flaps come at the left when viewed from the front of the machine Paper orientation when the flaps are closed: Flaps come at the front or right when viewed from the front of the machine. -
Page 17: Document Glass
Load the document face up (when the document is 2-sided, place the front side up) in the center of Document Feeder. Important Do not set documents above the maximum fill line. It may cause paper jams or machine malfunction. When the confirmation indicator lights up, move the document guide to align with both edges of the document. -
Page 18: Outputting Paper
Outputting Paper Print Surface The print surface refers to the surface printed on in single-sided printing (the first page in double- sided printing). For the front side printing, the paper is output to the tray with the print side up, and for the rear side printing, the paper is output to the tray with the print side down. - Page 19 Note The tray capacity varies depending on the following conditions. - Paper size, paper weight - Paper types (coated paper or uncoated paper, paper curl height, etc.) - Single-sided prints / double-sided prints - Image density Extension Tray Insert 2 extension trays until they stop. Note Pass them through over the guide at the rear side of the tray until they stop.
-
Page 20: Airflow Setting
Offset Note This function is available only for the Offset Catch Tray. Offset cannot be performed on the Long Catch Tray. The paper is output with offset stacking for easy separation. Use the printer driver to set the offset of outputs. Paper size (mm) Width 170.1 to 297... -
Page 21: Maintenance
Maintenance Consumables Consumables recommended by our company are manufactured under the standards suitable for this machine. Using consumables not recommended by our company may affect print quality or performance provided by the product. Use consumables that our company recommends for this machine. - Page 22 Cleaning Main Unit When wiping the main unit with a wet cloth, use a soft, moistened and tightly-squeezed cloth. The main unit may break down if the moisture remains on it. Do not use chemicals such as benzine or thinner. Doing so may damage the paint or coating on ...
- Page 23 While turning the rollers, wipe them with a soft cloth slightly moistened with water. Close the Top Cover of the Document Feeder and make sure that there is no gap on the front or rear of the cover. Cleaning the Chute Perform when: You print with the paper size larger than that printed in bulk just before (Example: Print with A4 in ...
- Page 24 Use a soft, dry cloth to wipe the surface of the ribs from the bottom to the top. Wipe all the ribs. Wipe the plate on the side of the roll off with the small folded cloth. Cleaning the Inlet Chute Wipe the top surface of the chute from front to rear or from rear to front.
-
Page 25: Paper Jams
Paper Jams If paper is jammed, the machine stops and an alarm sounds. Follow the instructions displayed on the screen to remove the jammed paper. Gently remove the paper being careful not to tear it. If paper is torn while it is being removed from the machine, remove all the torn pieces making sure that none remain inside the machine. - Page 26 Exit Depending on the optional units equipped in the right side of the machine, the method of paper removal differs. Refer For optional units, refer to “Reference Guide - Optional Units”. Paper Trays 1 to 3 Pull out the Paper Tray where the paper jam occurred until it stops.
-
Page 27: Duplex Automatic Document Feeder
Duplex Automatic Document Feeder Remove all documents from the Document Tray. Pull up the front handle of the Top Cover and open the cover until it stops. Open the Left Cover until it stops. Left cover Remove the document. If the document is caught in the entry, remove the jammed paper from the Left Cover. -
Page 28: Transfer Unit
Transfer Unit Note Before pulling out the Transfer Unit, check the screen display for any remaining paper in the left and right covers of the machine, Paper Tray 5 (Bypass), Exit, or optional High Capacity Feeder and Finisher. If the Transfer Unit is pulled out while paper is remaining in any of these locations, the paper may become torn. - Page 29 [2d], [2e] Lift up the handle [2d] ( ) and move the handle [2e] to the right ( ), then remove the jammed paper. ( Return the handle [2d], [2e]. [2f] Move the handle [2f] down and remove the jammed paper.
- Page 30 When paper is jammed between the right cover of the High Capacity Feeder and the machine Note Open the right cover and remove the jammed paper. Do not remove the jammed paper from the machine side. Do not pull out the Transfer Unit of the machine. Otherwise, the jammed paper is torn and unable to be ...
-
Page 31: Main Specifications
Appendix Main Specifications This section lists the main specifications of the machine. Note that the specifications and the appearance of the product may change without prior notice. Note The specifications are not intended to guarantee the image quality performance and feeding performance of all papers. -
Page 32: Copying Function
Item Specification Paper size Trays 1, 2 and 3 Standard size Max: A3, 11 x 17", Min: A5 Custom Size 140 x 182 mm to 330 x 488 mm Tray 5 (Bypass) Standard size Max: A3, 11 x 17", Min: A6 Custom Size 98 x 148 mm to 330 x 1,200 mm Note... -
Page 33: Scan Function
Item Specification First copy SC180 Monochrome 5.2 seconds (A4/Monochrome priority mode) output time Color 9.0 seconds (A4/Color priority mode) SC170 Monochrome 5.3 seconds (A4/Monochrome priority mode) Color 9.1 seconds (A4/Color priority mode) Scan Function Item Specification Type Color Scanner Original Size Same as the document size of the duplex automatic document feeder Scan resolution (dpi) 600 x 600, 400 x 400, 300 x 300, 200 x 200... - Page 34 Item Specification Paper Capacity (sheets) Note This value applies if 90 g/m paper is used. Long Catch Tray Item Specification Paper size Standard Size Max: A3, 11 x 17" Min: A6 Custom Size 98 x 148 mm to 330 x 1,200 mm 52 to 400 Paper weight (g/m Paper Capacity (sheets)
-
Page 35: Safety Notes
Safety Notes Refer Also refer to “User's Manual”. Operational Safety Do not place objects weighing more than 80 kg in Consumables Storage Unit. Heavy loads may deform or break them. Do not put your weight on or lift up a door of Consumables Storage Unit. It may cause deforming or breaking it. -
Page 36: Legal Notice
Legal Notice Printing certain documents may be illegal in your country. Penalties of fines or imprisonment may be imposed on those found guilty. The following are examples of items that may be illegal to copy or print in your country. Currency ... -
Page 37: Location Of Warning And Caution Labels
Location of Warning and Caution Labels 5.2 Safety Notes... - Page 38 Symbols Marked on the Machine Some of the following symbols may not be used depending on the model. DANGER, DO NOT USE DO NOT COPY CAUTION, AND ENVELOPE MONEY WARNING CAUTION DO NOT USE DO NOT THROW A (HEATED WINDOWED TONER SURFACE) ENVELOPE...
- Page 39 CAUTION (HEAVY PAPER JAM USB TERMINAL OBJECT) MARKING RISK TO SINGLE WORKER CLEANING OF GENERAL LAN TERMINAL SCANNER INSTRUCTIONS MARKING FACE PRINT FACE PRINT SURFACE DOWN SURFACE UP 5.2 Safety Notes...
Need help?
Do you have a question about the Revoria Press SC180 and is the answer not in the manual?
Questions and answers