Summary of Contents for Beckman Coulter Optima L Series
Page 1
Instructions For Use Optima L Series Preparative Ultracentrifuges PN LL-IM-12AB October 2013 Beckman Coulter, Inc. 250 S. Kraemer Blvd. Brea, CA 92821 U.S.A.
Page 2
Beckman Coulter, Inc. Beckman Coulter and the stylized logo are trademarks of Beckman Coulter, Inc. and are registered in the USPTO. All other trademarks, service marks, products, or services are trademarks or registered trademarks of their respective holders.
This instrument is designed to be installed by a Beckman Coulter Field Service representative. Installation by anyone other than authorized Beckman Coulter personnel invalidates any warranty covering the instrument. Also, should the instrument need to be moved, a Beckman Coulter Field Service representative must reinstall and relevel the instrument in its new location.
Mechanical Safety For safe operation of the equipment, observe the following: • Use only the Beckman Coulter rotors and accessories designed for use in this instrument. • Do not exceed the maximum rated speed of the rotor in use. • NEVER attempt to slow or stop a rotor by hand.
Page 5
• Dispose of all waste solutions according to appropriate environmental health and safety guidelines. It is your responsibility to decontaminate the instrument and accessories before requesting service by Beckman Coulter Field Service. PN LL-IM-12AB...
Page 6
Safety Notice Chemical and Biological Safety PN LL-IM-12AB...
Contents Safety Notice, iii Alerts for Warning, Caution, and Note, iii Safety During Installation and/or Maintenance, iii Electrical Safety, iv Safety Against Risk of Fire, iv Mechanical Safety, iv Chemical and Biological Safety, iv Introduction, xiii Instrument Certification, xiii Scope of Manual, xiii Conventions, xiv Recycling...
Page 8
Contents Vacuum System, 1-4 Temperature Sensing, 1-5 Temperature Control System, 1-5 Overspeed, 1-6 Rotor Energy System, 1-6 Drive, 1-6 Name Rating Plate, 1-6 CHAPTER 2: Preparation, 2-1 Introduction, 2-1 Power, 2-1 Key Switch Positions, 2-1 Standard Operation, 2-2 Keypad, 2-2 Parameter Keys, 2-3 Programmed...
Page 9
Contents Retrieving Your Sample, 4-1 Diagnostic Messages, 4-5 Cleaning, 4-7 Decontamination, 4-7 Sterilization and Disinfection, 4-7 Storage and Transportation, 4-8 Supply List, 4-8 Beckman Coulter, Inc. 
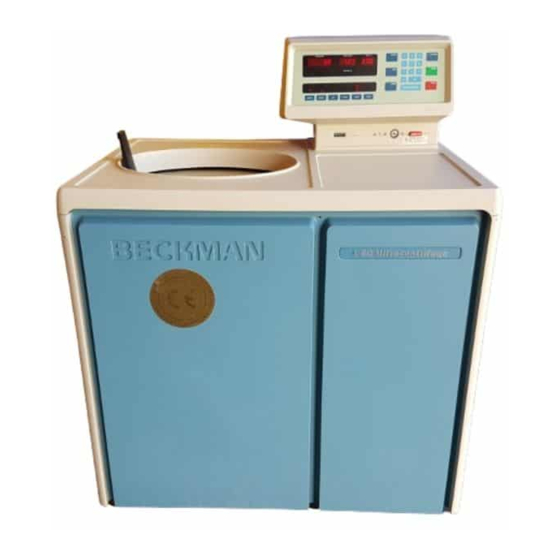
Optima L, LE, L-XP, and XL Preparative Ultracentrifuges Warranty Related Documents...
Page 11
Illustrations Illustrations The Control Panel, 1-2 The Rotor Chamber, 1-5 Inserting the Key Into the Interlock Switch, 2-2 Removing the Control Head Cover, 4-2 Depressing the Latch to Loosen the Front Panel, 4-3 Interior View of Instrument (Door Removed), 4-4 Location of Diagnostic Messages on the Control Panel, 4-5...
Page 12
Tables Tables Run Status indicators, 1-3 Vacuum LEDs, 2-9 Diagnostic Troubleshooting Chart, 4-6...
Further, the use of any equipment other than that intended for use by Beckman Coulter has not been evaluated for safety. Use of any equipment not specifically recommended in this manual is the sole responsibility of the user.
For Beckman Coulter products bearing this label please contact your dealer or local Beckman Coulter office for details on the take back program that will facilitate the proper collection, treatment, recovery, recycling and safe disposal of the device.
Introduction RoHS Notice RoHS Notice These labels and materials declaration table (the Table of Hazardous Substance’s Name and Concentration) are to meet People’s Republic of China Electronic Industry Standard SJ/T11364-2006 “Marking for Control of Pollution Caused by Electronic Information Products” requirements. —...
Introduction Specifications Specifications Control Panel Only values with tolerances or limits are guaranteed data. Values without tolerances are informative data, without guarantee. Specifications Description Speed • Set speed: — 1000 rpm to maximum speed in increments of 100 rpm • Speed control: —...
Page 17
1299 or lower) Diagnostic CHAPTER 4, Troubleshooting and Maintenance Messages NOTE The Optima L series ultracentrifuges have been designed and tested to operate safely indoors at altitudes up to 2000 m (6562 ft). Physical Data Specifications Description Weight...
The following information is provided in case the ultracentrifuge must be relocated. Contact your Beckman Coulter Field Service representative to adjust and level the instrument if it must be moved. Electrical Data...
Page 19
Mains (power) plug from the outlet receptacle. Optima L series ultracentrifuges have been designed and tested to operate safely indoors at altitudes up to 2000 m (6562 ft).
Page 20
Introduction Preinstallation Requirements The Mains (power) plug is the disconnect device and must remain easily accessible. Position the ultracentrifuge so that it is easy to remove the Mains (power) plug from the outlet receptacle. 15.2 67.3 26.5 94.0 The instrument will operate within specifications in a laboratory with ambient temperatures ranging from 15 to 40°C.
Introduction The Optima L-100K or L-90K Preparative Ultracentrifuge, classified S, is used to generate centrifugal forces for the separation of particles. The instrument can be used with all available Beckman Coulter rotors for standard and zonal operation. This section describes the control panel and the instrument’s major components.
Description Control Panel Control Panel Figure 1.1 shows the front control panel. Refer to this illustration to locate the keys and displays described below. Figure 1.1 The Control Panel SPEED–RPM TIME–HR:MIN VACUUM SPEED µ VACUUM– TIME START TEMP STOP ENTER/RECALL ACCEL DECEL HOLD...
Description Control Panel Actual (Current) Values When the power is on, the displays show the actual operating conditions at all times except when the instrument is in the editing mode or when has been pressed (see below). ENTER/RCALL Set Values Set values are the run conditions entered by the user.
Description Door Table 1.1 Run Status indicators (Continued) Key Pressed Description of Run Status Indicators SAVE SAVE blinks to indicate that you may save the program values just entered. Press SAVE and the values will be saved in memory under the assigned program number. VACUUM 750, 200, and <20 (microns) —...
Description Temperature Sensing Figure 1.2 The Rotor Chamber 1. Drive Spindle 3. Photoelectric Devices 2. Safety Plate 4. Radiometer At the end of a run, the chamber vacuum must be vented (by pressing ) before the door can VACUUM be opened. After the door is opened, the chamber is brought to approximate room temperature to prevent condensation from collecting in the chamber.
Name Rating Plate A name rating plate is affixed to the rear of the instrument. Always mention the serial number (located on the chamber door) and model number when contacting Beckman Coulter regarding your Optima L series instrument. PN LL-IM-12AB...
CHAPTER 2 Run Preparation Introduction This section explains how to use the control panel to enter run information. Refer to Figure 1.1 for the location of keys and indicators. Power If the power to the instrument is off, flip the circuit breaker at the right side of the instrument on. Do not turn the instrument power off except when maintenance is necessary or in the case of an emergency.
Run Preparation Standard Operation Turn the key to the left to select the zonal position for runs that require that the zonal rotor be loaded and unloaded while spinning. The key should not be removed during a zonal operation. NOTE As a safety feature, after you press , you must reset the key by turning ENTER/RECALL...
Run Preparation Standard Operation Press once to clear a numerical entry. Press twice to exit from the editing mode. The display will stop blinking and the actual values will reappear. Press once to clear a diagnostic message (see CHAPTER 4, Troubleshooting and Maintenance for more information.) Enter/Recall Use the...
Page 30
Run Preparation Standard Operation Use the keypad to enter or modify the speed. If you try to enter an invalid number the instrument will beep twice. Press to clear the value, then enter a valid speed. Press another parameter key or to save the set speed.
Page 31
Run Preparation Standard Operation When have been pressed, the instrument checks to make sure that a value ENTER/RECALL START display, that a value for ω has been entered in the t, has been entered in the speed display, or TIME that the mode has been selected.
Page 32
Run Preparation Standard Operation HOLD mode is used for runs of unspecified lengths or runs that will last longer than 99 hours HOLD and 59 minutes. When is pressed while the instrument is in this mode, the word ENTER/RECALL HOLD appears in the display for 5 seconds.
Run Preparation Programmed Operation Accel (Acceleration) The instrument has two acceleration profiles: maximum ( ) and SLOW Press the key repeatedly to toggle between the settings. ACCEL The run status indicator for the selected setting will light. Decel (Deceleration) The instrument has three deceleration profiles: , and SLOW NO BRAKE...
Run Preparation Activation Keys Press and the program will be stored in memory under the selected number. SAVE Actual values will reappear in the displays. To select a program for use: Press PROG Press the required program number. Press ENTER/RECALL START To modify a parameter during the run without changing the program, change the setting as described above and then press...
Page 35
Run Preparation Activation Keys Table 2.1 Vacuum LEDs Pressure 750 LED 200 LED <20 LED 750 or above blinking 220 to 750 blinking 20 to 200 blinking <20 START Press to begin a run. ENTER/RECALL START If you press only , the instrument will not be activated.
Run Preparation Delayed Start Program Function in succession to display the accumulated ω Press , and t at the time ENTER/RECALL STOP the rotor began decelerating. The ω t value is displayed in the display. SPEED Delayed Start Program Function The delayed start program function allows you the convenience of delaying the start of a run so that it begins and ends at the time you require—without you having to be there to start the run.
Run Preparation Delayed Start Program Function Running Program 0 with a Second Program To run program 0 followed by another program, do the following. Press then on the keypad to access program PROG • A blinking zero will appear above the key.
Page 38
Run Preparation Delayed Start Program Function 2-12 PN LL-IM-12AB...
This section summarizes standard, programmed, and zonal operation as well as the delayed start function. Use any of the acceptable Beckman Coulter rotors, consulting the applicable rotor manual and the Rotors and Tubes Manual (LR-IM) for instructions on preparing the rotor and accessories for centrifugation. For fast temperature equilibration, refrigerate or warm the rotor to the required temperature before the run.
Run Procedure Repeating a Run Select profiles. ACCEL DECEL Press ENTER/RECALL START (The vacuum system is automatically activated now, unless you pressed earlier.) VACUUM Press to terminate a run in the mode (or to stop any run for any reason). STOP HOLD Runs in the timed and ω...
Run Procedure Delayed Start Program Function Press a parameter key (for example, SPEED Enter the new value. Press ENTER/RECALL • The run in progress will be modified accordingly. • Runs in the timed and ω t modes will terminate automatically when the set value is reached.
Run Procedure Zonal Operation Zonal Operation WARNING In zonal operation, the operator is unavoidably exposed to rotating machinery. For safety, the operator must be properly instructed and qualified. Guard against accidentally dropping objects, such as pens, pencils, or hemostats into the chamber.
Run Procedure Zonal Operation Load the rotor. Disconnect the seal assembly and cap the rotor. Acceleration Close the chamber door. • The vacuum system will activate automatically. • The rotor will hold at 3000 rpm until the chamber pressure drops below 750 microns, at which time it will accelerate to set speed and the instrument will begin counting time remaining or time lapsed.
Run Procedure Points to Remember Points to Remember • Keep the chamber door closed whenever possible. This helps to keep the chamber clean, as well as assuring optimum performance of the vacuum system. • For fast temperature equilibration, cool or warm the rotor to the required temperature before the run.
Maintenance Introduction This section lists possible malfunctions, together with probable causes and corrective actions. Maintenance procedures are also described. For any problems not covered here, contact Beckman Coulter Field Service for assistance. NOTE It is your responsibility to decontaminate the instrument, as well as any rotors and/or accessories, before requesting service by Beckman Coulter Field Service.
Page 46
Troubleshooting and Maintenance Retrieving Your Sample WARNING Any maintenance procedure requiring removal of a panel exposes the operator to the possibility of electrical shock and/or mechanical injury. Therefore, turn the power OFF and disconnect the instrument from the main power source by removing the Mains (power) plug from the outlet receptacle, and refer such maintenance to service personnel.
Page 47
Troubleshooting and Maintenance Retrieving Your Sample To open the top cover, insert a #2 (0.25-inch diameter) Phillips-head screwdriver into the hole located in the front, center of the top cover (see Figure 4.2). a. Turn the screwdriver counterclockwise (to the left) until the screw bottoms out. b.
Page 48
Troubleshooting and Maintenance Retrieving Your Sample Lift the front panel to free the bottom tabs that secure the panel in place. WARNING After removing the panel, listen carefully for any sounds coming from the drive. Then touch the fan housing (Figure 4.3) to feel if it is vibrating and listen again.
Troubleshooting and Maintenance Diagnostic Messages Lift the front edge of the top panel a few inches and insert the upper edge of the front panel under it. a. Push down gently to engage the tabs. Replace the control head by sliding it along the small ridges provided, making sure to clear the emergency switch in front.
Page 50
The run will come to a stop. Table 4.1 to determine the nature of the error or problem, possible causes, and recommended corrective actions. If no user action is indicated, or the error persists, call Beckman Coulter Field Service for assistance. Table 4.1 Diagnostic Troubleshooting Chart...
If the instrument and/or accessories are contaminated with radioactive or pathogenic solutions, follow appropriate decontamination procedures as determined by your laboratory safety officer. Refer to Chemical Resistances (publication IN-175), or contact Beckman Coulter Field Service to ensure that the decontamination method does not damage any part of the instrument (or accessories).
Ethanol is a flammability hazard. Do not use it in or near operating ultracentrifuges. While Beckman Coulter has tested these methods and found that they do not damage the instrument, no guarantee of sterility or disinfection is expressed or implied. When sterilization or disinfection is a concern, consult your laboratory safety officer regarding proper methods to use.
Any product claimed to be defective must, if requested by Beckman Coulter be returned to the factory, transportation charges prepaid, and will be returned to Buyer with the transportation charges collect unless the product is found to be defective, in which case Beckman Coulter will pay all transportation charges.
Page 54
3. The drive unit has not been disassembled, modified, or repaired, except by Beckman Coulter personnel. 4. The drive unit was installed by a Beckman Coulter Field Service representative.
Page 55
English / Deutsch / Español / Français / Italiano / Portugués / Русский / 中文 / 日本語 / 국어 Symbol Simbole Symbol символ Title / Titel / Titulo / Titre / Titolo / Titulo / Название / 标题 / タイトル / 제목 符号...
Need help?
Do you have a question about the Optima L Series and is the answer not in the manual?
Questions and answers