
Related Manuals for Beckman Coulter Optima LE-80K


Summary of Contents for Beckman Coulter Optima LE-80K
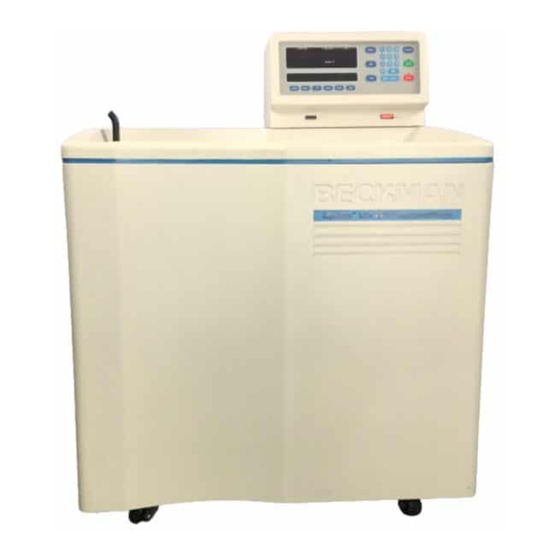
- Page 1 LLE7/8-IM-5 Optima LE-80K ™ Preparative Ultracentrifuge Instruction Manual Published by the Centrifuge Instrument Systems Development Center of Beckman Coulter, Inc., Palo Alto, California 94304...
- Page 2 Symbol Symbol Symbole Title Titel Titre Titulo Titolo Símbolo Simbolo Dangerous voltage Gefährliche elektrische Spannung Courant haute tension Voltaje peligroso Pericolo: alta tensione Attention, consult accompanying documents Achtung! Begleitpapiere beachten! Attention, consulter les documents joints Atención, consulte los documentos adjuntos Attenzione: consultare le informazioni allegate On (power) Ein (Netzverbindung)
- Page 3 Safety During Installation and/or Maintenance This instrument is designed to be installed by a Beckman Coulter Field Service representative. Installation by anyone other than authorized Beckman Coulter personnel invalidates any warranty covering the instrument. Also, if the instrument needs to be moved, a Beckman Coulter Field Service representative must reinstall and relevel the instrument in its new location.
- Page 4 Mechanical Safety For safe operation of the equipment, observe the following: • Use only the Beckman Coulter rotors and accessories designed for use in this instrument. • Do not exceed the maximum rated speed of the rotor in use. • NEVER attempt to slow or stop a rotor by hand.
- Page 5 LLE7/8-IM-5 January 2003 Optima LE-80K ™ Preparative Ultracentrifuge Instruction Manual © 2003 Beckman Coulter, Inc. Printed in the U.S.A. Published by the Centrifuge Instrument Systems Development Center of Beckman Coulter, Inc., Palo Alto, California 94304...
- Page 6 I.S. EN ISO 9001...
-
Page 7: Table Of Contents
¤ Contents Page INTRODUCTION Instrument Certification ........vii Scope of this Manual . - Page 8 ¤ ¤ ¤ ¤ ¤ ¤ ¤ ¤ ¤ ¤ ¤ Page Parameter Keys......... . . 2-2 •URAA@—...
- Page 9 Illustrations Page Figure 1-1. The Control Panel ......... . 1-2 Figure 1-2.
-
Page 10: Introduction
ISO 9001 facility. They have been designed and tested to meet the laboratory equipment safety standards and regulations (only when used with Beckman Coulter rotors) of CSA and CE Mark. SCOPE OF THIS MANUAL This manual is designed to familiarize you with the Beckman Coulter Optima LE-80K Preparative Ultracentrifuge—its functions, specifi-... -
Page 11: Conventions
Introduction NOTE If the Optima LE-80K is used in a manner other than specified in this manual, the safety and performance of this instrument could be impaired. Further, the use of any equipment other than that intended for use by Beckman Coulter has not been evaluated for safety. -
Page 12: Radio Interference
¤ Introduction WARNING Indicates high voltage or risk of electric shock. Refer servicing of all areas displaying this symbol to service personnel. TYPOGRAPHIC CONVENTIONS Certain typographic conventions are used throughout this manual to distinguish names of user interface components, such as keys and displays. - Page 13 Introduction CANADIAN REGULATIONS This digital apparatus does not exceed the Class A limits for radio noise emissions from digital apparatus as set out in the radio interfer- ence regulations of the Canadian Department of Communications. Le présent appareil numérique n’émet pas de bruits radioélectriques dépassant les limites applicables aux appareils numériques de Classe A prescrites dans le reglement sur le brouillage radioelectrique édicté...
-
Page 14: Specifications
Introduction SPECIFICATIONS Only values with tolerances or limits are guaranteed data. Values without tolerances are informative data, without performance guarantee. CONTROL FEATURES Speed Set speed ..... 1000 rpm to 80 000 rpm in increments of 100 rpm Speed control . -
Page 15: Installation Requirements
5 microns (0.7 Pa) Instrument Classification ..R (uses all Beckman Coulter preparative rotors except Types 35 and 42.1 rotors with serial numbers 1299 or lower); not equipped for zonal or... - Page 16 In regions where the instrument is supplied with an unterminated cord, a plug that meets local electrical and safety requirements must be supplied. (Contact your local Beckman Coulter office for specific information regarding these requirements.) See the Table below for the required wire connections. Make sure that the matching wall outlet receptacle is properly wired and earth-grounded.
- Page 17 Space Locate the Optima LE-80K in a clean, safe, uncluttered environment. Be sure to provide a 5.1-cm (2-in.) clearance on each side of the instrument, as the feet extend about 5.1 cm (2 in.) beyond the instru- ment.
- Page 18 Introduction 15.2 67.3 26.5 94.0 PHYSICAL DATA Weight ........465 kg (1025 lb) Height (overall) .
-
Page 19: Description
In this condition, only minimal power is used by the instru- ment. To restore the instrument to fully operational mode, press any key. CONTROL PANEL Figure 1-1 shows the Optima LE-80K control panel, which includes a video display and keys for entering run information. -
Page 20: Hardkeys
Description Parameter Activation Keys Keypad Keys SPEED–RPM TIME–HR:MIN TEMP–˚C SPEED VACUUM Location of µ Diagnostic VACUUM– TIME START Messages TEMP STOP ENTER/RECALL Parameter ACCEL DECEL HOLD PROG SAVE Keys POWER OFF X 10,000 Figure 1-1. The Control Panel HARDKEYS • Parameter hardkeys are used to enter the run conditions. They are •URAA@—... -
Page 21: Run Status Indicators
Description Actual (Current) Values When the power is on, the displays show actual operating conditions at all times except when the instrument is in editing mode or when has been pressed (see below). ENTER/RECALL Set Values Set values are the run conditions entered by the user. When you press a parameter key, the associated display blinks to indicate that a value can be entered or modified. -
Page 22: Door
Description Table 1-1. Run Status Indicators Pressed Description of Run Status Indicators A green LED on the •UV7TV— key lights when the key has been pressed. It blinks until the rotor START reaches set speed and then remains lit until the run ends or¤•UVQR— is pressed. STOP A green LED on the¤•UVQR—... -
Page 23: Vacuum System
Description Photoelectric Drive Devices Spindle Radiometer Safety Plate Figure 1-2. The Rotor Chamber VACUUM SYSTEM The vacuum system is automatically activated when ENTER/RECALL •UV7TV— are pressed, or it may be turned on directly by pressing •X79WWI— key. Three vacuum LEDs, labeled 750, 200, and <20, are located in the middle of the upper display to indicate the level of chamber pressure in microns. -
Page 24: Temperature Sensing
Description TEMPERATURE SENSING Rotor temperature is monitored by a radiometer mounted in the bottom of the rotor chamber (see Figure 1-2) when the chamber pres- sure is below 100 microns. Above 100 microns (or if the radiometer fails), chamber temperature is measured by a thermistor mounted in the chamber. -
Page 25: Rotor Energy System
NAME RATING PLATE A name rating plate is affixed to the rear of the instrument. Always mention the serial number (located on the chamber door) and model number when contacting Beckman Coulter regarding your Optima LE-80K. U.S. Pat. No. 4,846,773. -
Page 26: Run Preparation
Run Preparation This section explains how to enter run information. ENTERING INFORMATION Entering or modifying information is referred to as being in the editing mode. • Press the appropriate hardkey to enter or modify information or to access a specific function. •... -
Page 27: Standard Operation
Run Preparation STANDARD OPERATION KEYPAD Use the number keys, in sequence, to make numerical entries. As you enter each digit, the digits already entered move one place to the left in the display. • • • • 9 9 9 9 A A A A — — — — (CLEAR ENTRY) •9A—... -
Page 28: X95;Uraa@—
Run Preparation • • • • U U U U R R R R A A A A A A A A @ @ @ @ — — — — Run speed can be set between 1000 and 80 000 rpm in increments of 100 rpm. -
Page 29: X95;Veia—
Run Preparation The run termination method depends on the run mode—TIME, ω • • • • V V V V E E E E I I I I A A A A — — — — or HOLD. The information that appears in the TIME-HR: MIN display also depends upon the mode selected. - Page 30 Run Preparation •UV7TV—¤ have been pressed and the rotor begins spinning; deceleration begins when the set value is reached. There is no separate ω t display— the ω t values are shown in the SPEED display when the instrument is in the ω ω...
-
Page 31: X95;Dqh@—
Run Preparation To select the HOLD mode: •DQH@— •DQH@— 1. Press¤ . The LED above the key lights to indicate that the instrument is in HOLD mode, and the word HOLD appears in the TIME display. 2. Press the next parameter key or ENTER/RECALL •UV7TV—... -
Page 32: X95;@A9Ah— (Deceleration)
Run Preparation • • • • @ @ @ @ A A A A 9 9 9 9 A A A A H H H H — — — — ¤ The instrument has three deceleration profiles: maximum, slow, and (Deceleration) no brake. -
Page 33: Activation Keys
Run Preparation To select a program for use: •RTQC— 1. Press 2. Press the appropriate program number. •UV7TV— 3. Press ENTER/RECALL To modify a parameter during the run without affecting the program, change the setting in the normal manner, then press ENTER/RECALL •U7XA—... -
Page 34: X95;Uv7Tv—
Run Preparation When the run begins, the rotor will not accelerate past 3000 rpm until the chamber pressure drops below 750 microns. At that time, the rotor accelerates to set speed. •X79WWI— To vent the chamber, press . The chamber door can be opened only when the vacuum has been completely vented and the rotor is at rest. -
Page 35: Entering Program 0
Run Preparation To use the delayed start program function, a special program (called program “0”) is created, followed by a second program that contains the run conditions for the actual run. Follow the instructions below. ENTERING PROGRAM 0 The first program —program 0— is used to delay the start of the run until the required time. - Page 36 Run Preparation When the elapsed time in program 0 reaches zero, the second program begins automatically. Example: To run programs 0 and 3: •RTQC— • — •#— Press , and ENTER/RECALL •UV7TV— Press ENTER/RECALL NOTE If you change a run setting during program 0, the second program is automatically canceled.
-
Page 37: Run Procedure
Tubes for Preparative Ultracentrifuges (LR-IM) for instructions on preparing the rotor and accessories for centrifugation. The Optima LE-80K is not equipped for zonal or continuous-flow opera- tion. For fast temperature equilibration, refrigerate or warm the rotor to the required temperature before the run. -
Page 38: Standard Operation
Run Procedure The power must be turned on and the vacuum system turned off in order to open the chamber door. STANDARD OPERATION 1. With the power on, open the chamber door, install the rotor, and •X79WWI— close the chamber door. Press if you want to evacuate the chamber now. -
Page 39: Delayed Start Program Function
Run Procedure Any of the run conditions can be changed while a programmed run is in progress. However, such changes will affect only the current run. To change a parameter during the run: ¤•URAA@— 1. Press the appropriate parameter key (for example, 2. - Page 40 Run Procedure • Refer to the applicable rotor manual for complete instructions on rotor preparation, use, and care. • Refer to Section 4, , if TROUBLESHOOTING AND MAINTENANCE a diagnostic message flashes on the control panel during the run.
-
Page 41: Troubleshooting And Maintenance
Maintenance procedures are also described. Refer to the applicable rotor manual for instructions on the care of rotors and accessories. Troubleshooting and maintenance not covered in this manual should be handled by Beckman Coulter Field Service. NOTE... -
Page 42: Retrieving Your Sample
Troubleshooting and Maintenance RETRIEVING YOUR SAMPLE WARNING Any maintenance procedure requiring removal of a panel exposes the operator to the possibility of electrical shock and/or mechanical injury. Therefore, turn the power off and disconnect the instrument from the main power source, and refer such mainte- nance to service personnel. -
Page 43: Figure 4-1. Removing The Control Head Cover
Troubleshooting and Maintenance Access to Cover Latch Cover Latch Figure 4-1. Removing the Control Head Cover WARNING After removing the panel, listen carefully for any sounds coming from the drive. Then touch the fan housing (Figure 4-3) to feel if it is vibrating and listen again. -
Page 44: Figure 4-2. Depressing The Latch To Loosen The Front Panel
Troubleshooting and Maintenance Top Panel Tabs Front Panel Access Port Front Panel Tabs Figure 4-2. Depressing the Latch to Loosen the Front Panel 4. Vent the vacuum chamber by slowly turning the small setscrew on the vacuum solenoid valve to the right (clockwise) until you hear the air released into the chamber. -
Page 45: Figure 4-3. Interior View Of Instrument
Troubleshooting and Maintenance Spring-loaded Interlock Pin Door Lock System Vacuum Solenoid Screw Fan housing Figure 4-3. Interior View of Instrument 7. After retrieving the sample, close the chamber door, then replace the front panel on the instrument. Insert the tabs at the bottom of the front panel onto the lip at the base of the instrument, being sure to align the front panel with the side panels (see Figure 4-4). -
Page 46: Diagnostic Messages
The run will come to a stop. See Table 4-1 to determine the nature of the error or problem, possible causes, and recommended corrective actions. If no user action is indicated, or the error persists, call Beckman Coulter Field Service for assistance. -
Page 47: Cleaning
Troubleshooting and Maintenance SPEED TEMP DRIVE IMBAL DOOR Diagnostic Messages SPEED–RPM TIME–HR:MIN TEMP–˚C SPEED VACUUM µ VACUUM– TIME START TEMP STOP ENTER/RECALL ACCEL DECEL HOLD PROG SAVE POWER OFF X 10,000 Figure 4-5. Location of Diagnostic Messages on the Control Panel CLEANING Keep instrument surfaces clean by wiping them with a cloth damp- ened with a mild detergent such as Beckman Solution 555™... -
Page 48: Table 4-1. Diagnostic Troubleshooting Chart
Loss of power during run Check TIME display; the run may need to be restarted or aborted. Microprocessor malfunction or loss of No user action. Call Beckman Coulter Field Service. program memory NOTE Keep the chamber door closed between runs to keep the chamber clean and dry. -
Page 49: Decontamination
See Chemical Resistances for more information regarding chemical resistance of instrument and accessory materials. While Beckman Coulter has tested these methods and found that they do not damage the instrument, no guarantee of sterility or disinfection is expressed or implied. When sterilization or disinfection is a concern, consult your laboratory safety officer regarding proper... -
Page 50: Supply List
Department, 1050 Page Mill Road, Palo Alto, CA 94304, U.S.A. (Telephone 650-859- 1753; Fax 650-859-1375). Call Beckman Coulter Sales (1-800-742-2345 in the United States; worldwide offices are listed at the back of this manual) or see Ultra- centrifuge Rotors, Tubes & Accessories (BR-8101, available at www.beckmancoulter.com) for detailed information on ordering parts... - Page 51 Beckman Coulter personnel. defective, in which case Beckman Coulter will pay all trans- 4. The drive unit was installed by a Beckman Coulter Field portation charges. Service representative.
- Page 52 Telephone: (27) 11-805-2014/5 Fax: (27) 11-805-4120 e-mail: beckman@intekom.co.za Beckman Coulter, Inc. • 4300 N. Harbor Boulevard, Box 3100 • Fullerton, California 92834-3100 Sales: 1-800-742-2345 • Service: 1-800-551-1150 • Internet: www.beckmancoulter.com • Telex: 678413 • Fax: 1-800-643-4366 ©2003 Beckman Coulter, Inc.
Need help?
Do you have a question about the Optima LE-80K and is the answer not in the manual?
Questions and answers