Table of Contents
Advertisement
Quick Links
Advertisement
Table of Contents
Troubleshooting

Related Manuals for Daikin Modular L Smart


Summary of Contents for Daikin Modular L Smart
- Page 1 ESIE19-06 Service Manual Modular L Smart...
- Page 2 ESIE19-06 The present publication is drawn up by way of information only and does not constitute an offer binding upon Daikin Europe N.V.. Daikin Europe N.V. has compiled the content of this publication to the best of its knowledge. No express or implied warranty is given for the completeness, accuracy, reliability or fitness for particular purpose of its content and the products and services presented therein.
-
Page 3: Table Of Contents
Modular L Smart ESIE19-06 Part 1. Introduction ........................7 1.1. Version log ..............................7 1.2. Safety precautions .............................8 1.2.1. Meaning of symbols ............................8 1.2.2. Warnings ................................ 8 1.2.3. Cautions ............................... 10 1.2.4. Information ..............................10 1.3. General operation ............................11 1.4. How to use ...............................14 1.4.1. - Page 4 Part 5. Appendix ........................61 5.1. Field setting ............................. 63 5.1.1. HRV unit ............................... 63 5.1.1.1. Configuration ............................63 5.1.1.2. Modular L Smart performance curves ......................68 5.1.1.3. About the user interface ...........................74 5.2. Wiring diagram ............................80 5.2.1. HRV unit ............................... 80 5.2.1.1.
- Page 5 Modular L Smart ESIE19-06 Figure 3-1: Removing the screws ..........................40 Figure 3-2: Pulling the switchbox cover ........................41 Figure 3-3: Removing the Smart Gateway board ......................44 Figure 3-4: Removing doors and central panel ......................45 Figure 3-5: Removing the drain panel cover ......................46 Figure 3-6: Loosen and remove the screws ......................49...
- Page 6 Modular L Smart ESIE19-06 Page 6 21/01/20 Version 1.1...
-
Page 7: Part 1. Introduction
Modular L Smart ESIE19-06 Part 1. Introduction 1.1. Version log Part 1. Introduction This part contains the following chapters: Version log......................................7 Safety precautions....................................8 General operation....................................11 How to use ......................................14 1.1. Version log Version code Description Date ESIE19-06 Document release 21/01/2020 21/01/20 Version 1.1... -
Page 8: Safety Precautions
Modular L Smart ESIE19-06 Part 1. Introduction 1.2. Safety precautions 1.2. Safety precautions The precautions described in this document cover very important topics, follow them carefully. All activities described in the service manual must be performed by an authorized person. - Page 9 ARNING Make sure installation, testing and applied materials comply with applicable legislation (on top of the instructions described in the Daikin documentation). ARNING Make sure the work site environment is clean and safe to work in. Beware of spilled fluids, like water, oil or other sub- stances.
-
Page 10: Cautions
Modular L Smart ESIE19-06 Part 1. Introduction 1.2. Safety precautions ARNING • Only use copper wires. • All field wiring must be performed in accordance with the wiring diagram and installation manual supplied with the product. • If the power cable and lead wires have scratches or deteriorated, be sure to replace them. Damaged cable and wires may cause an electrical shock, excessive heat generation or fire. -
Page 11: General Operation
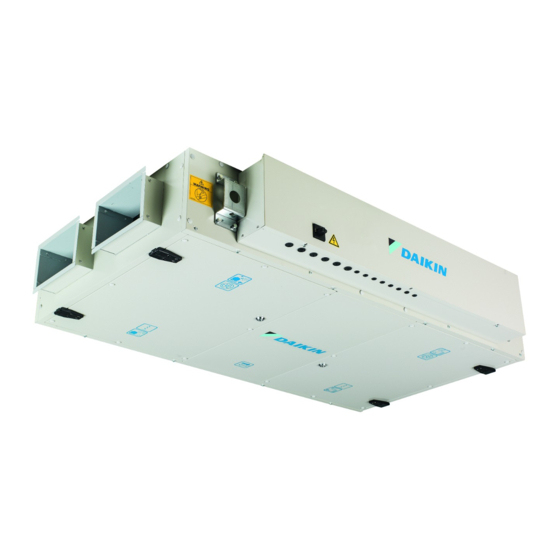
1.3. General operation 1.3. General operation • The heat reclaim ventilation units (HRV), model name Modular L Smart, is used to supply outdoor air into the building. The HRV unit is compliant with EN308 regulation according to Lot 6 Ecodesign requirements. •... - Page 12 Modular L Smart ESIE19-06 Part 1. Introduction 1.3. General operation 1. Fan 6. Service door 2. Heat exchanger 7. Drain pan panel 3. Pressure differential switches 8. Nylon socket 4. Hinge 9. Main PCB 5. Bypass actuator 10. Smart Gateway...
- Page 13 Modular L Smart ESIE19-06 Part 1. Introduction 1.3. General operation 1. Filter and pre-filter A. Supply air 2. Exchanger by-pass B. Internal air 3. Heat exchanger C. Exhaust air 4. Supply fan motor assembly D. Fresh air 5. Hanging devices 6.
-
Page 14: How To Use
1.4.1. Interactive information flow This Daikin product Service Manual is intended for professional use only. The actions described hereafter, are only to be performed by qualified and certified persons, taking into account the safety precautions mentioned in this manual and the local regulations as well. -
Page 15: Parts Of The Book
1.4.2. Parts of the book This Daikin product Service Manual is intended for professional use only. The actions described hereafter, are only to be performed by qualified and certified persons, taking into account the safety precautions mentioned in this manual and the local regulations as well. - Page 16 Modular L Smart ESIE19-06 Part 1. Introduction 1.4. How to use Page 16 21/01/20 Version 1.1...
-
Page 17: Part 2. Troubleshooting
Modular L Smart ESIE19-06 Part 2. Troubleshooting 2.1. Error codes check Part 2. Troubleshooting This part contains the following chapters: Error codes check ....................................17 Error based troubleshooting .................................20 Symptom based troubleshooting................................31 Component checklist ....................................33 2.1. Error codes check 2.1.1. Error codes via remote controller 2.1.1.1. -
Page 18: How To Reset Error Codes
Modular L Smart ESIE19-06 Part 2. Troubleshooting 2.1. Error codes check If an error or warning is present, it will be displayed on the user interface screen: for more information about troubleshooting, refer "Error based troubleshooting" on page 2.1.1.2. How to reset error codes "Error based troubleshooting"... - Page 19 Modular L Smart ESIE19-06 Part 2. Troubleshooting 2.1. Error codes check BRC1E51 Select RC Error History and press the Menu/Enter button. The error codes and unit No. can be con- firmed in the RC Error History screen. Press the Menu/Enter button.
-
Page 20: Error Based Troubleshooting
Modular L Smart ESIE19-06 Part 2. Troubleshooting 2.2. Error based troubleshooting 2.2. Error based troubleshooting Overview of error codes: HRV unit ......................................23 “6A” – Damper motor malfunction ............................23 “60” – External protection device activated ..........................23 “64” – Air return thermistor faulty............................. 24 “65”... - Page 21 Modular L Smart ESIE19-06 Part 2. Troubleshooting 2.2. Error based troubleshooting Error code Unit Error level Operation state Cause of error Main flashing flashing flashing error ① stop fan operation Exhaust air FAN ② (address 4) (cause of fault) hall-sensor location detection...
- Page 22 Modular L Smart ESIE19-06 Part 2. Troubleshooting 2.2. Error based troubleshooting Error code Unit Error level Operation state Cause of error Main flashing flashing flashing error ① stop fan operation Exhaust air FAN ② (address 4) (cause of fault) EEPROM read abnormality...
-
Page 23: Hrv Unit
Modular L Smart ESIE19-06 Part 2. Troubleshooting 2.2. Error based troubleshooting 2.2.1. HRV unit 2.2.1.1. “6A” – Damper motor malfunction Trigger Effect Reset The limit switch of the damper motor did Unit will not stop operating. Power reset. not detect move of motor when energized... -
Page 24: 64" - Air Return Thermistor Faulty
Modular L Smart ESIE19-06 Part 2. Troubleshooting 2.2. Error based troubleshooting 2.2.1.3. “64” – Air return thermistor faulty Trigger Effect Reset Air return sensor abnormal signal. Unit will not stop operating. Automatic reset. Control will use default value for air return To remove warning from main history, sensor. -
Page 25: A1-01" - Pcb Abnormality
Modular L Smart ESIE19-06 Part 2. Troubleshooting 2.2. Error based troubleshooting 2.2.1.5. “A1-01” – PCB abnormality Trigger Effect Reset EEPROM data is not received correctly. Unit will stop operating. Power reset via HRV unit. Possible cause Check Corrective action HRV unit - Electrical components Faulty indoor PCB. -
Page 26: Aj-00" - Capacity Setting Abnormality
Modular L Smart ESIE19-06 Part 2. Troubleshooting 2.2. Error based troubleshooting Possible cause Check Corrective action Faulty indoor PCB. Check if error still occurs after turning off Adjust power to the HRV unit. power and turning it back on again. -
Page 27: Cj-00" - Remote Controller Thermistor Abnormality
Modular L Smart ESIE19-06 Part 2. Troubleshooting 2.2. Error based troubleshooting 2.2.1.10. “CJ-00” – Remote controller thermistor abnormality Trigger Effect Reset Disconnected or short circuit remote con- Unit will not stop operating. Automatic reset. troller thermistor. Control will use air return sensor instead. -
Page 28: System
Modular L Smart ESIE19-06 Part 2. Troubleshooting 2.2. Error based troubleshooting 2.2.2. System 2.2.2.1. “U5-00” – Transmission user interface PCB abnormality Trigger Effect Reset Main PCB A1P detects abnormal/missing Unit will stop operating. Automatic reset. transmission to user interface for a certain time. -
Page 29: Ua-00" - Wrong User Interface Used
Modular L Smart ESIE19-06 Part 2. Troubleshooting 2.2. Error based troubleshooting 2.2.2.3. “UA-00” – Wrong user interface used Trigger Effect Reset Main PCB A1P detects incorrect type Unit will stop operating. Automatic reset (when correct type user interface. interface is detected). -
Page 30: Ue-00" - Transmission Fault Indoor-Central Control Device
Modular L Smart ESIE19-06 Part 2. Troubleshooting 2.2. Error based troubleshooting 2.2.2.5. “UE-00” – Transmission fault indoor-central control device Trigger Effect Reset Main PCB A1P does not detect anymore Unit keeps operating (only warning). Automatic. the central control device. Possible cause... -
Page 31: Symptom Based Troubleshooting
Modular L Smart ESIE19-06 Part 2. Troubleshooting 2.3. Symptom based troubleshooting 2.3. Symptom based troubleshooting 2.3.1. Unit does not operate Possible failures Root cause Check Corrective action Root cause category: component - electrical Units do not operate. Missing power supply to VAM Check to make sure that the Restore the power supply. -
Page 32: Equipment Operates But Does Insufficient Air Flow
Modular L Smart ESIE19-06 Part 2. Troubleshooting 2.3. Symptom based troubleshooting 2.3.3. Equipment operates but does insufficient air flow Possible failures Root cause Check Corrective action Root cause category: installation Low air flow rate. Field setting of RPM is not... -
Page 33: Component Checklist
Modular L Smart ESIE19-06 Part 2. Troubleshooting 2.4. Component checklist 2.4. Component checklist Overview of component checklists: HRV unit .......................................33 Control PCB .....................................33 Damper motor + limit switch ..............................35 Air thermistor ....................................36 Smart Gateway..................................38 2.4.1. HRV unit 2.4.1.1. Control PCB 21/01/20 Version 1.1... - Page 34 Modular L Smart ESIE19-06 Part 2. Troubleshooting 2.4. Component checklist Item Reference PCB Description X27A AC power X35A DC power X70A Communication inverter PCB X22A, X28A Damper motor X5A, X6A Limit switch X12A R1T air return thermistor X11A R2T air intake thermistor...
-
Page 35: Damper Motor + Limit Switch
Modular L Smart ESIE19-06 Part 2. Troubleshooting 2.4. Component checklist 2.4.1.2. Damper motor + limit switch Disconnected from main PCB Check Part Connector Reference (kΩ) Remark Measure point method motor X22A, X28A resistance 12,3 white wires ∞ limit switch X15A, X6A... -
Page 36: Air Thermistor
Modular L Smart ESIE19-06 Part 2. Troubleshooting 2.4. Component checklist 2.4.1.3. Air thermistor Remove plug from PCB Check Reference Part Connector Remark Measure point method (Volt) air return X11A kΩ 25°C= 20 kΩ Other temperature, see "Ther- thermistor mistor resistance characteris- tics"... - Page 37 Modular L Smart ESIE19-06 Part 2. Troubleshooting 2.4. Component checklist T °C kΩ T °C kΩ 39.96 7.18 38.08 6.91 36.30 6.65 34.62 6.41 33.02 6.65 31.50 6.41 30.06 6.18 28.70 5.95 27.41 5.74 26.18 5.14 21/01/20 Version 1.1 Page 37...
-
Page 38: Smart Gateway
Modular L Smart ESIE19-06 Part 2. Troubleshooting 2.4. Component checklist 2.4.1.4. Smart Gateway Item Location Function Ground connection J8 PIN NL Main switch connection J14 PIN 1463 Pin 14 connection X22A - pin 63 connection X5A DAMP-OUT Damper actuator Return fan dps... -
Page 39: Part 3. Repair
Unit specific repair procedures................................40 3.1. Service tools For an overview of the applicable service tools, please check the Daikin Business Portal: http://www.mydaikin.eu Go to the tab “After-sales support” on the left side and then select “Technical support”. You will then find a button “Service tools” which gives you an overview on which service tool to use for which product. Also additional information on the service tool (instruction, latest software) can be found there. -
Page 40: Unit Specific Repair Procedures
3.2.1.1. Basic removal - removing switchbox cover PRELIMINARY ACTIONS Switch off the Daikin unit via the user interface. Switch off the Daikin unit with the field supplied circuit breaker. PROCEDURE Removal Loosen and remove the screws that fix the switchbox cover. - Page 41 Modular L Smart ESIE19-06 Part 3. Repair 3.2. Unit specific repair procedures Figure 3-2: Pulling the switchbox cover Step 2 1. Control PCB 3. Pressure switches 2. Smart Gateway Installation Proceed in reverse order to fix again the switchbox cover.
-
Page 42: Removing Main Pcb
3.2. Unit specific repair procedures 3.2.1.2. Removing main PCB PRELIMINARY ACTIONS Switch off the Daikin unit via the user interface. Switch off the Daikin unit with the field supplied circuit breaker. PROCEDURE Removal Remove the switchbox cover, refer to "Basic removal - removing switchbox cover" on page Unplug all connectors from the main PCB, X5A, X11A, X12A, X22A, X24A, X27A, X70A, N/P2&P1/P1 (remote controller,... - Page 43 Modular L Smart ESIE19-06 Part 3. Repair 3.2. Unit specific repair procedures Installation Proceed in reverse order to fix again the PCB. 21/01/20 Version 1.1 Page 43...
-
Page 44: Removing Smart Gateway
3.2. Unit specific repair procedures 3.2.1.3. Removing Smart Gateway PRELIMINARY ACTIONS Switch off the Daikin unit via the user interface. Switch off the Daikin unit with the field supplied circuit breaker. PROCEDURE Removal Remove the switchbox cover, refer to "Basic removal - removing switchbox cover" on page Unplug all connectors ACS in, FAN1, FAN2, PS1, PS2, PS3, PS4, DAMP OUT, from the board. -
Page 45: Basic Removal - Removing Doors And Central Panel
3.2.1.4. Basic removal - removing doors and central panel PRELIMINARY ACTIONS Switch off the Daikin unit via the user interface. Switch off the Daikin unit with the field supplied circuit breaker. PROCEDURE Removal Loosen the 16 screws of the doors and central panel. - Page 46 Modular L Smart ESIE19-06 Part 3. Repair 3.2. Unit specific repair procedures Figure 3-5: Removing the drain panel cover Page 46 21/01/20 Version 1.1...
- Page 47 Modular L Smart ESIE19-06 Part 3. Repair 3.2. Unit specific repair procedures Installation Proceed in reverse order to fix again the doors and central cover. 21/01/20 Version 1.1 Page 47...
-
Page 48: Removing Heat Exchanger
3.2. Unit specific repair procedures 3.2.1.5. Removing heat exchanger PRELIMINARY ACTIONS Switch off the Daikin unit via the user interface. Switch off the Daikin unit with the field supplied circuit breaker. PROCEDURE Removal Remove the black gasket. Loosen and remove the screws that fix the heat recovery and the carpentries. -
Page 49: Removing Ec Fan
3.2. Unit specific repair procedures 3.2.1.6. Removing EC fan PRELIMINARY ACTIONS Switch off the Daikin unit via the user interface. Switch off the Daikin unit with the field supplied circuit breaker. PROCEDURE Removal Loosen and remove the 4 screws that fix the fan. - Page 50 Modular L Smart ESIE19-06 Part 3. Repair 3.2. Unit specific repair procedures Figure 3-7: Removing the cabling 1. Signal cable 2. Power supply cable Installation Proceed in reverse order to fix again the fan. Page 50 21/01/20 Version 1.1...
-
Page 51: Part 4. Maintenance
Modular L Smart ESIE19-06 Part 4. Maintenance 4.1. HRV unit Part 4. Maintenance This part contains the following chapters: HRV unit .......................................51 4.1. HRV unit 4.1.1. Safety precautions for maintenance ARNING Ordinary and extraordinary maintenance must be carried out solely by the operator assigned to perform maintenance (mechanical and electrical maintenance staff) according to the regulations in force in the country of use and respecting the laws regarding systems and work safety. -
Page 52: Ordinary Maintenance
Modular L Smart ESIE19-06 Part 4. Maintenance 4.1. HRV unit 4.1.2. Ordinary maintenance Proper maintenance of the systems maintains efficiency (reducing costs) and consistent performance over time, and increase the usable life of the equipment. FREQUENCY ACTIVITY General cleaning of the machine. - Page 53 Modular L Smart ESIE19-06 Part 4. Maintenance 4.1. HRV unit • After cleaning make sure that you have not damaged the electrical parts and the seals. • Cleaning operations should not involve the lubricated parts, like rotation shafts, because this could affect their good operation and create problems with durability.
-
Page 54: Extraordinary Maintenance
Modular L Smart ESIE19-06 Part 4. Maintenance 4.1. HRV unit 4.1.3. Extraordinary maintenance One can not predict extraordinary maintenance as it is normally due to effects of wear or fatigue caused by the incorrect operation of the machine. 4.1.3.1. Replacement of parts... - Page 55 Modular L Smart ESIE19-06 Part 4. Maintenance 4.1. HRV unit • Residues from cleaning the panelling. • Drive belts. • TUV germicidal lamps, which must be disposed of according to current legislation ARNING Waste from the cell filters are to be handled as special waste or harmful toxic depending on their use, the sector and the environment in which they are used.
-
Page 56: Diagnostics
Modular L Smart ESIE19-06 Part 4. Maintenance 4.1. HRV unit 4.1.4. Diagnostics 4.1.4.1. General diagnostics The machine's electrical system includes quality electromechanical components and is therefore extremely durable and reliable over time. Should there be any malfunctions due to malfunctions of electrical components it will be necessary to act as follows: •... -
Page 57: Troubleshooting Table
Modular L Smart ESIE19-06 Part 4. Maintenance 4.1. HRV unit 4.1.5. Troubleshooting table MALFUNCTION TYPE COMPONENT POSSIBLE CAUSE/SOLUTION Impeller deformed, unbalanced or loose Fan impeller Nozzle damaged Foreign bodies in the fan Transmission Motor or fan not attached well Bearings... -
Page 58: Environmental Conditions
4.1. HRV unit 4.1.6. Environmental conditions Modular L Smart heat recovery units are designed for use in indoor environments, installed on the ceiling. The unit cannot operate in environments containing explosive material and with a high concentration of dust. Outside air temperature •... - Page 59 Modular L Smart ESIE19-06 Part 4. Maintenance 4.1. HRV unit 21/01/20 Version 1.1 Page 59...
- Page 60 Modular L Smart ESIE19-06 Part 4. Maintenance 4.1. HRV unit Page 60 21/01/20 Version 1.1...
-
Page 61: Part 5. Appendix
Modular L Smart ESIE19-06 Part 5. Appendix Part 5. Appendix This part contains the following chapters: Field setting ......................................63 Wiring diagram .....................................80 Component overview of unit.................................84 Switch box ......................................85 Spare parts list .....................................87 Field information report ..................................88 21/01/20 Version 1.1... - Page 62 Modular L Smart ESIE19-06 Part 5. Appendix This page is deliberately left blank Page 62 21/01/20 Version 1.1...
-
Page 63: Field Setting
• Position number: for example, 02 Operating procedure You can use either the user interface of the Modular L Smart or of the air conditioner to adjust the heat reclaim ventilation unit settings. Initial settings • Mode numbers 17, 18 and 19: group control of Modular L Smart. - Page 64 Modular L Smart ESIE19-06 Part 5. Appendix 5.1. Field setting 11. After you have completed all the changes, press the Cancel button (a) twice to return to the normal mode. List of the settings Setting Setting position no. Setting position no.
- Page 65 Modular L Smart ESIE19-06 Part 5. Appendix 5.1. Field setting Setting Setting position no. Setting position no. Setting Setting switch mode description Filter cleaning Approx. 2500 ±1250 hours time setting hours Nigh-time free On after 2 On after 4 On after 6...
- Page 66 Provided the Unit Size is known, you can proceed to set the correspondent Supply/Return Fan step on the BRC controller, according to the following Speed-selection Tables (Make sure to consider “Heat recovery operation” rpm). If you do not have the unit selection from Daikin tool software, please check individual unit size performances from page 67 onwards.
- Page 67 Modular L Smart ESIE19-06 Part 5. Appendix 5.1. Field setting ML Smart Size 02 Supply fan Exhaust fan Step Heat recovery operation Bypass operation Heat recovery operation Bypass operation 2813 2343 1236 2943 2376 1336 3106 2646 1667 2787 2292...
-
Page 68: Modular L Smart Performance Curves
Modular L Smart ESIE19-06 Part 5. Appendix 5.1. Field setting 5.1.1.2. Modular L Smart performance curves Figure 5-1: Size 02 Airflow (m³/h) Nominal conditions SFPv values are evaluated with F7 and M5 filter respectively for supply and return air side. - Page 69 Modular L Smart ESIE19-06 Part 5. Appendix 5.1. Field setting Figure 5-2: Size 03 Airflow (m³/h) Nominal conditions SFPv values are evaluated with F7 and M5 filter respectively for supply and return air side. 21/01/20 Version 1.1 Page 69...
- Page 70 Modular L Smart ESIE19-06 Part 5. Appendix 5.1. Field setting Figure 5-3: Size 04 Airflow (m³/h) Nominal conditions SFPv values are evaluated with F7 and M5 filter respectively for supply and return air side. Page 70 21/01/20 Version 1.1...
- Page 71 Modular L Smart ESIE19-06 Part 5. Appendix 5.1. Field setting Figure 5-4: Size 05 Airflow (m³/h) Nominal conditions SFPv values are evaluated with F7 and M5 filter respectively for supply and return air side. 21/01/20 Version 1.1 Page 71...
- Page 72 Modular L Smart ESIE19-06 Part 5. Appendix 5.1. Field setting Figure 5-5: Size 06 Airflow (m³/h) Nominal conditions SFPv values are evaluated with F7 and M5 filter respectively for supply and return air side. Page 72 21/01/20 Version 1.1...
- Page 73 Modular L Smart ESIE19-06 Part 5. Appendix 5.1. Field setting Figure 5-6: Size 07 Airflow (m³/h) Nominal conditions SFPv values are evaluated with F7 and M5 filter respectively for supply and return air side. Factory configuration Size 02 Size 03...
-
Page 74: About The User Interface
Modular L Smart ESIE19-06 Part 5. Appendix 5.1. Field setting Settings for all configuration Setting 17(27)-4: First choose the fan speed. Set it to high or ultrahigh. Choose between 19(29)-0-04 or 19(29)-0-05 Setting 19(29)-2 and setting 19(29)-3: Balance return air and... - Page 75 Modular L Smart ESIE19-06 Part 5. Appendix 5.1. Field setting To change the ventilation rate Press the Menu/Enter button to display the main menu. Press the Up/Down buttons to select Ventilation and press the Menu/Enter button Press the Up/Down buttons to select Ventilation Rate and press the Menu/Enter button to confirm.
- Page 76 Menu/Enter button to display the error code or warning and contact information. The error code blinks and the contact address and model name appear as shown below. In this case, notify your Daikin dealer about the error code. Page 76 21/01/20 Version 1.1...
- Page 77 ARNING The differential pressure switch will be set according to the nominal air flow. If the Modular L Smart will operate at different condition from nominal airflow, you MUST adjust the set- ting according to the chart below.
- Page 78 Modular L Smart ESIE19-06 Part 5. Appendix 5.1. Field setting Figure 5-8: Size 03 [m³/h] Figure 5-9: Size 04 [m³/h] Figure 5-10: Size 05 [m³/h] Figure 5-11: Size 06 [m³/h] Page 78 21/01/20 Version 1.1...
- Page 79 Modular L Smart ESIE19-06 Part 5. Appendix 5.1. Field setting Figure 5-12: Size 07 [m³/h] 21/01/20 Version 1.1 Page 79...
-
Page 80: Wiring Diagram
Modular L Smart ESIE19-06 Part 5. Appendix 5.2. Wiring diagram 5.2. Wiring diagram 5.2.1. HRV unit 5.2.1.1. Legend Figure 5-13: Legend 5.2.1.2. Unit layout Figure 5-14: Unit layout - Bottom view Right connection Left connection ROOM AIR FRESH AIR FRESH AIR... -
Page 81: Fan-S Fan-R Size 06 And 07
Modular L Smart ESIE19-06 Part 5. Appendix 5.2. Wiring diagram 5.2.1.4. Fan-S fan-R size 06 and 07 Figure 5-16: Fan-S fan-R size 06 and 07 5.2.1.5. Control unit board Figure 5-17: Control unit board PRINTED CIRCUIT BOARD CAPACITOR X38A X14A X33A FUSE T, 6.3A 250V... -
Page 82: Smart Gateway
Modular L Smart ESIE19-06 Part 5. Appendix 5.2. Wiring diagram 5.2.1.6. Smart Gateway Figure 5-18: Smart Gateway 1/PS4 2/PS4 1/PS3 BELIMO 2/PS3 CM230-R 0-10V 0-10V ACS OUT ACS OUT ACS IN ACS IN 5.2.1.7. Tag list Figure 5-19: Tag list... -
Page 83: Terminals
Modular L Smart ESIE19-06 Part 5. Appendix 5.2. Wiring diagram 5.2.1.8. Terminals Figure 5-20: Terminals **** Size 02 to 05 Size 02 to 05 Size 02 to 05 Size 02 to 05 Size 02 to 05 Size 06 & 07 Size 06 &... -
Page 84: Component Overview Of Unit
Modular L Smart ESIE19-06 Part 5. Appendix 5.3. Component overview of unit 5.3. Component overview of unit 5.3.1. HRV unit Item Part description Heat exchanger Pressure switch Hinge Bypass actuator Service door Drain pan panel Nylon socket Main PCB Smart Gateway... -
Page 85: Switch Box
Modular L Smart ESIE19-06 Part 5. Appendix 5.4. Switch box 5.4. Switch box 5.4.1. HRV unit Item Part description Control PCB Smart Gateway Pressure differential switches Item Part description Supply filter Return filter Supply fan Return fan Defrost Figure 5-22: Smart Gateway 21/01/20 Version 1.1... - Page 86 Modular L Smart ESIE19-06 Part 5. Appendix 5.4. Switch box Figure 5-23: Control PCB Page 86 21/01/20 Version 1.1...
-
Page 87: Spare Parts List
Centre panel with drain pan - new AHPNMLDP0405NSP aluminium socket AHPNMLDP0607NSP Aluminium Panel blocking socket AHBPBLOCCAPANNELLI3 socket Daikin electronic board VAM - EUW Main PCB AHQE-VAMPCB[A] RoHS PCB Smart ACS Gateway for modular light VAM AHQE-ACSGATEPCB Gateway 21/01/20 Version 1.1... -
Page 88: Field Information Report
Modular L Smart ESIE19-06 Part 5. Appendix 5.6. Field information report 5.6. Field information report See next page. Page 88 21/01/20 Version 1.1... - Page 89 In case a problem occurred on the unit which could not be resolved by using the content of this service manual or in case you have a problem which could be resolved but of which the manufacturer should be notified, we advise you to contact your distributor. To facilitate the investigation, additional information is required.
- Page 90 Application info Application (house, apartment, office, …): New project or refurbishment: APPLICATIONS (Office, restaurant, hotel, …): Layout (simple schematic): Unit / Installation info l a i l l a i n i Air flow (m³/h): ESP (Pa): Additional accessories fitted (silencers, coil section, filters, others, ...): Provide pictures of the field settings overview (viewable on the user interface).
Need help?
Do you have a question about the Modular L Smart and is the answer not in the manual?
Questions and answers