Table of Contents
Advertisement
@AlphaEnergyStorageSystem
@AlphaESS
Alpha ESS Co., Ltd.
+86 513 806 068 91
info@alpha-ess.com
www.alpha-ess.com
JiuHua Road 888, High-Tech Industrial Development
Zone 226300 Nantong City, Jiangsu Province
Alpha ESS Europe GmbH
+
49 610 3459 1601
europe@alpha-ess.de
www.alpha-ess.de
Paul-Ehrlich-Straße 1a 63225 Langen
Alpha ESS Italy S.r.l.
+39 599 239 50
info@alpha-ess.it
www.alpha-ess.it
Via Loda,17-41013 Castelfranco Emilia(MO)
Alpha ESS UK Co., Ltd
uk@alpha-ess.com
Drake House, Long Street, Dursley, gl11 4hh
Alpha ESS USA, Inc.
USA@alpha-ess.com
638 S Ahwanee Ter Sunnyvale, California,
94085 United States of America
@alpha_ess
@AlphaESS
www.alpha-ess.com
Alpha ESS Suzhou Co., Ltd.
+86 512 6828 7609
info@alpha-ess.com
www.alpha-ess.com
Building 10-A, Canal Town Industrial Park,
99 Taihu E Rd, Wuzhong District, Suzhou 215000
Alpha ESS Australia Pty. Ltd.
+61 1300 968 933
australia@alpha-ess.com
www.alpha-ess.com.au
Unit 1, 2 Ralph Street Alexandria NSW 2015
Alpha ESS Korea Co., Ltd
+82 64 721 2004
korea@alpha-ess.com
2F, 19-4, Nohyeong 11-gil, Jeju-si, Jeju-do,
Republic of Korea
Alpha ESS International Pte. Ltd.
Singapore@alpha-ess.com
Blk 55 Ayer Rajah Crescent #01-01, Singapore
139949
INSTALLATION MANUAL
INSTALLATIONMANUAL
ENERGY STORAGE SYSTEM (ESS)
ENERGYSTORAGESYSTEM(ESS)
STORION-SMILE-T10(INDOOR)
SMILE-B3-PLUS
V01
Advertisement
Table of Contents
Troubleshooting

Related Manuals for Alpha ESS SMILE-B3-PLUS


Summary of Contents for Alpha ESS SMILE-B3-PLUS
- Page 1 INSTALLATIONMANUAL @AlphaEnergyStorageSystem @AlphaESS @alpha_ess @AlphaESS www.alpha-ess.com ENERGY STORAGE SYSTEM (ESS) ENERGYSTORAGESYSTEM(ESS) Alpha ESS Co., Ltd. Alpha ESS Suzhou Co., Ltd. +86 513 806 068 91 +86 512 6828 7609 STORION-SMILE-T10(INDOOR) SMILE-B3-PLUS info@alpha-ess.com info@alpha-ess.com www.alpha-ess.com www.alpha-ess.com Building 10-A, Canal Town Industrial Park,...
-
Page 2: Table Of Contents
CONTENT Copyright Statement This manual is under the copyright of AlphaESS Co., Ltd. with all rights reserved. Please INFORMATION ON THIS DOCUMENT keep the manual properly and operate in strict accordance with all safety and operating 1.1 Content and Structure of this Document instructions in this manual. -
Page 3: Information On This Document
1.1 Content and Structure of this Document 7.8 Mounting the Cable Box Cover This document is valid for product of SMILE-B3-PLUS (SMILE-B3-PLUS II, SMILE-B3-PLUS III, SMILE-B3-PLUS IV, SMILE-B3-PLUS V, SMILE-B3-PLUS VI) which has integrated 3 kW AC-coupled inverter with 1~6 battery packs -- SMILE-BAT-5P. -
Page 4: Nomenclature
NOTICE indicates a situation which, if not avoided, can result in property damage. 2.1 Intended Use The SMILE-B3-PLUS, expandable battery packs (SMILE-BAT-5P) and the ener-gy meters make up a system for optimization of self-consumption for a house-hold. The inverter can achieve bidirectional transfer between AC current and DC current. The battery pack is used for the energy storage . -
Page 5: Important Safety Instructions
SAFETY SAFETY 2.2.2 Response to Emergency Situations 2.3 Important Safety Instructions The battery pack is composed of multiple batteries and designed to prevent the This section contains safety precautions that must be observed at all times when working danger caused by malfunction. on or with the product. -
Page 6: Symbols On The Label
SAFETY SAFETY 2.4 Symbols on the Label WARNING Symbols on the type label of the inverter Risk of chemical burns from electrolyte or toxic gases Symbol Explanation During normal operation, no electrolyte would leak from the battery pack and Beware of a danger zone no toxic gases would form. -
Page 7: Product Introduction And Application Scenarios
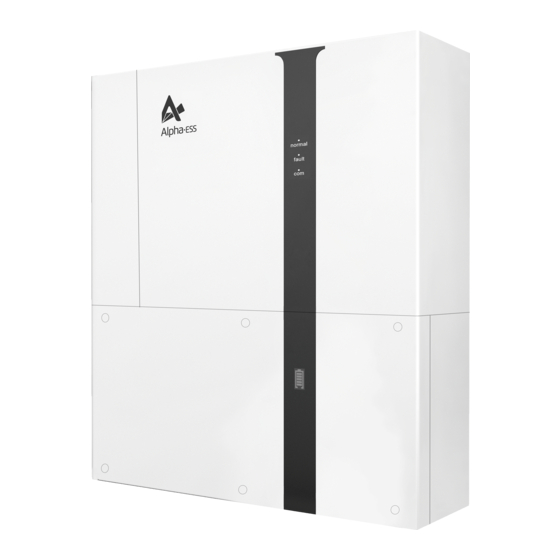
SAFETY PRODUCT INTRODUCTION AND APPLICATION SCENARIOS Symbols on the type label and warning label of the battery pack Product Introduction and Application Scenarios Symbol Explanation 3.1 Product Description Beware of a danger zone This symbol indicates that the product must be additionally grounded if additional Appearance and Dimensions (mm) grounding or equipotential bonding is required at the installation site. -
Page 8: Application Scenarios
Figure 3.2 SMILE-B3-PLUS System without PV SMILE-B3-PLUS is an AC-coupled all-in-one battery energy storage system (BESS). It can help to achieve the optimal usage of renewable energy. SMILE-B3-PLUS can control the bi-directional flow of electric power, work under auto/manual & time-of-use (TOU) modes, charge/discharge the battery as per customer’... -
Page 9: Storage
Contact your distributor if the scope of delivery is incomplete or damaged. 4. Store the product out of reach of children and animals. 5. Handle product with caution to avoid damage. SMILE-B3-PLUS 6. The storage environment requirements are as follows: – Ambient temperature: -10~55°C, recommended storage temperature: 15~30°C –... -
Page 10: Mounting
Do not mount the product in potentially explosive atmospheres. Basic Requirements Manual SMILE-B3-PLUS and SMILE-BAT-5P are suitable for indoor and outdoor use. Do not install the product in a place where a person can easily touch it because its housing and heatsink are hot during operation. -
Page 11: Preparing Tools And Instruments
MOUNTING MOUNTING Mounting Angle and Stack Requirement 6.2 Preparing Tools and Instruments SMILE-B3-PLUS and SMILE-BAT-5P should be mounted on the wall. The installation angle requirement is as follow: Category Tools and Instruments • Do not mount the product at forward tilted, side tilted, horizontal, or upside down positions. -
Page 12: Mounting Inverter And Expansion Battery Pack
3. Attach the wall bracket to the wall and tighten the screws with the tool of SW10 hexagon sleeve. SW10 The steps to mount the SMILE-B3-PLUS are listed below: 1. Remove the wall bracket from SMILE-B3-PLUS, place it on the wall where the system will be installed, and use a marker to locate the bracket. - Page 13 MOUNTING MOUNTING 4. Hold the handles on both sides of the inverter and install SMILE-B3-PLUS on the wall 6.3.2 Mounting the Expansion Battery Pack bracket. This step should take two people to complete. You can install up to 5 extra batteries in a system.
- Page 14 5. Use four M4 flange nuts to fix the wall bracket assembled in the step 1 to the wall screwdriver, torque: 3.0 Nm). bracket of SMILE-B3-PLUS again (tools: SW7 sleeve or other tools for M4 flange, torque: 1.6 Nm). 3 N·M 9.
-
Page 15: Electrical Connection
Precautions DANGER Before connecting cables, ensure that all breakers of the SMILE-B3-PLUS and the battery pack and all the switches connected to SMILE-B3-PLUS and the battery pack are set to OFF. Otherwise, the danger voltage of the product may result in electric shocks. -
Page 16: Preparing Cables
DRM5 Do not generate power An external grounding connection is provided at the left side of the SMILE-B3-PLUS. Prepare M5 OT terminals, strip the grounding cable insulation, insert the stripped part of Do not generate at more than 50% of rate power DRM6 the grounding cable into the ring terminal lug and crimp using a crimping tool. -
Page 17: Ac Connection
7.4.1 Conditions for the AC Connection AC breakers must be installed on the AC side of the SMILE-B3-PLUS to ensure that the Grid system can be safely disconnected from the power grid and the load. - Page 18 ELECTRICAL CONNECTION ELECTRICAL CONNECTION 6. Insert the terminals with different color conductor to the hole of the respective 3. Dismantle the AC cable by 80mm, and strip the insulation of L, N and PE conductors by polarity and tighten them one by one using the torque of 2 Nm with tool of #2 slotted 10mm.
-
Page 19: Meter & Ct Connection
Display 7.5.1 CT Connection The CT cables have been installed with SMILE-B3-PLUS when shipped. Please take out 2 CTs (Grid CT and PV CT) provided as accessory. When the meter is used as PV meter, please follow the steps below to complete the Step 1: Buckle the Grid CT on the house-service live wire. - Page 20 ELECTRICAL CONNECTION ELECTRICAL CONNECTION Meter Setting on AlphaCloud Step 1 When the system work mode is selected as DC, click the button under the “Grid Me-ter” to turn the “Meter” icon green. Basic Parameter Setting When the system work mode is selected as AC or Hybrid, click the buttons under the AC/DG/Hybrid Hybrid “Grid Meter”...
-
Page 21: Communication Connection
ELECTRICAL CONNECTION ELECTRICAL CONNECTION 1. DSTU666-3*230V 5A: Three/single -phase meter (without CT) connection SMILE-INV SMILE-INV PV CT RJ45 PV Inverter L2 L3 Grid Grid CT LOAD L1 L2 L3 N LOAD GRID PV Inverter Grid CT Wiring at three-phase home Wiring at single-phase home SMILE-INV Grid CT... -
Page 22: Electrical Connection Of Expansion Battery Packs
The system and the Demand Response Enabling Device (DRED) must be connected in the same network. Only DRM0 is available for SMILE-B3-PLUS. 3) Take out 6 pin terminal block for AUX connection. Tighten them one by one us-ing the torque of 0.2 Nm with tool of #0 slotted screwdriver. -
Page 23: Mounting The Cable Box Cover
ELECTRICAL CONNECTION ELECTRICAL CONNECTION 3. Connect the negative power cable from battery 2 to battery 1 (tool: T20 screwdriver, torque: 3 Nm). Battery 1 7. Insert the rubber plugs of the battery. Battery 2 3 N·M 4. Connect the BMS communication cables from battery 2 to battery 1. Battery 1 7.8 Mounting the Cable Box Cover Take out the cable box cover which is provided as accessory. -
Page 24: Wifi Setting
WIFI SETTING WIFI SETTING 8.2 Overview of Functions for Installer Account WiFi Setting 8.1 Download and Install APP 1.Android device users can download the application through major Android applica- tion markets such as Google Play. 2.IOS device users can search for “AlphaESS” in Appstore and download the applica- tion. -
Page 25: Wifi Module Setting
WIFI SETTING WIFI SETTING 8.3 WiFi Module Setting This section is for users who have a system with a WiFi module. AlphaESS App is able to complete network configuration, change setting of the system basic parameter, and monitor system operation and configuration information. Connect to Router System... -
Page 26: Commissioning
Commissioning Switch off the external AC breaker between the grid and the SMILE-B3-PLUS. The SMILE-B3-PLUS will enter the UPS status at once, and observe the LED states on the front 9.1 Checking Before Power-On panel. At this time, the following 2 LEDs ("Normal", "COM") and battery indictors on the front panel will show green always. - Page 27 On: system is in working mode normally To ensure that the SMILE-B3-PLUS can operate properly in the long term, you are advised to perform routine maintenance on it as described in this chapter.
-
Page 28: Maintenance And Troubleshooting
MAINTENANCE AND TROUBLESHOOTING MAINTENANCE AND TROUBLESHOOTING Solution Solution Description Description Zero firewire reverse Please check whether the live line and neutral line are 1. If the warning occurs occasionally, please restart the alarm inversely connected. inverter. Consistent warning 2. If this warning occurs frequently or cannot be cleared for Please check whether the cable connection to the NTC NTC fail a long time, please contact AlphaESS after-sales team. -
Page 29: Troubleshooting
MAINTENANCE AND TROUBLESHOOTING MAINTENANCE AND TROUBLESHOOTING 10.2.2 Battery Protection Description 10.2.3 Battery Protection Description Protection LED Ring Description Troubleshooting Display Code LED Indictor Error Code Description Troubleshooting Display Wait for automated recovery. In case the problem is not Temperature recovery for a long time, call Temperature difference Error 01... -
Page 30: Uninstallation & Return
Communication 11.2 Packing the Product Output AC (Back-up side) Rated output power 3 kW If the original packaging is available, put SMILE-B3-PLUS inside it and then seal it using Max. Apparent Output adhesive tape. 3 kVA Power If the original packaging is not available, put SMILE-B3-PLUS inside a suitable cardboard Back-up Switch Time <10 ms... -
Page 31: Specification
SPECIFICATION SPECIFICATION IP65 Overvoltage category Ingress Protection Energy Capacity 5.04 kWh Efficiency (Inverter side) Usable Capacity 4.79 kWh Max Efficiency >94.5% Protection Nominal Voltage 48 V Integrated Anti-Islanding Protec-tion Operating Voltage Range Insulation Resistor 45 ~ 54 V Integrated Detection Internal Resistance ≤... -
Page 32: Appendix: Communication Connection Figure
Appendix 1: Communication Connection Figure Choose the correspond Regional Application Standard, the power quality modes Volt-var and WiFi/4G VoltWatt will running automatically. (Only for regions with AS/NZW 4777.2 safety regulations). Regional application Standard Electric Company SMILE-B3-PLUS Home Appliances Australia A METER/ CAN/ GRID_CT...
Need help?
Do you have a question about the SMILE-B3-PLUS and is the answer not in the manual?
Questions and answers