Lexicon RV-5 User Manual
Hide thumbs
Also See for RV-5:
- User manual (136 pages) ,
- Supplementary manual (7 pages) ,
- Specifications (4 pages)
Table of Contents
Advertisement
Quick Links
Advertisement
Table of Contents

Related Manuals for Lexicon RV-5


Summary of Contents for Lexicon RV-5
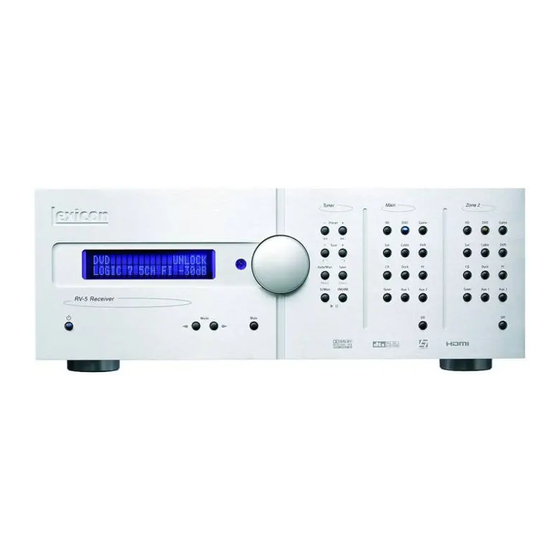
- Page 1 RV-5 Receiver User Guide...
- Page 2 IMPORTANT SAFETY INSTRUCTIONS Read these instructions. the cart/apparatus combination to avoid injury designed to provide reasonable protection against from tip-over. harmful interference in a residential installation. Keep these instructions. This equipment generates, uses, and radiates radio 13. Unplug this apparatus during lightning storms or Heed all warnings.
- Page 3 Lexicon, Logic 7, and the L7 logo are registered trademarks of Harman International Industries, Inc. DLP and Texas Instruments are trademarks of Texas Instruments. Dolby, Pro Logic, and the double-D symbol are registered trademarks of Dolby Laboratories, Inc. DTS, DTS-ES, DTS Surround, and Neo:6 are registered trademarks of Digital Theater Systems, Inc. and DTS 96/24 is a trademark of Digital Theater Systems, Inc.
- Page 4 Introduction Lexicon DOCUMENTATION CONVENTIONS This document contains general safety, installation and operation instructions for the RV-8 Receiver. It is important to read this user guide before attempting to use the product. Pay particular attention to safety instructions. The following symbols are used in the document:...
-
Page 5: Table Of Contents
Getting Started About the RV-8................1-2 Highlights ..........1-4 Product Registration .............. -
Page 6: About The Rv-8
5.1-channel sources. In addition to Logic 7, the RV-5 offers Dolby Digital Surround EX, The RV-5 features an integrated 7-channel power amplifier that is Dolby Pro Logic IIx, Dolby Pro Logic, DTS 96/24, DTS neo:6, and designed to achieve high levels of power and performance. - Page 7 The RV-8 features Lexicon’s LOGIC 7 decoding. This technology is based on decades of scientific research into how we hear and the Built to professional standards, the RV-5 is designed to serve as the study of room acoustics. Lexicon Logic 7 processing intelligently control center in any high-quality home theater.
-
Page 8: Highlights
Getting Started Lexicon HIGHLIGHTS • Eight channels • Four S/PDIF coaxial and four S/PDIF • DTS 96/24, DTS NEO:6, and DTS-ES optical (Toslink) digital audio input (discrete and matrix) decoding • Eight configurable inputs connectors • RS-232 control • Three independent zones •... -
Page 9: Product Registration
CAUTION! install the RV-5 on a solid, flat, level surface such as a table or Before moving the RV-5, power the unit off using the rear- shelf. The RV-5 can also be installed in a standard 19-inch... -
Page 10: Remote Control Battery Installation
When battery power is low, the remote control enters a low-voltage condition, preventing it from operating the RV-5. When this occurs, replace the batteries. Normal operation will resume when new batteries are installed. To replace the remote control batteries: 1. - Page 11 Basic Operation Front-Panel Overview ..............2-2 Rear-Panel Overview ..............2-6 Tuner Overview ................ 2-10 Selecting a Station...................2-10 Direct Station Access ................2-10 Tune/Seek Access ..................2-10 Scan Mode ....................2-11 Loading Presets ..................2-11 Saving Presets..................2-11 Editing Presets ..................2-12 Autoload ....................2-12 Amplifier Overview ..............2-12 Amplifier Channel Status .................2-13 Making Connections With the Amplifier Output ........2-13 Headphone Overview ...............
-
Page 12: Front-Panel Overview
Basic Operation Lexicon FRONT-PANEL OVERVIEW The RV-5 is shown below. The numbers in the front-panel illustrations correspond with the numbered items in the text. 1. Front Panel Display 7. Zone 2 Off Button 2. IR Receiver 8. Main Zone Off Button 3. - Page 13 Note: To adjust the Zone 2 volume level: Power is still supplied to the RV-5 when standby mode is activated. 1. Press and hold the front-panel Zone 2 input selection button that corresponds with the current input source. For instance, if the...
- Page 14 Main Zone. Zone 2 remains deactivated until a Zone 2 input is selected. 9 MUTE BUTTON Mutes or restores the RV-5 Main Zone volume to its original level. Press 6 ZONE 2 INPUT SELECTION BUTTONS the Mute button to mute volume level; “MUTE ON” appears in the Selects the corresponding input in Zone 2.
-
Page 15: Rear-Panel Overview
Basic Operation Lexicon REAR-PANEL OVERVIEW The RV-5 rear panel is shown below. The numbers in the rear-panel illustrations correspond with the numbered items in the text. 1. Microphone Input Connectors 8. Video Input Connectors 15. IR In Connector 2. Analog Audio Input Connectors 9. - Page 16 Center, LFE, Side L/R and Rear L/R are available. not configurable. It is activated when the RV-5 is powered on, and deactivated when the RV-5 is powered off from the rear panel or by putting the RV-5 into standby. The trigger output connector 3 MAIN ZONE AUDIO OUTPUT CONNECTORS (labeled 1) can be configured for remote or program operation.
- Page 17 One 3.5mm jack that accepts a stereo plug (Tip/Ring/Sleeve connection) or mono plug (Tip/Sleeve connection) is available. In the event of a power outage, the RV-5 will display a BROWNOUT, CYCLE POWER message. To turn the unit back on, use the rear- panel power switch.
- Page 18 Provides an input port for an iPod®, which can then be accessed through the RV-5. To use this feature, the D-1 Dock option must be The amplifiers feature advanced thermal current and DC protection installed to the DOCK connector. With a compatible iPod for each channel.
-
Page 19: Tuner Overview
WABC/90.90 FM or Preset 02/10.30 AM. Two antennas are To directly access a station from the front panel or remote control: supplied with the RV-5: one for AM and one for FM stereo. At a minimum, use of the supplied antennas is recommended to ensure 1. -
Page 20: Scan Mode
Scan Mode scans through all available stations, pausing for two seconds on each station before scanning to the next one. The RV-5 has 40 presets available for storing AM or FM stations. The presets are divided into four banks with ten presets per bank. It is... -
Page 21: Editing Presets
To start autoloading: EDITING PRESETS 1. Select AUTOLOAD from the MAIN MENU : SETUP : TUNER SETUP menu. It is possible to customize the name of each preset on the RV-5. 2. Press menu to start AUTOLOAD. To edit the preset name: 1. -
Page 22: Remote Control Overview
• For optimal performance, position the remote control at a 30-degree angle no more than 40 to 60 feet (12.2m to 18.3m) from the RV-5. Placing the RV-5 inside a smoked glass cabinet will reduce the remote control range. •... -
Page 23: Main Menu
Basic Operation RV-5 Note: The DVD1 device has been preprogrammed to control the Lexicon RT-10 and RT-20 disc players. MAIN MENU Use the MAIN MENU to open the four main MENU ITEM SELECTION M A I N M E N U... - Page 24 Basic Operation Lexicon MENU OPTIONS 2. When the desired setting appears beneath the parameter name, press the arrow to accept the setting and close the Selecting a menu option opens another menu within the menu drop-down menu. structure. For example, selecting SETUP from the MAIN MENU opens the SETUP menu.
- Page 25 The command matrix describes the commands that the remote control buttons perform when each command bank is active. BUTTON HOME MAIN PAGE1 MAIN PAGE2 ZONE2 PAGE1 ZONE2 PAGE2 Enters RV-5 standby mode. Activates the RV-5. Displays the MAIN Zone Displays the Selects the Dolby Displays the Zone 2...
- Page 26 Basic Operation Lexicon BUTTON HOME MAIN PAGE1 MAIN PAGE2 ZONE2 PAGE1 ZONE2 PAGE2 Displays the SAT Selects the SAT Selects the L7 FILM Selects the Reserved for future command bank, which input for the listening mode. Satellite input for expansion.
-
Page 27: Remote Control Buttons
Basic Operation RV-5 REMOTE CONTROL BUTTONS 1. SYSTEM POWER OFF 2. Displays the name of the selected device. 3. POWER ON 4. Device and function buttons 5. Light 6. Displays page number/currently selected device 7. LCD page change 8. FAVORITE 9. - Page 28 DISPLAY parameter. that control the CD player. Selects the Phono Selects the Toggles between Selects the Phono Deactivates the RV-5. command bank, which Phono input for setting the input input for Zone 2. includes commands the Main Zone. to auto, analog or that control the digital.
- Page 29 RV-5 BUTTON ZONE3 PAGE1 ZONE3 PAGE2 DVD1 PAGE1 DVD1 PAGE2 Enters RV-5 standby mode. Reserved for future expansion. Activates the RV-5. Toggles RT-10 or RT-20 power. Displays the Status of Resets the AUDIO Opens and closes the RT-10 or RT-20 disc tray.
- Page 30 Displays DVD1 Page 2 Displays DVD1 Page 1 command bank. command bank. command bank. command bank. Displays the Home command bank. Scrolls through Favorite Channel pages. Increases Zone 3 volume level in 1dB increments Increases RV-5 Main volume level in 1dB increments 2-20...
- Page 31 Adjusts the AUDIO CONTROLS menu modes. Main Zone FADER parameter towards the back. History-dependent* If the RV-5’s built-in tuner is the currently selected input, press to skip back to next available preset. History-dependent* Activates the Trigger output connector labeled 1.
- Page 32 Scrolls upward through RV-5 listening modes. Decreases Subwoofer output in 1dB increments. Scrolls downward through RV-5 listening modes. If the RV-5’s built-in tuner is the currently selected Skips to the beginning of the current chapter or track. Subsequent presses skip to the beginning of...
- Page 33 HOME MAIN PAGE2 ZONE2 PAGE1 ZONE2 PAGE2 PAGE1 History-dependent* If the RV-5’s built-in tuner is the currently selected input, press once to tune to the next available tuner frequency. Pressing for 2 seconds activates seek mode, which searches for the next available radio station. To enter Scan Mode, press and hold...
- Page 34 ZONE3 PAGE1 ZONE3 PAGE2 DVD1 PAGE1 DVD1 PAGE2 If the RV-5’s built-in tuner is the currently When RT-10 or RT-20 playback is activated, scans through the disc in reverse direction. selected input, press o nce to tune to the next available tuner frequency.
- Page 35 History-dependent* If the RV-5’s built-in tuner is the currently selected input, pressing this button will save the currently selected tuner frequency into a preset slot. Also use this button when programming the remote. See page C-4 for additional information.
- Page 36 RV-5’s built-in tuner is the currently selected input. If the RV-5 built-in tuner is the currently selected Enters values 10 and above on the RT-10 or RT-20. input, toggles between AM/FM frequency Press once for numbers in the teens, twice for bands.
-
Page 37: Understanding The Zones
RV-5 UNDERSTANDING THE ZONES TWO-LINE STATUS The RV-5 features two zones of operation: the Main Zone and Zone The two-line status opens in the on-screen and front-panel displays 2. The Main Zone controls audio and video signals in the primary whenever the RV-5 detects a change in input source or listening mode. -
Page 38: Status Menus
Basic Operation Lexicon TUNER STATUS Note: STATUS menu parameters provide information about the current The Tuner status indicates the current frequency, DVD1 90.9 FM input source and listening mode. These parameters cannot be band, listening mode and volume level. The... - Page 39 Basic Operation RV-5 2CH STATUS D STATUS Provides information about 2-channel input sources. Features L and Provides information about Dolby Digital input sources. Features R level meters. L, C, R, SL, SR and LFE level meters. Parameter Possible Settings Parameter...
- Page 40 Basic Operation Lexicon STATUS 5.1a BYPASS STATUS Provides information about DTS(-ES) input sources. Includes L, C, R, Provides information about 5.1-channel analog input sources when SL, SR, SB and LFE level meters. The SB level meter appears when a the MAIN ADV menu ANALOG BYPASS parameter is set to ON.
- Page 41 Basic Operation RV-5 2CH BYPASS STATUS DIGITAL STATUS Provides information about 2-channel analog input sources when Provides information about digital input sources for which a sample the MAIN ADV menu 2-CH ANLG BYP parameter is set to ON. rate is detected, but no audio is present in the input signal.
- Page 42 Basic Operation Lexicon 5.1 ANALOG STATUS LIVE! STATUS Provides information about 5.1-channel analog input sources. Provides information about LIVE! input sources. Features L and R level meters. Parameter Possible Settings Parameter Possible Settings INPUT The current input INPUT The current input...
-
Page 43: Status Menu Parameter Descriptions
DIALOG OFFSET parameter indicates the Indicates the rate at which the input signal is encoded. A higher bit amount of adjustment the RV-5 makes to normalize dialog to –27dBFS. rate indicates that less compression was used during the encoding process. -
Page 44: Status Menu Level Meters
Basic Operation Lexicon INPUT SURR MIX LVL +0.0dB, –3.0dB, –6.0dB Indicates the selected input (e.g., DVD1). Indicates the relative surround channel level that was used during the mixing process. INPUT TYPE ANLG, BYP, PCM, MIC, --- WORD LENGTH 16 bits, 20 bits, 24 bits Indicates the input source that is present. - Page 45 Setup Setup ..................3-2 Input Setup.................3-4 Changing Input Names................3-5 Assigning Audio and Video Input Connectors ........... 3-7 Selecting Preferred Listening Modes............3-12 Configuring Advanced Input Settings............3-17 INPUT SELECT Parameter Settings............3-19 ZONE2 in Parameter Settings..............3-22 Speaker Setup ................3-25 Setting Crossover Points................
-
Page 46: Setup
Setup Lexicon SETUP Selecting SETUP from the MAIN MENU opens the SETUP menu. and create and activate a custom unit name. See “DISPLAY SETUP” on page 3-63 for more information. MAIN MENU SETUP AUDIO CONTROLS DISPLAY SETUP DOLBY CONFIG SPEAKER/EQ SETUP... - Page 47 Setup RV-5 DISPLAY SETUP SETUP DISPLAY SETUP Selecting the SETUP menu DISPLAY SETUP option opens the DISPLAY SETUP menu, which is used to customize the on-screen and front-panel displays, restore audio/video synchronization, and activate and create a custom unit name.
- Page 48 FULL, HALF, OFF SETUP DISPLAY SETUP FRONT PAN DISPLAY BRIGHTNESS Opens the BRIGHTNESS menu, which is allows the user to set the brightness level of the RV-5 front display. TIME OUT OFF, 1 TO 10 SECONDS SETUP DISPLAY SETUP FRONT PAN DISPLAY...
-
Page 49: Input Setup
Setup RV-5 INPUT SETUP SETUP INPUT SETUP Selecting the SETUP menu INPUT SETUP option opens the INPUT SETUP menu, a two-screen menu which sets up the input type and name, the digital and analog inputs for both audio and video, the listening mode, speaker configuration, and other advanced input settings. -
Page 50: Changing Input Names
Setup Lexicon CHANGING INPUT NAMES Selecting the INPUT SETUP menu NAME parameter opens the INPUT NAME menu, which is used to customize or restore the factory-default name of the selected input. Factory-default input names correspond to front-panel and remote-control input selection button labels. -
Page 51: Assigning Audio And Video Input Connectors
ASSIGNING AUDIO and VIDEO INPUT CONNECTORS The RV-5 has eight configurable inputs, each of which can be assigned to its ten digital audio, eight analog audio, the built-in tuner, the phono input, two HDMI video, four composite video, four S-Video or three component video input connectors. - Page 52 An analog audio input connector must be assigned when no digital audio input connector is assigned. Refer to the previous audio input connector for the selected input. The RV-5 has eight page for information about assigning a digital audio input configurable inputs, each of which can be assigned to any of its eight connector.
- Page 53 Opens the VIDEO IN menu, which is used to assign the input Opens the DIG/ANLG AUTO menu, which ... connector for the selected input. The RV-5 has thirteen configurable video inputs, each of which can be assigned to any of its two HDMI,...
-
Page 54: Selecting Preferred Listening Modes
Selects a preferred listening mode for Dolby Digital sources The RV-5 allows five preferred listening modes for each Main Zone Selects a preferred listening mode for DTS(-ES) sources input: one listening mode each for 2-channel, Dolby Digital, DTS(-ES), 5.1a and MIC (LIVE!) sources. - Page 55 For example, many of the dynamic modes are only available when occur when a preferred listening mode is activated (also refer to the the RV-5 is configured for seven main output channels and source corresponding menus on 3-10): material with specific encoding is played. All Dynamic Listening...
- Page 56 When seven speakers are selected in the SPEAKER SETUP menu, and the appropriate source material is played, the dynamic listening When the RV-5 is set to use a preferred listening mode for a selected mode (or mode that does not appear in the input setup menu) can...
- Page 57 When the DOLBY D parameter is set to USE LAST: the RV-5 is set to standby. The RV-5 activates the listening mode that was activated the last time 2-CH a Dolby Digital source was present...
- Page 58 MUSIC cannot be selected as the preferred listening mode for 5.1- • The RV-5 activates the DTS THX MUSIC listening mode if it was channel analog sources. However, when the 5.1a parameter is set to activated the last time a DTS(-ES) source was present. Since USE LAST, the RV-5 will activate 5.1a MUSIC if this listening mode...
- Page 59 Note: Parameter Possible Settings When the INPUT SELECT parameter is set to AUTO, the RV-5 will not select INPUT SELECT DIGITAL, ANALOG, AUTO the assigned analog audio input connector when a valid digital audio ANLOG BYPASS ON, OFF input source is present.
-
Page 60: Configuring Advanced Input Settings
DVD1 MAIN ADVANCED S-VIDEO 16:9 When set to ON, the RV-5 passes the analog input signal to the Main Controls the passage of anamorphic trigger signals present in some Zone audio output connectors. For stereo analog sources, the input is video sources. -
Page 61: Input Select Parameter Settings
When a 2-channel PCM, Dolby Digital or are compatible with PCM (44.1, 48, SELECT parameter to ANALOG when the DTS(-ES ) source is presen t, th e RV-5 88.2 and 96kHz), Dolby Digital and DIGITAL IN parameter is set to NONE. - Page 62 Setup Lexicon CONFIGURING ADVANCE INPUT SETTINGS (continued) S-VIDEO OSD 4:3 COMPONENT OSD ON, OFF ON, OFF DVD1 S-VIDEO OSD 4-3 SETUP INPUTS MAIN ADVANCED SETUP INPUTS DVD1 MAIN ADVANCED COMPONENT OSD Controls the appearance of the on-screen display when the display Controls the appearance of the on-screen display when the display device is connected to an S-Video output connector.
- Page 63 When video played back from a VCR is converted to component Controls the interaction of the digital and analog audio input video by the RV-5, the resulting picture quality depends on both the connectors assigned to the current Zone 2 inputs. The INPUT SETUP...
-
Page 64: Zone2 In Parameter Settings
ANALOG and DIGITAL AUDIO DTS(-ES) and 5.1a sources. OUTPUTS. • The RV-5 sends the assigned • To generate a downmix, the same input must be selected in D I G I TA L c o n n e c t o r •... - Page 65 Allows adjustment of analog audio input levels for input signals sent DIG OUT RATE 96kHz, 88.2kHz, 48kHz, 44.1kHz to the Zone 2 digital audio output connectors. The RV-5 applies these RECORD BLOCKED, ENABLED adjustments to input signals before passing them to the Zone 2 digital audio output connectors.
- Page 66 Controls the sample rate of analog input signals sent to the Zone 2 digital audio output connectors. When a value is selected, the RV-5 runs the Zone 2 A/D converters at the selected sample rate. It is recommended to set the DIG OUT RATE parameter to the appropriate value when using a recording format that operates on a single sample rate, such as CD-R format (44.1kHz).
-
Page 67: Speaker Setup
Setup RV-5 SPEAKER/EQ SETUP SETUP SPEAK/EQ SETUP Select the SPEAKER SETUP menu to configure the Main Zone audio output connectors for the desired speaker setup. The Main Zone includes eight audio output connectors labeled Front L/R, Center, Subwoofer, Side L/R and Rear L/R. -
Page 68: Speaker Setup Parameters
Setup Lexicon SPEAKER SETUP PARAMETERS (continued) SETUP MAIN MENU SPEAK/EQ SETUP MANUAL SPEAKER/EQ DISPLAY SETUP AUDIO CONTROLS REAR AMP: REAR SPK SPEAKERS SPEAKERS INPUT SETUP VIDEO CONTROLS AUTOMATIC SPEAKER DISTANCES AUTO SETTINGS: 7.1 SETUP: 5.1+DSP SPEAKER DISTANCES AUTO EQ ONLY... - Page 69 -8 TO +8DB ANALOG BYPASS ON, OFF MANUAL SETUP SPEAK/EQ SETUP TILT ADJUST EQ SETUP INPUTS DVD1 MAIN ADVANCED ANALOG BYPASS Selects the TILT menu, which controls..When set to ON, the RV-5 passes the analog input signal to the Main 3-25...
- Page 70 Setup Lexicon CUSTOM SPEAKER SETUPS Selecting the CROSSOVER SETUP menu CUSTOM SETUP option opens the CUSTOM SETUP menu, which assigns independent crossover points for each Main Zone audio output connector. Possible crossover settings include FULL, FULL + SUB, and 10Hz increments within a 30Hz to 120Hz range.
- Page 71 Setup RV-5 In general, low frequencies will be redirected from speakers with the highest crossover points to speakers with the lowest crossover points. Low- frequency signals lower than the lowest crossover point will be redirected to the subwoofer. If the lowest crossover point is FULL, low frequency signals, excluding LFE information, will not be redirected to the subwoofer.
- Page 72 Setup Lexicon SPEAKER SETUP PARAMETERS SETUP SPEAKERS SET CROSSOVERS CUSTOM SETUP SETUP SPEAKERS SET CROSSOVERS THX SETUP The table below indicates the speaker setup parameters for config- Speaker setup parameters perform the same function regardless of uring the Main Zone audio output connectors for the desired speaker the selected speaker setup.
- Page 73 Setup RV-5 SPEAKER SETUP PARAMETERS (continued) CUSTOM SETUP MAIN MENU SETUP SPEAKER SETUP CROSSOVER SETUP FRONT L/R 40Hz INPUTS SET CROSSOVERS CUSTOM SETUP MODE ADJUST CENTER 60Hz SPEAKERS CHECK MICROPHONES THX SETUP AUDIO CONTROLS SIDE L/R 60Hz I/O CONFIG AUTOMATIC...
- Page 74 Setup Lexicon FRONT L/R CENTER FULL, FULL + SUB, 30 to 120HZ, THX 80HZ FULL, FULL + SUB, 30 to 120HZ, THX 80HZ, NONE SETUP SPEAKERS SET CROSSOVERS CUSTOM SETUP CENTER SETUP SPEAKERS SET CROSSOVERS CUSTOM SETUP FRONT L/R Assigns a crossover point for the Main Zone audio output connector Assigns a crossover point for the Main Zone audio output connectors labeled CENTER when a custom speaker setup is selected.
- Page 75 Side L/R output connectors. If connectors. If the REAR L/R parameter is also set to NONE, the the SIDE L/R parameter is also set to NONE, the RV-5 redirects RV-5 will redirect surround channel signals to the Front L/R surround channel signals to the Front L/R output connectors.
- Page 76 Assigns a crossover point for the Main Zone audio output connector Note: labeled Subwoofer. When set to FULL, the RV-5 sends a full-range When the SUBWOOFER parameter is set to NONE, subwoofer signals audio output signal to this connector. Otherwise, the RV-5 activates a will not be redirected if the 5.1a BYPASS listening mode is activated.
- Page 77 Setup RV-5 SPEAKER SETUP PARAMETERS (continued) SPEAKER SETUP CROSSOVER SETUP SETUP MAIN MENU SET CROSSOVERS CUSTOM SETUP INPUTS MODE ADJUST INPUTS CHECK MICROPHONES THX SETUP SPEAKERS AUDIO CONTROLS SPEAKERS AUTOMATIC I/O CONFIG TUNER PRESETS I/O CONFIG MANUAL DISPLAYS SETUP DISPLAYS...
- Page 78 When the remote control 7/5 button is used to toggle between 7 and 5-channel playback: • ASA processing is not available during 5-channel playback. • The RV-5 automatically switches between the 5.1 THX ULTRA2 and 5.1 THX or DTS THX ULTRA2 and DTS THX listening modes. 3-34...
-
Page 79: Automatic Calibration
Setup RV-5 AUTOMATIC CALIBRATION The RV-5 offers automatic calibration of speaker distances, output level, or both. The table below indicates available automatic calibration options. A successful microphone check is required before automatic calibration can be performed. Automatic Options Details MICROPHONE CHECK •... - Page 80 To connect the microphones: • The microphones included in the Lexicon Microphone Kit 4. Make sure the RV-5 is powered off OR in standby mode. require careful handling. Dropping or otherwise physically 5. Connect the microphones included in the Lexicon Microphone Kit abusing the microphones might cause errors during use or to the microphone input connectors on the RV-5 rear panel.
- Page 81 Setup RV-5 POSITIONING THE MICROPHONES FOR THE MICROPHONE CHECK Refer to the microphone placement examples that begin below to position the microphones for the microphone check. PROPER microphone positioning for the microphone check During the microphone check, position the microphones:...
- Page 82 Setup Lexicon IMPROPER microphone positioning for the microphone check During the microphone check, DO NOT: 7 Separate the microphones 7 Scatter the microphones throughout the listening space 7 Obstruct the line-of-sight path between the micro- phones and the speakers Rear...
- Page 83 After eliminating microphones that are mation and instructions are available in the on-screen display. not detected or not functioning, the RV-5 calculates an average level for all microphones. 1. Select the SPEAKER SETUP menu CHECK MICROPHONES option, as shown above.
- Page 84 PRESS TO VIEW microphone check. DETAILS The RV-5 uses the calibration noise signal to eliminate micro- 4. Press the arrow buttons to highlight the desired micro- phones that register the signal at a level that is too low or too phone parameter.
- Page 85 Setup RV-5 circumstance, place the successfully checked microphone in the primary listening position. • If a microphone check was successful, do not disconnect the microphones from the microphone input connectors. If the microphones are disconnected, you should perform the micro- phone check again before proceeding to automatic calibration.
- Page 86 The RV-5 did not detect the microphone • Examine microphone input connections to ensure that the microphones are properly con- (MICROPHONE) nected to the RV-5 and that microphone cable plugs are fully inserted for a solid connection. during the silence check. NOT DETECTED •...
- Page 87 Microphone single listening position. The microphones are Center positioned as close together as possible in a single listening position, allowing the RV-5 to calibrate optimal Subwoofer speaker distances and output levels for that position. Front Right...
- Page 88 Each micro- Microphone phone is positioned in a single listening position within a Center single row, allowing the RV-5 to calibrate optimal speaker distances and output levels for that row at the Subwoofer expense of a single listening position.
- Page 89 Each micro- Microphone phone is positioned in a single listening position within a Center row, allowing the RV-5 to calibrate optimal speaker distances and output levels for a larger listening area at Subwoofer the expense of a single listening position.
- Page 90 Subwoofer check. The microphones are positioned on the floor Front along the perimeter of the listening space, making it Right difficult for the RV-5 to calibrate optimal speaker distances and output levels for the actual listening positions. 3-46...
- Page 91 Setup RV-5 IMPROPER microphone positioning for automatic calibration During the automatic calibration, do not: 7 Arrange the microphones along the perimeter of the listening positions or space 7 Position the microphones at spots where the listeners’ heads will not be during listening...
- Page 92 The following AUTO SPEAKER SETUP messages are displayed before automatic calibration begins: • The !CAUTION! HIGH AUDIO LEVELS message indicates that the RV-5 generates loud calibration noise signals during automatic calibration. If the sig- nals become too loud, press the arrow button to cancel automatic calibration.
- Page 93 RV-5 calculates a distance for the corresponding speaker. As it finishes each parameter, the RV-5 enters the calibrated value or an ERROR message to the right of the parameter label. • Because of the way low-frequency signals propagate in most listening spaces, automatic speaker dis- tance calibration often produces unreliable results for subwoofers.
- Page 94 -4.5dB SIDE LEFT 4.5ft SUBWOOFER SUBWOOFER When the RV-5 is finished calibrating speaker distances and output levels, if there was a calibration error, the AUTO SPEAKER SETUP screen is displayed, indicating the results for each calibration procedure. If there was a DISTANCES calibration If there was a LEVELS calibration error, an •...
- Page 95 Setup RV-5 STEP DISTANCES DISTANCES & LEVELS LEVELS SET DISTANCES AUTO DISTANCES AUTO SPEAKER SETUP AUTO DISTANCES* SET LEVELS AUTO LEVELS AUTO DISTANCES FRONT LEFT 12.0ft DISTANCES FRONT LEFT 12.0ft AUTO LEVELS FRONT LEFT -2.0dB ORIGINAL DISTANCES CENTER 10.5ft LEVELS...
- Page 96 • Set the corresponding CUSTOM or THX SETUP menu parameter to include the selected (SPEAKER) speaker in the speaker setup. (The RV-5 only calibrates values for speakers that are included in speaker setup. SPEAKER IS NOT ENABLED the speaker setup.) The microphones detected out-of-phase •...
-
Page 97: Manual Calibration
Setup RV-5 MANUAL CALIBRATION SETUP SPEAKERS MANUAL Selecting the SPEAKER SETUP menu MANUAL option displays the MANUAL SPEAKER SETUP menu, to manually calibrate speaker distances and output levels. The table below indicates available manual calibration options. SPEAKER SETUP CUSTOM SETUP... - Page 98 Setup Lexicon PERFORMING MANUAL SPEAKER DISTANCE CALIBRATION SETUP SPEAKERS MANUAL SPEAKER DISTANCES Selecting the MANUAL SPEAKER SETUP menu SPEAKER DISTANCES option displays the SPEAKER DISTANCES menu, to manually calibrate speaker distances. SPEAKER SETUP MANUAL SPEAKER SETUP CUSTOM SETUP SPEAKER DISTANCES...
- Page 99 Setup RV-5 PERFORMING MANUAL OUTPUT LEVEL CALIBRATION SETUP SPEAKERS MANUAL LEVELS CALIBRATION Selecting the MANUAL SPEAKER SETUP menu LEVELS CALIBRATION option displays the LEVELS CALIBRATION menu shown below, to manually calibrate output levels. LEVELS CALIBRATION SETUP SPEAKER SETUP MANUAL SPEAKER SETUP...
- Page 100 Note: During the internal noise test, the RV-5 sends calibration noise signals During the internal noise test, it is possible to select an output level to each speaker in the order shown on the SPEAKER LEVEL ADJUST parameter just as the cursor is about to automatically scroll to the menu.
- Page 101 The external noise test requires an external calibration source such as an audio calibration disc. When the external noise test is conducted, the RV-5 activates a listening mode based on the current Main Zone To manually calibrate output levels during the external noise test: input source.
- Page 102 The BASS PEAK LIMITERS option displays the BASS PEAK LIMITERS menu, to set amplitude limits on low-frequency signals sent to the Main Zone audio output connectors, including the Subwoofer. The RV-5 is equipped with an internal limiter to prevent low-frequency signals from exceeding a designated output level.
- Page 103 Setup RV-5 LIMIT ADJ 75 to 120dB LIMITER ON, OFF SETUP SPEAKERS MANUAL LEVELS CALIBRATION BASS PEAK LIMITERS SETUP SPEAKERS MANUAL LEVELS CALIBRATION BASS PEAK LIMITERS LIMITER ADJ LIMITER Sets amplitude limits applied to the Subwoofer output connector, Limits low-frequency signals sent to the subwoofer or redirected to and to other Main Zone audio output connectors to which low- other speakers.
-
Page 104: I/O Config
Setup Lexicon I/O CONFIG SETUP I/O CONFIG The I/O CONFIG option is used to configure the analog audio input connectors as eight (Left/Right) stereo connectors, five (Left/Right) stereo connectors and one 5.1-channel configuration (Front L/R, Center, Subwoofer, Side L/R), or as two stereo connectors and two 5.1-channel configurations. - Page 105 Setup RV-5 5 ST. & (1) 5.1 ANLG 2 ST. & (2) 5.1 ANLG SETUP I/O CONFIG ANALOG INPUTS 5 ST. & (1) 5.1 ANLG SETUP I/O CONFIG ANALOG INPUTS 2 ST. & (2) 5.1 ANLG Configures the analog audio input connectors as two stereo Configures the analog audio input connectors as five stereo connectors and two 5.1-channel configurations.
- Page 106 Setup Lexicon I/O CONFIG (continued) SETUP I/O CONFIG AMP OUTPUTS MAIN MENU ANALOG INPUTS MAIN 7.1 INPUTS MODE ADJUST SPEAKERS AMP OUTPUTS MAIN 5.1 & ZONE2 2.0 AUDIO CONTROLS I/O CONFIG MAIN 5.1 & ZONE3 2.0 TUNER PRESETS DISPLAYS SETUP...
-
Page 107: Display Setup
Setup RV-5 DISPLAY SETUP SETUP DISPLAYS Selecting the SETUP menu DISPLAYS option opens the DISPLAY SETUP menu, which is used to customize the on-screen and front-panel displays, restore audio/video synchronization, and activate and create a custom unit name. MAIN MENU... -
Page 108: On-Screen Display Setup
When set to 2 SECONDS, the on-screen display FORMAT NTSC SECAM, PAL, NTSC appears for 2 seconds whenever the input source changes or the RV-5 BACKGROUND ON ON, OFF receives a command. When set to ALWAYS OFF, the on-screen display remains off at all times. - Page 109 Setup RV-5 POSITION BACKGROUND TOP, CENTER, BOTTOM ON, OFF SETUP DISPLAYS ON-SCREEN DISPLAY POSITION SETUP DISPLAYS ON-SCREEN DISPLAY BACKGROUND Controls the vertical position of the two-line status on the display Activates and deactivates the menu background. When set to ON, device screen.
-
Page 110: Front-Panel Display Setup
ON, the front-panel display remains on at all times. When set to 2 adjusts to the selected brightness. SECONDS, the front-panel display appears for 2 seconds whenever the input source changes or the RV-5 receives a command. When set to ALWAYS OFF, the front-panel display remains off at all times. 3-66... - Page 111 RV-5 is activated. character above the cursor (^). When set to OFF, the custom name does not appear when the RV-5 is activated. The custom name can be entered in the DISPLAY SETUP 3.
-
Page 112: Volume Control Setup
Setup Lexicon VOLUME CONTROL SETUP SETUP VOLUME CONTROLS Opens the VOLUME CONTROL SETUP menu, which is used to configure Main Zone, Zone 2, Zone 3, and Headphone volume levels. VOLUME CONTROL SETUP MAIN MENU SETUP VOLUME CONTROL SETUP VOLUME CONTROL SETUP... - Page 113 ZONE PWR ON Sets the Headphone volume level that will be selected whenever headphones are plugged in to the RV-5. When set to LAST LVL, the headphones will activate at the last volume level that was selected when they were last plugged in. When the headphones are unplugged, the volume will revert to the MAIN PWR ON setting.
-
Page 114: Trigger Setup
PWR – the power trigger output connector 5.1a BYPASS ZONE3 INPUTS 2CH BYPASS FILM – is not configurable. It is activated when the RV-5 is activated, HEADPHONE and deactivated when the RV-5 is deactivated. The trigger HEADPHONE 5.1 MUSIC... - Page 115 Setup RV-5 PROGRAM OPERATION PARAMETERS ON, OFF TRIGGER SETUP MAIN MENU SETUP MAIN MENU TRIGGER SETUP MODE ADJUST INPUTS REMOTE ONLY SETUP TRIGGER (PROGRAM OPERATION PARAMETER) MUSIC DVD1 AUDIO CONTROLS SPEAKERS DVD2 TUNER PRESETS I/O CONFIG 2-CHAN Configure the trigger output connector labeled 1 for...
-
Page 116: Tuner Setup
The tuner user interface will not allow illegal frequencies to be entered. It DISPLAY RDS NAME RDS NAME, PRESET NAME, will always set at the closest valid frequency. For example, if the RV-5 has FREQUENCY USA set as the current region, entering 107.8MHz will result in 107.9MHz... -
Page 117: Tuner Region Band Limit And Increments
Setup RV-5 MAIN MENU SETUP TUNER SETUP REGION INPUTS MODE ADJUST HIGH SCAN SENS SPEAKERS AUDIO CONTROLS AUTOLOAD I/O CONFIG TUNER PRESETS CLEAR ALL DISPLAYS SETUP TUNER PRESETS VOLUME CONTROLS DISPLAY RDS NAME TRIGGER RADIO TEXT TUNER SETUP SCROLL RATE... - Page 118 Setup Lexicon TUNER SETUP (continued) MAIN MENU SETUP TUNER SETUP PRESS RIGHT REGION TO START AUTOLOAD MODE ADJUST INPUTS SCAN SENS AUDIO CONTROLS SPEAKERS AUTOLOAD I/O CONFIG TUNER PRESETS CLEAR ALL DISPLAYS SETUP TUNER PRESETS VOLUME CONTROLS DISPLAY RDS NAME...
- Page 119 Setup RV-5 TUNER SETUP MAIN MENU SETUP PRESS RIGHT REGION INPUTS TO CLEAR ALL PRESETS MODE ADJUST SCAN SENS SPEAKERS AUDIO CONTROLS AUTOLOAD TUNER PRESETS I/O CONFIG CLEAR ALL SETUP DISPLAYS TUNER PRESETS VOLUME CONTROLS DISPLAY RDS NAME TRIGGER RADIO TEXT...
- Page 120 Setup Lexicon TUNER SETUP (continued) TUNER SETUP MAIN MENU SETUP RDS NAME PRESET NAME REGION INPUTS MODE ADJUST FREQUENCY SCAN SENS AUDIO CONTROLS SPEAKERS AUTOLOAD TUNER PRESETS I/O CONFIG CLEAR ALL SETUP DISPLAYS TUNER PRESETS VOLUME CONTROLS DISPLAY RDS NAME...
- Page 121 Setup RV-5 TUNER SETUP MAIN MENU SETUP REGION INPUTS MODE ADJUST SCAN SENS SPEAKERS AUDIO CONTROLS AUTOLOAD TUNER PRESETS I/O CONFIG CLEAR ALL SETUP DISPLAYS TUNER PRESETS VOLUME CONTROLS DISPLAY RDS NAME TRIGGER RADIO TEXT TUNER SETUP SCROLL RATE MEDIUM...
- Page 122 Setup Lexicon TUNER SETUP (continued) TUNER SETUP MAIN MENU SETUP REGION INPUTS MODE ADJUST SCAN SENS AUDIO CONTROLS SPEAKERS AUTOLOAD TUNER PRESETS I/O CONFIG CLEAR ALL SETUP DISPLAYS TUNER PRESETS VOLUME CONTROLS DISPLAY RDS NAME TRIGGER RADIO TEXT TUNER SETUP...
-
Page 123: Lock Options
Setup RV-5 LOCK OPTIONS SETUP LOCK OPTIONS Selecting the SETUP menu LOCK OPTIONS option opens the LOCK OPTIONS menu, which is used to protect MODE ADJUST, AUDIO CONTROLS and SETUP menu branch parameter settings from accidental changes. MAIN MENU SETUP... - Page 124 Setup Lexicon 3-80...
- Page 125 Audio & Video Controls Audio Controls ................4-2...
- Page 126 EQ PRESET AUDIO CONTROLS TREBLE The RV-5 provides 3 preset controls for the EQ plus one user- Controls the amount of high-frequency boost or cut applied to the controlled setting. audio output connectors labeled Front L/R and Center. The TREBLE Parameter Settings graph on the next page indicates the frequency response of all TREBLE parameter settings.
- Page 127 Audio & Video Controls RV-5 BASS Parameter Settings TREBLE Parameter Settings The BASS parameter controls the amount of low-frequency boost or cut applied to the The TREBLE parameter controls the amount of high-frequency boost or cut audio output connectors labeled Front L/R, Center and Sub.
- Page 128 The AUDIO STATUS menu is an information-only menu identifying the current audio status of the RV-5 unit. Input identifies the actual audio source. Name identifies the title of the RV-5 as defined by the user. Connector identifies the actual audio input port selected on the rear panel.
- Page 129 AUDIO CONTROLS The VIDEO STATUS menu is an information-only menu identifying the current video status of the RV-5 unit. Input Resol. identifies the current input resolution setting. Copy Protection identifies the current status of the copy protection mode. Video Process identifies the current setting of the video processor.
- Page 130 Audio & Video Controls Lexicon...
- Page 131 Tuner Presets Tuner Presets ................5-2...
- Page 132 Tuner Presets Lexicon TUNER PRESETS Selecting TUNER PRESETS from the MAIN MENU displays a list of the pages of existing presets. The preset number, preset name (if available), frequency and broadcast band is displayed. MAIN MENU TUNER PRESETS TUNER PRESETS...
- Page 133 Tuner Presets RV-5 LISTEN TO PRESET CLEAR PRESET TUNER PRESETS PAGE 1 TUNER PRESETS PAGE 1 LISTEN TO PRESET CLEAR PRESET Loads the current preset station. Press the menu arrow to load Clears the current preset entry. The front-panel and on-screen the station preset.
- Page 134 Tuner Presets Lexicon...
- Page 135 Mode Adjust Mode Adjust ................6-2 Listening Mode Activation............6-2 Listening Mode Descriptions ............6-4 Listening Mode Menu Option and Parameter Descriptions..6-39 Mode – Parameter Relationships ..........6-47...
-
Page 136: Mode Adjust
Listening modes are available for 2-channel, Dolby Digital, DTS(-ES), MIC and 5.1 PLIIx MOV* 5.1 PLIIx MUS* analog input sources. The RV-5 allows listening mode selection for all Main DIGITAL EX* Zone sources. In some cases, the RV-5 automatically activates a listening mode 5.1 2-CHANNEL... - Page 137 Main Zone input source that is present. when the RV-5 is configured for seven main output channels and *** For ES source. source material with specific encoding is played. All dynamic listening modes are available through the remote control or front panel Mode button.
-
Page 138: Listening Mode Descriptions
Logic 7 FILM is a proprietary Lexicon listening mode that derives Logic 7 TV is a proprietary Lexicon listening mode based on the seven channels from 2-channel input sources. Logic 7 also derives Logic 7 FILM listening mode, but specifically tailored for broadcast full-frequency stereo surround channels that realistically increase sources. - Page 139 It is recommended for Logic 7 MUSIC is a proprietary Lexicon listening mode based on the classical music sources, which are often recorded in real spaces with Logic 7 FILM listening mode, but specifically tailored for music added reverb to enhance the stereo mix.
- Page 140 DOLBY PLIIx MOV listening mode using the front-panel or remote control Mode buttons. When the 2-CH parameter is set to USE LAST, the RV-5 will automat- ically activate the DOLBY PLIIx MOV listening mode if this listening mode was activated the last time a 2-channel Dolby Surround-...
- Page 141 See “Listening Mode Menu Option and Parameter Descriptions” on page 6-30 for detailed descriptions. When the 2-CH parameter is set to USE LAST, the RV-5 will automat- ically activate the DOLBY PLIIx MUS listening mode if this listening mode was activated the last time a 2-channel Dolby Surround-...
- Page 142 To select either of these listening modes, use the remote control or front-panel Mode Parameter button. When the 2-CH parameter is set to USE LAST, the RV-5 will OUTPUT LEVELS Refer to page 6-28 automatically activate a DTS Neo:6 listening mode if this mode was activated the last time a 2-channel source was present.
- Page 143 Lexicon professional products. The NIGHTCLUB mode is a superior room simulation listening mode because it uses a proprietary reverb algorithm inherited from...
- Page 144 The CATHEDRAL mode is a superior room simulation listening The CHURCH mode is a superior room simulation listening mode mode because it uses a proprietary reverb algorithm inherited from because it uses a proprietary reverb algorithm inherited from Lexicon professional products. Lexicon professional products. Parameter Default Setting...
- Page 145 PANORAMA CALIBRATION The PANORAMA mode is designed for playback of stereo and Select PANORAMA CALIBRATION to open matrix-encoded sources. PANORAMA uses proprietary Lexicon PANORAMA CALIBRATION the PANORAMA CALIBRATION menu shown SOURCE LEFT & RIGHT algorithms to move the stereo image outward from the front...
- Page 146 • Select the AUTO SPEAKER SETUP menu DISTANCES option to 5. Begin playback of the external calibration source. have the RV-5 automatically calibrate speaker distances. 6. When playback of the external calibration source is in progress, • Measure the distance between the primary listening posi- set the SPEAKER ANGLE parameter so the sound is not heard in tion and the front baffle of each speaker.
- Page 147 This mode, designed for playback of mono sources, uses proprietary channel to Front, Side and Rear Left channels and the right channel Lexicon reverb algorithms to realistically expand mono sources to to Front, Side and Rear Right channels, and sums the Left and Right use all channels.
- Page 148 MODE ADJUST FILM This mode, designed for playback of mono sources, sends the The 5.1 L7 FILM mode is a proprietary Lexicon listening mode mono source to all channels. designed for playback of 5.1-channel Dolby Digital-encoded film sources, and provides remarkable improvement compared to other decoders.
- Page 149 MODE ADJUST MODE ADJUST MUSIC This proprietary Lexicon listening mode is designed for playback of This proprietary Lexicon listening mode is designed for playback of 5.1-channel Dolby Digital-encoded broadcast sources. Based on the 5.1-channel Dolby Digital-encoded music sources. Based on the 5.1 5.1 L7 FILM listening mode, 5.1 L7 TV derives seven channels from...
- Page 150 To activate this listening mode, use the front-panel or remote control Mode buttons. When the DOLBY D parameter is set to USE LAST, the RV-5 will automatically activate the dynamic 5.1 PLIIx MOV listening mode if this listening mode was activated the last time a Dolby Digital source was present.
- Page 151 To activate this listening mode, use the front-panel or remote control Mode buttons. When the DOLBY D parameter is set to USE LAST, the RV-5 will automatically activate the dynamic 5.1 PLIIx MUS listening mode if this listening mode was activated the last time a Dolby Digital source was present.
- Page 152 The Dolby DIGITAL EX listening mode is available when both the side and rear speakers are present and Dolby Digital Surround EX The RV-5 cannot detect Dolby Digital Surround EX encoding in non- decoding is activated. Matrix decoding is then applied to derive a flagged 5.1-channel Dolby Digital input sources because they do not...
- Page 153 The downmixed 5.1-channel Dolby Digital input signals are sent to listening space. the Front L/R speakers and subwoofer. Note that: When a 1.0 Dolby Digital source is present, the RV-5 automatically Parameter Default Setting Possible Settings activates the 5.1 MONO LOGIC listening mode.
- Page 154 Mode Adjust Lexicon 5.1 MONO SURR 5.1 MONO MODE ADJUST 5.1 MONO SURR MODE ADJUST 5.1 MONO This listening mode, designed for playback of Dolby Digital-encoded This listening mode, designed for playback of Dolby Digital-encoded mono sources, sends mono signals to all channels.
- Page 155 Mode Adjust RV-5 DTS-ES DECODING The DTS, DTS-ES, and DTS-ES Discr listening modes are designed • DTS-ES decoding is deactivated when the ES DECODING parameter is set to OFF or when the ES DECODING parameter for, at a minimum, playback of 5.1-channel DTS, 5.1-channel is set to AUTO and a 5.1-channel DTS source is detected.
- Page 156 MODE ADJUST MUSIC MUSIC These proprietary Lexicon listening modes use an advanced matrix to These proprietary Lexicon listening modes, similar to the DTS-ES decode seven channels from 5.1- and 6.1-channel film sources with L7 FILM listening mode, use an advanced matrix to decode seven enhanced front steering.
- Page 157 Mode Adjust RV-5 DTS, DTS-ES & DTS(-ES) Discr DTS 2-CHAN & DTS-ES 2-CHAN MODE ADJUST Discr 2-CHAN MODE ADJUST 2-CHAN This mode decodes 5.1 matrix or 6.1 discrete channels from DTS-ES These modes, recommended for recording purposes, send sources. It is designed for playback of 5.1-channel DTS, 5.1-channel downmixed 5.1-channel or 6.1-channel DTS-ES input signals to the...
- Page 158 MUSIC MODE ADJUST FILM The 5.1a LOGIC7 FILM listening mode is a proprietary Lexicon lis- The 5.1a LOGIC7 MUSIC listening mode is similar to the 5.1a tening mode that uses LOGIC7 decoding to derive seven channels LOGIC7 FILM listening mode, but specifically tailored for music from 5.1-channel analog film sources with enhanced front steering.
- Page 159 Mode Adjust RV-5 5.1a STANDARD 5.1a 2-CHANNEL MODE ADJUST 5.1a STANDARD MODE ADJUST 5.1a 2-CHANNEL This mode allows 5.1-channel analog sources to use bass This mode downmixes 5.1-channel analog input signals into management, speaker crossovers, speaker distance calibration, and 2-channel LOGIC7-encoded output signals. It sends these signals to audio controls (tone controls).
- Page 160 Mode Adjust Lexicon 5.1a BYPASS 2CH BYPASS MODE ADJUST 2CH BYPASS MODE ADJUST 5.1a BYPASS • Designed for playback of 5.1-channel analog sources, such as This listening mode sends 2-channel analog audio input signals to DVD-A or SACD players. the Main Zone audio output connectors labeled Front L/R with no •...
- Page 161 MODE ADJUST HEADPHONE MODE ADJUST HEADPHONE HEADPHONE L7 is a proprietary Lexicon listening mode designed HEADPHONE DTS is a proprietary Lexicon listening mode designed for enhanced playback of 2-channel sources through headphones. for enhanced playback of DTS(-ES)-encoded music or film sources This listening mode uses LOGIC7 processing and Head Related through headphones.
- Page 162 Mode Adjust Lexicon OUTPUT LEVELS CUSTOM VS PRESET Listening Mode OUTPUT LEVELS MODE ADJUST MODE ADJUST (Listening Mode) CUSTOM CUSTOM VS PRESET Allows comparison listening between the custom and factory-default Opens the OUTPUT LEVELS menu, which is OUTPUT LEVELS versions of the selected listening mode. When PRESET is selected, the...
- Page 163 Mode Adjust RV-5 RESET MODE MODE ADJUST (Listening Mode) CUSTOM RESET MODE Restores the factory-default version of the selected listening mode, restoring all listening mode menu parameters to their factory default settings. To restore the factory-default version of the selected listening mode: 1.
-
Page 164: Listening Mode Menu Option And Parameter Descriptions
Simulates 7-channel playback in 5-channel speaker configurations. Enhances stereo bass, which results in low-frequency reproduction When set to ON, the RV-5 provides an increased sense of that is less localizable and more realistic in the listening space. The spaciousness and envelopment through the surround speakers. This... - Page 165 Mode Adjust RV-5 LISTENING MODE MENU OPTION and PARAMETER DESCRIPTIONS (continued) CENTER especially for nighttime viewing to avoid disturbing others. Available in OFF, –30 to +12dB all Dolby Digital modes. Controls the output level of the audio output connector labeled Center.
- Page 166 Note: matrix-encoded or a 6.1-channel discrete-encoded DTS-ES source is detected. DTS-ES decoding is deactivated when a 5.1-channel DTS The RV-5 cannot automatically detect Dolby Digital Surround EX encoding source is detected. in non-flagged 5.1-channel Dolby Digital sources. A non-flagged input...
- Page 167 Mode Adjust RV-5 LISTENING MODE MENU OPTION and PARAMETER DESCRIPTIONS (continued) • This parameter is available in 5.1 PLIIx MOV, 5.1 PLIIx MUS, Careful adjustment of this parameter allows achievement of proper DOLBY DIGITAL EX and DOLBY DIGITAL modes. tonal balance and reduces the risk of subwoofer overload. When the speaker setup does not include a subwoofer, LFE information is mixed •...
- Page 168 When set to ON, the RV-5 applies a high-frequency filter. When set OUTPUT LEVELS to OFF, the RV-5 does not apply a high-frequency filter. It is recom- Opens the OUTPUT LEVELS menu, which is used to adjust output mended that you set this parameter to ON for film sources, as many...
- Page 169 Mode Adjust RV-5 LISTENING MODE MENU OPTION and PARAMETER DESCRIPTIONS (continued) REAR L/R SIDE L/R –30 to +12dB, OFF –30 to +12dB, OFF Controls the output level of the Main Zone audio output connector Controls the level of the Side L/R audio output connectors in the Main labeled Rear L/R.
- Page 170 Side L/R and Rear L/R. This filter is only applied to SPEAKER ANGLE output signals generated by the RV-5. Available in all Logic 7 modes. 10 to 90deg Compensates for a wide or narrow speaker angle relative to the...
- Page 171 Mode Adjust RV-5 LISTENING MODE MENU OPTION and PARAMETER DESCRIPTIONS (continued) SURROUND MIX -5 to +5dB Controls the relative level of surround channel information sent to the audio output connectors labeled Front L/R. It is recommended that you set this parameter to +2dB or +3dB for all input sources. Available in 5.1 2-CHANNEL and DTS (-ES) 2-CHAN modes.
-
Page 172: Mode - Parameter Relationships
Mode Adjust Lexicon MODE – PARAMETER RELATIONSHIPS The following table lists each parameter and the modes in which it is used. The parameter... Is used in these modes 5 SPKR ENHANCE All L7 modes ACADEMY FILTER MONO LOGIC and 5.1 MONO LOGIC... - Page 173 Mode Adjust RV-5 The parameter... Is used in these modes EX DECODING 5.1 PLIIx MOV, 5.1 PLIIx MUS, DOLBY DIGITAL EX and DOLBY DIGITAL FRONT STEERING L7 TV, L7 MUSIC, L7 MUSIC SURR, all 5.1 L7 modes and all DTS L7 modes...
- Page 174 Mode Adjust Lexicon The parameter... Is used in these modes SOUND STAGE All L7 modes SOURCE PANORAMA CALIBRATION SPEAKER ANGLE PANORAMA CALIBRATION SPEECH DETECT NIGHTCLUB, CONCERT HALL, CHURCH and CATHEDRAL SPREAD All LIVE! modes SUB & SUB LVL All except LIVE! modes...
- Page 175 Troubleshooting and Maintenance Troubleshooting................7-2 Routine Maintenance ..............7-4 Restoring Factory-Default Settings..........7-4...
- Page 176 On button. 4. Make sure the RV-5 is receiving an audio signal. To do this, 3. Examine the power cord to ensure a good connection between follow the instructions that begin on page 2-29 to open the the rear-panel AC input connector and the wall outlet.
- Page 177 RF interference is present in the audio or video. Visit the knowledgebase at http://www.lexicon.com/kbase for 1. Make sure the RV-5 is not positioned near unshielded TV or FM answers to frequently asked questions and additional trouble- antennas, cable TV decoders and other RF-emitting devices.
- Page 178 RV-5. 2. If the RV-5 is powered on, press the front-panel standby button or the remote control Off button to activate standby mode and •...
- Page 179 Appendix Specifications ................A-2 Declaration of Conformity............A-4 Menu Tree ................. A-5 Installation Worksheet .............. A-20...
- Page 180 Appendix Lexicon SPECIFICATIONS Main Zone Audio Performance Input Impedance 100kΩ in parallel with 150pF Audio Input & Output Connectors Preamp Output Level • 150mV Rms typical, 6V Rms maximum (RCA connectors) • Maximum value with full-scale input signal and volume Analog Audio Inputs Eight stereo (RCA) or five stereo and one 5.1-channel or 2...
- Page 181 RV-5 Appendix Composite & S-Video Performance FM Tuner Performance Switching Active Frequency Response 50Hz to 16kHz, +0.1dB/-1.0dB Output Level 1.0V peak-to-peak THD + Noise <0.4% at 1 kHz (stereo) Impedance Signal-to-Noise Ratio 50dB minimum at 60dBmV 75Ω Image Rejection >50dB, >60dB typical Input Return Loss >40dB...
- Page 182 Specifications are subject to change without notice. Bedford, MA 01730-1413 USA The equipment identified here conforms to the Direc- tive(s) and Standard(s) specified above. Type of Equipment: Digital Receiver Model: Lexicon RV-5 Date: January 2007 Harman Specialty Group Vice President of Engineering 3 Oak Park...
- Page 183 RV-5 Appendix MAIN MENU: SETUP MENU SETUP MAIN MENU DISPLAY SETUP AUDIO CONTROLS SPEAKER/EQ SETUP VIDEO CONTROLS INPUT SETUP SETUP SURROUND CONFIG DOLBY CONFIG MUTE LEVELS POWER ON SETTINGS DISPLAY SETUP DOLBY CONFIGURATION INPUT SETUP: INPUT SETUP 1 DISPLAY TYPE:...
- Page 184 Appendix Lexicon SETUP MENU: SPEAKERS AUTOMATIC EZ SET DESIGN SET 1 SETUP SPEAKER/EQ SETUP MAIN MENU Place mic at ear Automatic selection of AUDIO CONTROLS DISPLAY SETUP REAR AMP: REAR SPK level near listening x-over, Freq, Channel SPEAKER/EQ SETUP VIDEO CONTROLS...
- Page 185 RV-5 Appendix SETUP MENU: DISPLAY SETUP SETUP DISPLAY SETUP MAIN MENU AUDIO CONTROLS DISPLAY SETUP DISPLAY TYPE: VIDEO CONTROLS SPEAKER/EQ SETUP ASPECT RATIO: INPUT SETUP SETUP HDMI/DVI CONNECTION: SURROUND CONFIG HDMI AUDIO OUT: DOLBY CONFIG ON-SCREEN DISPLAY ON-SCREEN DISPLAY SETUP...
- Page 186 Appendix Lexicon SETUP MAIN MENU INPUT SETUP: INPUT SETUP 1 INPUT SETUP: INPUT SETUP 2 DISPLAY SETUP AUDIO CONTROLS Selecting an INPUT SETUP menu item opens the cor- INPUT: USE LAST USE LAST DEFAULT SUR: SPEAKER/EQ SETUP VIDEO CONTROLS NAME: ________ VIDEO IN: responding menu shown below.
- Page 187 RV-5 Appendix CHECK MICROPHONES CHECK MICROPHONES CHECK MICROPHONES MAIN MENU SETUP SPEAKER SETUP CHECKING FOR SILENCE CHECKING MICROPHONES GROUP MICROPHONES INPUTS SET CROSSOVERS MODE ADJUST INTO A BUNDLE IN THE AUDIO CONTROLS SPEAKERS CHECK MICROPHONES MIDDLE OF THE ROOM PLEASE WAIT...
- Page 188 Appendix Lexicon SETUP MENU: SPEAKERS (continued) SPEAKER SETUP AUTO SPEAKER SETUP AUTO SPEAKER SETUP AUTO SPEAKER SETUP MAIN MENU SETUP CUSTOM SETUP INPUTS SET CROSSOVERS MODE ADJUST DISTANCES & LEVELS !CAUTION! TEST WILL BEGIN IN 40 Hz AUDIO CONTROLS SPEAKERS...
- Page 189 RV-5 Appendix MAIN MENU SETUP SPEAKER SETUP AUTO SPEAKER SETUP CUSTOM SETUP AUTO SPEAKER SETUP AUTO SPEAKER SETUP INPUTS SET CROSSOVERS MODE ADJUST DISTANCES & LEVELS !CAUTION! TEST WILL BEGIN IN 40 Hz CHECK MICROPHONES AUDIO CONTROLS SPEAKERS DISTANCES HIGH AUDIO LEVELS...
- Page 190 Appendix Lexicon SETUP MENU: SPEAKERS (continued) MAIN MENU SETUP SPEAKER SETUP MANUAL SPEAKER SETUP LEVELS CALIBRATION MODE ADJUST INPUTS SET CROSSOVERS SPEAKER DISTANCES INTERNAL NOISE TEST AUDIO CONTROLS SPEAKERS CHECK MICROPHONES LEVELS CALIBRATION EXTERNAL NOISE TEST TUNER PRESETS I/O CONFIG...
- Page 191 RV-5 Appendix SETUP MENU: MUTE LEVELS SETUP MENU: DOLBY CONFIG SETUP MUTE LEVELS MAIN MENU SETUP DOLBY CONFIG MAIN MENU -30dB MAIN ZONE: DISPLAY SETUP MODE: AUDIO CONTROLS DOLBY PLII MU AUDIO CONTROLS DISPLAY SETUP -30dB ZONE 2: SPEAKER/EQ SETUP...
- Page 192 Appendix Lexicon MAIN MENU: VIDEO CONTROLS VIDEO CONTROLS MAIN MENU 4:3 IN>16:9 DISPLAY ORIGINAL AUDIO CONTROLS ORIGINAL LB ZOOM VIDEO CONTROLS VIDEO STATUS VIDEO STATUS STRETCH SETUP INPUT RESOL: - - - 2.35 LB ZOOM COPY PROTECTION: 2.35 LB STRETCH...
- Page 193 RV-5 Appendix MAIN MENU: MODE ADJUST MODE ADJUST FILM CATHEDRAL MODE ADJUST MAIN MENU PLIIx MOV 5.1a BYPASS FILM AUTO AZIMUTH MODE ADJUST CENTER DEPTH OUTPUT LEVELS OUTPUT LEVELS 2CH BYPASS VOCAL ENHANCE +0.0dB SPEECH DETECT AUDIO CONTROLS CUSTOM CUSTOM...
- Page 194 Appendix Lexicon 5.1 PLIIx MOV 5.1 MONO 5.1a 2-CHANNEL LIVE! MED FILM 2-CHAN EX DECODING AUTO MID RT 1.84s VOCAL ENHANCE +0.0dB SUB LEVEL +0dB CENTER MIX +0dB +0dB CENTER MIX RE-EQUALIZER COMPRESSION BASS RT 2.76s CUSTOM SURROUND MIX +0dB...
- Page 195 RV-5 Appendix MODE ADJUST (continued) Selecting the listening mode menu CALIBRATION, OUTPUT LEVELS or CUSTOM option opens the corresponding menu path shown below. The CALIBRATION option is available for the PANORAMA listening mode. The OUTPUT LEVELS and CUSTOM options are available for most listening modes. These menus are identical regardless of which listening mode is selected.
- Page 196 Appendix Lexicon INPUT BALANCE MASTER LEVEL REAR DLY OFFSET SIZE SPEECH DETECT SURROUND DLY -5 to +5dB OFF, 1 to 30ms 4 to 20 or 30ms 0 to 15ms L< <l> >R LFE MIX MID RT REAR L/R SOUND STAGE...
- Page 197 RV-5 Appendix MAIN MENU: RESTORE DEFAULTS Refer to the Restoring Factory-Default Settings section that begins on page 7-4 for more information. FACTORY SETTINGS FACTORY SETTINGS EXIT HAVE BEEN RESTORED RESTORE DEFAULTS PRESS ANY KEY TO RESTART 2CH STATUS D STATUS...
- Page 198 Appendix Lexicon INSTALLATION WORKSHEET INPUT SETUP DVD1 DVD2 GAME TAPE TUNER NAME DIGITAL IN ANALOG IN ANLG IN LVL VIDEO IN COMPONENT IN 2-CH MAIN ADVANCED INPUT SELECT 2-CH ANLG BYP S-VIDEO 16:9 S-VIDEO 4:3 OSD COMPONENT OSD ZONE2 IN...
- Page 199 INSTALLATION WORKSHEET (continued) SPEAKER SETUP CUSTOM SETUP SPEAKER DISTANCES LEVELS CALIBRATION FRONT LEFT/RIGHT CENTER SIDE LEFT/RIGHT REAR LEFT/RIGHT SUBWOOFER UNITS BASS PEAK LIMITERS CAL NOISE SUB LIMITER LIMIT ADJ REAR PANEL CONFIG VOLUME CONTROL SETUP LOCK OPTIONS Circle one. MAIN PWR ON MODES 8 STEREO INPUTS 5 ST.
- Page 200 Appendix Lexicon DISPLAY SETUP TRIGGER SETUP Circle all parameters set to ON. SCREEN DISPLAY STATUS REMOTE ONLY CH SURROUND DVD1 CHANNEL POSITION DVD2 MONO LOGIC FORMAT MONO SURROUND MONO BACKGROUND FILM REMOTE STATE MUSIC FRONT-PANEL DISPLAY TUNER 5.1 PLIIx MOV 5.1 PLIIx MUS...
- Page 201 Include a copy of the original dated sales receipt. RV-5 12/06 (A copy of the original dated sales receipt must be ccurring during any shipment of this presented whenever warranty service is required.)
- Page 202 A Harman International Company Product Shipments 900 Middlesex Bldg. #6 Billerica, MA 01821-0017 Part No. 070-18144 | Rev 0 | 12/06...
Need help?
Do you have a question about the RV-5 and is the answer not in the manual?
Questions and answers
where do i pug the audio output ca bles from my dv d player
You should plug the audio output cables from your Lexicon RV-5 into the appropriate speaker terminals or external amplifier inputs, depending on your speaker configuration. The RV-5 supports digital audio outputs via COAX, OPTICAL, or HDMI, and analog audio outputs through standard speaker terminals or pre-outs. Ensure each output is connected to the correct corresponding speaker or device.
This answer is automatically generated