
Related Manuals for SNBC BTP-M300


Summary of Contents for SNBC BTP-M300
- Page 1 SERVICE MANUAL Receipt Printer BTP-M300 Shandong New Beiyang Information Technology Co., Ltd.
- Page 2 Information in this document is subject to change without notice. SHANDONG NEW BEIYANG INFORMATION TECHNOLOGY CO., LTD. (hereinafter referred to as “SNBC”) reserves the right to improve product as new technology, components, software, and firmware become available. If users need further data about this products or have any doubt about safety issues that might arise from using it, please feel free to contact your dealer.
- Page 3 BTP-M300 Service Manual Maintenance cautions Follow the steps in this manual during maintenance; Make sure that the printer and the computer are turned off before plugging/unplugging the communication cable, changing print head or doing maintenance to the printer; Be sure to protect it against electrostatic damage when maintaining print head and other electronic components;...
-
Page 4: Table Of Contents
BTP-M300 Service Manual Contents 1 Features and Specifications ........................1 1.1 Features .............................1 1.2 Technical Specifications ........................1 2 Printer Overview ............................2 3 Main Control Board Description .........................4 3.1 USB interface .............................4 3.1.1 Parameter ...........................4 3.1.2 Interface signal ..........................4 3.1.3 USB interface connection ......................4 3.2 Serial interface ...........................4... - Page 5 BTP-M300 Service Manual 4.3 Assemble the printer .........................24 5 Printer maintenance ..........................25 5.1 Main part replacing ...........................25 5.1.1 Print head replacing ........................25 5.1.2 Cutter replacing .........................26 5.1.3 Main control board replacing .....................28 5.1.4 Paper feed motor replacing .......................29 5.1.5 CR motor replacing ........................29 5.1.6 Upper mark sensor replacing ....................30...
-
Page 6: Features And Specifications
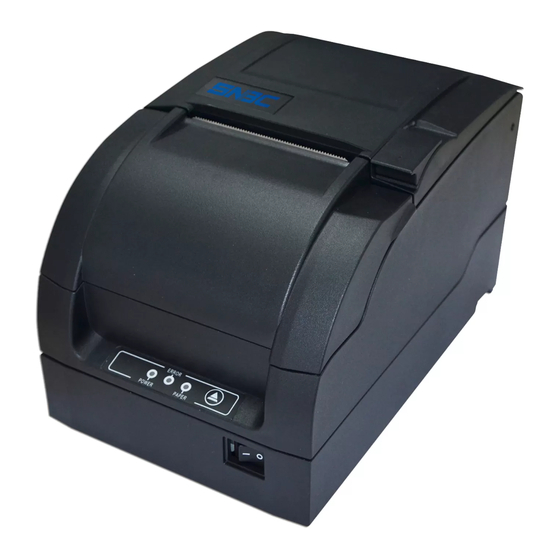
1 Features and Specifications 1.1 Features The BTP-M300 is a 9-pin serial impact dot matrix receipt printer offering high quality, high speed, and stable performance. It is widely used in real-time printing on-site, such as POS system, kitchen and finance applications. -
Page 7: Printer Overview
BTP-M300 Service Manual 2 Printer Overview The BTP-M300 printer consists of the following parts: Pinter mechanism part, NDLF main control board, expanded interface board. Main control board unit block diagram is shown as below: Main Control Board Unit Block Diagram... - Page 8 BTP-M300 Service Manual Position of all the sockets in the main control board - 3 -...
-
Page 9: Main Control Board Description
BTP-M300 Service Manual 3 Main Control Board Description BTP-M300 can be connected to another device with USB, serial, parallel, Ethernet or WIFI interface. 3.1 USB interface 3.1.1 Parameter Data transfer: Supports USB1.1 Protocol Connector: USB B type standard socket 3.1.2 Interface signal The printer built-in USB interface supports USB1.1 protocol, of which the outlet is USB A type. -
Page 10: Interface Connection And Signal Function
BTP-M300 Service Manual 3.2.2 Interface connection and signal function Signal Name Signal Direction Function — Frame ground OUTPUT Data output INPUT Data input OUTPUT Request to send INPUT Host ready — Signal ready OUTPUT Data terminal ready 3.2.3 Serial connection... -
Page 11: Interface Signal
BTP-M300 Service Manual Signal Min. value (ns) Max. value (ns) tSetup tReady tStb tBusy tHold Time Request of Parallel Interface 3.3.3 Interface signal Signal source Signal definition Signal source Signal definition nStrobe Signal Ground Data 0 (Least Significant Bit) Signal Ground... -
Page 12: Parameter
BTP-M300 Service Manual 3.3.4 Parameter 3.3.5 Effect of printer’s status on parallel interface Status /nFault Normal status High Paper end High Rear cover open Cutter error Input voltage is abnormal Print head is overheated HP error Caution: When the above error occurs, user can inquire the printer’s status from the pin of parallel interface. -
Page 13: Electrical Character
BTP-M300 Service Manual DHCP TFTP HTTP 3.4.3 Electrical character Output signal: The valid differential mode voltage is more than 450mV, and the peak voltage is no more than 13V; The common mode peak AC voltage is no more than 2.5V. -
Page 14: Disassembly And Assembly
BTP-M300 Service Manual 4 Disassembly and Assembly Caution: Do not disassemble, assemble or adjust the printer if it works properly. Do not unscrew any screws unless necessary. When disassembling and assembling, avoid damaging all wires and cables. When handling the print head or electronic component, make sure to take some measures to protect it from electrostatic charge. -
Page 15: Disassemble The Printer
BTP-M300 Service Manual 4.2 Disassemble the printer 4.2.1 Disassemble the printer cover Picture Instructions Top view of printer. Remove the two screws (ST2.9x8) shown in the figure with the cross screwdriver; Take off the vertical pluggable interface board shown in the figure. - Page 16 BTP-M300 Service Manual Remove the six screws (M3x4) shown in the figure with cross screwdriver, and take off the bottom cover. Remove the four screws (ST2.9x6) shown in the figure with cross screwdriver; Take off the top cover. Remove the four screws (ST2.9x6) shown in the figure with cross screwdriver, and take off the front cover.
- Page 17 BTP-M300 Service Manual Remove the two screws (M3x7) shown in the figure with cross screwdriver; Disconnect the connecting cable between button and control board; Push out the cover locking unit at the back of middle cover with appropriate force, and take off the middle cover;...
-
Page 18: Disassemble The Main Control Board Cover
BTP-M300 Service Manual 4.2.2 Disassemble the main control board cover Instructions Picture Remove the two screws (M2.5x5) shown in the figure with cross screwdriver, and take off the optional communication interface module. Notes: Please use moderate force to plug/unplug the... -
Page 19: Disassemble The Stationary Blade Cutter Module
BTP-M300 Service Manual Remove the three screws (M3x5) shown in the figure with cross screwdriver and take off the interface plate in the arrow direction shown in the figure. 4.2.3 Disassemble the stationary blade cutter module Instructions Picture Take off the one "E"-ring on one end of the rotation... -
Page 20: Disassemble The Non-Retraction Platen Roller Module
BTP-M300 Service Manual Remove the two screws (M2.5x4) shown in figure with cross screwdriver, disassemble the support plate module of paper pressure roller and cutter support module; Disassemble the two 2mm "E"-rings shown in figure with sharp-nose pliers, disassemble the paper pressure roller. - Page 21 P-M300 Ser rvice Manu move the tw wo screws (M3x5) sho own in the figur re with the e cross s screwdriver, and then disa ssemble the e sliding blad de and its fix xing plate. Remove th he two ST2 2.6x6 screw ws and four ST2.9x6 sc...
-
Page 22: Disassemble The Paper Cabinet Module
P-M300 Ser rvice Manu move the th hree ST2.9 9x6 screws and three .6x6 screws s shown in n the figure with cross scre wdriver, and d disassemb ble the uppe er path plate print bar. en the upp per mark sensor is configured, remo... - Page 23 P-M300 Ser rvice Manu move the tw wo ST2.9x6 screws sh hown in the figur re with the e cross s screwdriver, and then disa ssemble the e vertical pa per cabinet. Remove th he two scr rews (ST2. 6x6) at ① ①...
- Page 24 P-M300 Ser rvice Manu Remove th e two screw ws (ST2.6x4 4) shown in the figure w with cross s crewdriver a and take off the press p late of pape er near end s sensor; Take off the e horizontal/ /vertical pap per near end sensor hold...
-
Page 25: Disassemble The Print Module
P-M300 Ser rvice Manu move the two o screws (S ST1.7x10) sh hown in the figur re with cross s screwdrive er and take o off the micro switc 4 4.2.6 Disass s emble the print modu Picture Instructi ions move the fou ur screws (S ST2.9x6) sh... - Page 26 P-M300 Ser rvice Manu move the two o screws (S ST2.6x10) sh hown in the figur re with cross s screwdrive er, and then take off the print t head and r ribbon guide Take off th he two “E”- rings at bo oth sides of guide...
- Page 27 P-M300 Ser rvice Manu move the thr ree screws ( (ST2.9x6) s hown in the figur re with cros s screwdriv ver and take e off the left side board. move the thr ree screws ( (ST2.9x6) s hown in the figur re with cross s screwdrive...
- Page 28 P-M300 Ser rvice Manu Take e off the one e “E”-ring s hown in the e figure with shar rp-nose plie ers, and th hen take o ff the tight Take e off the one e “E”-ring s hown in the e figure with shar rp-nose plie...
-
Page 29: Assemble The Printer
P-M300 Ser rvice Manu Take e off the one e “E”-ring s hown in the e figure with shar rp-nose plier rs and take o off the drivin ng pulley. move the on ne screw (S ST2.9x6) sh hown in the figur re with the screw drive... -
Page 30: Printer Maintenance
BTP-M300 Service Manual 5 Printer maintenance 5.1 Main part replacing 5.1.1 Print head replacing Turn off the printer. Open the front cover of printer and take off the ribbon, and then disassemble the “E”-ring on right side of ribbon support plate as shown in the figure. -
Page 31: Cutter Replacing
BTP-M300 Service Manual Install a new print head in the reverse steps. Caution: Please do not pull the cable when detaching the connector, so as to avoid breaking the cable connector. Print head is a thermal part, please disassembly it after cooling down. - Page 32 BTP-M300 Service Manual Remove the two screws (M3X5) and take the stationary blade off. Install a new stationary blade in the reverse steps. Movable blade replacing Turn off the power. After the print head cooling down, disassemble the cover according to 4.2.1.
-
Page 33: Main Control Board Replacing
P-M300 Ser rvice Manu Install a a new movab ble blade in the reverse steps. Caut tion: While d isassemblin ng the lockin ng frame of printer, the f force must b be moderate e to avoid d damaging th cover of f printer;... -
Page 34: Paper Feed Motor Replacing
BTP-M300 Service Manual 5.1.4 Paper feed motor replacing Turn off the power. Disassemble the printer cover after print head cooling down with reference to section 4.2.1; Pull out the paper feed motor cable from main control board with moderate force. -
Page 35: Upper Mark Sensor Replacing
P-M300 Ser rvice Manu Install a a new CR mo otor in the re everse steps Caut tion: While d isassemblin ng the lockin ng frame of printer, the f force must b be moderate e to avoid d damaging th cover of f printer;... -
Page 36: Lower Mark Sensor Replacing
P-M300 Ser rvice Manu Remove e the two ST T2.2X4 screw ws with cros ss screwdriv ver, then disa assemble th he mark sens sor as show in the fig gure: Install a a new upper mark senso or in the reve erse steps. -
Page 37: Hp Sensor Replacing
P-M300 Ser rvice Manu Remove e the two ST T2.2X4 screw ws with cros ss screwdriv ver and disa ssemble the e lower mark k sensor; Install a a new lower mark senso or in the reve erse steps. Caut tion: When the lower m... -
Page 38: Paper Sensor Replacing
P-M300 Ser rvice Manu Caut tion: While d isassemblin ng the lockin ng frame of printer, the f force must b be moderate e to avoid d damaging th cover of f printer; Please do not drag g the conne cting cable while pullin g the cable... -
Page 39: Printer Adjustment
BTP-M300 Service Manual 5.2 Printer adjustment 5.2.1 Print spacing adjustment Turn off the power; Disassemble the printer cover with reference to 4.2.1 after print head cooling down; Measure the print spacing with feeler gauge and compare with standard distance(0.5±0.05mm), if the distance is bigger than standard distance, please rotate the eccentric bushing at both sides in arrow direction ①... - Page 40 BT P-M300 Ser r vice Manual - 35 -...
-
Page 41: Error Types And Processing
BTP-M300 Service Manual 6 Error Types and Processing PAPER Errors ERROR LED Buzzer Recovery Press the FEED Button for a long time, HP Error or send command DLE ENQ 2, or re-start the printer. Automatically come Print head is back to normal status... -
Page 42: Troubleshooting
BTP-M300 Service Manual 7 Troubleshooting If the printer works abnormally, consult this chapter below. If there are still problems that can not be solved, please contact your local dealer for assistance. 7.1 Abnormal print effect 1) Problems: Characters are not clear. -
Page 43: Abnormal Ribbon Action
BTP-M300 Service Manual 2) Problems: Big noise during CR running. Possible causes and solutions: The tension of tooth belt is too strong, please adjust the position of the tooth belt; The print gear is worn out, please replace it. 3) Problems: Big noise during two-color conversion. -
Page 44: Printer Doesn't Work
BTP-M300 Service Manual then turn on the power and the cutter will reset automatically. Caution: Please do not touch the stationary blade and the movable blade of cutter to avoid any damage when power on the printer. 7.6 Printer doesn’t work Problems: The printer doesn’t work when power switch is turned on. -
Page 45: Appendix
P-M300 Ser rvice Manu Appendix Appendix 1 Hexade ecimal Dum mp Mode This mode a allows the pr rinter print in n hexadecim mal format af fter got data from host. Enter He exadecimal l Dump mod 1) Make e sure that t the printer is s off and the rear cover i... -
Page 46: Appendix 2 Command List
BTP-M300 Service Manual Appendix 2 Command list Code Decimal Description Horizontal tab Print and line feed Print and carriage return DLE EOT n 10 04 n 016 004 n Real-time status transmission DLE ENQ n 10 05 n 016 005 n... - Page 47 BTP-M300 Service Manual ESC { n 1B 7B n 027 123 n Turn on/off upside-down printing p n m 1C 70 n m 028 112 n m Print NV bit-image 1C 71 028 113 Download NV bit-image GS FF 1D 0C...
-
Page 48: Appendix 3 Eeprom Setting Table
BTP-M300 Service Manual Appendix 3 EEPROM setting table Address Instruction Value range and description (HEX) Print width 0: 76mm,1: 69.5mm,2: 57.5mm Print speed 416-1000 steps/second Paper type 0: Continuous paper, 1: Marked paper CR(0x0D)command mode 0: Paper not feed, 1: CR equivalent LF... -
Page 49: Appendix 4 Spare Part List
BTP-M300 Service Manual Appendix 4 Spare part list Name Part No. Reference picture Print head 3004-904961 Print head FFC 7101-905477 Ribbon drive gear 8203-900490 Mark sensor 7600-931882 Microswitch of front 7600-914125 cover Microswitch of end 7600-911464 cover Paper end sensor... - Page 50 BTP-M300 Service Manual Shaft sleeve 8211-900499 Carriage shaft sleeve 8211-900651 Paper guide elastic 8104-904621 plate Paper feed motor 3200-904997 Carriage motor 3200-915008 Driving gear 8203-900487 Gear Tight gear 8203-900488 Roller gear 8203-900619 Paper feed gear Transition 8203-900594 gear - 45 -...
- Page 51 BTP-M300 Service Manual Gear 31-17 8203-901160 Transition 8203-900489 gear(25-19) Print Gear 3(42-17) 8203-901158 gear Gear 1(25-15) 8203-901159 Timing tooth belt 4930-901147 Cutter 7600-931885 Main control board 7204-931892 Button and LED 7600-931881 Button label (English) 8205-928534 - 46 -...
-
Page 52: Appendix 5 Exploded Drawing Of The Printer
BTP-M300 Service Manual Appendix 5 Exploded drawing of the printer Exploded drawing of cover module Exploded drawing of print module - 47 -... - Page 53 BTP-M300 Service Manual Exploded drawing of stationary blade Exploded drawing of platen roller module - 48 -...
- Page 54 BTP-M300 Service Manual Exploded drawing of paper cabinet module Exploded drawing of control board box module - 49 -...
-
Page 55: Appendix 6 Part List
BTP-M300 Service Manual Appendix 6 Part list Item Part No. Drawing No. Name Q'ty Remarks 8005- 904688 BTP-M300.01.02.16R Pressure spring of start spanner 8201-928543 BTP-M300.02.02R Spanner of top cover 8201-928584 BTP-M300.02.02R 8201- 928542 BTP-M300.02.01R Black Top cover 8201- 928583 BTP-M300.02.01R... - Page 56 BTP-M300 Service Manual Fasten plate(rustproof iron) riveted 7700-907766 BTP-M300.01.01.08R module Ribbon drive plate (rustproof iron) 7700-907764 BTP-M300.01.01.06R riveted module 7600-905463 HP sensor 4000- 900297 M3×8 Screw module 8203-901159 BSC-2000A.01.24R Scan gear 1 8203-900490 BTP-M270.01.03.18.07R Ribbon driving gear 8203-901158 BX-7R Gear 3 8203-900487 BTP-M270.01.03.18.02R...
- Page 57 BTP-M300 Service Manual 8203-901160 BTP-L340.01.05.01.10-AR Gear 31-17 8203-902066 BTP-L340.01.05.01.18R Platen roller gear 18 8301-909121 BTP-M300.01.09.09R Platen roller Transition gear 34(special for 8203-909477 BTP-M300.01.09.15R paper-pulling structure) 4400-900627 Φ3 “E”-ring 8103-909187 BTP-M300.01.09.05R Print bar Riveted platen roller left support 7700-928660 BTP-M300.01.09.15R frame 8299-904682 BTP-M300.01.02.13R...
- Page 58 BTP-M300 Service Manual 7201-902227 EZUPORT1.2 USB interface board 7201-902228 EZPNIBPORT1.11 36-pin nibble parallel interface board 105. 7201-902277 IFWI1.01 JK-W01 WLAN interface board 7201-900520 S25PORT1.2 25-pin serial interface board 4000-900988 M2.5×5 Pan head screw 106. 8210-900378 BTP-2000CPII.01.02.05R Guide plate 107. 4001-900165 M3×5...
-
Page 59: Appendix 7 Outline Drawing
BTP-M300 Service Manual Appendix 7 Outline drawing - 54 -... -
Page 60: Appendix 8 Main Board Layout
BTP-M300 Service Manual Appendix 8 Main board layout Top side of Main control board Bottom side of Main control board - 55 -... -
Page 61: Appendix 9 Lubrication
BTP-M300 Service Manual Appendix 9 Lubrication Please lubricate the printer according to following principle: Please lubricate joint point of gear and gear shaft, do not lubricate gear tooth. Please do not lubricate platen roller shaft and its sleeve. Please lubricate the carriage guide shaft in maintenance.
Need help?
Do you have a question about the BTP-M300 and is the answer not in the manual?
Questions and answers