
Related Manuals for SNBC BTP-2002NP


Summary of Contents for SNBC BTP-2002NP
-
Page 1: Receipt Printer
USER’S MANUAL Receipt Printer BTP-2002NP Shandong New Beiyang Information Technology Co., Ltd. - Page 2 Declaration Information in this document is subject to change without notice. SHANDONG NEW BEIYANG INFORMATION TECHNOLOGY CO., LTD. (hereinafter referred to as “SNBC”) reserves the right to improve products as new technology, components, software, and firmware become available. If users need further data about this product or have any doubt about safety issues that might arise from using it, please feel free to contact SNBC or your local agents.
- Page 3 User’s Manual BTP-2002NP BTP-2002NP has been approved of the following certification. Contact us Address: No.169 Huoju Rd, Weihai, Shandong, China. 264209 Hot line: +86-631-5673777 Fax: +86-631-5673778 E-mail: sales@newbeiyang.com - 2 -...
-
Page 4: Table Of Contents
User’s Manual BTP-2002NP Contents General Safety Information........................1 1 Overview ..............................2 1.1 Outline ............................2 1.2 Features............................2 1.3 Model Classification ........................3 2 Specifications ............................4 2.1 Main Specification ...........................4 2.2 Cutter Specification .........................5 2.3 Electric Parameters of the Power Supply..................5 2.4 Paper Specification .........................5 2.5 Printing and Cutting Position......................6... - Page 5 User’s Manual BTP-2002NP 5.3 Cleaning the Platen Roller ......................13 6 Interface Signal..........................14 6.1 Parallel Interface ...........................14 6.2 Serial Interface..........................14 6.3 RS-485 Serial Interface.........................15 6.4 USB interface..........................16 6.5 Ethernet Interface .........................17 6.6 WLAN interface..........................18 6.7 Signal Definition of Power Connector ...................18 6.8 Cash Drawer Kick-out Connector ....................18...
-
Page 6: General Safety Information
Set the print darkness to a lower grade as long as the print quality is acceptable. This will help to keep the print head durable. The printer should only be disassembled or repaired by a technician, who is certified by SNBC. - 1 -... -
Page 7: Overview
BTP-2002NP 1 Overview 1.1 Outline The BTP-2002NP is a high performance thermal printer. It can be widely used for real-time receipt printing applications, such as for POS systems, hospitality, lottery, weighing systems etc. The BTP-2002NP can be connected to computer systems via its interfaces and also offers drivers and utilities under WINDOWS98 /NT4.0 /2000/2003/XP/Vista. -
Page 8: Model Classification
User’s Manual BTP-2002NP 1.3 Model Classification BTP-2002NP X X a Interface module (daughter boards) R3:RS232 (DB25) (Standard configuration for Serial interface) R5:RS-485(DB25) R6:RS-485(RJ11) R8:RS-485(RJ45) P4:Parallel nibble mode (DB36 CENTRONICS)(Standard configuration for Parallel interface) U: USB 1.1 U2:PoweredUSB E:Ethernet W:WLAN b Color I:Ivory... -
Page 9: Specifications
User’s Manual BTP-2002NP 2 Specifications 2.1 Main Specification Item Specification Print method Direct thermal Resolution 203DPI X 180DPI Print speed Max. 150mm/s Print width Max. 80mm Paper type Continuous thermal paper Bar code supported UPC-A, UPC-E, EAN-8, EAN-13, Codabar, Code39, ITF, Code128, code93 Standard ASCII (12x24), compressed ASCII (9x17). -
Page 10: Cutter Specification
User’s Manual BTP-2002NP 2.2 Cutter Specification Item Parameter Remarks Cutter type Slide cutter (Guillotine type) Cutting time 600ms The time that one cut takes. Cutting interval 30 times/min. (Max.) Paper type Thickness: 0.065 – 0.1mm Thermal paper or paper with the same thickness... -
Page 11: Printing And Cutting Position
User’s Manual BTP-2002NP 2.5 Printing and Cutting Position 2.5.1 Printing Position L1: Paper cabinet width 83.5mm L2: Max Print width 80mm L3: Space between the left end of print head and the left side of paper roll supply device (non-changeable) 1.75±0.3mm... -
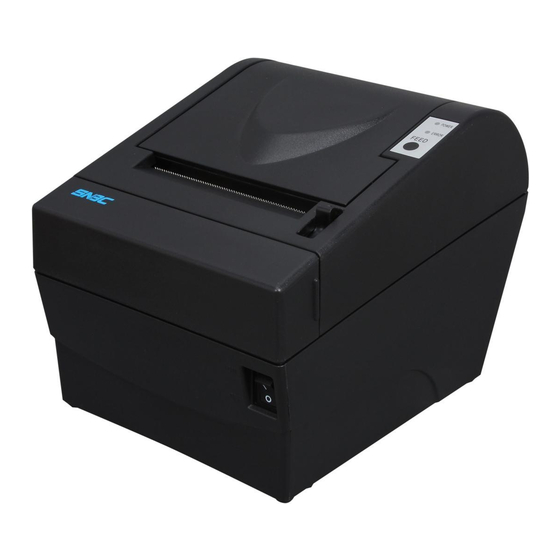
Page 12: Outline And Parts
User’s Manual BTP-2002NP 3 Outline and Parts 3.1 Outline and Parts 1— Cutter cover 2— Tear off bar 3— Printer top cover 4— Power LED 5— Error LED 6— Paper feed button 7— Top cover latch 8— Power switch 9—... -
Page 13: Error Led And Buzzer
User’s Manual BTP-2002NP c- Error LED Indicate all error status. Under normal conditions, ERROR LED is always off. under error conditions, ERROR LED will flash. d- Micro-switch Detect the status of top cover. e- Paper near end sensor When the paper near the end, the error LED will flash. the printer will continue printing until the paper end. -
Page 14: Installation
4.2 Selecting the Installation Position and Direction The BTP-2002NP can be installed in two positions: vertically on a wall or horizontally on a table. To install the printer vertically on a wall, please obtain the optional wall mount system WMS-2002NP from the supplier of the printer and follow instructions that are supplied with the system. -
Page 15: Connecting Signal Cable
User’s Manual BTP-2002NP 4.5 Connecting Signal Cable 1) Ensure the printer power is turned off. 2) Put signal cable into suitable connector which should be fixed with plug screws or clip springs (for USB connector, there are no such plug screws or clip springs). - Page 16 User’s Manual BTP-2002NP Caution: Adjust the position of paper guide according to the width of the paper to be used. Make sure that the beginning of roll paper is cut according to the requirement as follows before loading: Make sure that the heat sensitive side of paper faces the print head and the rolling direction of paper meets the requirements.
-
Page 17: Self-Test
User’s Manual BTP-2002NP 4.8 Self-test The self-test lets you know if the printer is operating properly. It checks the control circuits, printer mechanisms, print quality, firmware version and prints out the settings. The test is independent of any other equipment or software and can be started as follows: Ensure the printer power is turned off and the top cover is closed properly. -
Page 18: Routine Maintenance
User’s Manual BTP-2002NP 5 Routine maintenance 5.1 Cleaning the Print head phenomena When one or more of the following occur, the Print head need to be cleaned. Printout is light. Some of vertical columns on printout are light. The paper feeds with loud noises. -
Page 19: Interface Signal
User’s Manual BTP-2002NP 6 Interface Signal 6.1 Parallel Interface The parallel interface is bi-directional which supports BUSY/ACK handshaking protocol. Its connector is 36pin centronics. Pin No. Source Compatible Mode Pin No. Source Compatible Mode Strobe Signal Ground Data 0 (Least Significant Bit) -
Page 20: Rs-485 Serial Interface
User’s Manual BTP-2002NP User may check the current setting status of the interface by printing a configuration table. The default setting is as follows: Baud rate: 9600bps Data bit: Parity bit: None Stop bit: Handshaking: Hardware Serial interface connection example:... -
Page 21: Usb Interface
User’s Manual BTP-2002NP The 25 PIN D-SUB connector Signal definition and functions for RJ45 connector are shown as below: Signal Signal Functions Name Direction Output Sending data Input Receiving data Output When selecting DTR/DSR, the signal is used to indicate if the printer is busy or not. -
Page 22: Ethernet Interface
User’s Manual BTP-2002NP USB interface connection example: Host side Printer side VBUS ........VBUS DATA -.........DATA - DATA+........DATA+ GND ........GND Interface Connectors: Figure M.1 USB “B” type connector 6.5 Ethernet Interface The parameters of Ethernet interface socket match 10BASE-T standard of IEEE802.3. -
Page 23: Wlan Interface
User’s Manual BTP-2002NP 6.6 WLAN interface Item Content Wireless Standard 802.11b、802.11g Communication Speed (Max) 100m (Indoors without obstructs)(the distance depending on the Transmission Distance (Max) environment) channel 1-14 Safety 64/128 WEP、WPA Special configure tools Condition’s monitor Browser Special configure tools... -
Page 24: Troubleshooting
User’s Manual BTP-2002NP 7 Troubleshooting If the printer does not operate correctly, refer to the troubleshooting table below. If there are still problems that cannot be solved, please contact your local distributor or a manufacturer technician for assistance. 7.1 Clearing Paper Jams... -
Page 25: Error Led And Buzzer
User’s Manual BTP-2002NP 7.2 Error LED and Buzzer Problem Possible cause Solution Error LED flashes quickly Paper near end Replace the paper roll in time Paper end Load new paper roll Cutter error Deal with the error according to 7.1... -
Page 26: Accessories
8.1 Spill Proof Cover( SPC-2002NP) 8.2 Wall Mount System (WMS-2002NP) This wall mount system (WMS-2002NP) can be used for mounting the POS printer BTP-2002NP on a vertical surface. The system contains the following items except the installations instructions: Item a: One Paper-Roll-Tray... - Page 27 User’s Manual BTP-2002NP Select the location for mounting the printer with wall mount systems, It needs at least 15 cm free space to the right of the location. Drill three Ø 8 mm holes in the wall using the Fixed-Hook-Plate as a template. Insert three plastic plugs (Ø 8 mm x 40 mm) in these holes and make sure that the plugs are completely inserted in the holes.
-
Page 28: Cable For Poweredusb Connections
User’s Manual BTP-2002NP 8.3 Cable for PoweredUSB Connections 8.4 HERALD – Kitchen Alarm System Exterior and parts(see figures below) 1—Light 2—Light pole 3—Top cover 4—MODE button 5—OK button 6—Bottom cover 7—Turn-plate 8—Bracket Assembling the HERALD Mounting of the bracket Mount the metal bracket with two nylon feet and two screws onto the bottom of the printer as shown in the following diagram. - Page 29 User’s Manual BTP-2002NP Mounting the Main Unit Step 1: Insert the Main Unit in the plastic turn-plate of the Bracket as shown in Figure 1. FIGURE 1 FIGURE 2 Step 2:Rotate the Main Unit clockwise as shown in figures 2 and 3 if the printer is to be used on a horizontal surface.
-
Page 30: Cable Cover And Power Adapter Cover
User’s Manual BTP-2002NP Printer button he printer module has two buttons: MODE button and OK button. The HERALD has two modes, named “Operation” and “Setting”. The operation mode is used for operating the HERALD; the settings mode is used for setting the light and sound signals of the HERALD.
Need help?
Do you have a question about the BTP-2002NP and is the answer not in the manual?
Questions and answers