Table of Contents
Advertisement
Advertisement
Table of Contents
Troubleshooting

Related Manuals for SNBC BTP-R880NPI


Summary of Contents for SNBC BTP-R880NPI
- Page 1 Receipt Printer BTP-R880NPII SERVICE MANUAL...
- Page 2 BTP-R880NPII Service Manual Revision Sheet Date Version Description Distributor 2014-3-7 V1.0 Primary version - 1 -...
- Page 3 Information in this document is subject to change without notice. SHANDONG NEW BEIYANG INFORMATION TECHNOLOGY CO., LTD. (hereinafter referred to as “SNBC”) reserves the right to improve products as new technology, components, software, and firmware become available. If users need further data about this product or have any doubt about safety issues that might arise from using it, please feel free to contact SNBC or your local agents.
- Page 4 BTP-R880NPII Service Manual Notes Follow the steps in this manual hereafter during maintenance. Make sure that the printer and the computer are turned off before plugging the communication cable, changing print head or doing maintenance to the printer. Be sure to protect it against electrostatic damage when maintaining print head and other electronics. Time between turning on and turning off the printer is no less than 20 seconds.
-
Page 5: Table Of Contents
BTP-R880NPII Service Manual Content DECLARATION ..................................1 1 FEATURE ....................................1 ………………………………………………………………………………………………………………. 1 1.1 O UTLINE ……………………………………………………………………………………………………….. 1 1.2 M EATURE ………………………………………………………………………………………….2 1.3 T ECHNICAL PECIFICATIONS ……………………………………………………………………. 2 1.4 P OWER SWITCH EED BUTTON AND NDICATOR 1.4.1 Power switch ................................2 1.4.2 Feed button ................................2 1.4.3LED Indicator .................................3 2 PRINTER OVERVIEW AND MODULES ......................... - Page 6 BTP-R880NPII Service Manual …………………………………………………………………………………………10 4.2 D ISASSEMBLE THE RINTER 4.2.1 Disassemble bottom and top covers ......................10 4.2.2 Disassemble lower board cover ........................13 4.2.3 Disassemble the main control board and the main control boardprotection film ........13 4.2.4 Disassemble the power switch ........................14 4.2.5 Disassemble top cover .............................14 4.2.6 Disassemble the cutter still blade and platen roller ..................15 4.2.7 Disassemble the cutter .............................15...
- Page 7 BTP-R880NPII Service Manual …………………………………………………………………………………….. 33 PPENDIX BUTTON SETTING LIST - 5 -...
-
Page 8: Declaration
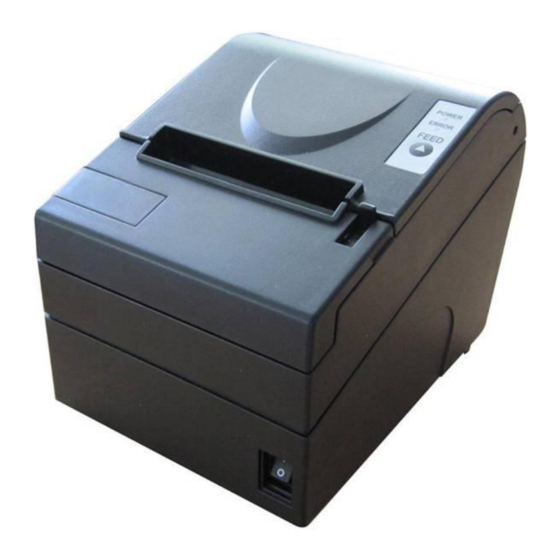
BTP-R880NPII Service Manual 1 Feature 1.1 Outline BTP-R880NPII is a high performance thermal printer, which can be widely used for real-time printing application, such as POS system, restaurant system, ATM, etc. BTP-R880NPII can be connected with other devices via parallel interface, serial interface, USB, Ethernet or WIFI and is available for WINDOWS 2000/XP/Server 2003/VISTA/WIN7/ WIN8/Server2008, Linux and MAC. -
Page 9: Technical Specifications
BTP-R880NPII Service Manual 1.3 Technical Specifications Item Parameter Print Method Direct Thermal Print Resolution 203×180DPI Print Speed Max. 230mm/s Print Width Max. 80mm Paper type Continuous paper, marked paper One-dimensional bar code: UPC-A, UPC-E,JAN8 (EAN8), JAN13 (EAN13), CODE 39, Barcode Supported CODE 93, CODE 128, ITF, CODABAR, GS1-128, GS1 DataBar Two-dimensional barcode: PDF417,QR,Maxicode,2D GS1 DataBar,Composite Symbology Font A: 12 ×... -
Page 10: 3Led Indicator
BTP-R880NPII Service Manual Power on printer while pressing the FEED button will start the printing of the configuration table. Press down the FEED button while power on printer, printer will start printing self-test page. In normal status: The printer will feed paper continuously when press the FEED button for longer time; the printer will stop feeding paper when loosen the FEED button. -
Page 11: Printer Overview And Modules
BTP-R880NPII Service Manual 2 Printer overview and Modules 2.1 Printer overview BTP-R880NPII printer is made up of the following major components: printer and power adaptor. Printer consists of four main modules, including: Bottom cover board, Main control board, Printer mechanism, Printer, Shell module. -
Page 12: Main Control Board Unit Block Diagram
BTP-R880NPII Service Manual 2.2 Main Control Board Unit Block Diagram This printer uses main control board named POSJV1.2, the sensor, button, motor and cutter is connected to main control board via connectors. The block diagram is shown as below: Figure 2.2-1 Main control board unit block diagram Figure 2.2-2 Position of each connector - 5 -... -
Page 13: Communication Interface
BTP-R880NPII Service Manual 3 Communication interface BTP-R880NPII support RS232 serial interface, USB interface, Ethernet interface. 3.1 RS232 serial interface 3.1.1 Connector and specification The printer serial interface is compatible with RS-232 standard, of which the outlet is 9PIN and the connector is female DSUB-9 type. -
Page 14: Timing Sequence
BTP-R880NPII Service Manual Handshaking: Hardware 3.1.5 Timing sequence The software handshake (XON/XOFF) timing sequence: When XON/XOFF control is selected, the printer transmits XON or XOFF signals as follows. Printer status Action 1) When the printer goes online after turning on the power Transmit Transmission 2) When the receive buffer is released from the buffer full state... -
Page 15: Signal Cable Of Usb Interface Module
BTP-R880NPII Service Manual signal Signal define Power DATA+ Data + DADA- Data - Ground 3.2.3 Signal cable of USB interface module USB interface cable adopts standard USB A TO B cable, cable length1.5M. USB interface cable accord with USB2.0 standard. 3.2.4 Parameters of the USB Interface Module The USB interface supports USB2.0 protocol and can concatenate through USB HUB. -
Page 16: Ethernet Interface
BTP-R880NPII Service Manual 3.3 Ethernet interface 3.3.1 Ethernet interface connector and specification The parameters of network interface socket match 10BASE-T standard of IEEE802.3. Signal name Introduction Data sending+ Data sending- Data receiving + Reserve Reserve Data receiving - Reserve Reserve 3.3.2 Ethernet interface electric specification Output signal: Efficient differential mode voltage more than 450mV, top voltage more than 13V. -
Page 17: Disassembly And Assembly
BTP-R880NPII Service Manual 4 Disassembly and Assembly Caution: Do not disassemble any parts of the printer or loosen any screw if it works properly; When disassembling parts, please check carefully if the connecting lines are damaged or not; When handling the thermal print head or electronic components, please make sure to use antistatic gloves or bracelet;... - Page 18 BTP-R880NPII Service Manual Follow the arrows to push the hooks on the right and left of the top cover so that it could be taken off the roller bracket. Take off the top cover Follow the arrows to uplift the cutter cover and take it off - 11 -...
- Page 19 BTP-R880NPII Service Manual Unscrew two M3*5 screws which fix the middle body Take off the middle body Unscrew four M3*5 screws which fix the lower body and take off the lower body - 12 -...
-
Page 20: Disassemble Lower Board Cover
BTP-R880NPII Service Manual Take off the lower body, separate it from the mechanism and finish disassembling the printer housing 4.2.2 Disassemble lower board cover Disassemble two ST2.9tapping screws and separate the hook of the bottom circuit board cover from the circuit board cover to take off the bottom circuit board cover. -
Page 21: Disassemble The Power Switch
BTP-R880NPII Service Manual 4.2.4 Disassemble the power switch Follow the arrows to hold the power switch flat spring, and remove the power switch from the main control board cover. 4.2.5 Disassemble top cover Disassemble the two ∮ 3”E” rings which fix the top cover shaft and take the torque spring and the shaft out. -
Page 22: Disassemble The Cutter Still Blade And Platen Roller
BTP-R880NPII Service Manual 4.2.6 Disassemble the cutter still blade and platen roller Disassemble the two M2.5*4 screws fixing the still blade shrapnel and take it off. Take the still blade out of the still blade Fixed column. Disassemble the two “E” rings fixing roller bracket, take the roller shaft sheath out of it and take the platen roller off. -
Page 23: Disassemble The Print Head Module
BTP-R880NPII Service Manual Disassemble the two M2 *4 screws fixing the cutter and separate the cutter from its holder. Disassemble the two ST2.2*3 screws fixing the tear-off bar and take it off. 4.2.8 Disassemble the print head module Remove the print head module from the mechanism and separate the print head holder from the mechanism. -
Page 24: Disassemble Paper House
BTP-R880NPII Service Manual Disassemble the two M2.5*5 pan head screw switch fix the pressure spring bracket and separate the print head pressure spring and the print head supporting pressure spring from the pressure spring bracket; Disassemble the two M3*4 pan head screws which fix the print head, separating the print head and its bracket. -
Page 25: Disassemble Hook
BTP-R880NPII Service Manual 4.2.11 Disassemble hook Take off the spring from paper house, and then rotate it as the direction in left picture to take the hook out from paper house. 4.2.12 Disassemble sensor Unscrew the two ST2.6*4 screws fixing the paper sensor and take off the paper sensor out from the paper house. -
Page 26: Disassemble The Motor
BTP-R880NPII Service Manual Unscrew the ST2.6*6 screw fixing the paper near end sensor, take it off from the paper house, and remove the paper near end holder and the paper near end bracket from the paper house. 4.2.14 Disassemble the motor Disassemble the two spring gaskets which fix the motor and the flat gasket and take off the motor from the mechanism left holder. -
Page 27: Disassemble The Micro Switch
BTP-R880NPII Service Manual 4.2.17 Disassemble the Micro Switch Unscrew the two M2*8 screws fixing the micro switch and take off the Micro-switch. 4.3 Printer assembly Assemble the printer in the reverse sequence of disassembly. - 20 -... -
Page 28: Maintenance Of Main Parts
BTP-R880NPII Service Manual 5 Maintenance of Main Parts 5.1 Print head cleaning When the TPH happens in any case as below, you should clean it: Printout is not clear; Some tier printout is not clear; Noise in paper feed or retraction is high. The steps for cleaning print head are shown as below: Turn off the printer power and open the top cover;... -
Page 29: Troubleshooting
BTP-R880NPII Service Manual 6 Troubleshooting In case of printer fault, consult this section for solutions and advice. If you do not find a solution in this section, please contact your local dealer for assistance. 6.1 Cutter error troubleshooting When cutter fails to recover due to paper jam or sudden off-line status, the top cover cannot be uplifted for the cutter sliding blade is pinned. -
Page 30: Printer Doesnt Work
BTP-R880NPII Service Manual 6.2 Printer doesn’t work Problems Possible Causes Solution LED is off and the printer doesn’t Make sure that printer cable has been connected Printer power is off. work properly on both ends. 6.3 Error LED and buzzer Problems Possible Causes Solution... -
Page 31: Appendix
BTP-R880NPII Service Manual Appendix Appendix 1 Command set Refer to Programming Manual Appendix 2 Service Parts List Parts Number Amount Reference picture TL80 print head 3000-906822 TPH cable 7110-900714 Paper sensor module 7600-910789 Platen roller 8301-909972 Step motor 3200-900260 Platen roller gear 8203-902239 (Smallest) Gear 2... - Page 32 BTP-R880NPII Service Manual Main control board 7201-917768 Cymbiform 7600-910793 switch(white) Power switch Cymbiform 7600-910792 switch(black) Feed button control board 7600-911463 1 Micro switch 7600-911464 paper near end sensor 7600-910972 Rubber foot 8303-901997 - 25 -...
- Page 33 BTP-R880NPII Service Manual Cutter 3100- 909137 Keypad 8205-911389 - 26 -...
-
Page 34: Appendix 3 Printer Exploded View
BTP-R880NPII Service Manual Appendix 3 Printer Exploded View 1 Printer Exploded View Figure appendix 3-1 - 27 -... - Page 35 BTP-R880NPII Service Manual 2 Exploded view Figure appendix 3-2 - 28 -...
-
Page 36: Appendix 4 Parts List
Middle cover(black) 8201-909985 Middle cover(white) 4006-900295 M3*5 8201-909980 Bottom cover(black) 8201-909986 Bottom cover( white) 8303-901997 Rubber foot 4006-900295 M3*5 8205-916067(SNBC) Product label 8205-910012 Feed button label 3100-909137 Cutter stationary blade 8103-909993 Platen holder 8211-907575 Platen shaft bushing 8203-902239 Platen gear 4400-900293 Opening washer ¢3... - Page 37 BTP-R880NPII Service Manual 8001-910007 Gear shaft2 8001-910006 Gear shaft 1 4006-900295 M3*5 8103-909992 Mechanism left holder 8299-909999 Lock hook 4002-902695 ST2.6*6 7600-910789 Paper sensor 3200-900260 Motor 8102-909989 Main control board cover 3000-906822 8103-909994 TPH holder 4000-900184 Pan head screws M3*4 8005-900090 TPH pressure spring 8103-909996...
-
Page 38: Appendix 5 Overall Dimension
BTP-R880NPII Service Manual Appendix 5 Overall Dimension Figure appendix 5-1 - 31 -... -
Page 39: Appendix 6 Main Board Layout
BTP-R880NPII Service Manual Appendix 6 Main board layout Figure appendix 6-1 Front layout of main board - 32 -... - Page 40 BTP-R880NPII Service Manual Appendix 7 button setting list Parameter setting (configuring) by Feed button Hold the FEED button pressed while switching the printer on. 2) After the printer has printed the configuration sheet, press and hold the FEED button to configure the printer.
- Page 41 BTP-R880NPII Service Manual PARAMETER SETTING BY FEED BUTTON MAIN MENU Exit ->1 Print Self Test ->2 Configuration ->3 CONFIGURATION Exit Without Save ->1 Exit With Save ->2 Communication ->3 Back To Last ->1 Menu Serial Interface ->2 SERIAL INTERFACE Back Last ->1 Menu...
- Page 42 BTP-R880NPII Service Manual Back To Last ->1 Menu 4k Bytes ->2 45 Bytes ->3 64K Bytes ->4 Mechanism & ->4 HARDWARE SETTINGS Hardware Back To Last ->1 Menu Mark Sensor ->2 MARK SENSOR: Disable Back To Last ->1 Menu Enable ->2 Disable ->3...
- Page 43 BTP-R880NPII Service Manual Darkness ->2 DARKNESS SETTING: Settings Normal Back Last ->1 Menu ->2 Normal ->3 High ->4 Extra High ->5 Paper Roll Width ->3 PAPER ROLL WIDTH:80.0mm Back To Last ->1 Menu 57.5mm ->2 69.5mm ->3 76.5mm ->4 80.0mm ->5 82.5mm ->6...
- Page 44 BTP-R880NPII Service Manual Two-color Verify ->9 Gray Bmp Verify ->10 Paper Sensor ->6 PAPER NEAR END Settings SETTINGS Back To Last ->1 Menu Paper Low Alarm ->2 PAPER LOW ALARM: Enable Back To Last ->1 Menu Enable ->2 Disable ->3 Stop Print When ->3 STOP PRINT WHEN...
- Page 45 BTP-R880NPII Service Manual Set Printer Mode ->10 Printer Mode: Default Printer Mode Back To Last ->1 Menu Default Printer ->2 Mode BTP-2002NP ->3 Mode Enter code,then hold Button Down at least 1 second to validate Sensor Test ->4 Sensor Test Mode: ERROR LED state will change according to sensor state...
Need help?
Do you have a question about the BTP-R880NPI and is the answer not in the manual?
Questions and answers