Advertisement
Quick Links
Advertisement

Subscribe to Our Youtube Channel
Related Manuals for DT SWISS R 535 ONE


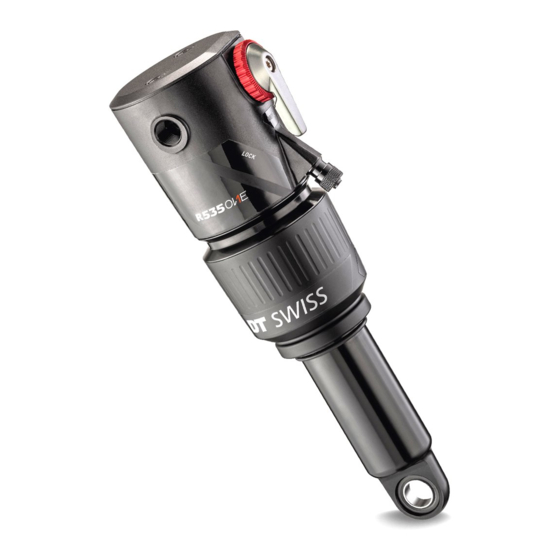
Summary of Contents for DT SWISS R 535 ONE
- Page 1 R 535 ONE TECHNICAL MANUAL V2021.10...
-
Page 2: Table Of Contents
1. GENERAL ..................... 3 2. TROUBLE SHOOTING ................... 5 3. CARE AND MAINTENANCE ................. 7 4. REPLACING DU BUSHINGS ................ 17 5. REPLACING SPHERICAL BEARINGS ............22 6. ATTACHING THE REMOTE CABLE .............. 24... -
Page 3: General
If you have any doubts about your own abilities, you should definitely contact a specialist or a DT Swiss Service Center. Any warranty claims will lapse if work is not carried out properly. - Page 4 DT Swiss special tools are precision tools. Damage-free mounting and dismounting of the components can only be ensured if the tools are working properly and if the condition of the tools are perfect. Always keep the tools in their original packaging or adequate devices to prevent damage.
-
Page 5: Trouble Shooting
Contact a DT Swiss service center. The lockout cap does not close completely. Only trunnion mount shocks: Dirt between lockout shaft and rebound wheel or between rebound wheel and end cap. R 535 ONE Technical Manual V2021.10... - Page 6 Leakage. Check in a water bath where the shock is leaking. Contact your dealer or a DT Swiss Service Center to solve the problem. The pressure indicated on the Valve does not open. Check the positioning of the pump pressure gauge rises rapidly while on the shock or change the pump.
-
Page 7: Care And Maintenance
Incorrect maintenance or assembly of the shock can lead to incorrect function! • Maintenance and assembly may only be done by a skilled professional. • In case of any doubt, contact a DT Swiss service center. • Only use original spare parts. - Page 8 3.4 OVERVIEW SEAL KIT AIR CHAMBER The seal kit includes all parts needed for a small service. All of these parts can be changed without using special tools. Standard Mount Trunnion Mount 1a O-ring air chamber standard mount support ring 1b O-ring air chamber trunnion mount quad-ring support ring...
- Page 9 3.5 SMALL SERVICE This chapter describes a small service. Further service works will be carried out by a DT Swiss service center. A small service should be carried out in the following cases: • The interval for a small service is expired (see table at the beginning of this chapter).
- Page 10 RELEASING THE AIR DANGER RISK OF INJURY FROM PRESSURIZED COMPONENTS! During the disassembly of the shock, compressed air can escape uncontrolled or pressurized components can be ejected. • Release the air before carrying out any work on the shock. DANGER SHOCK OIL MAY BE FATAL IF SWALLOWED AND ENTERS AIRWAYS! Oil mist might escape through the valve while releasing the air from the air chamber.
- Page 11 2. Clamp the shock into a vice vertically. 3. Unscrew the air chamber by hand. 4. If the air chamber can not be loosened by hand, unscrew the air chamber using a strap wrench. 5. Slide off the air chamber. R 535 ONE Technical Manual V2021.10...
- Page 12 REPLACING THE O-RING OF THE AIR CHAMBER, QUAD-RING AND SUPPORT RING Only shock with trunnion mount: 1. Remove the O-ring from the air chamber. 2. Clean the seat of the O-ring on the air chamber. 3. Slightly grease the new O-ring and fit it onto the air chamber.
- Page 13 9. Put both support rings on both sides of the quad ring onto the oil chamber tap. 10. Slightly grease the oil chamber. GREASE R 535 ONE Technical Manual V2021.10...
- Page 14 REPLACING THE WIPER SEAL 1. Carefully remove the wiper seal from the air chamber using plastic forceps. → Do not damages the air chamber housing! → Do not re-use the wiper seal! 2. Remove the support ring from the air chamber housing by hand.
- Page 15 (see figure). 7. Slightly grease the new wiper seal and put it into the outer groove of the air chamber (see figure). → Ensure, the wiper seal lays evenly all around the groove. R 535 ONE Technical Manual V2021.10...
- Page 16 8. Slightly grease the inner surface of the air chamber housing and the thread. Grease the wiper seal generously. → Required grease, see table “Required Material“ on page 9. GREASE 9. Clamp the shock into the vice. 10. Slide on the air chamber and tighten it by hand. →...
-
Page 17: Replacing Du Bushings
4. REPLACING DU BUSHINGS DT Swiss shocks use DU bushings or spherical bearings. These two types, as well as their hardware and tools, are not compatible with each other. Preparatory Steps Link Dismount the shock from the bike. Clean the surface of the shock. - Page 18 REMOVING THE SLEEVES 1. Remove the sleeves by hand. TESTING THE DU BUSHINGS 1. Clamp the DU pin into a vice. 2. Rotate the shock on the pin to check the DU bushing. → If the shock can be rotated without resistance, the DU Bushings must be changed.
- Page 19 1. Slide the pusher into the DU bushing. 2. Align the receiver like shown in the picture. receiver pusher TOOL KIT DU BUSHING UNMOUNTING ASSEMBLY CWTXX10031927S 3. Push out the DU bushing using a press or a bench vise. R 535 ONE Technical Manual V2021.10...
- Page 20 MOUNTING THE DU BUSHINGS 1. Slightly grease the inner surface of the shock eyelet and the outer surface of the bushing. GREASE 2. Put the bushing onto the pusher. 3. Position the bushing to the shock eyelet that the gap is oriented 90° to the axis of movement of the receiver shock.
- Page 21 4. Wait a few minutes and check the DU bushing again (see “Testing the DU bushings“ on page 18). If this test fails a second time, contact a DT Swiss service center. MOUNTING THE SLEEVE 1. Slightly grease the DU pin.
-
Page 22: Replacing Spherical Bearings
5. REPLACING SPHERICAL BEARINGS DT Swiss shocks use DU bushings or spherical bearings. These two types, as well as their hardware and tools, are not compatible with each other. Preparatory Steps Link Dismount the shock from the bike. Clean the surface of the shock. - Page 23 10. Check the spherical bearing again (see “Checking the spherical bearings“ on page 23). Closing Steps Link Dispose all waste in an environmentally compatible “1.6 Environmental protection“ on page 4 manner. Assemble the shock to your bicycle. R 535 ONE Technical Manual V2021.10...
-
Page 24: Attaching The Remote Cable
ATTACHING THE REMOTE CABLE 1. Insert the cable housing (1) into the remote lever on the handlebars and into the cable adjuster (2) on the shock. → Only use cable housings with an outer diameter of 4 mm. → The cable housing must be long enough to allow the handlebars to turn fully in both directions. The shock and other components must function properly at all times. - Page 25 USA - Grand Junction, CO 81505 59302 Oelde info.us@dtswiss.com Germany info.de@dtswiss.com DT SWISS (FRANCE) S.A.S. DT SWISS POLSKA Sp. z o.o. Parc d‘Activites de la Sarrée ul. Towarowa 36 Route de Gourdon PL-64-600 Oborniki F - 06620 Le Bar sur Loup Poland info.fr@dtswiss.com...
Need help?
Do you have a question about the R 535 ONE and is the answer not in the manual?
Questions and answers