Table of Contents
Advertisement
Available languages
Available languages
CD RECORDER
CDR-1000
OPERATING INSTRUCTIONS
MODE D'EMPLOI
INSTRUCCIONES DE OPERACION
B
CDR-1000
PCM AUDIO TECHNOLOGY/ CD RECORDER
PHONES
PHONES LEVEL
¢
ON / STANDBY
£
OFF
MIN
MAX
OPEN /CLOSE
PLAY / PAUSE
STANDBY
REM
REC
TIME
TRACK
TIME
/
1 2 3 4 5 6 7 8 9 10
11
L
MANUAL SYNC
OPTICAL I
R
CD
RW
REMOTE SENSOR
DISPLAY
INPUT
SHUFFLE
SCROLL
ERASE
FINALIZE
ON/STANDBY
SCAN
REPEAT
PROGRAM
SHUFFLE
ABC
DEF
GHI
1
2
3
JKL
MN
OPQ
4
5
6
RST
UVW
XYZ
7
8
9
SPACE
TRACK MARK
SCROLL
0
STOP
REC MODE
REC
PLAY
STOP
REPEAT
PROGRAM
PAUSE
STORE /
MENU
MULTI JOG
STORE/
CANCEL/
MENU
ENTER
DELETE
-
+
CANCEL / DELETE
REMOTE CONTROL UNIT RC-276
ENTER
FOR ENGLISH READERS
PAGE
005 ~ PAGE
POUR LES LECTEURS FRANCAIS
PAGE
020 ~ PAGE
PARA LECTORES DE ESPAÑOL
PAGINA 035 ~ PAGINA 049
019
034
Advertisement
Table of Contents

Related Manuals for Denon CDR-1000


Summary of Contents for Denon CDR-1000
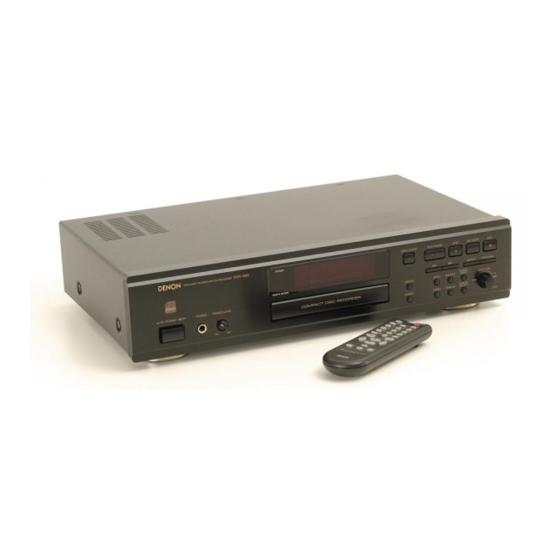
- Page 1 CD RECORDER CDR-1000 OPERATING INSTRUCTIONS MODE D’EMPLOI INSTRUCCIONES DE OPERACION CDR-1000 PCM AUDIO TECHNOLOGY/ CD RECORDER STANDBY TIME 1 2 3 4 5 6 7 8 9 10 OPTICAL I REMOTE SENSOR PHONES PHONES LEVEL ¢ ON / STANDBY £...
-
Page 2: Safety Instructions
CAUTION RISK OF ELECTRIC SHOCK DO NOT OPEN CAUTION: TO REDUCE THE RISK OF ELECTRIC SHOCK, DO NOT REMOVE COVER (OR BACK). NO USER SERVICEABLE PARTS INSIDE. REFER SERVICING TO QUALIFIED SERVICE PERSONNEL. The lightning flash with arrowhead symbol, within an equilateral triangle, is intended to alert the user to the presence of uninsulated “dangerous voltage”... - Page 3 FRONT PANEL PANNEAU AVANT PANEL FRONTAL REAR PANEL PANNEAU ARRIERE PANEL TRASERO DISPLAY AFFICHAGE VISUALIZADOR CDR-1000 PCM AUDIO TECHNOLOGY/ CD RECORDER STANDBY TIME 1 2 3 4 5 6 7 8 9 10 OPTICAL I REMOTE SENSOR PHONES PHONES LEVEL ¢...
- Page 4 ENGLISH FRANCAIS ESPAÑOL NOTE ON USE / OBSERVATIONS RELATIVES A L’UTILISATION / NOTAS SOBRE EL USO • Keep the set free from moisture, water, and dust. • Avoid high temperatures. • Protéger l’appareil contre l’humidité, Allow for sufficient heat dispersion l’eau et lapoussière.
-
Page 5: Table Of Contents
Please switch the power to the CD recorder off at such times. • The CDR-1000 has a broad dynamic range. Please exercise caution when turning up the volume on the amplifier in cases when the playback volume is low. If the volume is turned up too high, it could damage the speakers. -
Page 6: Disc Handling And Precautions
ENGLISH Digital Copies A CD-R/RW disc onto which has been recorded using the digital input cannot be further digitally recorded (i.e., copied) onto a separate CD-R/RW disc or MD, etc.. This is a standard established by the SCMS (Serial Copy Management System). Recording is not possible. -
Page 7: Restrictions Related To The Cd-R/Rw Standards
/DAT w Output: Connect the analog output jacks (ANALOG OUT) of this unit with the input jacks of the amplifier (MD or TAPE). CDR-1000 ANALOG COAXIAL (2) Connection of Digital Input/Output Jacks • Please use the supplied optical fiber MD recorder cables when making connections to the digital (OPTICAL) input/output jacks. -
Page 8: Part Names And Functions
ENGLISH (3) Connection of the AC Cord q Plug the power cord supplied into the AC IN on the CD recorder, then into a mains socket. PART NAMES AND FUNCTIONS Front Panel Power button • Turns the CD recorder ON and OFF. •... -
Page 9: Remote Control Unit
ANALOG …………………… Analog input selected. INITIALIZING ... During laser power calibration for COPY PROTECT…………… No digital recording can be made of DISC RECOVER ... During disc recovering after power the connected source. See “Digital Copies” on Page 6. NOTFINALIZED ………… When opening the tray with an OPC ERROR... -
Page 10: Remote Control Unit
ENGLISH (3) Names and Functions of Remote Control Unit Buttons Buttons without descriptions have the same function as those on the main unit. See “PART NAMES AND FUNCTIONS” on Page 8. Scan button (SCAN) • Plays/program plays the first 10 seconds of each track. - Page 11 • Set so that the red portion of the level meter lights only when the largest signal is input. A distorted sound will be recorded when the setting results in the red portion being lit all the time. CDR-1000 PCM AUDIO TECHNOLOGY/ CD RECORDER OPEN /CLOSE PLAY /PAUSE...
- Page 12 • Only make analog recordings when digital recording is not possible. • Make sure the disc is absolutely free of scratches and dust particles. Manual recording 4 2 3 PCM AUDIO TECHNOLOGY/ CD RECORDER CDR-1000 OPEN /CLOSE PLAY /PAUSE STOP REC MODE STANDBY TIME...
-
Page 13: Playing
• One or more tracks from the end, • The entire disc. PCM AUDIO TECHNOLOGY/ CD RECORDER ¢ ON / STANDBY £ To erase one or more tracks from the end PCM AUDIO TECHNOLOGY/ CD RECORDER CDR-1000 OPEN /CLOSE PLAY /PAUSE STOP REC MODE STANDBY TIME TRACK... - Page 14 ENGLISH Selecting a track when CD play is stopped Manual Search PCM AUDIO TECHNOLOGY/ CD RECORDER CDR-1000 OPEN /CLOSE PLAY /PAUSE STOP REC MODE STANDBY TIME TRACK TIME 1 2 3 4 5 6 7 8 9 10 OPTICAL I...
-
Page 15: Programming
• The total program time will not be displayed when it exceeds 199 minutes. Neither will the program remaining time be displayed when the remaining time of programmed play exceeds 199 minutes. CDR-1000 PLAY /PAUSE STOP REC MODE PCM AUDIO TECHNOLOGY/ CD RECORDER... - Page 16 By finalizing the disc, the text data of the disc is automatically recorded to the disc. TEXT EDIT Storing names PCM AUDIO TECHNOLOGY/ CD RECORDER CDR-1000 OPEN /CLOSE PLAY /PAUSE STOP REC MODE STANDBY...
- Page 17 ) on the NOTES: • Fade-in and Fade-out will not function in Synchro- recording mode. However, the sound fades out if the STOP button ( ) or the PAUSE button ( CDR-1000 PLAY /PAUSE STOP REC MODE OPEN /CLOSE STANDBY...
-
Page 18: Troubleshooting
2 Are you following the instructions in the manual ? 2 Are the amplifier and speakers operating properly ? If the CDR-1000 does not seem to be functioning properly, check the table below. If this does not solve the problem, the CDR- PCM AUDIO TECHNOLOGY/ CD RECORDER... -
Page 19: Discs
MAIN SPECIFICATIONS AUDIO Frequency Response: 2 Hz~22.05 kHz Dynamic Range: During digital recording/playback: 100 dB Signal-to-noise Ratio: During digital recording/playback: 108 dB Harmonic Distortion: During digital recording/playback: 0.003% (1 kHz) Separation: During digital recording/playback: 105 dB Digital input recording/playback performance: Same as for CD playbsck Analog input recording sensitivity: 500 mV... -
Page 20: A Propos Des Disques
FM ou AM. Si cela se produit, éteindre l’enregistreur CD. …………………………………25~28 • Le CDR-1000 a une gamme dynamique étendue. Faire attention lors de l’augmentation de volume de l’amplificateur à partir d’un niveau de volume de lecture bas. Si le volume est augmente à un niveau trop élevé, les enceintes pourraient être endommagées. - Page 21 Copies numériques Un disque CD-R/RW enregistré en utilisant l’entrée numérique ne peut plus être enregistré numériquement (c’est à dire copié) sur un autre disque CD-R/RW ou MD, etc. C’est la norme établie par le système SCMS (Serial Copy Management System). Impossible d’enregistrer Numérique Numérique...
- Page 22 Sortie: Connecter les prises de sortie analogique (ANALOG OUT) de cet appareil aux prises de sortie de l’amplificateur (MD ou TAPE). CDR-1000 ANALOG COAXIAL (2) Branchement des connecteurs d’entrée/sortie numériques • Utiliser le câble à fibre optique fourni lors Enregistreur de MD de la réalisation de connexions aux...
-
Page 23: Nomenclature Et Fonctions
(3) Connexion du cordon secteur q Brancher le cordon d’alimentation fourni dans la prise AC IN de l’enregistreur CD, puis dans la prise principale. NOMENCLATURE ET FONCTIONS Panneau avant Touche d’alimentation Touche d’enregistrement (REC) • Mise sous/hors tension de l’enregistreur de CD. •... - Page 24 FRANCAIS ANALOG INITIALIZING ………………… Entrée optique numérique sélectionnée. COPY PROTECT ……… Impossibilité d’enregistrement DISC RECOVER numérique depuis la source connectée. OPC ERROR Voir “Copies numériques” à la page 21. NOTFINALIZED ……… Ouverture du tiroir comportant un RECORD ERROR disque non finalisé. MAKE CD …………………...
- Page 25 (3) Nomenclature et fonctions des touches de la télécommande Les touches sans description ont la même fonction que celles de l’unité principale. Voir “NOMENCLATURE ET FONCTIONS” à la page 23. Touche de balayage (SCAN) • Lit/programme les 10 premières secondes de chaque plage. Touche de répétition (REPEAT) ON /STANDBY SCAN...
- Page 26 Le niveau d’enregistrement est mémorisé dès qu’il est défini. Le niveau d’enregistrement peut être ajusté pendant l’enregistrement. • Effectuer le réglage de façon à ce que le segment PCM AUDIO TECHNOLOGY/ CD RECORDER CDR-1000 OPEN /CLOSE PLAY /PAUSE STOP REC MODE STANDBY...
- Page 27 Pour débuter l’enregistrement, appuyez sur touche REC sur l’enregistreur de CD et débutez immédiatement la 4 2 3 source (à partir du mode STOP). • “ d’enregistrement apparaissent sur l’afficheur. CDR-1000 OPEN /CLOSE PLAY /PAUSE STOP REC MODE PCM AUDIO TECHNOLOGY/ CD RECORDER...
- Page 28 • le disque entier. ¢ ON / STANDBY Pour effacer une ou plusieurs plages à partir de la fin Charger le disque CD-RW à effacer. PCM AUDIO TECHNOLOGY/ CD RECORDER CDR-1000 OPEN /CLOSE PLAY /PAUSE STOP REC MODE STANDBY TIME...
- Page 29 Recherche manuelle Sélection d’une plage tandis que la lecture du CD est arrêtée PCM AUDIO TECHNOLOGY/ CD RECORDER ¢ ON / STANDBY £ PCM AUDIO TECHNOLOGY/ CD RECORDER CDR-1000 OPEN /CLOSE PLAY /PAUSE STOP REC MODE STANDBY TIME TRACK TIME...
-
Page 30: Text Edit
(“STEP”). Appuyez à nouveau sur la touche STOP ( le programme. Programmation • “PROGRAM” s’éteint. • L’ouverture du tiroir de chargement efface également PCM AUDIO TECHNOLOGY/ CD RECORDER CDR-1000 OPEN /CLOSE PLAY /PAUSE STOP REC MODE STANDBY TIME TRACK... - Page 31 En finalisant le disque, les données de Afficher les caractères texte du disque sont enregistrées automatiquement sur le disque. TEXT EDIT Réglages concernant le texte PCM AUDIO TECHNOLOGY/ CD RECORDER CDR-1000 OPEN /CLOSE PLAY /PAUSE STOP REC MODE STANDBY TIME...
- Page 32 ) de la télécommande REMARQUES: • La fonction de fondu en entrée et à la sortie ne fonctionne pas en mode d’enregistrement synchronisé. Cependant, le son s’atténue progressivement si la CDR-1000 PLAY /PAUSE STOP REC MODE PCM AUDIO TECHNOLOGY/ CD RECORDER...
-
Page 33: Localisation Des Pannes
L’amplificateur et les haut-parleurs fonctionnent-ils correctement ? Si le CDR-1000 semble ne pas fonctionner correctement, vérifier le tableau ci-dessous. Si le problème n’est pas résolu, le CDR- 1000 peut être endommagé. Eteindre l’appareil, débrancher le câble d’alimentation et contacter le revendeur ou le point de vente... -
Page 34: Caracteristiques Principales
FRANCAIS CARACTERISTIQUES PRINCIPALES AUDIO Réponse en fréquence: 2 Hz~22,05 kHz Gamme dynamique: Pendant l’enregistrement/lecture numérique: 100 dB Rapport signal-bruit: Pendant l’enregistrement/lecture numérique: 108 dB Distorsion harmonique: Pendant l’enregistrement/lecture numérique: 0,003% (1 kHz) Séparation: Pendant l’enregistrement/lecture numérique: 105 dB Performance d’enregistrement/ lecture entrée numérique: Identique à... -
Page 35: Acerca De Los Discos Cd-R/Rw
Gracias por haber adquirido este grabador de discos Sincronizada de Disco, que permite grabar un álbum compactos DENON. A fin de familiarizarse con el grabador de desde la fuente; Grabación Sincronizada de Pistas, que CD y aprovechar plenamente las características del mismo, lea permite grabar las pistas deseadas de una en una;... - Page 36 ESPAÑOL Copias digitales Un disco CD-R/RW sobre el cual se ha grabado utilizando la entrada digital no se puede volver a grabar digitalmente (p.e., copiado) sobre un separado disco CD-R/RW o MD, etc. Este es un estándar establecido por SCMS (Sistema de Gestión de Copia en Serie). La grabación no es posible.
- Page 37 /DAT /DAT los conectores de salida del amplificador (MD o TAPE). w Salida: Conecte los conectores de salida CDR-1000 analógica (ANALOG OUT) de esta unidad a los conectores de entrada del amplificador (MD o TAPE). ANALOG COAXIAL (2) Conectores de entrada/salida digital •...
-
Page 38: Nombre Y Función De Las Partes
ESPAÑOL (3) Conexión del cable de alimentacion q Conecte el cable de CA incluido a la toma AC IN del grabador de MD, y luego a la toma de la red de alimentación. NOMBRE Y FUNCIÓN DE LAS PARTES Panel frontal Botón de alimentación •... -
Page 39: Mando A Distancia
ANALOG …………………… Entrada analógica seleccionada. OPC ERROR... Error de calibración durante el COPY PROTECT…………… No se puede grabar digitalmente de la fuente conectada. RECORD ERROR ... Ha ocurrido un error durante la Vea “Copias digitales” en la página NOTFINALIZED ………… Durante la apertura de la bandeja DISC ERROR ... - Page 40 ESPAÑOL (3) Nombre y función de los botones del mando a distancia Los botones que no tienen descripción tienen la misma función que los botones correspondiente de la unidad principal. Vea “NOMBRE Y FUNCIÓN DE LAS PARTES” en la página 38. Botón de exploración (SCAN) •...
- Page 41 • Ajuste el nivel de manera tal que la parte roja del medidor de nivel se ilumine sólo cuando se reciba la señal de mayor intensidad. Si el ajuste realizado hace que la parte roja se ilumine PCM AUDIO TECHNOLOGY/ CD RECORDER CDR-1000 OPEN /CLOSE PLAY /PAUSE STOP REC MODE...
- Page 42 Grabación manual fuente (desde el modo de parada). • El indicador “ 4 2 3 • Para comprobar el tiempo de grabación transcurrido, PCM AUDIO TECHNOLOGY/ CD RECORDER CDR-1000 OPEN /CLOSE PLAY /PAUSE STOP REC MODE STANDBY TIME...
- Page 43 • una o más pistas del final, • el disco entero. PCM AUDIO TECHNOLOGY/ CD RECORDER ¢ ON / STANDBY £ Para borrar una o más pistas del final PCM AUDIO TECHNOLOGY/ CD RECORDER CDR-1000 OPEN /CLOSE PLAY /PAUSE STOP REC MODE STANDBY TIME TRACK...
- Page 44 ESPAÑOL Búsqueda manual Selección de una pista cuando está detenida la reproducción de CD CDR-1000 PCM AUDIO TECHNOLOGY/ CD RECORDER OPEN /CLOSE PLAY /PAUSE STOP REC MODE STANDBY TIME TRACK TIME ¢ ON / STANDBY 1 2 3 4 5 6 7 8 9 10...
-
Page 45: Modo De Menú
Programación tiempo restante de reproducción del programa exceda de 199 minutos. • No es posible realizar operaciones de programa durante los modos de reproducción o pausa. CDR-1000 PCM AUDIO TECHNOLOGY/ CD RECORDER OPEN /CLOSE PLAY /PAUSE STOP REC MODE... - Page 46 30 discos.) Cuando Visualización de caracteres se finaliza el disco, los datos de texto del mismo son grabados automáticamente en el disco. Asignación de nombres TEXT EDIT CDR-1000 PCM AUDIO TECHNOLOGY/ CD RECORDER OPEN /CLOSE PLAY /PAUSE STOP...
- Page 47 ) o el botón PAUSE ( ) en el mando a distancia para hacer una pausa. Girando el control MULTI JOG usted puede seleccionar el tiempo de FADE IN o FADE OUT. CDR-1000 OPEN /CLOSE PLAY /PAUSE STOP REC MODE •...
-
Page 48: Solución De Problemas
CDR-1000 tuviera alguna avería. Desactive la alimentación, desenchufe el cable de alimentación de la toma de red general, y póngase en contacto con la tienda de compra o con la oficina de ventas DENON más próxima. -
Page 49: Especificaciones Principales
ESPECIFICACIONES PRINCIPALES AUDIO Respuesta de frecuencia: 2 Hz–22,05 kHz Intervalo dinámico: Durante la grabación/reproducción digital: 100 dB Relación señala a ruido: Durante la grabación/reproducción digital: 108 dB Distorsión armónnica: Durante la grabación/reproducción digital: 0,003% (1 kHz) Separación: Durante la grabación/reproducción digital: 105 dB Actuación de grabación/reproducción de entrada digital: Igual que para la reproducción de CD... - Page 50 14-14, AKASAKA 4-CHOME, MINATO-KU, TOKYO 107-8011, JAPAN Telephone: (03) 3584-8111 Printed in Japan 511 3538 105...
Need help?
Do you have a question about the CDR-1000 and is the answer not in the manual?
Questions and answers