Table of Contents
Advertisement
Quick Links
Advertisement
Chapters
Table of Contents

Related Manuals for Denon DN-500R


Summary of Contents for Denon DN-500R
- Page 1 SD/USB Recorder DN-500R Owner’s Manual...
-
Page 2: Fcc Information
This product, when installed as indicated in the instructions contained in this manual, 3. Do not place anything inside meets FCC requirements. Modification not expressly approved by DENON may void your Do not place metal objects or spill liquid inside the system. -
Page 3: Important Safety Instructions
IMPORTANT SAFETY INSTRUCTIONS READ BEFORE OPERATING EQUIPMENT This product was designed and manufactured to meet strict quality and safety standards. There are, however, some installation and operation precautions which you should be particularly aware of. 1. Read these instructions. 12. Use only with the cart, stand, tripod, bracket, or table specified by the manufacturer, or sold with the apparatus. - Page 4 n NOTE ON USE / HINWEISE ZUM GEBRAUCH CAUTION: (English) PRECAUCIÓN: (Español) To completely disconnect this product from the mains, Para desconectar completamente este producto de WARNINGS WARNHINWEISE disconnect the plug from the wall socket outlet. la alimentación eléctrica, desconecte el enchufe del • Avoid high temperatures.
- Page 5 n OBSERVATIONS RELATIVES A L’UTILISATION / NOTE SULL’USO / NOTAS SOBRE EL USO / ALVORENS TE GEBRUIKEN / OBSERVERA / NOTA SOBRE UTILIZAÇÃO AVERTISSEMENTS AVVERTENZE ADVERTENCIAS WAARSCHUWINGEN VARNINGAR AVISOS • Eviter des températures • Evitate di esporre l’unità a • Evite altas temperaturas. • Vermijd hoge temperaturen. • Undvik höga temperaturer. • Evite temperaturas altas.
- Page 6 • DECLARATION OF CONFORMITY A NOTE ABOUT RECYCLING: Our products following the provisions of EC/EU directives, that as follows; This product’s packaging materials are recyclable and can be reused. Please dispose of any materials in accordance with the local recycling regulations. 2006/95/EC When discarding the unit, comply with local rules or regulations. EMC: 2004/108/EC Batteries should never be thrown away or incinerated but disposed of in accordance with the...
-
Page 7: Table Of Contents
Getting started Thank you for purchasing this DENON Professional product. To ensure proper operation, please read this owner’s manual carefully before using the product. After reading, be sure to keep for future reference. Contents Connections Selecting Files and Folders ···········································································11 ·············································27... - Page 8 Playback Edit Function ···················································································39 ··········································································47 Selecting files to playback ·························································39 EDIT ······························································································47 Playback ·······················································································39 COMBINE ···················································································47 Operations during playback ·······················································40 DIVIDE ························································································47 Changing files ·············································································40 COPY ··························································································48 Fast forward and fast rewind (Search) ········································40 MOVE ·························································································48 Jumping by frames (Frame jump) ···············································40 UNDO ·························································································48 Rewind a specified amount of time and playback (Skip back) ····40 Playback pitch adjustment (Pitch control) ···································41...
-
Page 9: Main Features
Check that the conditions of use for all materials are thoroughly satisfied before reproduction etc., and use this equipment correctly. DENON Professional cannot accept any responsibility whatsoever for acts of copyright infringement undertaken by the user. -
Page 10: Accessories
Next, disconnect the cables connected to other system units before moving the unit. • Rack mount cautions (Required rack specifications for mounting the DN-500R on a rack ) • EIA Standard 19 inch rack • 1U Size installation compatible rack • Rack that has a guide rail or shelf board that can support this device... -
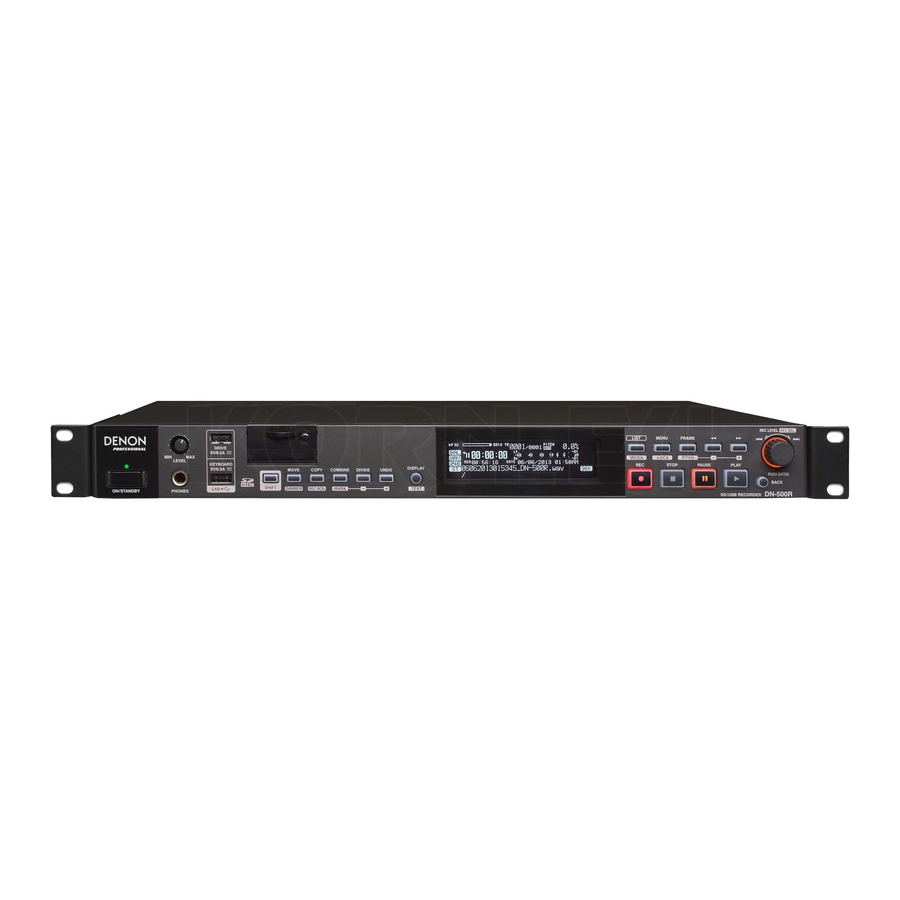
Page 11: Part Names And Functions
Part names and functions Front Panel For buttons not explained here, see the page indicated in parentheses ( ). LIST MENU FRAME MEDIA -LOCK PITCH STOP PAUSE PLAY DISPLAY MOVE COPY COMBINE DIVIDE UNDO SHIFT DIMMER REC MON. MARK TEXT Power switch (ON/STANDBY) USB connector for USB device (DRIVE) ···... - Page 12 Front Panel W5 W4 W3 W2 W1 LIST MENU FRAME MEDIA -LOCK PITCH STOP PAUSE PLAY DISPLAY MOVE COPY COMBINE DIVIDE UNDO SHIFT DIMMER REC MON. MARK TEXT REC button (4) ············································ (31) PAUSE button (3) ································ (32, 39) Fast Forward/Pitch + button MENU/LOCK button ······················...
-
Page 13: Rear Panel
Rear Panel RS-232C PARALLEL ANALOG INPUT DIGITAL INPUT ANALOG OUTPUT DIGITAL OUTPUT REMOTE Analog input (Balanced) terminal ·········································· (11) Analog output (balanced) terminal ······································· (11) RS-232C Terminal ······························································ (12, 56) • XLR Type • XLR Type • 9pin DSUB Connector (Female) • Pin Arrangement: 1. GND / 2. Hot (w/ Phantom) / 3. Cold • Pin Arrangement: 1. -
Page 14: Display
Display The playback status and information about various media is displayed on the DN-500R display. Status display Playback level display Details of the display differ depending on the operating status (stopped/recording/playing) of the DN-500R. • Displays the operating status. • Displays the playback level. -
Page 15: Properties Display (Playback/Pause/Search/Stop)
Display Properties display (Playback/pause/search/stop) 0.0 % 0000 P USB 524M PITCH /0000 OFF M Property : 00 000 00 0001 BGM_001.mp3( /Full/Path) 04:14:44 01/02/2013 10:23:45AM 05/13/2013 11:44PM DATE XXXXX.MP3 44K Mo 320kbps FolderXXX “Album” , “Title” , “Artist” Remote serial connection display Media display Title Name Album name... -
Page 16: Display During Recording And When Recording Is Paused
Display Track name display Remote serial connection display Display during recording and when recording is paused • Displays the progress bar when “14 Auto • Displayed when the remote serial command is Track” (vpage 18) of “Preset Setting” is being received. DISPLAY • Press to switch to an enlarged level meter display. -
Page 17: Connections
Connections NOTE Audio connections • Do not plug in the power cord until all connections have been completed. Digital connection (COAXIAL) Analog connection (unbalanced connection) • When making connections, also refer to the operating instructions of the other components. Connect digital inputs/outputs to the digital input/output (COAXIAL) Connect line-level analog inputs/outputs to the analog (unbalanced) • Insert the plugs securely. -
Page 18: Connecting The External Control Terminal
SHIFT DIGITAL OUTPUT REMOTE RS-232C PARALLEL REMOTE Power cord Parallel control can be used to control DN-500R from an external To AC outlet (supplied) device. (AC 120 V, 60 Hz) For details on parallel control, see “Parallel control” (vpage 59). U.S.A. and Canada models LEVEL... -
Page 19: Mounting Recording Media
SD card protection SD card Check beforehand that playback from or recording to the SD card The DN-500R SD card door can be fixed in place using the SD card is stopped. security screw included. (A small Phillips screwdriver is required n Inserting an SD card for installation). -
Page 20: Connecting A Usb Device
For details of SD cards that have been confirmed as being compatible for use by DENON, see the DENON website The DN-500R supports USB flash memory and external USB device • Do not used a cracked or warped SD card or USB drive, or one (URL: http://www.d-mpro.com). -
Page 21: Setting Defaults
Setting defaults Menu List Setting Setting MENU Setting Item Page MENU Setting Item Page button button 01 PRESET1 31 End Of Message 01 User Preset Sel 02 PRESET2 32 Master Key 03 PRESET3 33 Time Display 01 Preset Title 34 File Sort 02 Shift Mode 35 Dimmer 03 Power On... - Page 22 Menu List Setting MENU Setting Item Page button 01 Timer Priority 02 Rec Folder 03 Signal Pass Thru 04 User Area 05 File Name Form 06 Mono Play 07 Output Rate 08 Volume Input 09 Ref(XLR/RCA) 10 Input Trim Lch 11 Input Trim Rch 07 System Setting 12 Output Trim Lch...
-
Page 23: Setting Defaults
Setting defaults DN-500R can record audio input on an SD card in the unit or to a USB drive. Rotate the jog dial to select the menu of the settings that you want to change, and DN-500R is equipped with various recording and playback settings so that you can use wide-... -
Page 24: Shift Mode
Sets the operation when the Resume Play: Start playback from the track that was played last by the 12 Sample Rate 44.1k (PRESET1/2): Records at 44.1kHz. DN-500R power is switched previous operation. Selects the sampling 48k: Records at 48kHz. Play First: Playback starts from the first track in the folder that was played last by the previous operation. -
Page 25: Random
Setting defaults Setting Items Setting details (Items in bold are factory default) Setting Items Setting details (Items in bold are factory default) 21 Random On: Random order playback is performed. 15 Auto Mark Off: Turns the auto mark function off. If an input that is below the On: Turns the auto mark function on. -
Page 26: Start Delay
US(English) / UK(English) / FR(French) / GE(German)/ IT(Italian) / SP(Spanish) / 25%: 25 % of the normal brightness. Sets the language type of DU(Dutch) / SW(Swedish) / JP(Japanese) the keyboard connected to the DN-500R. 42 Default Resets all of the preset settings to the defaults. -
Page 27: Timer Priority
Setting defaults n Renaming presets n System Setting Preset names can be renamed according to their use. A maximum of 32 characters can be input. Setting Items Setting details (Items in bold are factory default) Entering Characters Off: Timer playback only starts in the standby, stop or cue state. 01 Timer Priority Sets the priority of timer On: Timer playback starts any time other than when recording. -
Page 28: Volume Input
Resets all of the system settings to the defaults. Sets the display order of the DMY: Displays the date in Day/Month/Year order. date. YMD: Displays the date in Year/Month/Day order. z1 The DN-500R will automatically reboot (power off and then back on) to enable the settings. -
Page 29: Menu Operations (Utility)
Saving the menu settings to an SD card or USB memory Menu Operations (Utility) This unit has a function for saving the menu settings to an SD card or USB flash memory. This function is useful for transferring the settings from one DN-500R onto other DN-500R units. Jog Dial/ ON/STANDBY... -
Page 30: Time/Date
ENTER Select “OK” with the jog dial, and press press ENTER The “DN-500R.ini” file on the currently used media is read, and the unit's settings are updated. When the update is complete, “Completed” is displayed. Date/Time Date:May/13/2013 n Save Setting Time:11:54 Saves the current preset settings in the root directory of the currently used media (SD/USB). -
Page 31: Format Media
Setting defaults n Firmware Version n Speed Check Displays the firmware version of the DN-500R. Checks the read and write speed of the currently used media (SD/USB). Always perform a speed check on media before using it. ENTER Select “Utility” and rotate the jog dial to select “Firmware Version”, then press Select “Utility”... -
Page 32: Selecting Media
Selecting Media Media List Media that can be selected are displayed in a list. Jog Dial/ ENTER SHIFT MEDIA LIST MENU FRAME MEDIA -LOCK PITCH STOP PAUSE PLAY DISPLAY MOVE COPY COMBINE DIVIDE UNDO SHIFT DIMMER REC MON. MARK TEXT n Displaying the media list and selecting media SHIFT MEDIA... -
Page 33: Selecting Files And Folders
Selecting Files and Folders File List The list of folders and files that can be selected is displayed. MENU Rotate the jog dial to select the file or folder to operate, and press Jog Dial/ The File List Menu is displayed. ENTER SHIFT LIST... -
Page 34: Playing Back Files (01 Preview)
File List Changing the file name or folder name Playing back files (01 Preview) Deleting Files and Folders (04 Delete) (03 Rename) Playback starts to preview the selected file. Delete the selected file or folder. Rotate the jog dial to select “01 Preview”, and press Change the name of the selected file. -
Page 35: Copying Files And Folders (05 Copy)
File List Copying Files and Folders (05 Copy) Moving files (06 Move) Creating folders (07 Make Folder) Copy the selected file or folder to a different media or folder. Move the selected file or folder to a different media or folder. Create a new folder in the selected folder. -
Page 36: Deleting Marks (08 Delete Mark)
File List Other functions Deleting marks (08 Delete Mark) Locking operation buttons (Key lock) Deletes all of the marks written into the selected file. Hold down SHIFT and press LOCK for more than Select “08 Delete Mark” in the folder list menu, and press ENTER. -
Page 37: Recording
NOTE To record on an SD card, be sure to format it on DN-500R before recording. If the SD card is formatted on a v See overleaf computer or is used for recording without formatting it, this could result in sound cutoffs during recording. - Page 38 Recording To pause recording Press REC. PAUSE Press during recording. Recording starts. PAUSE • Recording is paused, buttons flashes lights. 0.0 % 0001 • Press again to resume recording on the same file. P USB 0036 PITCH /0001 OFF M • When “15 Auto Mark” (vpage 19) in the preset menu is set to “On”, a mark is added at the point 000:00:00 where the recording is resumed from the paused status.
-
Page 39: Recording Monitor
Recording Monitor Dual recording Relay recording The Record Monitor feature allows you to monitor the audio that has The selected media and backup media can be recorded simultaneously. Data is recorded to the first selected media, and when the remaining been recorded to the media. -
Page 40: Timer Recording
Timer All Clear Day Of Week Sunday Timer Week:S_ _ _ _ _ _ Monday While DN-500R is stopped, press MENU Time:00:00 Tuesday The menu list is displayed. Wednesday Rotate the jog dial to select “Edit”, and press ENTER </>:<</>>... -
Page 41: Turning Timer Recording On/Off
Timer Recording Turning timer recording on/off Rotate the jog dial to select the recording time n When entering “Date Time” (hours/minutes) and press ENTER. In the recording timer list, rotate the jog dial to The recording timer is displayed in the recording timer list Date Time select the recording timer that you want to turn on when the recording timer input is completed. -
Page 42: Editing Timer Recording Information
Timer Recording Editing timer recording information Using timer recording n Deleting all recording timers q Rotate the jog dial to select “All Clear”, and press In the recording timer list, rotate the jog dial to • Set the timer recording information and turn the timer on. ENTER select the recording timer that you want to edit, and • Load a recording media to the current recording media. -
Page 43: Add A File During Recording (Manual Track)
Operations during recording Add a file during recording (Manual track) MARK DIVIDE The manual track function divides tracks at the desired place during recording. Recording continues as a new file. LIST MENU FRAME MEDIA -LOCK PITCH DIVIDE Press during recording. STOP PAUSE PLAY... -
Page 44: Recording Time Chart
Operations during recording Recording time chart All of the recording times are approximate times. Differences occur between recording media made by different manufacturers. n Recording time Stereo file Recordable time (Hours: Minutes) Setting Bitrate 16GB 32GB 0:30 0:59 1:59 3:57 7:54 15:48 PCM-24 (96kHz) -
Page 45: Playback
(point A). ON/STANDBY. PLAY. Press Press PLAY The power of DN-500R is switched ON, and the display screen lights and playback starts. PLAY STOP PLAY Press STOP Head of the next file Press lights. -
Page 46: Operations During Playback
Operations during playback MARK Rewind a specified amount of time and MARK- SHIFT MARK+ FLAME/PITCH PITCH- PITCH+ playback (Skip back) Jog dial During playback or pause, the track returns only the set amount of LIST MENU FRAME time from the playback position, and is then played back or paused MEDIA -LOCK PITCH... -
Page 47: Playback Pitch Adjustment (Pitch Control)
NOTE • The pitch changes by 0.1% each time the button is pressed. • You cannot add marks to MP3 files that are not recorded by DN-500R. • Press and hold the button to change the pitch continuously. • You cannot add marks when files are recorded in VBR. -
Page 48: Program Playback
ENTER The “File List” is displayed. Create program The “Program List Menu” is displayed. Program List <SD> While DN-500R is stopped or in cue, press MENU Rotate the jog dial to select “Preview”, and press BGM_002.MP3 0001 BGM_001.MP3 ENTER The menu list is displayed. -
Page 49: Program Playback
Program playback Program playback Editing the program Saving/reading program data n Inserting a new program in front of the selected Set “22 Program” (vpage 19) in “Preset n Saving the program to the selected media program 100 program lists can be saved. Setting”... -
Page 50: Timer Playback
In the playback timer list, rotate the jog dial to select Timer Off Turns the selected timer off. the playback timer that you want to turn on or off, While DN-500R is stopped, press MENU and press ENTER The menu list is displayed. -
Page 51: Editing Timer Playback Information
Timer playback Editing timer playback information Using timer playback In the playback timer list, rotate the jog dial to select • Set the timer playback information and turn the timer on. the playback timer that you want to edit, and press • Load a timer playback media to the current playback media. -
Page 52: Hot Start
• The operating method is the same as operation 2 of “Editing the program” (vpage 43). Rotate the jog dial to select “Execute”, and press MENU While DN-500R is stopped or in cue, press ENTER n Deleting all hot list files The menu list is displayed. -
Page 53: Edit Function
Edit Function EDIT Edit files. COMBINE Jog Dial/ENTER MOVE COMBINE UNDO Combine the selected file with another file on the same media to LIST MENU FRAME create a new file. MEDIA -LOCK PITCH STOP PAUSE PLAY DISPLAY MOVE COPY COMBINE DIVIDE UNDO SHIFT... -
Page 54: Copy
EDIT COPY MOVE UNDO Copies the selected file to a different folder or folder on a different Moves the selected file to a folder on the same or different media. Returns the edit operation performed immediately prior to the media. To move multiple files, use “06 Move”... -
Page 55: Control Function
Control Function USB Keyboard This unit can be controlled using a keyboard by connecting a USB keyboard to the keyboard USB connector on this unit. Keyboard key Unit operation button Keyboard key Unit operation button STOP (during Play, Rec etc.) Other CHARACTER BACK (during MENUs) -
Page 56: Various Playback Functions With Rc-F400S
If the firmware version of your RC-F400S is an earlier version than A-5.00 it will not work correctly with the DN-500R. Please visit our website (URL:http://www.d-mpro.com) for the latest firmware version. The RC-F400S version information is displayed under the startup screen that appears when it is turned on. - Page 57 • HOT LIST: Press the function button to check the Hot Start list. FILE LIST button EXIT button [Special Feature of DN-500R] Moves to the file list. Enters the main mode. • FRAME: Press the FRAME button to start Audible pause from STORE button that position, and switch to frame search mode.
-
Page 58: Connection
Various playback functions with RC-F400S Connection As shown below, connect the RS-232C port on DN-500R to the RS-232C port on RC-F400S using the straight cable that is supplied RS-232C PARALLEL with RC-F400S. • Once they are connected, turn the power switch on for the respective devices. -
Page 59: Hot Start Playback
Perform Hot Start playback n Jumping by frames (Frame Accurate Search) n Stop After connecting DN-500R to RC-F400S, turn the power switch on for the respective devices. Press 6 or 7 during Audible pause. Press 20. • In the RC-F400S display, the startup screen “DENON • Pressing 6 moves 1 frame in the reverse direction. - Page 60 Convert the allocated Hot Start list into a file and save it to a current to the Hot Start buttons. to play back. media connected to the DN-500R. If this file exists in the media, the Hot Start list in this file is automatically used for allocation. FILE LIST...
-
Page 61: Playback From The Main Screen
• x2, x10, x50, x100, x200 The button lights green and file playback starts. • If the “Search Mode” settings in the “Preset Menu” of the DN-500R n Pause are set to “Normal”, sound is output when the search speed is 2x. -
Page 62: Serial Remote Control Function
PARALLEL Controlling the DN-500R externally REMOTE Sending the status information to the host when DN-500R receives a status request command from the host Automatically sending the status information to the host when there is a change to the DN-500R status n About Connections • Transmission System: Asynchronous full duplex transmission... -
Page 63: D&M Rc Communication Format
When the DN-500R receives a control command from the host, the DN-500R sends ACK (received successfully) to the host and executes n Configuration of control commands When a status request is received from the host, the DN-500R returns the command. ACK and a response to the request details. - Page 64 Serial remote control function e Automatic output of status information when the DN-500R status changes When the DN-500R status or recording or playback file changes, or when the storage status changes, the details of the change of status are sent to the host.
-
Page 65: Parallel Control
The MODE 1,2 pins are used to switch this mode. Hot Start Mode n Parallel remote mode switching Normal Mode Hot Cue Mode Parallel remote mode is switched according to the status of parallel remote inputs #5 and #6. DN-500R DN-500R NAME MODE 1 HIGH HIGH... - Page 66 Parallel Control n Remote Control Connection • Connection Example Normal Mode Hot Start Mode Hot Cue Mode MODE2 MODE1 CUE/STOP PAUSE PLAY STOP MODE2 MODE1 6 SEARCH 7 SKIP BACK START 1 START 2 START 3 START 4 START 5 RELOAD CUE/STOP REC PAUSE PAUSE...
-
Page 67: Information
Registered • The file that you are to a program, hot start or timer playback list. 29, 42, media on DN-500R or set the format to FAT16 or FAT32. For Files registered to these lists cannot be edited. 44, 46 details, see the operation instructions of the recording media. -
Page 68: Troubleshooting
• Check whether the power cord is firmly connected to the AC GRC-F400S error messagesH outlet. Error message Cause/Solution Page Not Connected • Check if it is properly connected to DN-500R. If this message – GRecordingH persists, replace the cable. Symptom Cause/Solution Page Not Supported • A device that is not supported by RC-F400S is connected. - Page 69 Troubleshooting GPlaybackH GRecording mediaH Symptom Cause/Solution Page Symptom Cause/Solution Page Cannot perform • The recording media could be a cause of this trouble. Copy a file – The media is not • Sometimes this unit cannot recognize media because of a playback or does not to another recording media and retry playback.
-
Page 70: Main Specifications
Main specifications n Input n Output • System SD/USB Recorder 0dBu=0.775 Vrms, • Compatible media SD/USB memory/USB HDD 0dBV=1.0 Vrms • BALANCED ANALOG IN L/R • Playable formats, file systems SD, USB: FAT16/FAT32/HFS+ • BALANCED ANALOG OUT L/R Type XLR(1:GND, 2:Hot, 3:Cold) • Playable WAV Format XLR(1:GND, 2:Hot, 3:Cold) Type Line setting WAV, AIFF, AIF... - Page 71 Index Delete folder ····················································· 28 Language type ···················································· 20 Save Setting ······················································· 24 Delete mark ······················································· 30 Load Setting ······················································· 24 SD card ······························································· 13 Accessories ·························································· 4 Display ·································································· 8 Search ································································ 40 Add file ······························································ 37 Divide ································································ 47 Search the marks ···············································...
-
Page 72: Appendix
Appendix Appendix shows the list of commands that control this unit externally through a host device. Normally, it is dealers such as installers that use the list of commands to make settings, so this section is only in English. n D&M RC Communication format Control Command List Description Command... - Page 73 Appendix Description Command Remarks Control PITCH @02337ON'\r' @02337OF'\r' @02338'\r' @02339'\r' Value @0PTSSXXXX'\r' SS:ON/OFF, ON:SS=ON, OFF:SS=OF XXXX:Pitch Value First Sign=0:Plus/1:Minus Second Pitch 10(0~9) Third Pitch 1(0~9) Fourth Pitch 0.1(0~9) Example)ON, :+16.0%:SSXXXX=ON0160 +16.0~-16.0% Range:0.1% @02359'\r' Divide @023Dd'\r' Rec Volume + @023V+'\r' Rec Volume - @023V-'\r' Rec Vol Balanse Right @023BR'\r' Rec Vol Balanse Left @023BL'\r' Rec Vol Right + @023R+'\r'...
- Page 74 Appendix Description Command Remarks File List Move File nnnn XXXXXXXXXXX @0MvnnnnXXXXXXXXXXX'\r' nnnn:Move Track No. (4digits) b2 XXXX:Move folder name (Max 255 words) b4 Invalid, when Track No. which moves does not exist. Invalid, when a movement place folder does not exist. Invalid, when there is the same file name as the move folder.
- Page 75 Appendix Description Command Remarks File List HotStart Set xxxx @0hsnnxxxx'\r' nn:Hot Start No., xxxx:Track No. (4 digits)(The setting is cancelled in case of 0000.) Usually, the head of a file is saved as a Hot Start starting position at the time. In PLAY PAUSE, when nnn is the same as current Track, a current position is saved as a Hot Start starting position.
- Page 76 Appendix Description Command Remarks Preset Rec RecFormat WAV(PCM) @0AFPMXX'\r' XX:Bit length 24bit XX=24 16bit=16 @0AFM3XXX'\r' XXX:Bit rate 320Kbps:XXX=320 256Kbps:XXX=256 192Kbps XXX=192 128Kbps XXX=128 64Kbps XXX=064 Rec Cannel STEREO @0CHST'\r' L-Mono @0CHML'\r' LR-MONO @0CHMX'\r' Sample Rate @0FSXX'\r' XX:Sampling rate 96KHz:XX=96 48KHz:XX=48 44.1KHz:XX=44 Ext(AES):XX=EX PreRec x (sec) @0PRxS'\r' x sec:x=1 ~ 5 (Sec ) @0PR'\r'...
- Page 77 Appendix Description Command Remarks Preset Play Search Mode Normal @0sMNO'\r' Silent @0sMSL'\r' Auto Fade In @0FIxxx'\r' xx:set Time Off:xx=00 0.5sec:xx=05, 1.0sec:xx=10, 1.5sec:xx=15 Auto Fade Out @0FOxxx'\r' xx:set Time Off:xx=00 0.5sec:xx=05, 1.0sec:xx=10, 1.5sec:xx=15 Start Delay @0sDxxx'\r' xxx:set Time(10msec) Off:xxx=000 100msec:xxx=010 200msec:xxx=020 300msec:xxx=030 EOM(End Of Message) @0EDxx'\r' xx:set Time Off:xx=OF...
- Page 78 Appendix Description Command Remarks Preset Other KeyBoard Englaish(US) @0KBUS'\r' Englaish(UK) @0KBUK'\r' France @0KBFR'\r' German @0KBGE'\r' Italia @0KBIT'\r' Spanish @0KBSP'\r' Nederland @0KBNE'\r' Swedish @0KBSW'\r' Japanese @0KBJP'\r' Preset Default PresetDefault Preset(all) @0DEFL'\r' Default processing to current Preset Rec Timer Timer Recording DayOfWeek @0ShDWXXxxxxxxxxHHMMhhmmXXXX'\r' XX:Reserve No! 01-30 xxxxxxx:Setting on a day of the week...
- Page 79 Appendix Description Command Remarks Play Timer Timer Playback DayOfWeek @0TPDWXXxxxxxxxxhhmmFFFFF'\r' XX:Reserve No! 01-30 xxxxxxx:Setting on a day of the week The initial (“S”, “M”, “T”, “W”, “T”, “F”, “S”) of the day of the week to reserve is connected, and the day of the week which is not reserved is connected by “_.” hhmm:Time set If it is “Every time”, it is displayed by “**”.
- Page 80 Appendix Description Command Remarks System Setting Digital Out Fs AUTO @0dFAT'\r' 44.1KHz @0dF44'\r' 48KHz @0dF48'\r' Ext(AES) @0dFEX'\r' Volume Input Fixed @0VIFX'\r' Variable @0VIVA'\r' Ref (XLR/RCA) @0FrXX'\r' XX:Set value(dBu) (FS Reference) XX=24:XLR=+24dBu / RCA=+10dBV XX=20:XLR=+20dBu / RCA=+6dBV XX=18:XLR=+18dBu / RCA=+4dBV Input Trim L @0ItLXXX'\r' XXX:Trim set value(+2.0dB~ -2.0dB) XXX=+20:+2.0 Input Trim R @0ItRXXX'\r' XXX:Trim set value(+2.0dB~ -2.0dB) XXX=+20:+2.0...
- Page 81 Appendix Status Command List Status request command (Host ! This unit) Status message (this unit ! host) Request Command Ans. Command Remarks Status Power Status @0?PW'\r' Power Mode @0PW00'\r' Standby @0PW01'\r' Card @0?CD '\r' Card No Card @0CDNC'\r' Card In @0CDCI'\r' Card Error @0CDCE'\r' Unformat...
- Page 82 Appendix Status request command (Host ! This unit) Status message (this unit ! host) Request Command Ans. Command Remarks Status Time Mode(Display Mode) @0?TMOD'\r' Time Mode RecRemainTime @0TMRE'\r' (Display Mode) TotalTrackNumber @0TMTN'\r' Total Mark @0TMTM'\r' Number Algo @0TMAG'\r' Current Date/Time @0TMND'\r' TrackTime(Elapsed @0TMTT'\r' Time)
- Page 83 Appendix Status request command (Host ! This unit) Status message (this unit ! host) Request Command Ans. Command Remarks Track Elapse Time @0?ET'\r' Elapse Time hhmmss @0EThhhmmss'\r' hh:hour (24h display 0~23) Key select mm:minute ss:second Remain Time @0?RM'\r' Elapse Time hhmmss @0RMhhhmmss'\r' hh:hour (24h display 0~23) mm:minute ss:second Rec Remain Time...
- Page 84 Appendix Status request command (Host ! This unit) Status message (this unit ! host) Request Command Ans. Command Remarks Track Play Track Algo/File @0?ch'\r' STEREO @0chST'\r' Key select MONO @0chMO'\r' Algo @0?af'\r' Algo @0afPMXX'\r' XX :Bit length @0afM3XXX'\r' XXX:bps @0afWVXX'\r' XX :Bit length AIFF @0afAIXX'\r'...
- Page 85 Appendix Status request command (Host ! This unit) Status message (this unit ! host) Request Command Ans. Command Remarks Preset Power On Mode @0?PO'\r' Power On Mode Resume Play @0PORM'\r' General Play First @0POPF'\r' STOP @0POST'\r' @0PORE'\r' Preset Rec Dual Rec @0?dR'\r' Dual Rec @0dROF'\r'...
- Page 86 Appendix Status request command (Host ! This unit) Status message (this unit ! host) Request Command Ans. Command Remarks Preset Rec Silent Level @0?SL'\r' Silent Level @0SLXX'\r' -20dB=20, -25dB=25 etc The kind of the setting is the same as the selection of Menu. Preset Play Play Range On/Off...
- Page 87 Appendix Status request command (Host ! This unit) Status message (this unit ! host) Request Command Ans. Command Remarks Preset Display LED Dimmer @0?LD'\r' LED Dimmer 100% @0LD00'\r' @0LD01'\r' @0LD02'\r' @0LD03'\r' Screen Saver @0?Ss'\r' Screen Saver @0Ss00'\r' @0Ss01'\r' Preset Fadar Start @0?FD'\r' Fedar Start Play...
- Page 88 Appendix Status request command (Host ! This unit) Status message (this unit ! host) Request Command Ans. Command Remarks Rec Timer Rec Timer Timer No:XX @0?ShXX'\r' Rec Timer DayOfWeek @0ShDWxxxxxxxxHHMMhhmmXXXX'\r' XX:Reserve No! 01-30 xxxxxxx:Setting on a day of the week The initial (“S”, “M”, “T”, “W”, “T”, “F”, “S”) of the day of the week to reserve is connected, and the day of the week which is not reserved is...
- Page 89 Appendix Status request command (Host ! This unit) Status message (this unit ! host) Request Command Ans. Command Remarks Play Timer Play Timer Timer No:XX @0?TPXX'\r' Play Timer DayOfWeek @0TPDWxxxxxxxxHHMMFFFF'\r' XX:Reserve No! 01-30 xxxxxxx:Setting on a day of the week The initial (“S”, “M”, “T”, “W”, “T”, “F”, “S”) of the day of the week to reserve is connected, and the day of the week which is not reserved is...
- Page 90 Version etc Version @0?VN'\r' Version xxxxxxxx:Version @0VNxxxxxxxxmmmmmmm'\r' xxxxxxxx:Version No(8 digits) No(8 digits) mmmmmmmm:model name mmmmmmmm: (Case of DN-700R:DN-700R) model name (Case of DN-500R:DN-500R) Update Update File ? @0?UF'\r' Update File ? @0UFOK'\r' (for RCF400S @0UFNG'\r' Update start @0?UD'\r' Update Data xxxxx...
- Page 91 Appendix Status Information List Remarks Status information (this unit ! host ) Ans. Command When current media change. Card Card No Card @0CDNC'\r' Card In @0CDCI'\r' Card Error @0CDCE'\r' Unformed @0CDUF'\r' Write Protect @0CDWP'\r' Door Open @0CDDO'\r' Disc Disc No Disc @0CDNC'\r' Disc In @0CDCI'\r'...
- Page 92 Appendix Status information (this unit ! host ) Remarks Ans. Command When current media change. Media Media @0MEUS'\r' @0MES1'\r' When current track change. Cue Track No. XXXX @0CnXXXX'\r' XXXX:Track No. When total folder number change. Total Folder Number XXXX @0TfXXXX'\r' XXXX:Total Folder number When folder change.
-
Page 93: License
LABORATORY OR CONTRIBUTORS BE LIABLE FOR ANY DIRECT, INDIRECT, INCIDENTAL, SPECIAL, EXEMPLARY, ITALIANO OR CONSEQUENTIAL DAMAGES (INCLUDING, BUT NOT LIMITED TO, PROCUREMENT OF SUBSTITUTE GOODS Questa sezione descrive la licenza software usata per il DN-500R/ OR SERVICES; LOSS OF USE, DATA, OR PROFITS; OR BUSINESS INTERRUPTION) HOWEVER CAUSED AND ON RC-F400S. - Page 94 Dimensions Unit: in. (mm) 19 (482.6) 1 49/64 1 49/64 (45.0) 13 35/64 (344.0) (45.0) Weight: 7 lbs 14.99 oz (3.6 kg)
- Page 95 3520 10272 00AP...
Need help?
Do you have a question about the DN-500R and is the answer not in the manual?
Questions and answers