Table of Contents
Advertisement
CD RECORDER
DN-C550R
OPERATING INSTRUCTIONS
MODE D'EMPLOI
INSTRUCCIONES DE OPERACION
8
9
PLAY
1
Downloaded From Disc-Player.com Denon Manuals
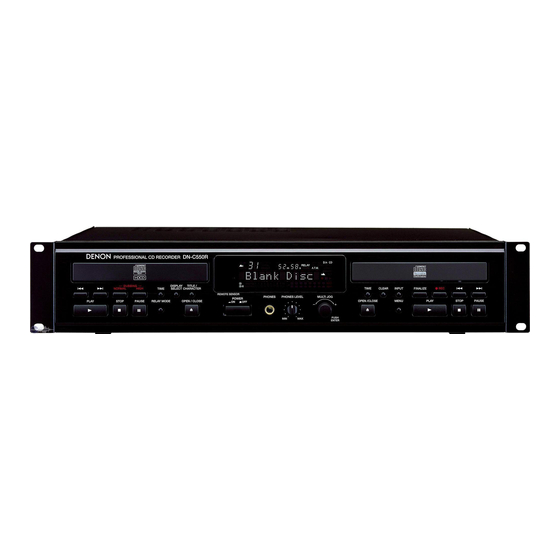
PROFESSIONAL CD RECORDER
DN-C550R
DUBBING
DISPLAY
TITLE /
NORMAL
HIGH
TIME
SELECT
CHARACTER
REMOTE SENSOR
PHONES
PHONES LEVEL
MULTI JOG
POWER
STOP
PAUSE
RELAY MODE
OPEN / CLOSE
ON
OFF
-
+
2
3
5
MIN
MAX
PUSH
ENTER
_ DUBBING _
NORMAL
HIGH
A ! "
A ! "
D # %
D # %
1
2
J
( (
) )
M
4
5
S S
.
V V
: ;
7
8
[ = ]
[ = ]
{ { ? } }
10
+
10
REC
6
MENU
8
ENTER
PLAY
STOP
2
PROG/DIRECT CALL
TIME
CLEAR
INPUT
FINALIZE
4 REC
8
9
RANDOM
TIME
DISPLAY SEL. FADER INPUT
OPEN /CLOSE
MENU
PLAY
STOP
PAUSE
5
1
2
3
B
REMOTE CONTROL UNIT RC-278
CD CD-R
RELAY
MODE
G & '
G & '
3
+
P P
,
–
6
Y
< < >
9
CLEAR
CLEAR
7
9
PAUSE
3
1 / ALL
A - B
TITLE
CHARACTER
FINALIZE
FOR ENGLISH READERS
POUR LES LECTEURS FRANCAIS
PARA LECTORES DE ESPAÑOL
PAGE
005 ~ PAGE
035
PAGE
036 ~ PAGE
066
PAGINA 067 ~ PAGINA 097
Advertisement
Table of Contents

Related Manuals for Denon DN-C550R


Summary of Contents for Denon DN-C550R
- Page 1 OPEN /CLOSE MENU PLAY STOP PAUSE REMOTE CONTROL UNIT RC-278 PUSH ENTER FOR ENGLISH READERS PAGE 005 ~ PAGE POUR LES LECTEURS FRANCAIS PAGE 036 ~ PAGE PARA LECTORES DE ESPAÑOL PAGINA 067 ~ PAGINA 097 Downloaded From Disc-Player.com Denon Manuals...
-
Page 2: Safety Instructions
LEAD IN WIRE GROUND CLAMP ANTENNA DISCHARGE UNIT (NEC SECTION 810-20) ELECTRIC SERVICE EQUIPMENT GROUNDING CONDUCTORS (NEC SECTION 810-21) GROUND CLAMPS POWER SERVICE GROUNDING ELECTRODE SYSTEM (NEC ART 250, PART H) NEC - NATIONAL ELECTRICAL CODE Downloaded From Disc-Player.com Denon Manuals... - Page 3 CHARACTER TIME CLEAR INPUT FINALIZE 4 REC REMOTE SENSOR PHONES PHONES LEVEL MULTI JOG POWER PLAY STOP PAUSE RELAY MODE OPEN / CLOSE OPEN /CLOSE MENU PLAY STOP PAUSE PUSH ENTER FRONT AVANT FRONTAL (mm) Downloaded From Disc-Player.com Denon Manuals...
- Page 4 Mount the units onto your console or rack with 19” EIA rack rails. CAUTION: This DN-C550R will work normally when the player unit is mounted with the front panel within 10 degrees of the vertical plane. If the unit is tilted excessively, discs may not load or unload properly.
-
Page 5: Table Of Contents
FEATURES such times. Do not damage or deform the power supply cord. If it is • The DN-C550R has a broad dynamic range. Please exercise damaged or deformed, it may cause electric shock or malfunction 1. Various copying functions caution when turning up the volume on the amplifier in when used. -
Page 6: Disc Handling And Precautions
Please set a suitable recording level. periods. 2. Where there is a lot of dampness and dust. 3. Where it will be exposed to heat such as from a heater. Downloaded From Disc-Player.com Denon Manuals... -
Page 7: Restrictions Related To The Cd-R/Rw Standards
• Recording may stop if the unit is subject to shocks during recording. If recording stops, it may no longer be possible to Clear button (CLEAR) use the disc normally. • Use this to delete programmed tracks or text input characters. • When pressed in the menu mode, the set returns to the previous mode. Downloaded From Disc-Player.com Denon Manuals... - Page 8 • When both the CD and CD-R times are displayed, the displayed. CD time is displayed. • REPEAT A-B: This lights when in the A-B repeat play mode. Off when both the CD and CD-R units’ times are displayed. Downloaded From Disc-Player.com Denon Manuals...
-
Page 9: Remote Control Unit
Buttons not explained here function in the same way as the corresponding buttons on the main unit. Buttons marked “ ” function regardless of the function selector switch. The included remote control unit (RC-278) can be used to operate the DN-C550R from a distance. Inserting the batteries High speed dubbing q Remove the remote control unit’s back lid. -
Page 10: Setup Method
Turn the jog dial of the main unit or press the automatic search button of the remote control, then select the synchro recording mode. “Sync. Off?”. “Disc Sync.?”. “Make CD?”. “1Tr Sync.?”. Press the enter button and set the synchro recording mode. “Synchro Off”. “Disc Synchro”. “Make CD”. “1Tr Synchro”. Downloaded From Disc-Player.com Denon Manuals... - Page 11 Press the enter button to set the fade-out recording time. • “Complete” will be displayed. Press the enter button and set the auto track mark on or off. • “A.T.Mark On” or “A.T.Mark Off” will be displayed. Downloaded From Disc-Player.com Denon Manuals...
- Page 12 Enter one character at a time with the enter button. • See “Text editings” on Page 30, 31 for details of the character entry method, then perform operations 7 and 8. Downloaded From Disc-Player.com Denon Manuals...
-
Page 13: Copying Procedure
• For some CDs, the text cannot be copied because of copyright protection. In this case “Text Protect” is displayed. • Do not turn off the power or unplug the power cord while “Now PMA Rec” is displayed after recording is completed. Doing so may render the disc unusable. Downloaded From Disc-Player.com Denon Manuals... - Page 14 • To stop in the middle of copying, press the stop button on the CD or CD-R unit. NOTE: • If you wish to input text data, select the “All Tr Dubb” mode. With CD-R discs, text data cannot be input after the disc has been finalized. Downloaded From Disc-Player.com Denon Manuals...
-
Page 15: Recording From External Devices
• By programming the source first, a compilation can be recorded. NOTE: • A maximum of 30 tracks can be set to be recorded. After setting 30 tracks, “Choice OK?” is displayed and more tracks can not be set. Downloaded From Disc-Player.com Denon Manuals... - Page 16 • The recording level can be adjusted over a range of – ∞ to +12 dB for analog and digital input recording. Note that the displayed setting values may include a degree of error in terms of calculation processing. • When the recording level is – ∞, “Level---.-dB” is displayed and audio is not output. Downloaded From Disc-Player.com Denon Manuals...
- Page 17 • Press the play button ( PLAY) to resume recording. w Press the play button ( PLAY). • A blank section of approximately 2 seconds is inserted before recording resumes. Downloaded From Disc-Player.com Denon Manuals...
- Page 18 • Recording stops if there is a soundless section of 10 seconds or more. NOTE: • If you wish to input text data, select the “Disc Synchro” mode. With CD-R discs, text data cannot be input after the disc has been finalized. Downloaded From Disc-Player.com Denon Manuals...
-
Page 19: Normal Playback
2. Stopping playback Press the stop button ( STOP). • Playback stops. • The stop mode is set automatically once all the tracks on the disc have been played. Downloaded From Disc-Player.com Denon Manuals... -
Page 20: Various Playback Functions
VARIOUS PLAYBACK FUNCTIONS Press and hold in the manual search During playback, press and hold in the manual search reverse In addition to normal playback, the DN-C550R also offers the playback functions described below. reverse button ( button ( 1. Playing a certain track (remote control unit only) ………………………………………………………………… Direct Search •... - Page 21 6th track • The pause mode is set. • Press the play button ( PLAY) to resume playback from the point at which the pause mode was set. w Press the play button ( PLAY). Downloaded From Disc-Player.com Denon Manuals...
- Page 22 • Random playback is not possible with non-finalized discs. • To cancel the single track repeat mode, press the repeat This operation is repeated. 1/ALL button repeatedly until the “REPEAT” indicator turns off. Downloaded From Disc-Player.com Denon Manuals...
- Page 23 • When A-B repeat playback is canceled when point B is set on a different track from point A, playback resumes from the beginning of the track that is playing when the A-B repeat mode is canceled. • A-B repeat playback is not possible with non-finalized discs. Downloaded From Disc-Player.com Denon Manuals...
-
Page 24: Relay Mode
CHARACTER NOTE: Turn on the power of the DN-C550R and the connected components. • Recording, finalizing and editing are not possible in the relay or mix mode. Perform the procedure at “Setup Method (10) Timer play mode setting” (Page 13) and make the timer playback on setting. - Page 25 • When relaying between a CD and CD-R, the digital data from the CD/CD-R digital output terminal is interrupted momentarily. The digital input of the connected external device is temporarily unlocked at this time. momentarily. The digital input of the connected external device is temporarily unlocked at this time. Downloaded From Disc-Player.com Denon Manuals...
- Page 26 • To quit the dual mode, press the relay mode button and select “Single Play”. • When relaying between a CD and CD-R, the digital data from the CD/CD-R digital output terminal is interrupted momentarily. The digital input of the connected external device is temporarily unlocked at this time. Downloaded From Disc-Player.com Denon Manuals...
-
Page 27: Finalizing Cd-R/Rw Disc
• For information about cancelling CD-RW finalizing, see “Cancellation of CD-RW Disc Finalizing (i.e., Unfinalizing)” on Page • Never turn off the power or unplug the power cord during finalization. Doing so may render the disc unusable. Downloaded From Disc-Player.com Denon Manuals... -
Page 28: Editing
• When erasing is completed, the time display will be “Blank Disc”. • “Erase OK?” is displayed. Press the enter button again. • “TOC Erase” display is flashing. • When unfinalizing is completed, the disc type display will be “CD-RW”. Downloaded From Disc-Player.com Denon Manuals... - Page 29 • “Now PMA Rec” is displayed and the registration is completed. • The music calendar display of the selected track number is switched off. • The total track number and total time displays do not change even if tracks are set to be skipped. Downloaded From Disc-Player.com Denon Manuals...
- Page 30 (Programmed and random playback are possible once finalization is performed.) • It is not possible to register or cancel tracks you do not want to hear with store-bought CDs or CD-R/RW discs that have been finalized. Downloaded From Disc-Player.com Denon Manuals...
- Page 31 • Either turn the jog dial on the main unit or use the automatic search buttons ( ) on the remote control (Remote control unit) unit to select the desired character. • Some characters that can be input on the DN-C550R cannot be displayed on other models. CD CD-R _ DUBBING _ RELAY...
- Page 32 • “Complete” is displayed. control, and select the track for which the track name will be erased. • “**Tr Title?” is displayed. Press the enter button to define the erasure of the disc name. • “Complete” is displayed. Downloaded From Disc-Player.com Denon Manuals...
-
Page 33: Menu Mode
(Page 28 ~ 30). Ô Ô ª Ô Skip Track? Skip Set? Skip Set **Tr Ô ª ˛ Skip Clear? S. Clear **Tr ª A. Rec Level? Level 00.0dB Change setting with jog dial (or D.Rec Level?) Downloaded From Disc-Player.com Denon Manuals... -
Page 34: Messages
ENGLISH MESSAGES Messages may appear on the display while using the DN-C550R. The meanings of these messages are explained below. Message Meaning Message Meaning 23 text characters have already been input or a total of 900 characters TOC Reading Name Full Reading disc information. -
Page 35: Troubleshooting
0.003 % (1 kHz): 0.01 % (1 kHz) If the DN-C550R does not seem to be functioning properly, check the table below. If this does not solve the problem, the DN- Wow & flutter: Below measurable limits (±0.001 % W. peak) C550R may be damaged.
Need help?
Do you have a question about the DN-C550R and is the answer not in the manual?
Questions and answers