Table of Contents
Advertisement
Quick Links
Advertisement
Table of Contents

Subscribe to Our Youtube Channel
Related Manuals for Siruba 700Q


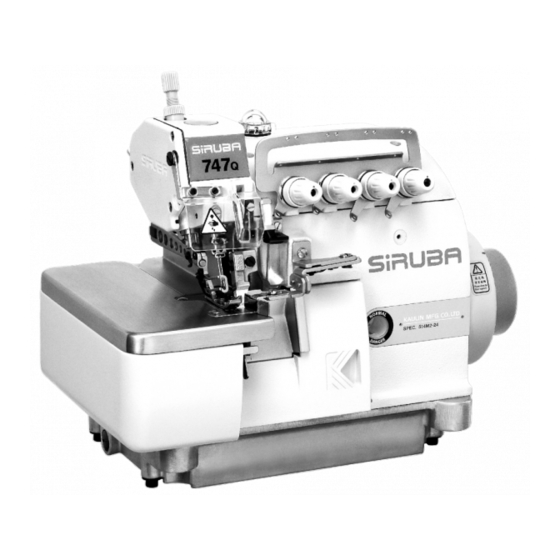
Summary of Contents for Siruba 700Q
- Page 1 700Q/988Q...
- Page 3 誌...
- Page 5 一般安全事項說明 GENERAL SAFETY INSTRUCTIONS 重要安全事項說明 IMPORTANT SAFETY INSTRUCTIONS 特別事項 WARNING 警告標籤 WARNING TAG 護針安全圖說 SAFETY ILLUSTRATION OF THE NEEDLE GUARD 搬運縫紉機 MOVING THE SEWING MACHINE 縫紉機的安裝位置 THE INSTALLATION POSITION 規格 SPECIFICATION 各部件名稱 NAMES OF MAJOR PARTS 安裝 INSTALLATION 照明設備 LIGHTENING EQUIPMENT 新機器啟用規定...
- Page 6 電眼感測器調整 ADJUST ELECTRIC EYE SENSOR 電眼自動感應切線系統 ELECTRIC EYE AUTOMATIC SENSOR 控制箱使用說明 CONTROL BOX SPECFICATION 控制箱調整 CONTROL BOX SETTING 操作環境照明 LIGHTENING OF THE OPERATION ENVIRONMENT 操作者條件 CONDITION OF ALL OPERATORS 保養 MAINTENANCE 故障檢修 TROUBLESHOOTING 控制箱故障排除 CONTROL BOX TROUBLESHOOTING 桌板圖 TABLE CUT-OU 報廢流程...
- Page 7 cause Consider environment’s safety 場所良好的照明。當有引發火災或爆炸危 險時,勿使用電源工具。 防範於電擊危害 may be caught in moving parts.Wear 物品 object.
- Page 8 有...
- Page 11 有接地線的之插座上。 因私自 標誌...
- Page 14 圖1/Fig. 1 安全防護裝置及轉動方向(圖2) Safety protection device and Safety Ÿ Ÿ protection device.(Fig.2) 圖2/Fig. 2...
- Page 15 圖3/Fig. 3 縫 紉 機 之 搬 運 , 應 按 圖 示 用 左 手 托 住 前 To move the sewing machine, please follow 機 殼 本 體 , 右 手 撐 扶 住 底 盤 進 行 搬 運 。 the figure shows.
- Page 16 圖5/Fig. 5 1.外銷型號分類 : 1.Description: 747 Q - 514 M 2 - 2 4 CT (1) 表示線數分 737, 747, 757, 767 (1) Thread numbers / Four types: 737, 747, (2) 機種別 757, 767 (3) 縫合方式(圖表1) (2) Machine type (3) Sewing type(Chart1) 型式...
- Page 17 (4)車縫布料 (4)Sewing materials F: 輕薄布料 F: Fine weight material L: 薄布料 L: Light weight material M: 中厚布料 M: Medium weight material H: 厚布料 H: Heavy weight material X: 特厚布料 X: Extra heavyweight materia (5)送具型式 (5)Feed dog type (6)針寬 (6)Needle width (7)包邊寬度...
- Page 18 圖6/Fig. 6 (1)押具扳手 (圖6) (1)Lifting lever (Fig. 6) (2)押具 (2)Presser toot (3)控制箱 (3)Control box (4)線架 (4)Thread stand (5)油窗 (5)Oil gauge window (6)手輪 (6)Pulley (Hand Wheel) -12-...
-
Page 19: Installation
安裝 INSTALLATION 1.縫紉機拆箱搬運過程中,不可扶持布蓋 1.While moving the sewing machine after 板 下方。(圖7) opening the box, please do not hold the below side of the cloth cover .(Fig. 7) 圖7/Fig. 7 -13-... - Page 20 2.依 本 機 所 附 桌 板 裁 製 圖 及 零 件 組 合 圖 2. Please refer to the attached table cut-out 所 列 之 配 件 , 依 序 安 裝 機 板 支 撐 架 diagram and the parts list to orderly 及...
-
Page 21: Lightening Equipment
馬達啟動踏板 裝於左邊,押具腳 4. Assemble the motor starting pedal 踏板 則裝於右邊。 (圖 to the left side, and the presser foot pedal to he right side. (Fig.10) 圖10/Fig.10 照明設備 LIGHTENING EQUIPMENT 貼心使用者設計的照明機構,其採 Thoughtful lightening equipment is 用不發熱、壽命長之發光二極體 deigned for the operators. Non-heating 燈具,讓使用者能方便於穿線。... - Page 22 HOW TO OPERATE 新機器啟 用 規 定 THE NEW MACHINE 1 .新 機 器 在 最 初 啟 用 磨 合 期 的 四 個 星 期 1. Please operate this machine in 80% of the 內 , 請 用 低 於 最 高 速 度2 0% 的 速 度 運 maximum speed in the first four weeks for 轉...
- Page 23 2.潤 滑 油 之 更 換 (圖 2.Drainage and refill the oil (Fig. 13 ) ( 1)將 螺 絲 放 鬆 旋 開 , 使 油 槽 內 的 油 (1)Loosen the screw and drain all the oil 完 全 排 出 後 再 鎖 緊 。 inside the oil tank.
- Page 24 圖14/Fig. 14 穿線 方 法 THREADING 請 確 實 按 照 圖 示 穿 線 , 錯 誤 之 穿 線 將 引 Follow the procedures for threading. Wrong 起 斷 線 、 跳 針 及 車 縫 不 平 坦 … 等 現 象 。 threading may cause thread breaking, stitch 1.
- Page 25 2.For four thread only 747 .(Fig. 16) 2.747 用 穿 線 圖 。(圖16) 圖16/Fig. 16 3.757 3.For five thread only 757 .(Fig. 17) 用 穿 線 圖 。(圖17) 圖17/Fig. 17 -19-...
-
Page 26: Adjust Thread Tension
4.76 7穿 線 圖(圖1 8 ) 4.For six thread only 767(Fig18) 圖18/Fig. 18 控線調整 ADJUST THREAD TENSION 線 張 力 必 須 根 據 縫 合 布 料 種 類 , 布 料 厚 The thread tension should be adjusted 薄... - Page 27 圖19/Fig. 19 2.針 線 控 線 關 係 (圖2 0 ) 2.Needle thread control (Fig20) 1)在 縫 合 方 式 504 (1)When the sewing type is set to 504, 512, or 、 、 時 , 將 過 線 組 件 移...
- Page 28 .勾 針 控 線 關 係(圖 3.Looper thread control(Fig.21) ( )若 縫 合 方 式 為 503 , 504 , 505及 上 勾 (1)When the sewing type is 503, 504, 505, 針 移 至 最 低 時 , 將 及 調...
-
Page 29: Replace The Needle
換針 方 法 REPLACE THE NEEDLE 1 .使 用 D C X 2 7 或 同 規 格 之 針 。 1.Please use the needle DCX27 or the 2 .旋 開 螺 絲 並 取 下 針 。 equivalents. 3 .將 新 針 插 至 針 孔 最 底 端 , 並 使 針 之 長 2.Loosen the screw and take off the needle. -
Page 30: Adjust The Differential Feed Ratio
圖24/Fig. 24 ADJUST THE DIFFERENTIAL 差 動 比調整 FEED RATIO 若主送具之運動行程大於差動送具運動行 If the stroke of the main feed dog is larger than 程時,布料車縫時會伸張,反之則會收 the stroke of the differential feed dog, the 縮。 fabric will be extended while sewing. .調整方法一: Otherwise, it will be shrunk 放鬆調整鈕... - Page 31 圖25/Fig. 25 2.調整方法二:(圖 2.Adjust solution 2:( Fig.26) ( 1)鬆 開 螺 絲 , 並 從 機 台 後 方 移 開 外 (1)Loosen the screw and remove the 蓋 。 cover from the rear side of the ( 2)鬆 開 螺 帽 , 上 下 移 動 連 桿 。 欲 增 machine bed.
-
Page 32: Replace The Trimmers
更換切刀 REPLACE THE TRIMMERS 1.Replace the upper trimmer : 1.更換上切刀: (1)放鬆螺絲 將下刀座 向左邊推,輕 (1)Loosen the screw and move the lower 鎖螺絲 。 trimmer holder to the left. Then, tighten (2)取下螺絲 ,換上新刀片後,輕輕鎖 the screw a little. 上螺絲 。 (2)Remove the screw and put the new (3)轉動手輪使上刀移至下死點,調整上... - Page 33 圖27/Fig. 27 包 邊寬度調整 ADJUST THE HEM WIDTH 轉動皮帶輪,將上刀移至下死點。(圖 Turn the pulley to move the upper trimmer to the lower dead point. (Fig28) 2.放鬆螺絲 ,向左移動下刀座疊 2.Loosen the screw and move the lower 後,暫時輕鎖螺絲 。 trimmer holder to the left, and then 3.放鬆螺絲...
-
Page 34: Adjust The Needle Height
針高度之調 整 ADJUST THE NEEDLE HEIGHT 1.轉 動 皮 帶 輪 使 針 上 升 至 最 高 點 時 , 針 尖 1.The is the distance from the needle tip to 至 針 板 面 之 距 離 為 。(圖29) the surface of the needle plate when the 2.調... - Page 35 ( 4)調 整 適 當 壓 力 , 螺 絲 順 時 針 方 向 (4)To adjust to a proper pressure: turn the 旋 轉 時 , 壓 力 加 大 , 反 之 減 弱 。 screw clockwise will increase the pressure, whereas turn it counter clockwise will decrease the pressure.
-
Page 36: Adjust The Feed Dog
送具調整 ADJUST THE FEED DOG 1.送具高度調整 (圖32) Adjust the feed dog height(Fig 32) (1)Rotate the pulley to rise the feed dog the (1)轉動皮帶輪使送具上升至針板上最高 點。 highest point of the needle plate. (2)放鬆螺絲 ,上下移動主送具 ,使 (2)Loosen the screw , and move the main 其齒面高出針板面約0.7 ~ 0.9mm ,... -
Page 37: The Relationship Between Needle And Looper
圖33/Fig. 33 3. 輔助送布齒高度 3.Adjust the auxiliary feed dog height. 輔助送具 ,其齒面比送布齒齒面低0.3 The teeth side of the auxiliary feed dog is 0.3 ~ 0.5mm ,可放鬆螺絲 來調整。(圖 ~ 0.5mm lower than the teed dog. The height can be adjusted by loosening the screw .(Fig.34) 圖34/Fig. - Page 38 圖35/Fig.35 2.針與下勾針之關係 2.The relationship between the needle and the (1)當下勾針移至最左時,勾針尖端與針 lower looper. 中心距約3.7 ~ 3.9mm(雙針時以左針 (1) When the lower looper moves to the 為主)。(圖36) lettest point, the distance between the looper tip and the middle line of the needle should be about 3.7 ~ -3.9mm. For double needles model, the distance is from the lower looper tip to the middle line of the left needle.(Fig.36)
- Page 39 3.上勾針與下勾針之關係 3.The relationship between the upper looper 當上下勾針相交時,兩勾針盡量接近, and the lower looper. 但不可摩擦或碰撞。其間隙 點為0 5 When the upper and the lower looper cross, 點為0.2mm。(圖38) keep them as close as possible. Somehow, the loopers shall not either touch or collide to each other. The clearance point is 0.5 mm, as well as the clearance point is 0.2 mm.(Fig.38) 圖38/Fig.
-
Page 40: Adjust The Chainstitch Looper Movement Amount
(2)當針在下死點時,針與前擋針片之間 ( 2)When the needle is at the lower dead 隙為0.1 ~ 0.2mm(圖40) point, the clearance between the needle and the front needle guard is 0.1 ~ 0.2mm.(Fig.40) 圖40/Fig. 40 ADJUST THE CHAINSTITCH 環勾針運 動 量 之調整 LOOPER MOVEMENT AMOUNT 環勾針之運動呈橢圓形,當針號數變動過... -
Page 41: Filter Cleaning
圖41/Fig. 41 濾網 清 潔 FILTER CLEANING 1.將螺絲放鬆旋開,取出濾網清理乾淨 1.Loosen the screw and take out the filter for 後,再鎖緊。 cleaning 2.為延長本機器之壽命,請在每使用一段 2.To extend the machine life, please clean the 時間後卸下,清潔乾淨。(圖42) filter frequently.( Fig.42) 圖42/Fig.42 ADJUST THE ELECTRIC 電眼 感 測器調整 EYE SENSOR 1.調整電眼感測器與工作平台呈平行方... - Page 42 3.以 待 縫 製 物 測 試 , 放 入 縫 製 物 時 , 檢 3.For testing the sewing, the indicated light 測 燈 為 滅 的 狀 態 , 表 示 目 前 已 檢 測 would be extinguished after putting the 到...
- Page 43 ELECTRIC EYE AUTOMATIC 電眼自 動 感應切線系統 SENSOR 紅 色 按 鈕 為 電 眼 感 應 切 線 系 統 , 按 鈕 按 The red button is for the trimming system of 下 即 可 呈 現 自 動 切 線 裝 置 , 若 欲 取 消 電 the electric eye sensor.
- Page 44 圖45/Fig. 45 控 制 箱調整 CONTROL BOX SETTING 1.電機轉速操作設定(圖46) 1.Motor speed settings( Fig.46) 本公司出廠設定為5000rpm,調速旋鈕 The factory default setting is at 5000rpm, 逆時針旋轉至底為最低轉速200rpm,順 and the minimum speed is at 200rpm when 時針轉到最底為5000rpm。如需修正電 speed control knob is turning 機最大轉速時,需先行打開外殼並針對 counterclockwise to the end, and at 撥碼開關做設定,再調整調速旋鈕,以...
- Page 45 自動切 線 模式 Auto thread cutting mode DIP 3 上下停針 備 註 DIP 1 速度切換 DIP 2 速 度切換 DIP 4 自動/ VT Upper/Lower Remarks Speed Switch Speed Switch needle Auto/VT positioning 0 ~ 3000rpm 0 ~ 4000rpm 0 ~ 5000rpm 0 ~ 6000rpm 表4/Table4 CT/VT模式...
- Page 46 (2)控制箱調整(圖47) (2)Control Box Adjustment( Fig.47) 為LED燈,綠色燈表示控制器正常運 LED: Green color stands for the 作,紅燈表示控制器異常,若閃燈其 controller being working well and red 原因請詳閱故障檢修。 color stands for the controller being 為速度調整旋鈕,可用一字起子調整 abnormal. Please refer to the ,順時針調整縫速加快,反之變慢。 troubleshooting section if you see LED is 為前吸風針數調整旋鈕...
- Page 47 (2)CT/VT模 式( DIP 4 SETUP OFF) (2)VT /CT Mode(DIP 4 SETUP OFF): a.前 吸 風 針 數 調 整 旋 鈕 : (表 ) a. Front suction needle numbers(SW2) (Table9) 刻度Scale 針數Needle (刻 度 0 為 不 吸 風 切 線) ( 0 means no suction &...
- Page 48 另 外 , 本 產 品 提 供DC12V/40mA、 三 In addition, this product provides 組DC24V/80mA、DC24V/4.2A電 源 供 DC12V/40mA and three sets of 縫 紉 機 照 明 燈 、 電 磁 閥 及 電 磁 鐵 使 DC24V/80mA, DC24V/4.2A power for 用...
-
Page 49: Maintenance
圖48/Fig. 48 CONDITIONS OF ALL 操作者 條 件 OPERATORS 1. 熟 讀 並 了 解 使 用 說 明 書 內 容 。 1. Read and understand well the content of 2. 認 識 機 器 各 部 功 能 及 注 意 事 項 。 this instruction book. -
Page 50: Troubleshooting
定 期 保 養 項 目(表11) Periodical Maintenance Items(Table11) 保養循環 保養項目 Maintenance Cycle Maintenance Items 1. 清潔送料具上之棉 絮 1. Clean the lint on the feed dog. 2. 檢查油盤是否有足 夠 之液 態 油。 (油量在 油鏡之上、下兩紅漆記號 問) 2. Check if there has enough liquid oil inside the oil pan. (The amount should be between the red up and down paint mark of the oil level 每天... - Page 51 No. 現象 Problem 檢 查及調 整 Exam and Adjustment 針線 太過緊密 / 鬆疏 Q: 針線張力是否過大或過小? Needle thread too tight / loose A: 調整 針 線張力。 Q: The tension of the needle thread is too loose or to tight? A: Adjust the needle thread tension 針線...
- Page 52 No. 現 象 Problem 檢查及 調 整 Exam and Adjustment 右 勾針線的跳線 Q: 右勾 針 與車 針 的間隙 太大? The Skipping Stitch of the A: 右勾 針向右 退 後時,和車針的問隙必須為0.1lmm 乃 Right Looper Thread 使用正 規的右 勾 針。( 備有單 針、雙針、厚 料、薄 料用各...
- Page 53 No. 現象 Problem 檢查 及 調整 Exam and Adjustment Q: 送 布 齒的安 裝高低不對? A: 調 整 送布齒的高度為 一 ,同時保 持適 0 . smm 當的 押具壓力。 Q: Wrong assembling height of the feeding teeth? A: Adjust the height of the feeding teeth to be around 0.8 mn to 1 mm.
- Page 54 No. 現 象 Problem 檢查及 調 整 Exam and Adjustment Q: 線的 張 力調 整 不好? 注意 左 右勾 針 的線不要太鬆,要調整一支 針線時也 要注意 到有關 的線變 化。 拉 緊針 線 → 左勾針線 會鬆 → 右勾針線會緊。 拉緊左 勾針線 → 右勾針線會鬆 → 針線也 會 鬆...
- Page 55 No. 現象 Problem 檢查 及 調整 Exam and Adjustment 粗細針不能分 偏 心凸輪生誘? Cannot Separate the Thin and 清 除 阻塞部分使 油通到凸輪上。 Thick Thread Q: The eccentric is rusty? A: Clean the stuck part so the the oil can reach the cam.
- Page 56 No. 現 象 Problem 檢查及 調 整 Exam and Adjustment Q: 上下 刀 位置 不 對? 調整 上 刀下 刀 角度。 Q: Incoorect position of the upper and the lower knife? A: Adjust the angles of the upper and the lower knife. Q: 布板...
- Page 57 紅燈閃燈 次數 說明 故障排除 Red LED DESCRIPTION TROUBLESHOOTING Blinking 溫度感測元 件發生 故障時 , 步驟1: 關閉電源 後,再重新開啟電源。 MCU會 偵測出不 符合規 格之溫 Step1:Turn off the power,and turn on the 度, 此時MCU則判定 為感測 元 件 power again. 異 常,Motor 不 再啟動 。 步驟2: 故 障無法排除, 請更換 控制基板。 Awhen temperature sensor fails, Step2:If faults cannot be solved, please MCU will detect that the...
- Page 58 紅燈閃 燈 次數 說明 故障排除 Red LED DESCRIPTION TROUBLESHOOTING Blinking 異常 電磁鐵 24V 步驟1:檢查電磁 閥是否 故障(機構 部分) 。 (電磁鐵 電壓小於 判 12VDC Step1:Check whether the solenoid is 定異常) malfunctioned (mechanical part) 24V solenoid abnormal (When 步驟2: 關 閉電源後,再重新 開啟電 源。 24V solenoid voltage is Step2:Turn off the power,and turn on the below12VDC, it’s determined...
- Page 59 桌板圖 TABLE CUT-OUT 圖49/Fig. 49 -53-...
- Page 60 圖50/Fig. 50 -54-...
- Page 61 桌板圖 TABLE CUT-OUT 圖51/Fig. 51 -55-...
- Page 62 圖52/Fig. 52 -56-...
- Page 63 -57-...
- Page 64 700Q/988Q 700Q/988Q.SEP.2012...
Need help?
Do you have a question about the 700Q and is the answer not in the manual?
Questions and answers