Table of Contents
Advertisement
Quick Links
Advertisement
Table of Contents

Subscribe to Our Youtube Channel
Related Manuals for Siruba 700LQ


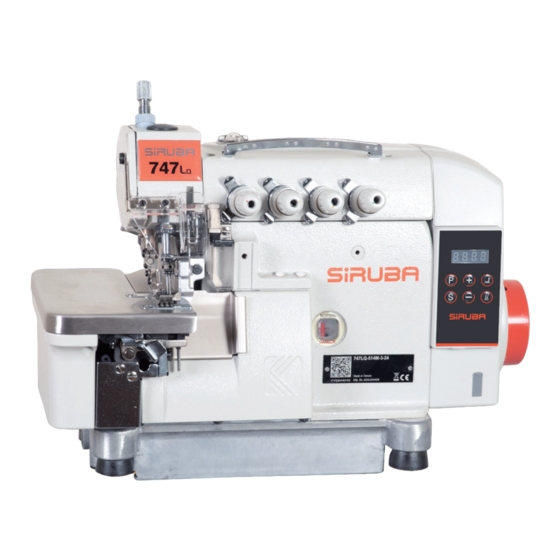
Summary of Contents for Siruba 700LQ
- Page 1 使用說明書與零件圖 INSTRUCTIONS BOOK & PARTS LIST 700LQ...
- Page 3 溫馨提醒 請儘快下載 SIRUBA APP,並將您的機器註冊,以便獲得原廠的保固。APP 還 提供多項有用的資訊。 Apple Store Google Play 安全警示 有關於縫紉機,自動化機構,以及其他輔助設備(以下統稱為機器),在工作中無可避免會接近機器移動區域,也就 有伴隨著潛在風險。因此,我們強烈要求操作者,維修技師一定要先仔細閱讀並瞭解本操作手冊的內容。 安全指示係包含了某些未載於規格書上的加裝配件。 現場管理者有責任要求所有操作者要閱讀並瞭解機器的操作與注意事項。 未能確實遵守本手冊所記載的事項,將可能導致機器的損害,或是人員的傷亡。 警告標示說明 高壓電危險 在機器關機後十分鐘內, 零部件移動區 勿開啟電控箱。 勿接近 , 以避免人員受傷。 CAUTION 零部件高速移動區 機械作動部份請注意裝上 保護裝置 穿線、換線、調整、清潔 時請注意關閉電源. Moving parts may cause in jury. Operate with safety devices.
- Page 4 安全須知 危險 意外事件將會導致人員受傷甚至死亡,也會造成財產的損害。 當有必要進行電控系統的檢修時,務必要關閉電源,並等候至少5分鐘以上才能打開電控箱/操作箱,以避免電擊。 注意 1. 基本預防 (1) 在操作前務必先閱讀操作手冊與其他機器電件的說明書,請妥善保存操作手冊與說明書以便隨時查閱。 (2) 這些注意措施包含了機器上加裝,但未列在規格書上的項目。 (3) 務必要戴護目鏡與手套,以避免破損零件所帶來的傷害。 (4) 有裝戴心臟調節器的人員,請先詢問醫護人員有關注意事項。. 2. 安全裝置與警告標示 (1) 操作前要檢查 , 並確認所有的安全設施有妥善安裝且運作正常。 (2) 若安全設施因維修需要有移動,在機器重新啟動操作前,請確認安全設施有重新安裝回原位,並且運作正常。 (3) 機器上的安全警告標示要保持完整與可辨視。如果有污損或遺失,請儘以更新。 (4) 未能確實遵守安全規範,將會導致人員受傷,甚至影響生命安全。 3. 應用與修改 (1) 嚴格禁止機器使用在非原始設計用途。也禁止以任何不是操作手冊上記載的方式來操作機器 . (2) 嚴格禁止修改機器。任何未經原廠許可的變動將不在保固範圍內。 (3) 機台一經修改變動,本公司將不擔負財務損失,人員傷亡的責任。 4. 教育與訓練 (1) 工廠主管人員有義務提供機台使用人(操作者/維修者)相關的教育訓練。良好的教育訓練不僅可以避免造成 人員傷害,也可以避免財產的損失。...
- Page 5 在不同階段的注意事項 1. 運輸 (1) 當搬運或移動機器時,請考量機器重量,選擇安全合適的方式。請參考機器規格。 (2) 採取足夠的安全防護,以避免機台在搬運或移動中掉落。 (3) 為避免意外,運送時不要重覆使用包裝材料。 2. 拆箱 (1) 在拆箱前,檢查機器是否平穩放置,並採用適當的工具維持拆箱過程的穩定。 (2) 進行拆箱時,遵循外箱上的指示,小心外箱上的釘子或碎片。 3. 安裝 : 3A. 桌板與腳架 (1) 採用原廠的桌板以確保機器得到足夠的保護與支撐。如果在安裝或維修時,需要暫時將機器置放於物件上,請 確定該物件有足夠的支撐力。 (2) 如果桌板有裝置滾輪,滾輪需要有煞車鎖定機構,而且在操作與維修時,煞車機構必需鎖定。 3B. 電線與管路 (1) 電線與管路的材質必需符合規範與需求。. (2) 電線與管路不能夠有折彎或壓迫。移動的零配件上,電線與管路需有至少 30mm 以上的預留量 . (3) 接線時不能有跳火。 (4) 所有接頭都必需要確實固定。當拆除時,務必要抓住接頭本體。 3C. 接地 (1) 接地是必需的。且需由合格的技師來施工。...
- Page 6 5. 在操作中 (1) 注意手,頭髮,布料不在機件移動範圍。不要將個人物品置放於機器上。 (2) 機器會高速運作。保持雙手遠離移動機件範圍。機器完全停止前不要靠近。 (3) 在移動物件或重新設定機器時,注意不要被機器或零件撞擊。 (4) 避免突然起動造成意外,在檢查或維修馬達或皮帶時,務必關閉電源並確認機器完全停止。 (5) 機器停止時,伺服馬達是無聲的。注意要關閉電源以免突然起動。 (6) 永遠保持電控箱的風扇與氣道淨空。 6. 潤滑 (1) 請依照說明書指示,選用合格的油脂來潤滑機件。 (2) 如果油品接觸到眼睛或身體,立即以清水沖洗。如有不適,立即尋求醫護人員協助。 (3) 如果油品不慎進入身體,立即尋求最近的醫療協助。 7. 維修保養 (1) 只有合格的技師或工程師能夠進行維修服務,包含機器調整與修理。只採用原廠的零件進行更換。如果採用非 原廠零件,或是因不當維修/調整所造成的傷害,本公司將不負任何責任。 (2) 只有合格的技師或認證的工程師才能對電控系統進行維修或保養。 (3) 當對氣動原件(如氣缸)進行維修保養時,務必先拔除風源,並將氣體完全洩除,以避免突然啟動。 (4) 在調整或更換部件後,檢查所有螺絲是否銷固。 (5) 定期清潔是必需的。在清潔前務必先關閉電源,並確認機台完全停止。 (6) 如果運作異常或不良,立即停止操作並關閉電源。聯絡授權經銷商或我們公司以尋求技術協助。 (7) 當保險絲故障,立即關閉電源,找出故障原因並予以排除後,更換同規格的新的保險絲。 (8) 定期檢查與清潔風道,電線與管路。 8.
-
Page 7: General Safety Instruction
A WARM REMINDER please register your Siruba machine online or through Siruba App at once, as to gain the full warranty protection. You may also acquire more useful information through Siruba APP . Apple Store Google Play GENERAL SAFETY INSTRUCTION For the sewing machine, automatic mechanic system, and auxiliary devices (hereinafter referred as “machine"), it is... -
Page 8: Safety Precautions
SAFETY PRECAUTIONS Danger An accident means " to cause personal injury or death, or damage to property. " When it is necessary to perform service on electrical parts, be sure to turn the power off and wait for 5 minutes or more before opening the power cabinet/box in order to avoid electrical shock. - Page 9 6. Remove the power plug by holding the plug section instead of the cord to avoid electrical shock, leakage, or fire accident. 7. Turn off the power whenever the machine is left unattended between works. 8. In case of a power failure or black out, turn off the power to avoid damage or accident. PRECAUTIONS TO BE TAKEN IN VARIOUS OPERATION STAGES 1.
- Page 10 (3) Make sure all the stand casters are locked or fixed in position. (4) Keep the working area clean from obstacles. 5. During Operation (1) Always keep your fingers, hair, or clothing away from the moving components and moving area. Do not place your personal belongings on the machine.
- Page 11 頁 /PAGE INDEX 索引 MAINTENANCE 保養 WARNING TAG 警告標籤 SAFETY ILLUSTRATION OF THE NEEDLE GUARD 護針安全圖說 MOVING THE SEWING MACHINE 搬運縫紉機 THE INSTALLATION POSITION OF THE SEWING MACHINE 縫紉機的安裝位置 SPECIFICATIONS 規格 NAMES OF MAJOR PARTS 各部件名稱 INSTALLATION 安裝 LIGHTENING EQUIPMENT 照明設備...
- Page 12 INDEX 索引 THE RELATIONSHIP BETWEEN NEEDLE AND LOOPER 針與勾針之關係 ADJUST THE CHAINSTITCH LOOPER MOVEMENT AMOUNT 環勾針運動之調整 TABLE CUT-OUT 桌板圖 PARTS LIST 零件圖 MODEL 700LQ Net Weight(Kg) Noise Level, dB(A) 82dB(A) Serial No. Vibration (m/sec2) Length Width Height Dimension 35cm 22cm...
-
Page 13: Maintenance
MAINTENANCE 保養 xiii... -
Page 14: Warning Tag
注意 機 械 保 護 穿 線 時 請 Movin WARNING TAG 警告標籤 Opera Turn threa needi 1. 縫紉機上有警告標籤 ( 圖 1)。 1. The following warning tags will be attached 2. 當使用縫紉機時,請遵守標籤上的說明。 on the sewing machine.(Fig. 1) 2. When using the sewing machine,please 如果標籤脫落或模糊不清,請和購買商店聯... -
Page 15: Safety Illustration Of The Needle Guard
SAFETY ILLUSTRATION OF 護針安全圖說 THE NEEDLE GUARD • 本縫紉機之押具防護裝置如圖所示,為保護 • The presser foot protection device is as shown as the fugure 3. 操作者之操作安全,嚴禁將此裝置拆卸。 ( 圖 3) For safety of all operators,this device is restriced to disassemble.(Fig.3) 圖 3 / Fig. 3 MOVING THE SEWING MACHINE 搬運縫紉機... -
Page 16: The Installation Position Of The Sewing Machine
THE INSTALLATION POSITION 縫紉機的安裝位置 OF THE SEWING MACHINE 1. 勿將該縫紉機置於設備附近,如電視機、收 1. Please do not install the sewing machine near the equipments,such as Television, 音機或無線電話等,否則這些設備可能會對 縫紉機的電子干擾所影響。( 圖 5) Radio,or Wireless Telephone.Or these equipments will experience electronic interference.(Fig.5) 2. 應將縫紉機直接插入 AC 電源插座,如果使 2. -
Page 17: Specifications
SPECIFICATIONS 規格 1. 型號分類表示 : 1.Description: 514 M 3 2 4 (6) (7) (1) 表示線數分 737、747、757、767 (1)Thread numbers / Four types: (2) 機種別 737、747、757、767 (3) 縫合方式 ( 圖表 1) (2)Machine type (3)Sewing type(Chart1) 型式 Type 圖形 Pattern 圖表 1 / Chart1 (4) 車縫布料... - Page 18 2. 規格說明 ( 表 1) 2. Specification(Tab.1) 機型 Model 700LQ 最高縫速 Max Stitch Speed 7000rpm / 7000rpm 噪音值 Noise Level 82 分貝以下 under 82 dB 縫距 Stitch Length 4 / 5 / 6 mm 針棒行程 Stroke of the needle bar 標準行程...
-
Page 19: Names Of Major Parts
NAMES OF MAJOR PARTS 各部件名稱 ③ ④ ① ⑤ ② 圖 6 / Fig. 6 (1) 押具扳手 ( 圖 6) (1)Lifting lever (Fig. 6) (2) 押具 (2)Presser foot (3) 線架 (3)Thread stand (4) 油窗 (4)Oil gauge window (5) 電控箱 (5)Electric control box... -
Page 20: Installation
INSTALLATION 安裝 1. 縫紉機拆箱搬運過程中,不可扶持布板蓋 1. While moving the sewing machine, please do not hold the below side of the cloth ①。( 圖 7) cover ① .(Fig. 7) 圖 7 / Fig. 7... - Page 21 2. 依本機所附桌板裁製圖及零件組合圖所列之 2. Please refer to the attached table cut-out 配件,依序安裝防震機座鋁板①。 ( 圖 8) diagram and the parts list to assemble the anti-chock machine aluminum plate ① in order. (Fig.8) ① 圖 8 / Fig. 8 3. 裝置導布屑及線架。( 圖 9) 3.
-
Page 22: Lightening Equipment
4. 在桌板上完成踏板傳感器的安裝後,將縫紉 4.After the completion of installation of the 機機頭放在桌板上。。( 圖 10) pedal sensor on the table, place the sewing machine head on the table. (Fig.10) 本體與桌板不得干涉 The machine cannot touch the table. 圖 10 / Fig. 10 LIGHTENING EQUIPMENT 照明設備... -
Page 23: How To Operate The New Machine
HOW TO OPERATE THE 新機器使用規定 NEW MACHINE 1. 新機器在最初啟用磨合期的四個星期 1. Please operate this machine in 80% of the 內,請用低於最高速度 20% 的速度運 maximum speed in the first four weeks for engagement. After four weeks, please do not 轉,之後換上新潤滑油,才運轉至最高 operate under the maximum speed until replacing 速度。... - Page 24 2. 潤滑油之更換 ( 圖 13) 2.Drainage and refill the oil :(Fig. 13 ) (1) 將螺絲Ⓑ放鬆旋開,使油槽內的油完全排出 (1)Loosen the screw Ⓑ and drain all the oil inside the oil tank. Then, tighten the screw 後再將螺絲Ⓑ鎖緊。 Ⓑ again. (2) 為延長本機器之壽命,請於開始使用後四個 (2)In order to extend the term of usage, please replace the oil after the first four week, and 星期更換新油,爾後約每四個月更換一次。...
-
Page 25: Threading The Machine
THREADING THE MACHINE 穿線方式 • 請確實按照圖示穿線,錯誤之穿線將引起斷 • Follow the procedures for threading. Wrong threading may cause thread breaking, stitch 線、跳針或車縫不平…‥等現象。 skipping, puckering or unexpected sewing. 1.737 用穿線圖 ( 圖 15) 1. For three thread only 737(Fig. 15) 圖 15 / Fig. 15 2.747 用穿線圖... -
Page 26: Adjust Thread Tension
3.767 用穿線圖 ( 圖 18) 3. For five thread only 757(Fig. 18) 圖 18 / Fig. 18 ADJUST THREAD TENSION 控線調整 The thread tension should be adjusted 線張力必須根據縫合布料種類,布料厚薄,線 properly according to the kinds and the 及包邊寬度等之差異而做不同的調整。順時針 thickness of the materials, stitch length, 旋轉張力控制螺帽,縫線張力加大,反之減弱。... - Page 27 弱 Weak 強 Sreong 圖 19 / Fig. 19 2. 針線控線關係 ( 圖 20 ) 2.Needle thread control. (Fig. 20) (1) 縫合方式 504、512、514 時,將過線組件 (1)When the sewing type is set to 504, 512 ⑥ 移至最下端,縫合方式 516 時,則將過 or 514 , move the threading part ⑥ to the lowest part.
- Page 28 3. 勾針控線關係 ( 圖 21) 3.Looper thread control.( Fig. 21) (1) 若縫合方式 504,上勾針移至最低時,將 (1) When the sewing type is 504 and the upper ⑨ 及 ⑩ 調至 + 位置。 looper is on the lowest point, adjust ⑨ and (2) 固定線導板 如下...
-
Page 29: Replace The Needle
REPLACE THE NEEDLE 換針方式 1. 使用 DCX27 或同規格之針。 1.Please use the needle DCX27 or the equivalents. 2. 旋開螺絲 ① 並取下針。 3. 將新針插至針孔最底端,並使針之溝面向自 2.Loosen the screw ① and take off the needle. 己,固定螺絲 ①。( 圖 23) 3.Insert the new needle till reaching the end, as well as the long groove faces your side. -
Page 30: Adjust The Differential Feed Ratio
ADJUST THE DIFFERENTIAL 差動比調整 FEED RATIO If the stroke of the main feed dog is larger 若主送具之運動行程大於差動送具運動行程 than the stroke of the differential feed dog, 時,布料車縫時會伸張,反之則會收縮。 1. 調整方法一: the fabric will be extended while sewing. Otherwise, it will be shrunk. 為放鬆調整鈕... -
Page 31: Replace The Trimmers
REPLACE THE TRIMMERS 更換切刀 1. 更換上切刀 1.Replace the upper trimmer: (1) 放鬆螺絲①將下刀座②向左邊推,輕鎖螺絲 (1)Loosen the screw ① and move the lower trimmer holder ② to the left. Then, tighten ① 。 (2) 取下螺絲③換上新刀片後,輕輕鎖緊螺絲③ the screw ① a little. (2)Remove the screw ③ and put the new 。... -
Page 32: Adjust The Hem Width
ADJUST THE HEM WIDTH 包邊寬度調整 1. Turn the pulley to move the upper trimmer to 1. 轉動手輪,將上刀移至下死點。( 圖 28) the lower dead point. (Fig.28) 2. 放鬆螺絲①,向左移動下刀座疊②後,暫時 2. Loosen the screw ①and move the lower 輕鎖螺絲①。 trimmer holder ② to the left, and then 3. -
Page 33: Adjust The Needle Height
ADJUST THE NEEDLE HEIGHT 針高度之調整 1. 轉動手輪使針上昇至最高點時,針尖至針板 1.The (a) is the distance from the needle tip ① 面之距離為 (a)。( 圖 29) to the surface of the needle plate when the 2. 調整 : needle is rised to the highest point after (1) 打開上蓋①。... - Page 34 強 Sreong 弱 Weak 圖 30 / Fig. 30 2. 押具提升量調整 2. Adjust the lift amount of the presser foot. (1) 轉動手輪使送具降至針板下,押具底平貼針 (1)Rotate the pulley to move the feed dog downward until the feed dog is under the 板。 (2) 放鬆螺帽④,壓下拉桿⑥使押具上昇至適當 needle plate, as well as the bottom of the 位置約...
-
Page 35: Adjust The Feed Dog
ADJUST THE FEED DOG 送具調整 1. 送具高度調整 1.Adjust the feed dog height. (1) 轉動手輪使送具上升至針板上最高點。 (1)Rotate the pulley to rise the feed dog the (2) 放鬆螺絲①,上下移動主送具②,使其齒面 highest point of the needle plate. 高出針板面約 0.9~1.1mm,鎖緊螺絲①。 (2)Loosen the screw ① , and move the main (3) 放鬆螺絲③,上下移動差動送具④,使其齒... - Page 36 2. 送具水平調整 2. Adjust the feed dog horizontally. (1) 送具齒的齒面在運轉的循環中,必須保持針 (1)During operation, the teeth side of the feed dog should keep parallel with the surface of 板面成水平。 (2) 調整時放鬆螺絲⑤,旋轉後支軸 ⑥,齒面 the needle plate. 呈水平後固定螺絲⑤。( 圖 33) (2)For adjustment, loosen the screw ⑤ , and rotate the rear support shaft ⑥.
-
Page 37: The Relationship Between Needle And Looper
THE RELATIONSHIP BETWEEN 針與勾針之關係 NEEDLE AND LOOPER 1. 針與上勾針之關係 1.The relationship between the needle and the When the upper looper moves to the leftest 當上勾針移至最左時,勾針尖端與針中心距 約 4.4 ~ 4.7mm ,雙針時其左針中心與勾 point, the distance from the looper tip to the 針尖端距約 5.4~5.7mm 。( 圖 35) middle line of the needle is 4.4 ~ 4.7mm. - Page 38 (2) 當下勾針向右移至針中心時 ( 雙針以左針 (2)The relationship between the needle and 為主 ) 針與勾針之間隙為 0~0.05mm。 the middle line of the needle (use the left ( 圖 37) needle as standard when it's double needle model), the clearance between them should be 0 ~ 0.05mm.( Fig.37) 0~0.05mm 圖...
-
Page 39: Adjust The Chainstitch Looper Movement Amount
5. 針與檔針片之關係 5.The relationship between the needle and the (1) 當下勾針由左向右至針中心時 ( 雙針以左針 needle guard. 為主 ) 針與後檔針片之間隙為 0~0.05mm。 (1)When the lower looper moves from left to (2) 當針在下死點時針與前檔針片之間隙為 right to the central line of the needle (when 0.1~0.2mm。( 圖 40) it's double needle model, it means the left needle), the clearance from the needle to the rear needle guard is 0 ~ 0.05 mm. - Page 63 由於對產品的改良及更新 , 本產品使用說明書中與零件圖之產品及外觀的修改恕不事先通知 ! The specification and/or appearances of the equipment described in this instruction book & parts list are subject to change because of modification which will without previous notice. KZ08LQ.FEB.2022...
Need help?
Do you have a question about the 700LQ and is the answer not in the manual?
Questions and answers