Table of Contents
Advertisement
Quick Links
Advertisement
Table of Contents

Related Manuals for Siruba 700L-BKF1


Summary of Contents for Siruba 700L-BKF1
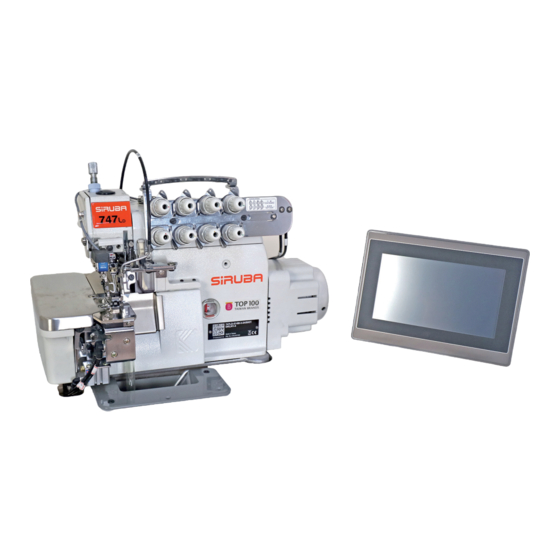
- Page 1 ORIGINAL 使用說明書與零件圖 INSTRUCTION BOOK & PARTS LIST 700L-BKF1...
- Page 2 溫馨提醒 A WARM REMINDER 請儘快下載 SIRUBA APP,並將您的機器註冊,以便獲得原廠的保固。APP 還提供多項有用 的資訊。 please register your Siruba machine online or through Siruba App at once, as to gain the full Apple Store Google Play warranty protection. You may also acquire more useful information through Siruba APP .
-
Page 3: Safety Precautions
SAFETY PRECAUTIONS 安全須知 Danger 危險 An accident means " to cause personal injury or death, or damage 意外事件將會導致人員受傷甚至死亡,也會造成財產的損害。 to property. " 當有必要進行電控系統的檢修時,務必要關閉電源,並等候至少 When it is necessary to perform service on electrical parts, be sure to 5分鐘以上才能打開電控箱/操作箱,以避免電擊。 turn the power off and wait for 5 minutes or more before opening the power cabinet/box in order to avoid electrical shock. - Page 4 PRECAUTIONS TO BE TAKEN IN 在不同階段的注意事項 VARIOUS OPERATION STAGES 1. 運輸 1. Transportation (1) When lift or move the machine, please take the machine (1) 當搬運或移動機器時,請考量機器重量,選擇安全合適的 weight into consideration and apply a safe manner. 方式。請參考機器規格。 Refer to the specification for the information you need for (2) 採取足夠的安全防護,以避免機台在搬運或移動中掉落。...
- Page 5 (1) 注意手,頭髮,衣服不在機件移動範圍。不要將個人物品 (2) The machine is designed to run at high speed. Always keep your hands away from the moving area. Do not resume the 置放於機器上。 work cycle until the machine stops completely. (2) 機器會高速運作。保持雙手遠離移動機件範圍。機器完全 (3) Be careful not to be caught by the machine or components 停止前不要靠近。...
- Page 6 索引 INDEX 頁 PAGE NAMES OF MAJOR PARTS 各部件名稱 INSTALLATION AND ADJUSTMENT 安裝與調整 SEWING SCREEN 縫製畫面 PROGRAMMING SCREEN 編程畫面 PARAMETER SETTING SCREEN 參數設定畫面 LOGIN USER SCREEN 登入使用者畫面 ELASTIC ADJUSTMENT SCREEN 鬆線緊度調整畫面 SOLENOID VALVE TEST SCREEN 裝置測試畫面 SYSTEM SETTING SCREEN 系統設定畫面 HISTORICAL ALARM 警報歷史畫面...
-
Page 7: Names Of Major Parts
NAMES OF MAJOR PARTS 各部件名稱 ⑤ ③ ④ ② ① ① Operation Box ①控制箱 ② Operation Padel ②操作盒 ③ Machine ③機體 ④ Dust collecting suction device ④吸風集塵裝置 ⑤ Thread Frame ⑤線架... -
Page 8: Installation And Adjustment
INSTALLATION AND ADJUSTMENT 安裝與調整 (1) 馬达的安装 : 請参閱各車头製造厂之說明书。 Motor installation: Please refer to the machine head ’ s instruction. (2) 控制箱的安装 : Control Box Installation: a).桌板右侧面須預留 100 mm以上空間 b).将控制箱鎖装於桌板下方 c).安装後示意图 Leave 100 mmspace at right Mounting under the working table Installation layout 尺寸图... - Page 9 調整需求 調整結果 Term of adjustment Adjustment result 當彈簧 A 愈向右側勾時,表示力量愈重。 Spring A move to right = force increased. 踏板前踏力量的調整 Toeing forward force adjustment 當彈簧 A 愈向左側勾時,表示力量愈輕。 Spring A move to left = force decreased. 當螺栓 B 愈向上 時,則後踏力量愈輕。 踏板後踏力量的調整 Bolt B turn = force decreased.
-
Page 10: Sewing Screen
SEWING SCREEN 縫製畫面 ⑤縫製 ⑥步驟 ⑦模式 ⑧型式 ⑭感應器 ⑬線 ① ⑫測試 ② ⑪功能 ③ ⑩強度 ⑨型式 ④ Shift upward ① 螢幕光棒上移鍵 ① Description: To go to the previous step 說明:每按一次上移鍵,光棒則返回上一 when press shift upward key. 階。 注意 ! CAUTION! 按此鍵,縫製模式由 Step 02 (B) 返回 Step If the sewing mode returns to Step 01 (P) from 01 ( P) 或者由... - Page 11 Shift downward ② 螢幕光棒下移鍵 ② Description: To go to the next step when 說明:每按一次下移鍵,光棒則往下一階。 press shift downward key. 回到縫製模式 Step 01 ③ Return to the first step ③ 說明:按此鍵後會回到縫製模式 Step 01。 Description: Press key to return to the first step (sewing mode). 注意...
- Page 12 Strength key ⑩ 鬆線緊度調整鍵 ⑩ Description: to adjust the sewing performance after 說明:按此鍵會切換到鬆線緊度調 replacing the needle or threading the machine. 整畫面。 Function key 參數設定鍵 ⑪ ⑪ Description: press this key, it will switch to the 說明:按此鍵會切換到參數設定畫 parameter setting mode. 面。 Device test key 輸出裝置測試鍵...
-
Page 13: Programming Screen
PROGRAMMING SCREEN 編程畫面 ②縫製 ③步驟 ④模式 SC 開始計數 SC 結束計數 ① 線鏈返回計數 夾具 長度 ⑨ ⑧ ⑦ ⑥ ⑤ Return key ① 返回鍵 ① Description: back to the sewing screen. 說明:返回到縫製畫面。 Prog Prog Progrrams ② 縫製工程 ② 說明:縫製工程,共 A~Z 26 個工程。 Description: the sewing programs, a total of 26 types. - Page 14 Parameter select key ⑥ 參數選擇鍵 ⑥ Description: to select parameters. 說明:選擇參數用。 Sewing mode select key ⑦ 縫製模式選擇鍵 ⑦ 說明:進入縫製模式選擇畫面 , 縫製模式 Description: Enter sewing mode select screen, sewing mode select screen shown 選擇畫面如下圖所示: below: 車縫 Sewing 取消 :Plain seaming :基本縫 :包線頭...
-
Page 15: Parameter Setting Screen
PARAMETER SETTING SCREEN 參數設定畫面 ⑤ No. ⑥ Description ⑦ Value ①功能 PL 模式 Function PL 時間 ② SC 開始計數 ③ SC 開始 SC 結束計數 ④ ① Return key ① 返回鍵 Description: back to the sewing screen. 說明:返回到縫製畫面。 Parameter select key ②... - Page 16 設定 Bc,Pc,Rc.Sc 啟縫時從空線環變為基本縫 的針數 . SC Start In each mode of Bc, Pc, Rc, and Sc, set the stitch at which 獨 (Condensed) 0~99 the thread chain mode is changed to the plain seaming exclusive SC 開始 ( 密縫 ) mode at the start of sewing.
- Page 17 對於設置動作 , 可選擇由"設置開關"、"腳踏 板"或" 設置開關 & 腳踏板"進行設置 Set Up SW / Pedal SW: To perform a SET UP operation by “THREAD"key 共 Selection / SW&Pedal Pedal: To perform a SET UP operation by pedal sharable 設置選擇 SW&Pedal: To perform a SET UP operation by “THREAD"key or pedal H&P: 啟用一般踏板和立作業踏板...
-
Page 18: Login User Screen
LOGIN USER SCREEN 登入使用者畫面 登入 登出 變更密碼 目前使用者:操作人員 Current user: Operator 目前使用者:維修人員 Current user: Maintenance staff Login:登入 ( 輸入密碼 ) ,預設密碼:0168 Logout:登出 Change Password:變更 密碼 Login: Login (enter password), default password: 0168 User:開機預設 Operator ( 操作人員 ),登入後可 切換至 Mechanic( 維修人 員... - Page 19 ELASTIC ADJUSTMENT SCREEN 鬆線緊度調整畫面 ② ④ ③ ① ⑤ ⑥ Return key ① 返回鍵 ① Description: back to the sewing screen. 說明:返回到縫製畫面。 To activate top row elastic device ② 上排鬆緊裝置動作 ② Description: press this key, activate top row 說明:按此鍵時,上排鬆緊裝置動作, elastic device, can be use as thread tension 可做線張力調整用。...
- Page 20 SOLENOID VALVE TEST SCREEN 裝置測試畫面 ⑧壓腳裝置 ⑩鬆線裝置 Presser foot lift Thread releaser actuator ①側吹掃線頭裝置 Trailing thread chain blower ④前下吹線頭裝置 Leading thead chain blower ⑦夾線頭裝置 Trailing thread chain blower ⑨拉線頭裝置 ③前吸線頭裝置 Thread chain Suction for holding clamp(left) thread chain under needle olate ⑤前吹布屑裝置...
- Page 21 Return key 返回鍵 說明:返回到縫製畫面。 Description: back to the sewing screen. Trailing thread chain blower ① ① 側吹掃線頭裝置 Description: check trailing thread chain 說明:側吹線頭裝置測試鍵。 blower function. Chain cutter rear suction ② ② 後吸風切線裝置 Description: check chain cutter suction 說明:後吸線頭裝置測試鍵。 function. ③ 前吸線頭裝置...
-
Page 22: System Setting Screen
SYSTEM SETTING SCREEN 系統設定畫面 變更語言 自動測試模式 人機系統設定 ( 開發測試用 ) ( 更新人機用 ) 返回前一頁 Return key 警報歷史,顯示近 期發生的錯誤代碼 Showing recent error codes 當前人機版本 Current HMI version 當前控制箱版本 Current control box version HISTORICAL ALARM 警報歷史畫面 返回前一頁 Return key 顯示近期發生警報 錯誤資料 Displays recent alarm error data 清除報警紀錄... - Page 23 LANGUAGE SETTING SCREEN 語言設定畫面 當前語言:英文 Current language: English HMI update method: 人機更新方式: ① 將人機更新檔案存入 USB 隨身碟。 ① Save the HMI update file to a USB flash drive. ② 點選 Setting → Bios 進入人機系統 Bios。 ② Click Setting → Bios to enter the human- machine system Bios.
- Page 24 WIRING GRAM 接管圖 ⑩...
- Page 25 TIP CODE LIST AND ERROR CODE LIST 提示代碼和錯誤代碼 操作盒用 : / For operation box: 提示代碼 顯示訊息 說明 Tip Code Message Comment 馬達過電流,請關閉電源,並聯絡維修人員。 E.01 Motor over current Motor overcurrent, please turn off the power and contact maintenance personnel. 馬達過電流,請關閉電源,並聯絡維修人員。 E.02 Motor over load Motor overcurrent, please turn off the power and contact maintenance personnel.
- Page 38 由於對產品的改良及更新 , 本產品使用說明書中與零件圖之產品及外觀的修改恕不事先通知 ! The specification and/or appearances of the equipment described in this instruction book & parts list are subject to change because of modification which will without previous notice. BKF156.SEP .2022...