Table of Contents
Advertisement
Quick Links
Advertisement
Table of Contents

Subscribe to Our Youtube Channel
Related Manuals for Ikegami HQLM-1720WR


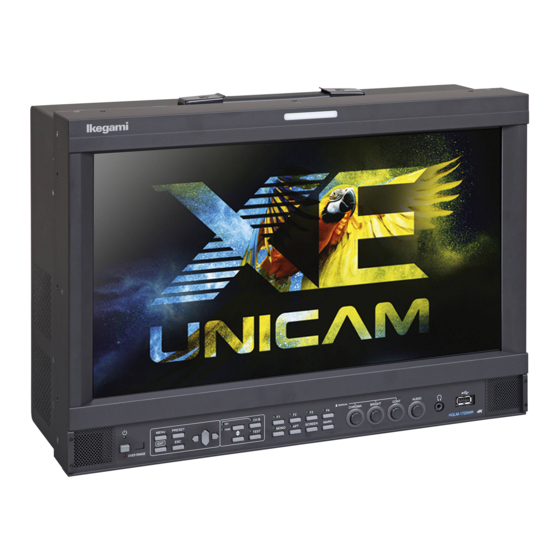
Summary of Contents for Ikegami HQLM-1720WR
- Page 1 MODEL HQLM-1720WR OPERATION MANUAL...
- Page 3 2014/35/EU for Low voltage (Safety) 2011/65/EU for RoHS directive Standards : HQLM-1720WR: EN55032(Class A), EN55103-2-E4, EN60950-1 WARNING: TO REDUCE THE RISK OF ELECTRIC SHOCK, DO NOT EXPOSE THIS EQUIPMENT TO RAIN OR WATER. Disposal of used Electric and Electronic Equipment...
-
Page 4: Important Safety Instructions
IMPORTANT SAFETY INSTRUCTIONS 5) For added protection for this television 1. General equipment during a lightning storm, or when it is 1) Read all instructions provided. left unattended and unused for long periods of 2) Save these instructions for future use. time, unplug it from the wall outlet. - Page 5 IMPORTANT SAFETY INSTRUCTIONS 4) Avoid operating or placing (keeping) in a hot 3) Upon completion of any service or repairs to this (+40 or over) or cold (less than 0 ), high monitor, ask the service technician to perform vibration, or dusty place. Avoid operating or routine safety checks to determine that the storing in a place exposed to direct sunlight.
-
Page 6: Precautions For Operation
In Be sure to operate the color monitor within the such cases, contact the Ikegami service desk. voltage range marked on its back. 9) Should this unit fail within one year after 4) If cabinet or screen is dirty, wipe with soft cloth. -
Page 7: Precautions Upon Use
Precautions Upon Use In order to use the monitor safely, read through this manual and pay attention to the following points in particular. 1. Do not use any power supply other than the specified one (AC). 2. Do not give a shock to the monitor. Be very careful to keep the monitor from shocks because glass is used inside the LCD. - Page 8 in the non-HDR operations; to turn off the power supply of the main body while not using the panel. (After-images may be gradually resolved by changing the screen display.) 8. Avoid operation at low temperatures. The response speed of the liquid crystal decreases as the temperature decreases. Therefore, it is recommended to use the monitor at room temperature.
- Page 9 The brightness of the backlight may be reduced in order to keep the internal temperature of the motor from rising. If the message "FAN ERROR!" is displayed, contact your dealer or Ikegami service desk. Warranty If the product should fail within one year from the date of delivery in spite of the proper use, the manufacturer will repair the product free of charge.
-
Page 10: Table Of Contents
HQLM-1720WR CONTENTS IMPORTANT SAFETY INSTRUCTIONS ......ii PRECAUTIONS FOR OPERATION ........iv Cautions for Rack-Mount..........iv Precautions Upon Use ............v 5. Preset Menu Function ........... 49 1. Outline ..............1 ..........49 List of preset menu ............... 1 1-1. -
Page 11: Outline
HQLM-1720WR HQLM-1720WR 17-inch 4K/HD Multi Format LCD Monitor 1 Outline 1-1 Outline nectors for 3G-SDI. In addition, two input con- This monitor adopts a 17-inch 4K UHD LCD nectors and two output connectors of 12G-SDI and two input connectors and two output con- panel. - Page 12 HQLM-1720WR adjustment tasks can be performed by the moni- (9) MENU/UP/DOWN/LEFT/RIGHT SW When tor itself. MENU SW UP/DOWN/LEFT/RIGHT SW are used, calling of the menu and operation of various settings has been improved. (14) Time code display function It is possible to display the time code...
- Page 13 HQLM-1720WR (18) USB mouse control (23) Switching between HDR and color space by By connecting a commercially available USB payload mouse to the USB terminal of this monitor, it is By the payload compatible with ITU-R BT.2077 possible to perform various adjustments including and ITU-R BT.1120-9, switching of HDR and...
-
Page 14: Names Of Parts And Their Functions
HQLM-1720WR 2 Names of parts and their Functions 2-1 Front Control Panel POWER switch INPUT SELECT switch This switch is used to turn ON/OFF the monitor. Use the switches to change input * This switch will not fully turn OFF the AC power sources. - Page 15 HQLM-1720WR TEST switch F4 switch Press this switch to display internal test signals. Press this switch to select an item preset in the The switching between the following seven types “MENU-FUNC.SW-FUNCTION-MODE”. For presettable items, refer to "4-9. Description of TESTS signals is done each time this switch is pressed.
- Page 16 HQLM-1720WR AUDIO control USB terminal Use this control to adjust the sound volume of Connect a USB memory, and the monitor’s data the front speaker or the headphones. (“MENU setting,” “PRESET data setting,” and The embedded audio channel to output from the “USER MARKER setting”) can be saved on the...
-
Page 17: Rear Panel
HQLM-1720WR 2-2 Rear panel (left) Handle (option) AC power input This is an optional handle dedicated for this sys- Insert an AC cable here to supply AC power. tem. For details, refer to “10.2 Fixed stand STD-1720 Lock (option) and handle GR-1720 (option).”... -
Page 18: Rear Panel (Video Inputs/Outputs)
HQLM-1720WR 2-3 Rear panel (video inputs/outputs) PARALLEL REMOTE SDI CH-A1(12G/3G/HD) singal input and SDI CH-B2(3G/HD) singal input and output A 3G/HD signal is input to the "IN" connector. output A 12G/3G/HD signal is input to the "IN" con- The input signal format is automatically detected. - Page 19 HQLM-1720WR SDI CH-B4(3G/HD) singal input and output PARALLEL REMOTE signal input A3G/HD signal is input to the "IN" connector. Connect the accompanying remote connector here. The input signal format is automatically detected. Use shielded wire for the cable. The input signal is output from the "OUT" con- For the setting items, refer to "4-10.
-
Page 20: External Control
HQLM-1720WR 2-4 External control Ikegami SRC-400 SERIAL REM OT E CO NT ROL LER M ONITOR NUM BER CAL L... -
Page 21: Markers
HQLM-1720WR 3 Markers 3-1 Types of Markers (1) Safety marker / Frame Marker Active screen area Frame marker [100% fixed] Safety marker [Variable from 80% to 99% (1% increments)] (2) 5-division Active screen area (3) 10-division Active screen area (4) Cross marker... -
Page 22: Menu Functions
HQLM-1720WR 4 MENU Functions 4-1 MENU Outline... -
Page 23: Description Of Menu-4K/2K/Multi Functions
HQLM-1720WR 4-2 Description of MENU-INPUT Functions VIEW MODE setting 4K MODE SDI-B1/2/3/4 SELECT setting Set the combination of switching input signals. Setting ENABLE and DISABLE is possible. When 4K MODE Current mode DISABLE is set, Quad Link 4K which uses four 2K MODE Switches to the 2K mode. - Page 24 HQLM-1720WR MULTI MODE MULTIPATTERN setting MULTI MODE SRC GROUP setting The inputs CH-B1, CH-B2, CH-B3, and CH-B4 are When 4 MULTI displayed in the tetrameric areas in the 4K-size SDI ONLY CH-B1, CH-B2, CH-B3, CH-B4 screen as follows. SDI + HDMI CH-B1, CH-B2, CH-B3, HDMI The 4th screen becomes HDMI instead of CH-B4.
- Page 25 HQLM-1720WR SDI RANGE setting 2K MODE SDI-B4 SELECT setting When an SDI signal without the payload information When DISABLE is set, CH-B4 is skipped by transition is input, the image may not be displayed properly of the front INPUT switch.
-
Page 26: Description Of Menu-Video Functions
HQLM-1720WR 4-3 Description of MENU-VIDEO Functions Setting the chroma gain-up ON/OFF Setting the APERTURE LEVEL Set the gain-up ON/OFF for chroma. Set the APERTURE level in the range from 1 to 63. When Chroma Gain Up is On the chroma gain Default setting is 16. -
Page 27: Description Of Menu-Audio Functions
HQLM-1720WR 4-4 Description of MENU AUDIO Functions Setting the channels of embedded audio for MODE1 (1357-2468) output Set any of the following pairs of channels of em- bedded audio to be output to the front speaker and the headphone jack. - Page 28 HQLM-1720WR MODE5 (1357-2468) Setting the brightness of the audio level meter Set the brightness of the audio level meter. The level meter image transmissive mode or nontransmissive mode can be set. HIGH LOW (MIX) (Image transmissive mode) MID (MIX) (Image transmissive mode) HIGH (MIX) (Image transmissive mode) Default setting is HIGH.
- Page 29 HQLM-1720WR Setting the embedded audio channel assign- ment of speaker (C) Set which embedded audio channel is allocated to the 5.1-ch surround C speaker (center). Default setting is CH3 Setting the embedded audio channel assign- ment of speaker (Ls) Set which embedded audio channel is allocated to the 5.1-ch surround Ls speaker (left side in rear).
-
Page 30: Description Of Menu-Tc/Wfm/Vsc Functions
HQLM-1720WR 4-5 Description of MENU-TC/WFM/VSC Functions * TC / WFM / VSC is supported for HD/3G/12G SDI signals. Setting the SDI TC display ON/OFF Setting of waveform display size Used to turn ON or OFF the VITC/LTC display The waveform display scale can be set to AUTO, multiplexed with the ANC part of the signal. - Page 31 HQLM-1720WR Setting the VSC (VECTOR SCOPE) display Setting the VSC (VECTOR SCOPE) display po- brightness sition Used to set the VECTOR SCOPE display Used to set the vector display to either the RIGHT brightness in 3 levels: LOW, MID, HIGH and and LEFT positions.
-
Page 32: Description Of Menu-Marker Functions
HQLM-1720WR 4-6 Description of MENU-MARKER Functions <SCENE NAME> <SETTING OF USER MARKER> PAGE1 NO.1 SCENE1 SCENE NAME SCENE1 NO.2 SCENE2 SW COL DATA(X NO.3 SCENE3 S 1920 1080 NO.4 SCENE4 E 1920 1080 NO.5 SCENE5 S 1920 1080 NO.6 SCENE6 E 1920 1080 NO.7... - Page 33 HQLM-1720WR Setting the aspect marker shadow level Used to set the contrast level of the aspect marker The name of each scene can be up to 8 characters in shadow, when displayed. length with the following characters: "0-9, A-Z, (), Settings: 0%, 20%, 40% and 60% -, □...
-
Page 34: (User Marker)
HQLM-1720WR 4-7 Description of MENU-USER MARKER Functions and Setup <SETTING OF USER MARKER> <SETTING OF USER MARKER> PAGE1 PAGE2 SCENE NAME SCENE1 SW COL DATA(X SW COL DATA(X (BACK) S 1920 1080 S 1920 1080 E 1920 1080 E 1920 1080... - Page 35 HQLM-1720WR Resetting the data Accordingly, in drawing a horizontal line, the With the “DATA (X Y)” in blinking, rotating Y-direction address has a coordinate value with the mouse wheel upwards a few times will re- 3pixel added, as shown below.
- Page 36 HQLM-1720WR <MARKER> START PO INT(X : 204 8 , Y : 108 0) MARKER(16:9,1.90:1) SAFETY END P OINT (X : 204 8 , Y : 108 0) SHADOW LEVEL CENTE R MARKER MARKER LEVEL MARKER CO LOR USER MA RKE R...
- Page 37 HQLM-1720WR START PO INT(X : 070 0, Y : 054 0) <MARKER> END P OINT (X : 108 0 , Y : 220 0) MARKER(16:9,1.90:1) SAFETY SHADOW LEVEL CENTE R MARKER MARKER LEVEL MARKER CO LOR USER MA RKE R...
-
Page 38: Description Of Menu-Utility Functions
HQLM-1720WR 4-8 Description of MENU-UTILITY Functions <LOCK ALL/PRESET> CONFIG UNLOCK ENTER PASSWORD POWER ON CONFIG SAVE CONFIG EXECUTE RETURN R+G The entire tally is displayed. Setting the CONT VR ASSIGN The lamp is displayed in amber when both the The "CONT" volume at the front can be operated for the purpose of backlight adjustment. - Page 39 HQLM-1720WR FRONT LIGHT operation mode The mode when the operation panel is illuminated 4K/2K/MULTI <UTILITY> is set. VIDEO CONT VR ASSIGN CONT AUDIO CONTRAST RANGE NORMAL : Always off TC/WFM/VSC TALLY MARKER INPUT LOCK : Always on UTILITY FORMAT DISPLAY...
- Page 40 HQLM-1720WR POWER ON ONFIG memory method Setting the POWER ON CONFIG “POWER ON CONFIG” 4K/2K/MULTI <UTILITY> ON: When the power is turned on, MENU and VIDEO CONT VR ASSIGN CONT AUDIO CONTRAST RANGE NORMAL PRESET MENU settings memorized during TC/WFM/VSC...
-
Page 41: Description Of Menu-Func.sw Functions
HQLM-1720WR 4-9. Description of MENU-FUNC.SW Functions Setting the function assignment of the F1 Setting the function assignment of the F3 switch The function assignment is selectable in the same switch The function assignment is selectable from the way as described above. -
Page 42: Description Of Menu-P.remote Functions
HQLM-1720WR 4-10 Description of MENU-P.REMOTE Functions SHADOW shadow ON at the level set in Setting the functions of the parallel remote “MENU-MARKER-SHADOW” pins Select the pre-assigned pin functions of the SHADOW0 shadow ON at shadow level parallel remote control or the individual us- 0% (Black) er-set functions. -
Page 43: Description Of Menu-Umd/Imd Functions
HQLM-1720WR 4-11 Description of MENU-UMD/IMD Functions SETTING SDI-A1 SDI-B1 SDI-B2 SDI-B3 SDI-B4 SDI-B1/B2/B3/B4 HDMI RETURN Setting the TSL/USER DISPLAY function switching SETTING Selects whether the UMD/IMD display is per- SDI-A1 formed by TSL or DISPLAY. SDI-B1 TSL: TSL is enabled... - Page 44 HQLM-1720WR Setting the TSL TALLY light-up method Setting the Display character size (common set- Sets whether to light up the TALLY set on the top ting item) of monitor or display it on the screen. Selects the character size from two types: DISPLAY: Displays on the screen "NORMAL/SMALL".
-
Page 45: Umd/Imd Indicationtable
HQLM-1720WR UMD/IMD IndicationTable TEXT SIZE NORMAL TEXT SIZE NORMAL TEXT POSITION BOTTOM TEXT POSITION TEXT SIZE SMALL TEXT SIZE SMALL TEXT POSITION TEXT POSITION BOTTOM... -
Page 46: Description Of Menu-C.caption Functions
HQLM-1720WR 4-12 Description of MENU-C.CAPTION Functions Setting of closed caption ON/OFF HD TYPE display subtitle setting The closed caption ON/OFF is set. Select from SERVICE #1 through #6. * When the menu is displayed, the closed caption is Default setting is #1. -
Page 47: Description Of Menu-Usb Memory Functions
HQLM-1720WR 4-13 Description of MENU-USB MEMORY Functions Writing from monitor to USB memory File structure Setting the date of a file to be written on USB MENUSW.TXT memory Used to set the editing date of a file to be written File to save the menu (USER on a USB memory. - Page 48 HQLM-1720WR USER MARKER File to save the PRESET menu set- Check this box if you want to download the tings as well as all the D65, D93 and various settings (color, ON/OFF, XY coordi- FILE1 thru -8 data. nates) of “S01 (SCENE1) to S10 (SCENE10)”...
- Page 49 HQLM-1720WR Precautions on downloading Error messages during writing or downloading With a USB memory connected to the monitor, ERROR-1 A file system error is detected do not turn ON/OFF the monitor or disconnect ERROR-2 USB memory is broken. ERROR-3 USB memory is not connected...
-
Page 50: How To Write From Monitor To Usb Memory
HQLM-1720WR How to write from monitor to USB memory How to write from monitor to USB memory <USB> SETTING DATE&TIME DATE(Y/M/D) 18 / 04 / 10 TIME(H M) CONFIG MENU&SW USER MA RKE R PRESE T SAV E CONFIG EXE CUTE... -
Page 51: How To Download From Usb Memory To Monitor
HQLM-1720WR How to download from USB memory to monitor How to download from USB memory to monitor <USB> SETTING DATE&TIME DATE(Y/M/D) 18 / 04 / 01 TIME(H M) CONFIG MENU&SW USER MA RKE R PRESE T SAV E CONFIG EXE CUTE... -
Page 52: Update Of Firmware
EXECUTE. Updating process requires approximately 0.5 to 20 Model information minutes, depending on the USB performance and 1720 : HQLM-1720WR the selected items. Identification information Updating of only SUB MPU requires nine minutes. for MAIN MPU... -
Page 53: How To Update Mpu From Usb Memory
HQLM-1720WR How to update MPU from USB memory How to update MPU from USB memory <USB> SETTING DATE&TIME DATE(Y/M/D) 18 / 03 / 01 TIME(H M) CONFIG MENU&SW USER MA RKE R PRESE T SAV E CONFIG EXE CUTE LOA D CONFIG... -
Page 54: How To Update Fpga From Usb Memory
HQLM-1720WR How to update FPGA from USB memory How to update FPGA from USB memory <USB> SETTING DATE&TIME DATE(Y/M/D) 18 / 03 / 01 TIME(H M) CONFIG MENU&SW USER MA RKE R PRESE T SAV E CONFIG EXE CUTE LOA D CONFIG... -
Page 55: Description Of Menu-Network Functions
HQLM-1720WR 4-14 Description of MENU-NETWORK Functions REMOTE number TSL MONITOR ID RT setting Set the ID number for the optional serial remote Set the TSL ID number at the upper right screen. controller, "SRC-400," and the IR remote controller, "RCT-30A" from 01 through 99. -
Page 56: Description Of Menu-Reset Functions
HQLM-1720WR 4-15 Description of MENU-RESET Functions Executing the initialization of setup data Selecting the preset files to be initialized Perform this setting to restore the default set- When “PRESET” is selected in , select a file tings. for restoring the setup data to the facto- Factory settings are restored for ry-settings. -
Page 57: Description Of Menu-Info Functions
HQLM-1720WR 4-16 Description of MENU-INFO Functions (1) INFO (1/2) Displaying the format Displaying of F3 switch assignment function Displays the format of the signal being displayed. Displays the function assigned to the F3 switch. Displaying the payload Displaying of F4 switch assignment function Displays the payload data of the signal being dis- Displays the function assigned to the F4 switch. - Page 58 HQLM-1720WR (2) INFO (2/2) - PAYLOAD INFO Display information on payload relation. VIDEO SOURCE Picture Structure Displays a source name which indicates the pay- The picture structure information is extracted from load information. the payload values and displayed. When VIDEO SOURCE is SDI-B1/2/3/4 in 4K...
-
Page 59: Preset Menu Function
HQLM-1720WR 5 Preset Menu Function 5-1 List of preset menu To execute the preset menu, press PRESET switch. * Turn off the menu screen. SELECT FILE FILE REFERENCE INPUT BACKLIGHT DIM. PRESET CHANGE FILE D65 COLOR SPACE BT.709 CHROMA BRIGHT YCbCr MATRIX BT.709... - Page 60 HQLM-1720WR YCbCr MATRIX setting MASTER CLIP setting YCbCr matrix is set. In addition to the setting in , the clip point of high AUTO : Automatically judge the conversion matrix bright section where R/G/B is simultaneously oper- by the payload, ated is set.
- Page 61 HQLM-1720WR B.BKG B.BACKGROUND Used to set the black balance (blue component) at dark level.. Variable range : -25.0 +25.0 Default setting is 0.0. R.GAIN Used to set the white balance (red component) at bright level. Variable range : 0.0 200.0 Default setting is 100.0.
-
Page 62: How To Change Preset Data
HQLM-1720WR How to change PRESET data How to change PRESET data SELECT FILE FILE REFERENCE INPUT PRESET CHANGE FILE D65 BACKLIGHT DIM. CHROMA BRIGHT COLOR SPACE BT.709 CONTRAST 89.0 YCbCr MATRIX BT.709 R.BKG EOFT G.BKG B.BKG HLG TONEMAP MODE1 R.GAIN 90.5... -
Page 63: Mouse Menu Function
HQLM-1720WR 6. Mouse menu function 6-1 Basic procedure of the mouse menu - 53 -... -
Page 64: Basic Procedures On The Menu And Preset Menu Screens
HQLM-1720WR 6-2 Basic procedures on the MENU and PRESET MENU screens Basic mouse behavior on the MENU screen Basic mouse behavior on the CHANGE PRE- SET screen PRESET CHANGE FILE D65 CHROMA BRIGHT CONTRAST 100.0 R.BKG G.BKG B.BKG R.GAIN 100.0 G.GAIN... -
Page 65: Specifications
HQLM-1720WR 7. Specifications 7-1 General specifications 3G-SDIx4 Quad Link 4K (1) Supply voltage 3840x2160 AC input 59.94p,29.97p,23.98p,29.97psf,23.98psf 100 V 120 V 10 % 50 60 Hz 50p,25p,24p,25psf,24psf,60p,30p,30psf 200 V 240 V 10 % 50 60 Hz 4096x2160 (2) Power consumption 59.94p,29.97p,23.98p,29.97psf,23.98psf... -
Page 66: Specifications For Lcd Panel
HQLM-1720WR e) Audio output (7) EOTF ITU-R BT.2100 (HLG) By selecting one pair of channels from ch1/2, SMPTE ST.2084 (PQ) ch3/4, ch5/6, and ch7/8 and DOWNMIX, the audio can be output from the analog audio outputs, the headphone output terminal, and built-in stereo speakers. -
Page 67: Applicable Standards
HQLM-1720WR 7-4 Applicable Standerds The “safety marker in aspect” refers to (1) Safety standards the safety marker with respect to the UL60950-1 aspect marker display zone, and can be EN60950-1 preset in 1 % increments in the range of 80-99 %. - Page 68 HQLM-1720WR (6) UMD/IMD display with user display A function used to set a material name on a (10) WFM monitor display channel basis (SDI-A1, SDI-B1, SDI-B2, SDI-B3, a) Single channel display SDI-B4, SDI-B1/B2/B3/B4 and HDMI) and dis- Select from Y, Cb, Cr, R, G, B...
-
Page 69: Remote Control
HQLM-1720WR 8. Mounting 7-6 Remote Control (1) Parallel remote control Equipped with "100 x 100 mm" mounting holes Input connector: HD D-SUB 15-pin compliant with the VESA mount interface For the pin function, refer to "Data2 Parallel standard. Other mounting holes also available. -
Page 70: External View
HQLM-1720WR 10 External View [UNIT mm] 10.1 Without option - 60 -... -
Page 71: Fixed Stand Std-1720 With Handle Gr-1720
HQLM-1720WR 10.2 Fixed stand STD-1720 with handle GR-1720 10.3 Tilted stand with STD-1720T STD-1720T OPTION - 61 -... -
Page 72: Fixed Rack Mount With Adapter Rs-1770
HQLM-1720WR 10.4 Fixed rack mount with adapter RS-1770 10.5 Tilted fixed rack mount adapter RS-1770T, with a blank panel RS-1770T-BP When installing this system, a space of EIA 8U size is required. Use a dedicated blank panel, RS-1770T-BP. When the system is tilted for 15°, the lower section of the system body (section with * mark) pops out for ap- proximately 1.8 mm downward. -
Page 73: Data 1 Input Signal Compatible Formats
HQLM-1720WR Data 1 Input Signal Compatible Formats - 63 -... - Page 74 HQLM-1720WR - 64 -...
- Page 75 HQLM-1720WR - 65 -...
-
Page 76: Data 2 Parallel Remote Pin Functions
HQLM-1720WR Data 2 Parallel Remote Pin Functions Wiring of Remote Connector (by default) Connector Face View on Rear Panel V:4K-CH-B1 on G TALLY on CHROMA UP on 6 MONO on <Connector on system side> D-Sub 15-pin (male) mini-type *Connector CD0115PA100: CVILUX-made... - Page 77 HQLM-1720WR Additional user-set functions Functions in “Pin function in the default condition” described in the preceding section and the following func- tions can be allocated to any desired pin. Pin No. Function External Assignment for Function Connect to Pin 1 for running with shadow level 0% (black).
-
Page 78: Data3 Rs-485 Pin Functions
HQLM-1720WR Data3 RS-485 Pin Functions When connecting to the SRC - 400, use a straight cable between the SRC - 400 and the monitor and between the monitor and the next monitor. Pin No. IN terminal OUT terminal Female terminal... -
Page 79: Data4 Control With Remote Controller
HQLM-1720WR Data4 Control with Remote Controller There is a button, but it is not assigned to the function. There is no button. Serial remote Wireless remote Control item Remarks SRC-400 RCT-20A/30A ■Switch functions VIDEO SELECT (*1) TEST mode by long press... - Page 80 HQLM-1720WR Notes - 70 -...
- Page 81 © Dec. 2018 by Utsunomiya Factory of Ikegami Tsushinki Co., Ltd. All right reserved. Reproduction or duplication, without permission of Ikegami Tsushinki Co., Ltd. of edition or contents in whole in part, any manner, is prohibited. Specifications and design are subject to change without notice.
- Page 82 Ikegami Tsushinki Co., Ltd. 5-6-16, Ikegami, Ohta-ku, Tokyo, 146-8567, Japan Phone: +81-(0)3-5700-4114 Fax: +81-(0)3-5748-2200 URL: https://www.ikegami.co.jp/en/ Contact: https://www.ikegami.co.jp/en/inquiry-general Ikegami Electronics (U.S.A.), Inc. 300 Route 17 South, Mahwah, New Jersey 07430, U.S.A. Phone: +1-201-368-9171 Fax: +1-201-569-1626 URL:https://www.ikegami.com Contact: https://www.ikegami.com/contact-form Ikegami Electronics (Europe) GmbH...
Need help?
Do you have a question about the HQLM-1720WR and is the answer not in the manual?
Questions and answers